Electric Stainless Brew Kettle build

The Homebrew Forum

Help Support The Homebrew Forum:

This site may earn a commission from merchant affiliate links, including eBay, Amazon, and others.

DrewsBrew

Active Member
Joined
Nov 27, 2016
Messages
33
Reaction score
24
Location
Wiltshire
Thought I share some photos of my new hop boiler/kettle. I originally used a plastic Electrim boiler with a mechanical thermostat which was ok but only being 30l meant it was easy to get a boil over until it settled into a steady rolling boil. I then switched to a slightly larger stainless urn, however it was still susceptible to boil over, and the hysteresis was too high on the thermostat which led to vigorous boiling for 5 mins then nothing for about 2mins etc.
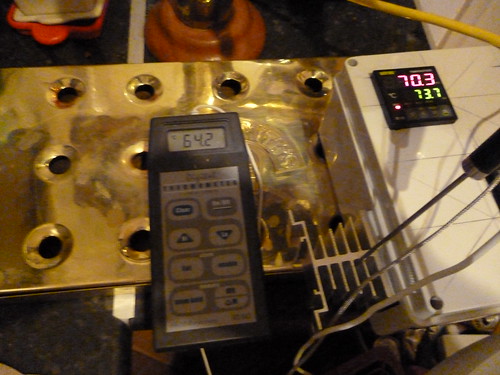
So, I've decided to use a 50L stainless stock pot, 2 kettle elements (one controlled and one just to help get upto boiling quickly), a ball valve kit and a DIY control box using an inkbird PID controller with solid state relay (SSR) and a pt100 bulkhead stainless probe sensor. The sensor has a connector on the back so I can easily remove the control box to make it easy to clean out the boiler after the brew.
 
The box is a die-cast box I had, but I think I'll change it for a more fancy extruded box if it works well.

IMG_20170510_193814165.jpg


IMG_20170510_193705166.jpg
 
Ball Valve kit installed which has a large diameter silicone gasket to seal the bulkhead fitting. On the inside of the boiler I have the option of a dip tube or a false bottom depending on whether I'm using whole hops or pellets. Or I might just leave it without any fittings and whirlpool if I'm using pellets.

IMG_20170510_192314974_HDR.jpg


IMG_20170510_192818143_HDR.jpg


IMG_20170510_192751475_HDR.jpg


IMG_20170510_193108117.jpg
 
I've installed the PT100 bulkhead sensor above the heating element so it get the fastest response and should be able to control effectively. The sensor is fully immersed when there is more than 15L of wort.

Looks excellent. Done everything yourself? :thumb:
 
Looks excellent. Done everything yourself? :thumb:

Thanks, Yeah, I'll get some photos of inside the control box when I get a chance. I'll stick a youtube video link on too of it controlling a rolling boil.

It was pretty straight forward really, just took a bit of time to choose the parts I wanted to use like the PT100. I found cheap TCT cutters off ebay worked really well to cut the holes for the sensor, ball valve and kettle elements. The control box wiring was a bit fiddly due to the space around the back of the PID controller, and I need to shorten the PT100 lead as it's currenlty coiled up inside the box which won't do much for electrical interference on the sensor signal.
 
Inside the control box. The SSR is screwed down to the base with some thermal paste underneath it to help conduct the heat away. It doesn't seem to get very warm really, but I think it would get warm if it was in a plastic box.
As you can see I need to shorten the sensor cable, I just didn't get round to finding some new crimps.

IMG_20170510_220635708.jpg


IMG_20170510_220645891.jpg


IMG_20170510_220654229.jpg
 
That's a lovely looking build, can I ask where you got the Bulkhead adapter from?
 
That's a lovely looking build, can I ask where you got the Bulkhead adapter from?

I got some machined because I was frustrated that there was nothing really available. I had previously tried the cheap kits on eBay on my old boiler only to discover they leak down the threads, even with loads of PTFE it still weeped a bit.
I know some people just use a fibre washer between the ball valve and boiler wall but I wanted something a little more robust. Unfortunately it was too expensive to get 1 or 2 machined so I got 10 machined and I've put a the rest together as ball valve kits and put them on eBay.

The YouTube video is just uploading, hopefully post a link before I go to bed!
 
Lovely work Drew. Looks ace. I'd love to be able to make something similar.
Think it will have to be a peco for me though.
 
Great build, well done.

Have you conducted the self-asjustment function on your Inkbird? If so, how long does it take? I started but had to leave the house so had to abort.
 
nice job, i would suggest you consider adding a heatsink to the SSR employed however. encapsulating it within a box gives the heat produced little route of escape. fwiw i recorded temps over 60C 2 vanes down on an external heatsink sat under a 40A ssr switching 3kw.
8440023604_bb6254ec12.jpg
 
nice job, i would suggest you consider adding a heatsink to the SSR employed however. encapsulating it within a box gives the heat produced little route of escape. fwiw i recorded temps over 60C 2 vanes down on an external heatsink sat under a 40A ssr switching 3kw.
8440023604_bb6254ec12.jpg

I'm suprised it got that hot with a heat sink, what was the ambient temperature, around 25 degrees? The volt drop across the 40a SSR is 1.6V. I'm switching a 2.4kW element so the current will be around 10A. 10A x 1.6V gives 16W of heat which will need to be dissipated from the SSR. As it's screwed down to an aluminium enclosure this will act as a heat sink. I'm doing a brew on Saturday so I'll take some temperature readings from the base of the box. When I did the 1st trial run it barely felt warm after about an hour but it was pretty cold outside! It was switched on solid whilst heating up, then switching to control.
 
Great build, well done.

Have you conducted the self-asjustment function on your Inkbird? If so, how long does it take? I started but had to leave the house so had to abort.

Yes I did it around 100*C, it didn't take too long once it was up to temperture, it ramped up and down about 5 times over 30mins or so. I only did it with 15L of water but hopefully the learnt values will be sufficiently close enough to be able to control boiling 25L of wort. I may have to tweak the temperature untill I get a decent rolling boil.
 
I got some machined because I was frustrated that there was nothing really available. I had previously tried the cheap kits on eBay on my old boiler only to discover they leak down the threads, even with loads of PTFE it still weeped a bit.
I know some people just use a fibre washer between the ball valve and boiler wall but I wanted something a little more robust. Unfortunately it was too expensive to get 1 or 2 machined so I got 10 machined and I've put a the rest together as ball valve kits and put them on eBay.

The YouTube video is just uploading, hopefully post a link before I go to bed!

Thanks, yes the nut on mine seems a really poor fit and leaks, also the silicon O-Ring is the wrong size, but I have some diffeent ones on order in the quest for a non-leaky tap :-)
 
I got some machined because I was frustrated that there was nothing really available. I had previously tried the cheap kits on eBay on my old boiler only to discover they leak down the threads, even with loads of PTFE it still weeped a bit.
I know some people just use a fibre washer between the ball valve and boiler wall but I wanted something a little more robust. Unfortunately it was too expensive to get 1 or 2 machined so I got 10 machined and I've put a the rest together as ball valve kits and put them on eBay.

The YouTube video is just uploading, hopefully post a link before I go to bed!


I see your valve kits on eBay, very nice! Would you be tempted to sell the bulkhead without the tap and barb?


Sent from my iPhone using Tapatalk
 

Latest posts

Back
Top