repairing a Cornelius Maxi 310 cooler

The Homebrew Forum

Help Support The Homebrew Forum:

This site may earn a commission from merchant affiliate links, including eBay, Amazon, and others.

beermaker

Regular.
Joined
Oct 14, 2012
Messages
476
Reaction score
5
Location
Yarm, North Yorkshire
After many years sitting at the back of a shed waiting to me to get round to it, a friends wedding has forced my hand and I have finally got round to repairing my maxi 310. On taking off the cover I've traced the problem to the ice bath thermostat which appears to be shot. When I manually switch it the fan and compressor come on but they don't come on automatically. Does anyone know where I can get a replacement stat or do I have to go directly to Cornelius?

Wassail!
Phil
 
Just spoken to Cornelius, but they don't deal with you unless you have an account. Gave me the number for First Choice catering spares who can get me the part for £10.73 plus vat and £9.75 carriage, and there's a six week lead time on the part! Will have to wait until payday anyway so going to look at the option of either repairing the existing part or adapting another thermostat.
 
Cheers Fil, have to admit I hadn't even thought of using something like that! I was planning to botch a fridge thermostat in but this would be the business! :cheers: have you bought from this person before? Always been a little reticent to buy things from China just in case I get fleeced

Wassail
Phil
 
Big thanks to Fil!! The temperature controller arrived today, just got it installed in the cooler and after some fettling it's now working a treat. The thermostat is great, will definitely be getting more! Certainly has a lot of bang for a tenner!

Had a couple of setbacks, including the fan motor not working properly. The spindle was very stiff, ended up taking the fan/motor assembly out, stripping the motor and taking the rotor out. Cleaned the bushes with acetone and cotton buds, then lubed with Parker Hale gun oil (couldn't find the 3 in 1!). Rebuilt the motor and reinstalled. Fan now working better than ever. However, when I turned everything on, the fan was on when the compressor was off and vice-versa! Tracked the problem down to my cack-handedness! I'd disconnected the fan motor from the neutral but reconnected it to the live! What a moron! Swapped the wire over and now it works a treat!!


Wassail!
Phil
 
Just had to repair the damned cooler again! Tried turning it on and the cooling fan was running slow again. Took it apart, cleaned the bushes, re-oiled and then put it back together. This time, absolutely nothing! Tested the motor and one of the windings had packed in :( New motor time. Didn't want to part with readies as I'm a tight fisted Yorkshireman, so had a rummage about in the shed. Found a pump off a washing machine which had a shaded pole motor. Disassembled the pump, turned the armature round to make the motor fit in the space available which also had the advantage of making the pump face sit at the back, acting as a mounting flange onto the original steel bracket. Had to reshape the fan slightly so it didn't catch the radiator as the motor shaft was 1/4" longer but it now works a treat! The reduction in efficiency of the fan is more than offset by the speed of the motor - up from 1400 RPM to 3000RPM, a little noisier but I can live with that for free and it cools like a bugger!! Well pleased, especially since it's only 8 weeks to the wedding now! Just about to start building the bar so this is one less thing to worry about :)
 
Hi Phil

Your cooler's back from the dead - twice! Think I have similar prob with a Maxi 110. Been tucked under a chair for many months, 'cos it would cool fine when first switched on, but not afterwards. Seemed like its 'stat would turn it off when it reached temp, but wouldn't turn it back on when the coolant temp rose.

Plan on my 'to do' list is to stick a WH7016 (or similar) in it, and bypass the original control unit and sensor. The cooler I'm using had to have a similar fix. It's an MF Refrigeration re-circ only job (hooked-up to a cooling pod). It too had a control unit failure (theme emerging here - I think the control units get wet from careless use/handling, and burn out. Not us, of course - previous owners :)).

The MF jobbie had a very elaborate and expensive Carell control unit - about £70 a shout - no thanks! Replaced with a WH7016, and it's not missed a beat ever since :-D

Cheers,
Chris
 
Hi Chris

It's definitely a labour of love, good job I bought it cheap in the first place! I imagine the 110 will have similar guts to the 310 with a capillary action thermostat operating a contactor with bellows. The capillary tube is a sod to pull out (well, mine was) but just go steady and it'll come out. Be careful not to go too rash, you don't want it to snap in the tube! The electronic thermostat that Fil recommended to me was a great purchase (Cheers again Fil!) The thermocouple dropped straight into the existing tube into the ice bath, the thermostat itself fits nicely just above the cooling fan on the front and the wiring is simple enough with some two-core cable.

Cheers
Phil

Thanks Phil - detailed info is always useful. Plan is to disconnect the original stat, and just drop the sensor supplied with the new control unit into the ice bath. It worked with the MF cooler, so hope it will again :???:.

With the Maxi working, I plan to keep the cooling pod connected to keg and recirc pump, and have a second keg going through the product lines. Basic idea here is that more beer is good! :-D

Cheers,
Chris
 
Its a fairly straightforward job, the hardest bit was cutting a hole for the stat. It fits on mine quite nicely above the fan. I've taken a few pictures of the guts of mine if they're any help.


An overview of the innards showing how the wiring's routed


This stainless tube is where the original capillary tube went, the thermocouple drops in here nicely!


I used spade connectors to connect the solenoid wires into the original wiring to the fan and pump


This is where the mains power comes in, easy job to wire the stat into here. The holes on the right were where the original capillary stat was mounted.


Lastly, the stat itself. Wiring brought up over the top and secured with cable ties to prevent it fouling in the fan. Hope this helps!
 
Last edited:
Cheers Phil - the pics are a great help. In the 110, I can see a control unit, and the terminal screws for the sensor are marked. The wires just disappear into the ice bank reservoir, which makes me optimistic that I can drop the new unit's sensor down there to get on with it!

This thread has been very useful, cheers - there were wires that I couldn't figure their purpose. Now I believe it must be the wires to switch the fan on with the compressor. When I whip the top off next to give it another coat of looking at, I'll take and post a pic.

As you say, I think the worst aspect will be cutting the rectangle to accept the new unit. I might get some dremel type cutting discs, or beefy metal jigsaw blades. What did you use?

Dear dear, I sense I have some more world class kitchen table bodgineering coming up!

Cheers,
Chris
 
Glad they've been some help Chris, looking forward to seeing pics of your cooler too, will be interesting to see the differences. If you google your model you should be able to bring up the user manual with parts lists and the like. The basic wiring in mine before I modified it consisted of the power coming into the unit into the terminal blocks. Live and neutral went to the agitator pump in the ice reservoir which was permanently on. Live also went to the capillary thermostat and then two wires came out of there, one to the fan motor and one to the compressor. Lastly, the neutrals from the fan and compressor returned to the main terminal block. Earths came out to all electrical parts.

Following modification, I completely removed the capillary thermostat, took a permanent live and neutral feed to the new thermostat and took the switched return back to the live connections to the fan and compressor. I left the neutrals wired back to the terminal block.

For making the hole, I put masking tape over the area just to draw on, then marked out the aperture. Take lots of measurements and be careful - the unit has to fit above the fan but below the lip of the lid and the face of the digital stat has a flange all round which you need to take into account. After marking and checking, I drilled a small hole in each corner and then used a coping saw with a fine metal cutting blade to cut the aperture. The casing is very thin and cuts easily. A dremel would do the job admirably but I didn't have one!

Cheers
Phil
 
Hi BM

Many thanks for all that extremely useful info. The exploded diagram is a bit different to mine (which is about 10 years old). I took a couple of pics:


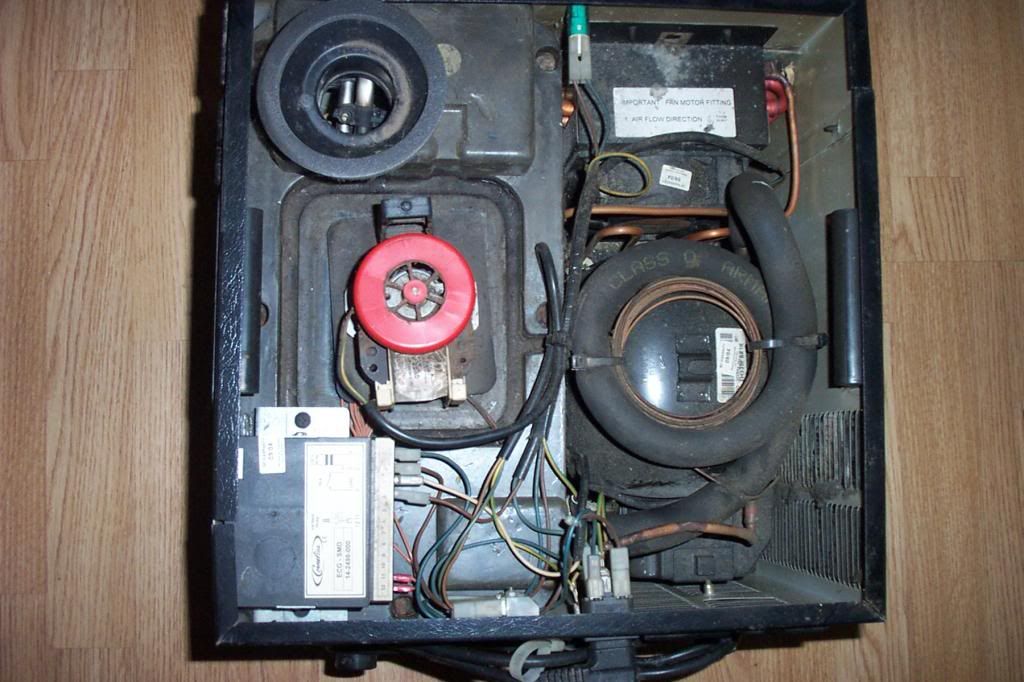
This overview shows the 'stat to the bottom left. The space available for the new unit is top right, above the fan (but not too close). This is the control unit in more detail.


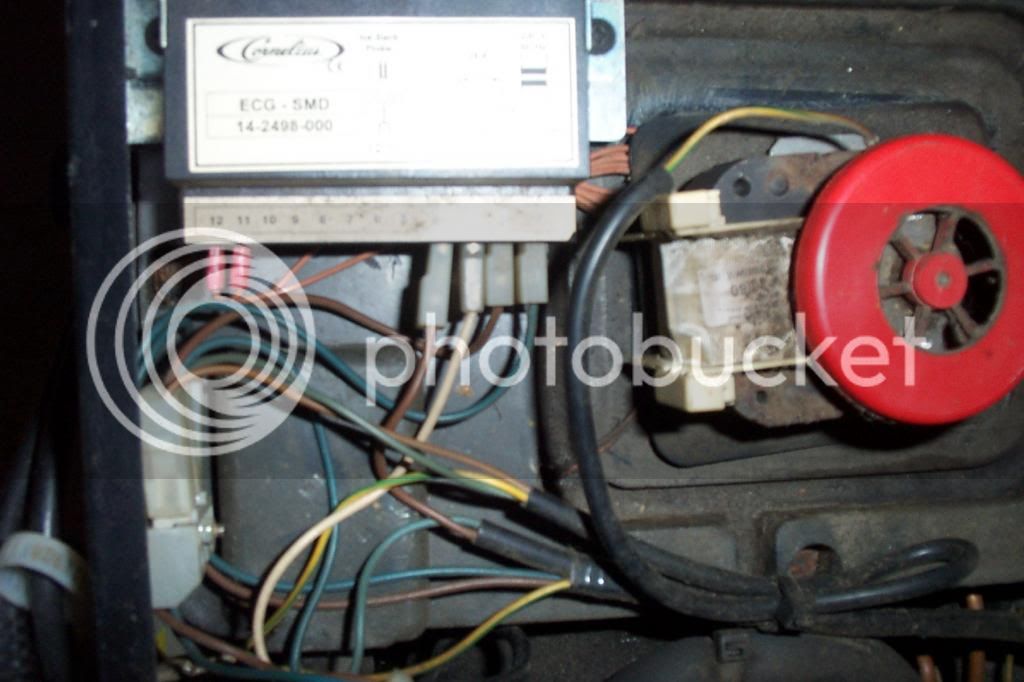
You can see terminals 12 and 11 on the left, which are for the sensor. It just disappears into the reservoir under the edge of the pump. Not too technical - I think I can do that :smile: (Probably explains why the exploded diagram shows a more recent, slightly improved model!). Mains in and out are on the right - I'm pretty confident I can work out which goes where and does what. Then just have to relate that to the terminals on the new control unit, turn it on, and hope nothing goes bang :-?.

TBH, I just bought a beer tower and tap on Ebay, so my current project is adding another keg to my bar. My present cooler is recirc only - beer lines go from keg to cooling pod to BE. Whilst we're on pics...


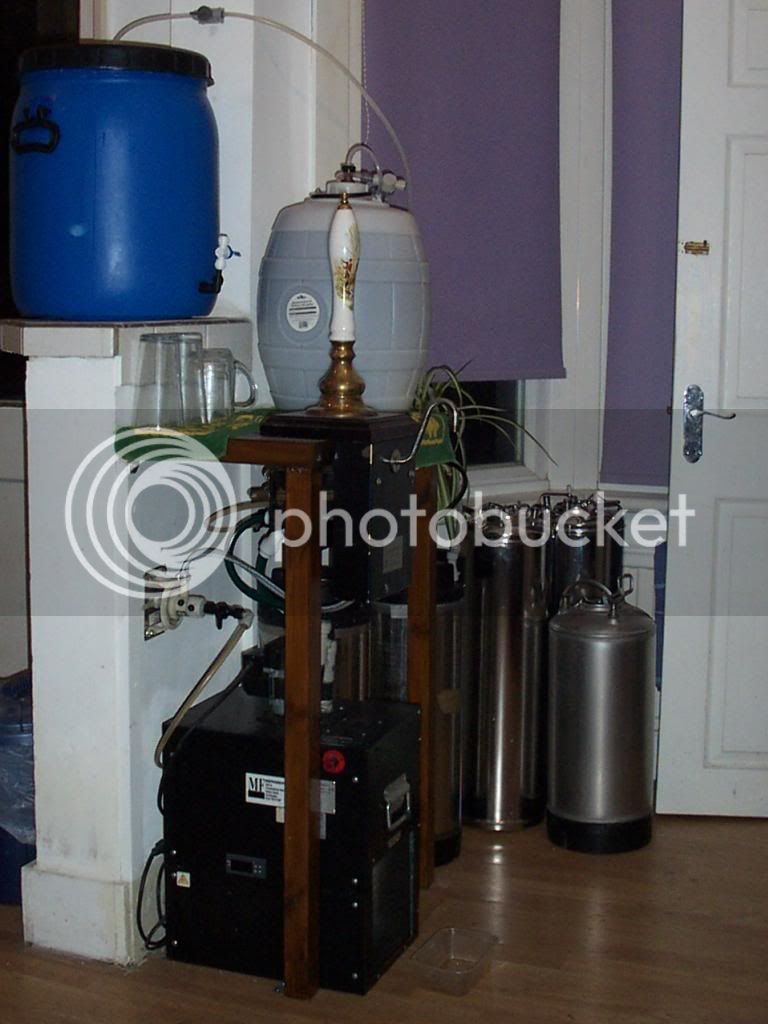
I could just add another cooling pod - but you can see space is tight. Instead, plan is a simple (crude?) cooling jacket - beer line threaded through holes in an old towel, tied tight round the keg, and connected to the recirc cooler. Coolant then goes on to the pod, so 2 cold beers from one cooling circuit. If it doesn't work well enough, it will have to be the revived 110 - 1 beer line, plus recirc for the pod. Wish me luck!

Cheers,
Chris
 
Hi, just seen this post. I've also just bought a second hand maxi 310 from eBay, I think made in 2003.
Just had a couple of questions if anyone knows, is it possible to depressurize it ie take out the refridgerant gas? I'm flying it to south America on Monday, so I think it'll need to be depressurized.. although not entirely sure.
Another thing, is it normal for the compressor to get really hot and one of the copper pipes also when running?
 
depressurized don't think so yes the pipe in to the condenser the rad should get quite hot if anyone needs any bits for under bar cooler let me know I can supply any parts that can be swapped out or could even swap out coolers if local
 
welcome @blade72003,

Im sure a refrigeration engineer could remove the coolant safely and another could refill the other end, but it would probably be a lot cheaper to simply buy an ebay chiller wherever your going..
 
Actually in Argentina everything is very expensive. An equivalent cooler there costs around £1,000.
I'm hoping that it'll be ok to check in as hold luggage as it's only a small amount of refrigerant inside, 115 grams it says. Strange though there are no valves for emptying and filling the gas like there are on an ac unit.
 
Back
Top