CptSlow
New Member
I thought I would document my new brew system build as I have seen a few similar posts here. It is my first dedicated brew system. My previous AG brews have been stove top BIAB brews which worked but werenââ¬â¢t great. They involved using all pots in the house with every stove burner on max and were generally a bit chaotic.
My intention was to make an all-in-one system, based on a BM/GF, which is compact and easy to store with interchangeable parts. I prefer the Brew-in-a-basket systems over Brew-in-a-bag as you can remove the grain bed without disturbing it.
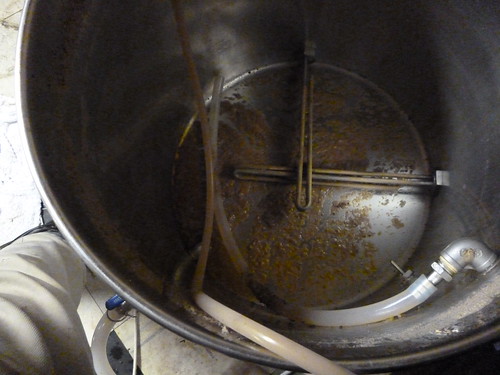
I planned it around a Burco/Cynet 30L boiler (MFCT1030) with a SS ball-valve and bazooka filter. A grain basket is suspended inside the boiler with a mini-pump recirculating from the ball valve through to the grain basket.

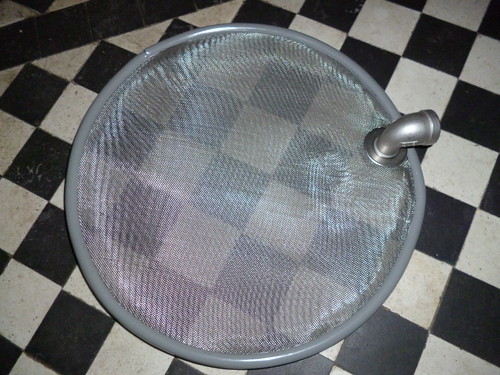
Remove the standard urn tap and replace with the Ball valve kit. Purchase a ball value kit so you donââ¬â¢t have to worry about any missing parts. The existing hole is oval but the kit from Bridgewater Brewing included large washers to I did not need to modify the hole. I added a few extra washers made from a silicon baking tray - a tip from the guys at Bridgewater brewing. I added a 90ââ¬â¢ SS elbow so the bazooka follows the wall of the boiler to maximizing whirlpooling at flameout.


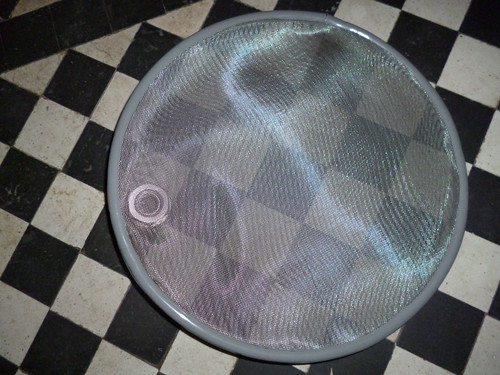
The grain-basket, a 15L FV is made from Polypropylene plastic (PP5) which is food safe at mashing temperatures. Drill holes, lots of holes. Remove the FV handle for a snug fit.


The grain-basket needs to be raised so not to interfere with the bazooka filter. I used a SS colander to do this.


I opted for a mini solar pump to recirculate the wort and ensure better temperature control. These pumps are great. A small variable voltage AC/DC power supply is used to control the flow. On first attempt the pump outperformed the grain-basket throughput, but I added more holes to the grain basket for the second brew and it works better for it. This process is not perfect yet and needs a bit of fine tuning.
From the pump, silicon tubing recirculates through the grain-bed and sparges. A FV lid with holes drilled into it acts as a sparge plate. The end of the silicon tubing has holes for better distribution of recirculated wort. The sparge plate is not perfect, again more fine tuning is needed.

The Burcoââ¬â¢s output is excellent and the thermostat seems decent; 0-5 and ââ¬ËHighââ¬â¢ settings. ââ¬ËHighââ¬â¢ for a rolling boil with no cut out. From tap water temperature to rolling boil takes just over 1h15m. I estimate the thermostat probably has a 3ââ¬â¢C to 5ââ¬â¢C variance before the element kicks in. A PID would reduce this, which I might add in the future but for now I am just insulating the boiler during the mash.
Strike water - Setting 3 - Takes about 40mins to reach 72ââ¬â¢C.
Mash in - Drop to just below setting 3 for 65ââ¬â¢C - 60 mins
Mash out / Sparge - Setting 4 for 10 mins


Water calcs modified from the Grainfather water calculator for a 23L batch:
Mash vol - 18L
Sparge vol - 14L
To sparge, attach the FVââ¬â¢s handle and raise the basket out of the boiler. I suspend the basket above the boiler with an oven tray. Doing this on the floor makes it easier to lift the basket out. Disconnect the pump from the ball valve and reattach to the sparge water.

Remove the grain-basket suspender!
Then set the thermostat to ââ¬ËHighââ¬â¢ and boil for 1 hour. Iââ¬â¢m very happy with the Burco, it produced a good rolling boil through the hour with no cut-outs.
The hop spider is also new and I am happy with it, it trapped 99% of the hops and it is so much easier to use and clean than my previous hops filter bags. My existing immersion chiller fits in perfectly.

The standard boiler tap hole is higher than I would like, with about 5L dead space. However, tilting the boiler forward at the end and you can reduce this to about 500ml.


Overall, Iââ¬â¢m very happy with the outcome, nice clear wort. Clean-up is a pleasure compared to before. All in it, the brew day was about 4.5 hours, but I am sure I can get this down.
A bit more tweaking and fine-tuning is needed, but very happy with the first run.
Recipe - Single Malt / Single Hop
4.5kg Marris Otter Pale
100g Citra hops
Target volume 23L
OG 1.046
Estimated 75% efficiency
Parts and costs (approximate)
- Burco Cygnet 30L kettle (MFCT1030) - GBP90.00
- Tap and bazooka filer kit - GBP27.00
- SP20/20 Easy Connect Water Circulation (Solar) Pump - GBP26.00
- Fittings and tubing - GBP9.00
- AC/DC multi-voltage power supply - GBP13.00
- Grain basket 15L Fermenter - GBP6.00
- Grain basket suspender tray - GBP12.00
Total (approximate) - GBP183.00
My intention was to make an all-in-one system, based on a BM/GF, which is compact and easy to store with interchangeable parts. I prefer the Brew-in-a-basket systems over Brew-in-a-bag as you can remove the grain bed without disturbing it.
I planned it around a Burco/Cynet 30L boiler (MFCT1030) with a SS ball-valve and bazooka filter. A grain basket is suspended inside the boiler with a mini-pump recirculating from the ball valve through to the grain basket.
Remove the standard urn tap and replace with the Ball valve kit. Purchase a ball value kit so you donââ¬â¢t have to worry about any missing parts. The existing hole is oval but the kit from Bridgewater Brewing included large washers to I did not need to modify the hole. I added a few extra washers made from a silicon baking tray - a tip from the guys at Bridgewater brewing. I added a 90ââ¬â¢ SS elbow so the bazooka follows the wall of the boiler to maximizing whirlpooling at flameout.
The grain-basket, a 15L FV is made from Polypropylene plastic (PP5) which is food safe at mashing temperatures. Drill holes, lots of holes. Remove the FV handle for a snug fit.
The grain-basket needs to be raised so not to interfere with the bazooka filter. I used a SS colander to do this.
I opted for a mini solar pump to recirculate the wort and ensure better temperature control. These pumps are great. A small variable voltage AC/DC power supply is used to control the flow. On first attempt the pump outperformed the grain-basket throughput, but I added more holes to the grain basket for the second brew and it works better for it. This process is not perfect yet and needs a bit of fine tuning.
From the pump, silicon tubing recirculates through the grain-bed and sparges. A FV lid with holes drilled into it acts as a sparge plate. The end of the silicon tubing has holes for better distribution of recirculated wort. The sparge plate is not perfect, again more fine tuning is needed.
The Burcoââ¬â¢s output is excellent and the thermostat seems decent; 0-5 and ââ¬ËHighââ¬â¢ settings. ââ¬ËHighââ¬â¢ for a rolling boil with no cut out. From tap water temperature to rolling boil takes just over 1h15m. I estimate the thermostat probably has a 3ââ¬â¢C to 5ââ¬â¢C variance before the element kicks in. A PID would reduce this, which I might add in the future but for now I am just insulating the boiler during the mash.
Strike water - Setting 3 - Takes about 40mins to reach 72ââ¬â¢C.
Mash in - Drop to just below setting 3 for 65ââ¬â¢C - 60 mins
Mash out / Sparge - Setting 4 for 10 mins
Water calcs modified from the Grainfather water calculator for a 23L batch:
Mash vol - 18L
Sparge vol - 14L
To sparge, attach the FVââ¬â¢s handle and raise the basket out of the boiler. I suspend the basket above the boiler with an oven tray. Doing this on the floor makes it easier to lift the basket out. Disconnect the pump from the ball valve and reattach to the sparge water.
Remove the grain-basket suspender!
Then set the thermostat to ââ¬ËHighââ¬â¢ and boil for 1 hour. Iââ¬â¢m very happy with the Burco, it produced a good rolling boil through the hour with no cut-outs.
The hop spider is also new and I am happy with it, it trapped 99% of the hops and it is so much easier to use and clean than my previous hops filter bags. My existing immersion chiller fits in perfectly.
The standard boiler tap hole is higher than I would like, with about 5L dead space. However, tilting the boiler forward at the end and you can reduce this to about 500ml.
Overall, Iââ¬â¢m very happy with the outcome, nice clear wort. Clean-up is a pleasure compared to before. All in it, the brew day was about 4.5 hours, but I am sure I can get this down.
A bit more tweaking and fine-tuning is needed, but very happy with the first run.
Recipe - Single Malt / Single Hop
4.5kg Marris Otter Pale
100g Citra hops
Target volume 23L
OG 1.046
Estimated 75% efficiency
Parts and costs (approximate)
- Burco Cygnet 30L kettle (MFCT1030) - GBP90.00
- Tap and bazooka filer kit - GBP27.00
- SP20/20 Easy Connect Water Circulation (Solar) Pump - GBP26.00
- Fittings and tubing - GBP9.00
- AC/DC multi-voltage power supply - GBP13.00
- Grain basket 15L Fermenter - GBP6.00
- Grain basket suspender tray - GBP12.00
Total (approximate) - GBP183.00
") Some folk manage to whirlpool by simply stirring?
Some folk manage to whirlpool by simply stirring?