benkbenkbenk
Active Member
- Joined
- May 31, 2013
- Messages
- 41
- Reaction score
- 2
So I couldn't get hold of a Tesco Value Kettle, and I live almost next door to Morrisons, so I thought I'd give it a try using one of their value kettles a go. They are available now (Aug 14) for a mere £5!
Here is my first guide, but hopefully someone will find it useful.
PLEASE NOTE ELECTRICITY CAN KILL, PLEASE ONLY FOLLOW THESE INSTRUCTIONS IF YOU ARE COMPETENT TO DO SO. I DO NOT ACCEPT ANY RESPONSIBILITY FOR ANY INJURIES OR DAMAGES THAT MAY OCCUR THROUGH FOLLOWING THESE INSTRUCTIONS, USE AT YOUR OWN RISK!
Equipment Required:
2 x Morrisons Savers Kettle £5 each
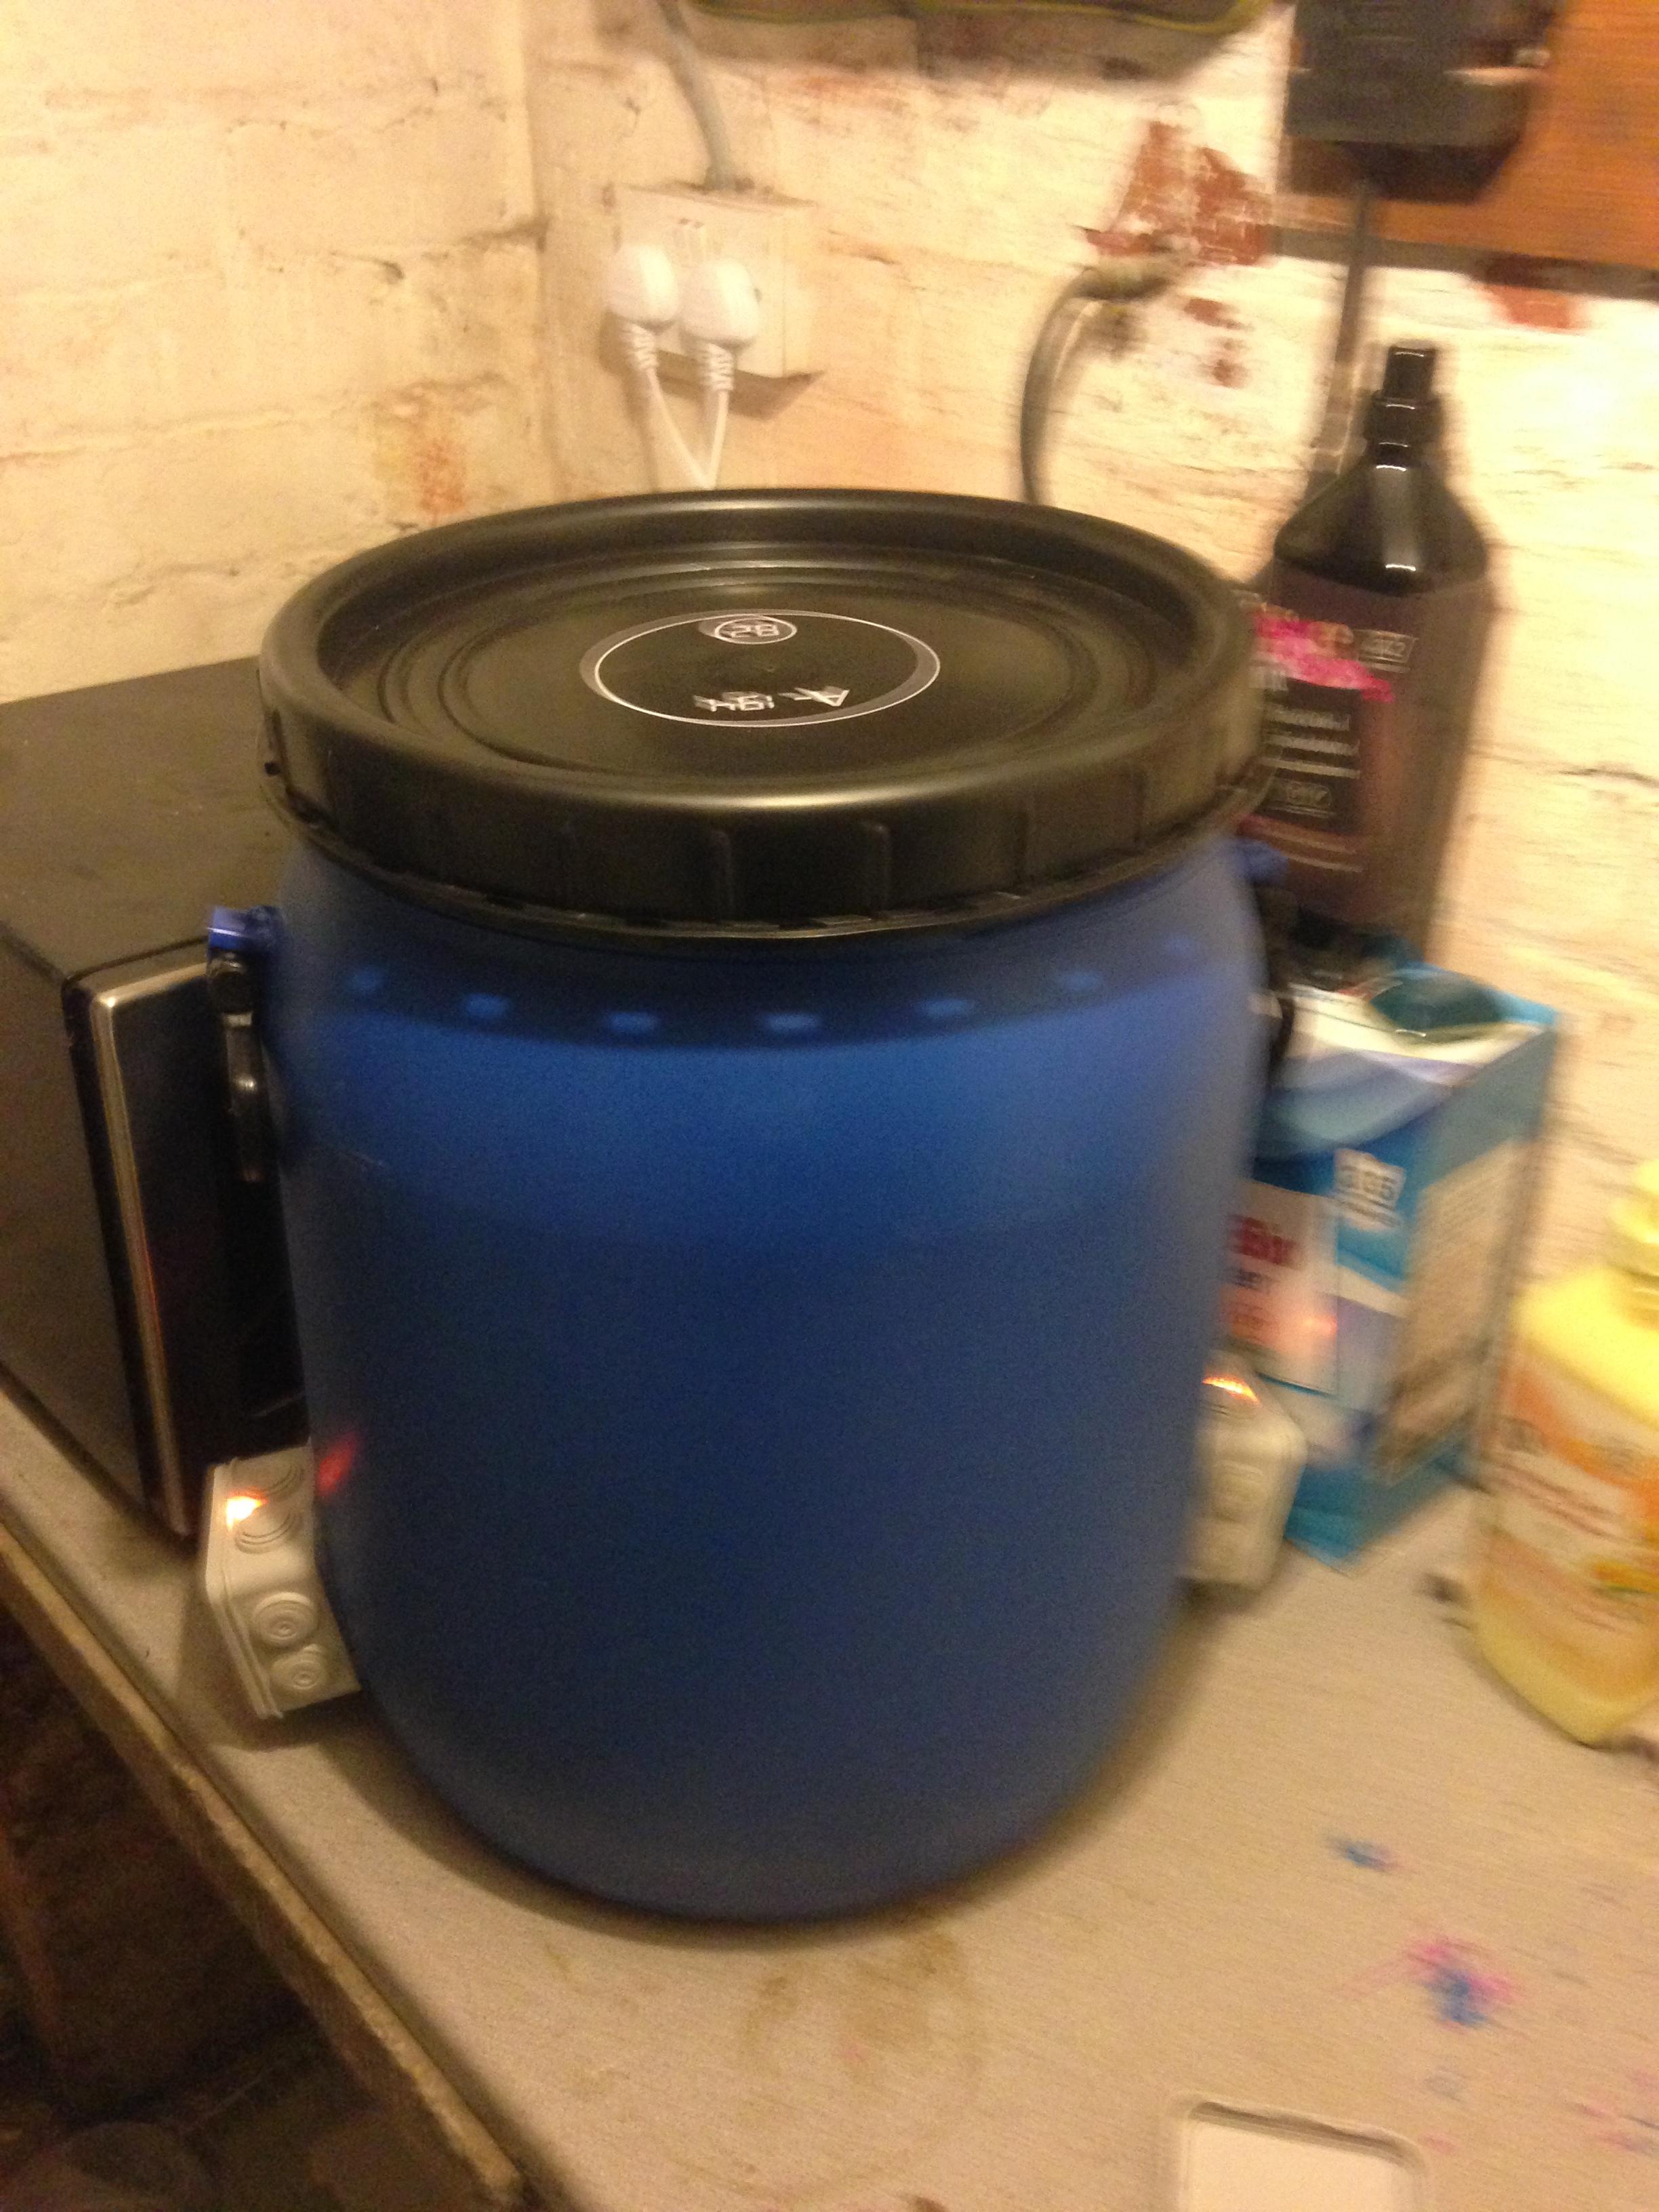
1 x 50L HDPE Food Safe Plastic Bucket (or similar) c£10 from ebay
2 x IP55 Enclosure (http://www.screwfix.com/p/7-entry-junction-box-with-knockouts-grey-95-x-95-x-51mm/30356) £1.79 each from Screwfix
2 x Compression Glands (http://www.screwfix.com/p/tower-male-comp-gland-black-20mm-pack-of-2/80851) £1.21 for two
Total Build Cost: £24.79
Tools required:
Posi and Flat Screwdrivers
Star Screwdriver (or small terminal driver)
Hacksaw
44mm & 51mm Hole Saw
Drill + 4mm bit
Silicone Sealant
------------------------------------------------------------------------
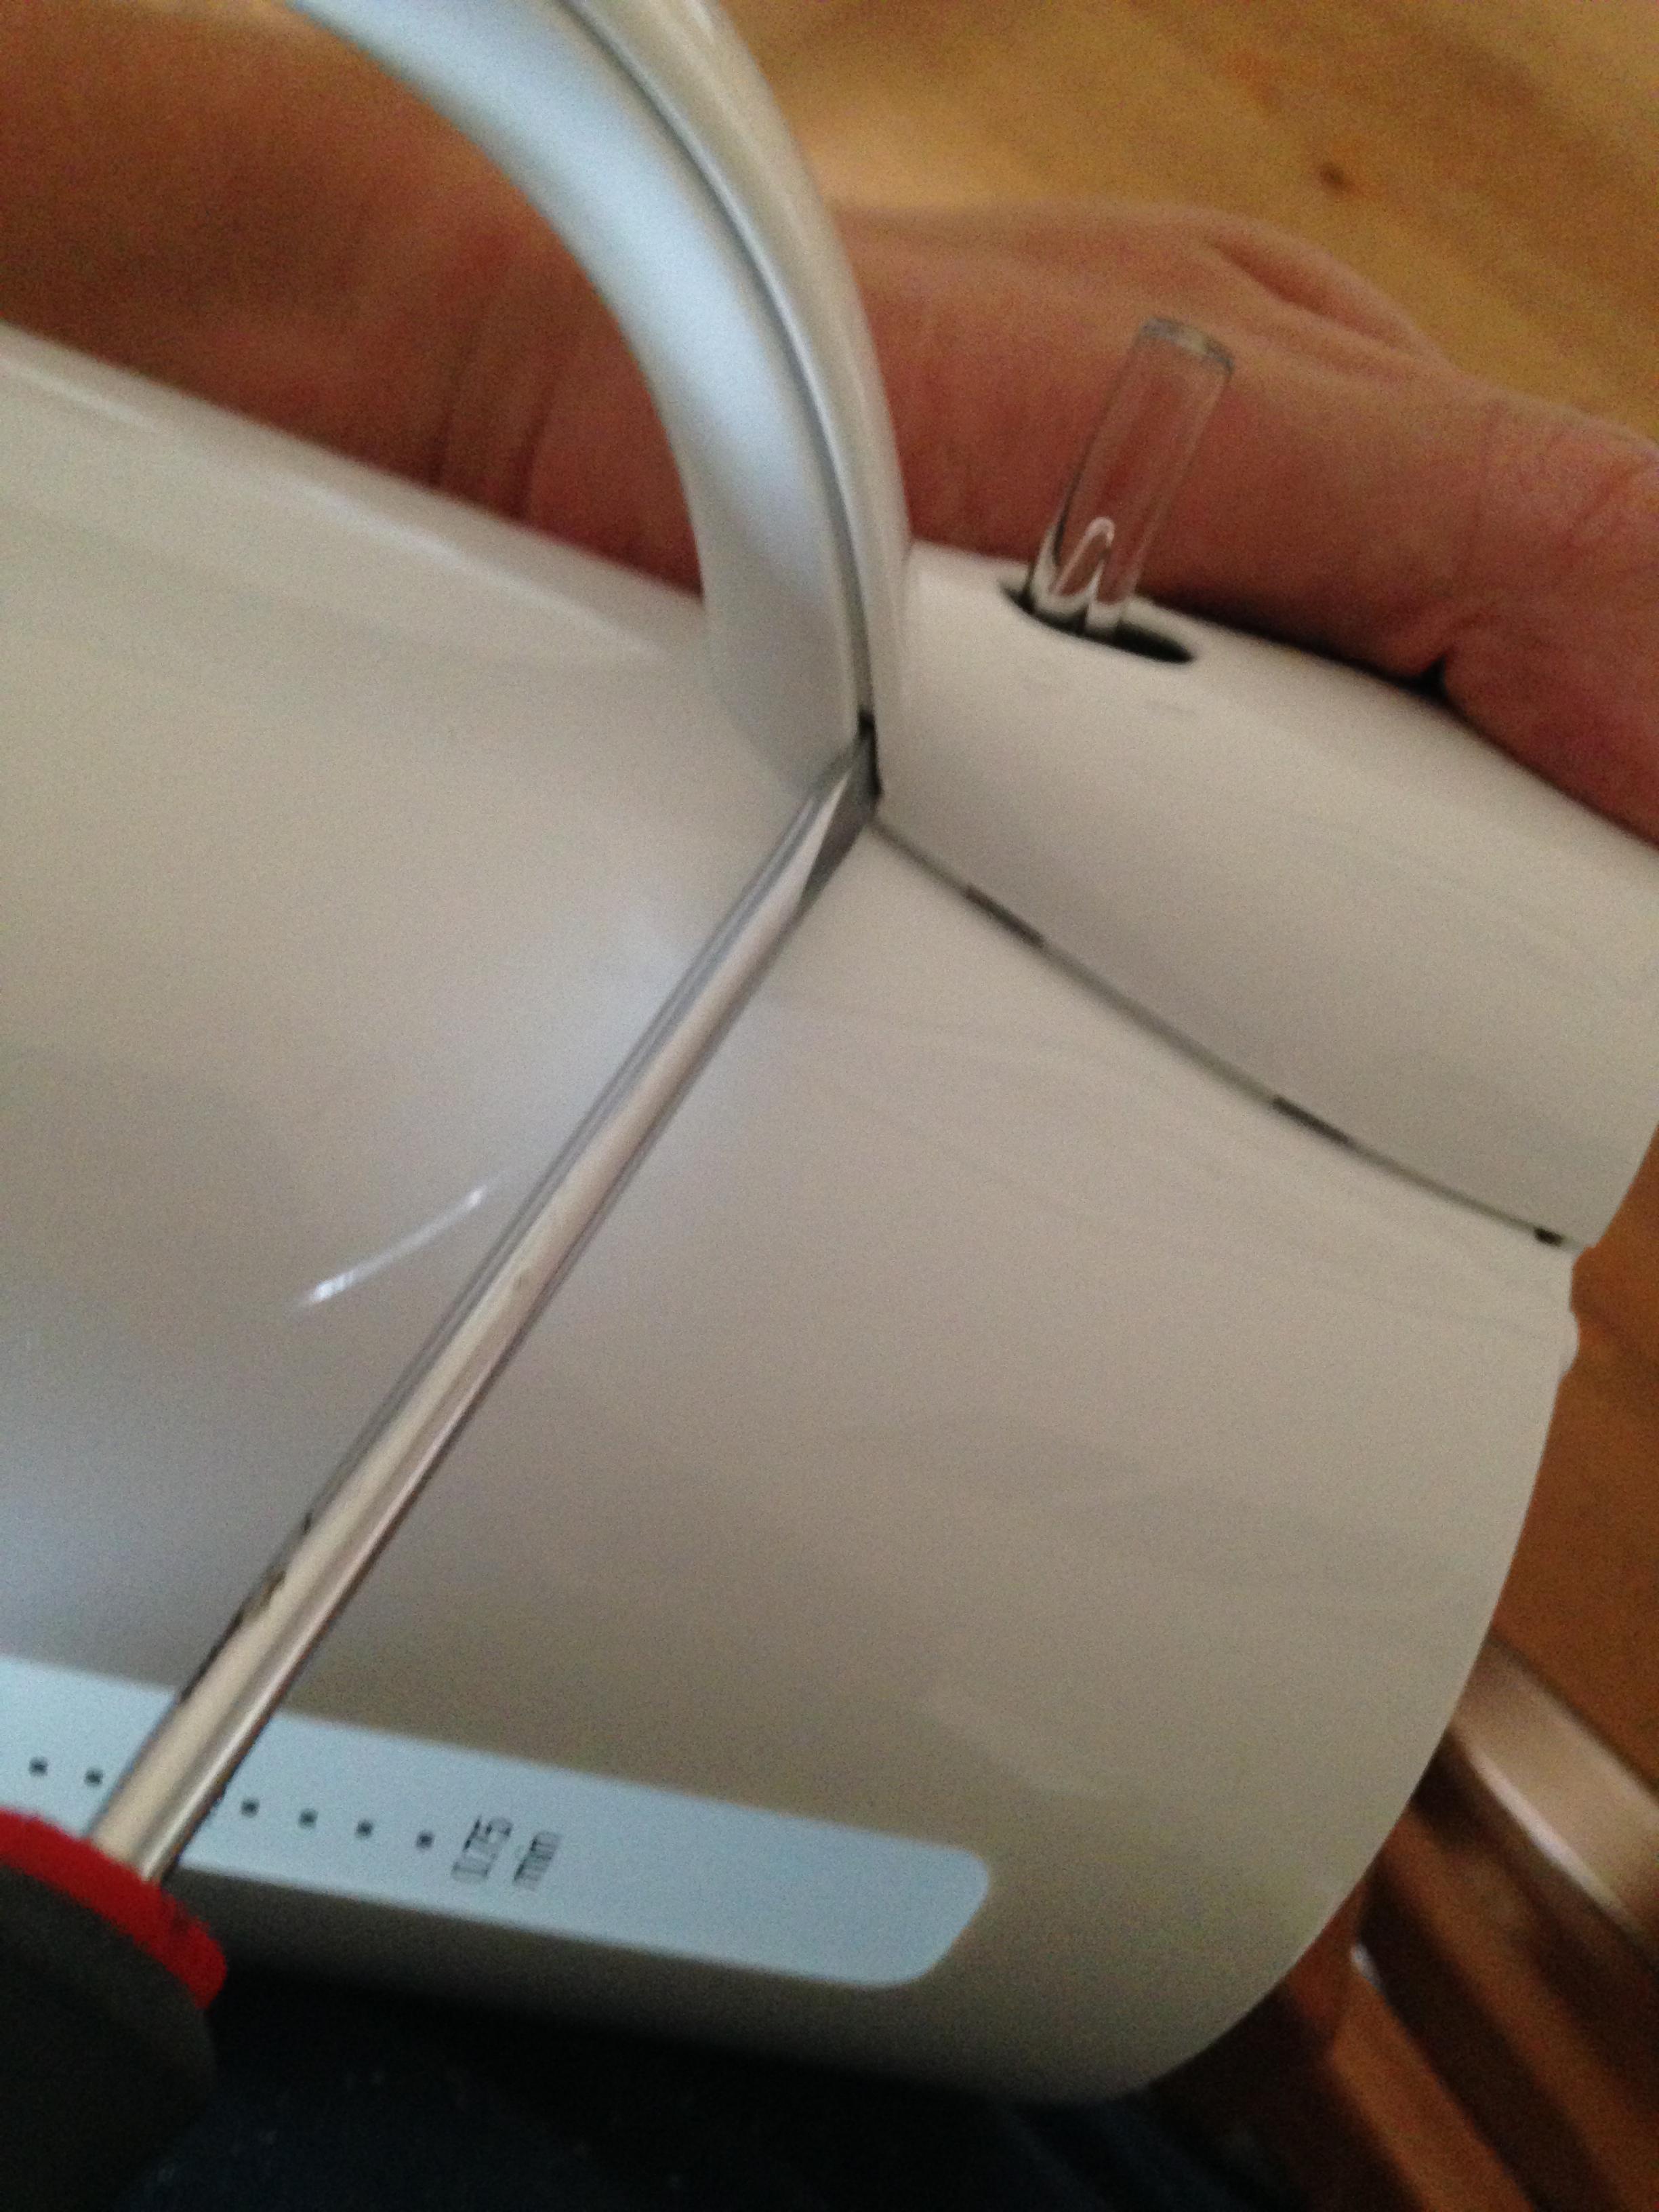
Unscrew the two star screws on the base of the kettle, I managed to do this easily with a terminal driver (small flat screw driver), but if you have the right sort of screwdriver even better!
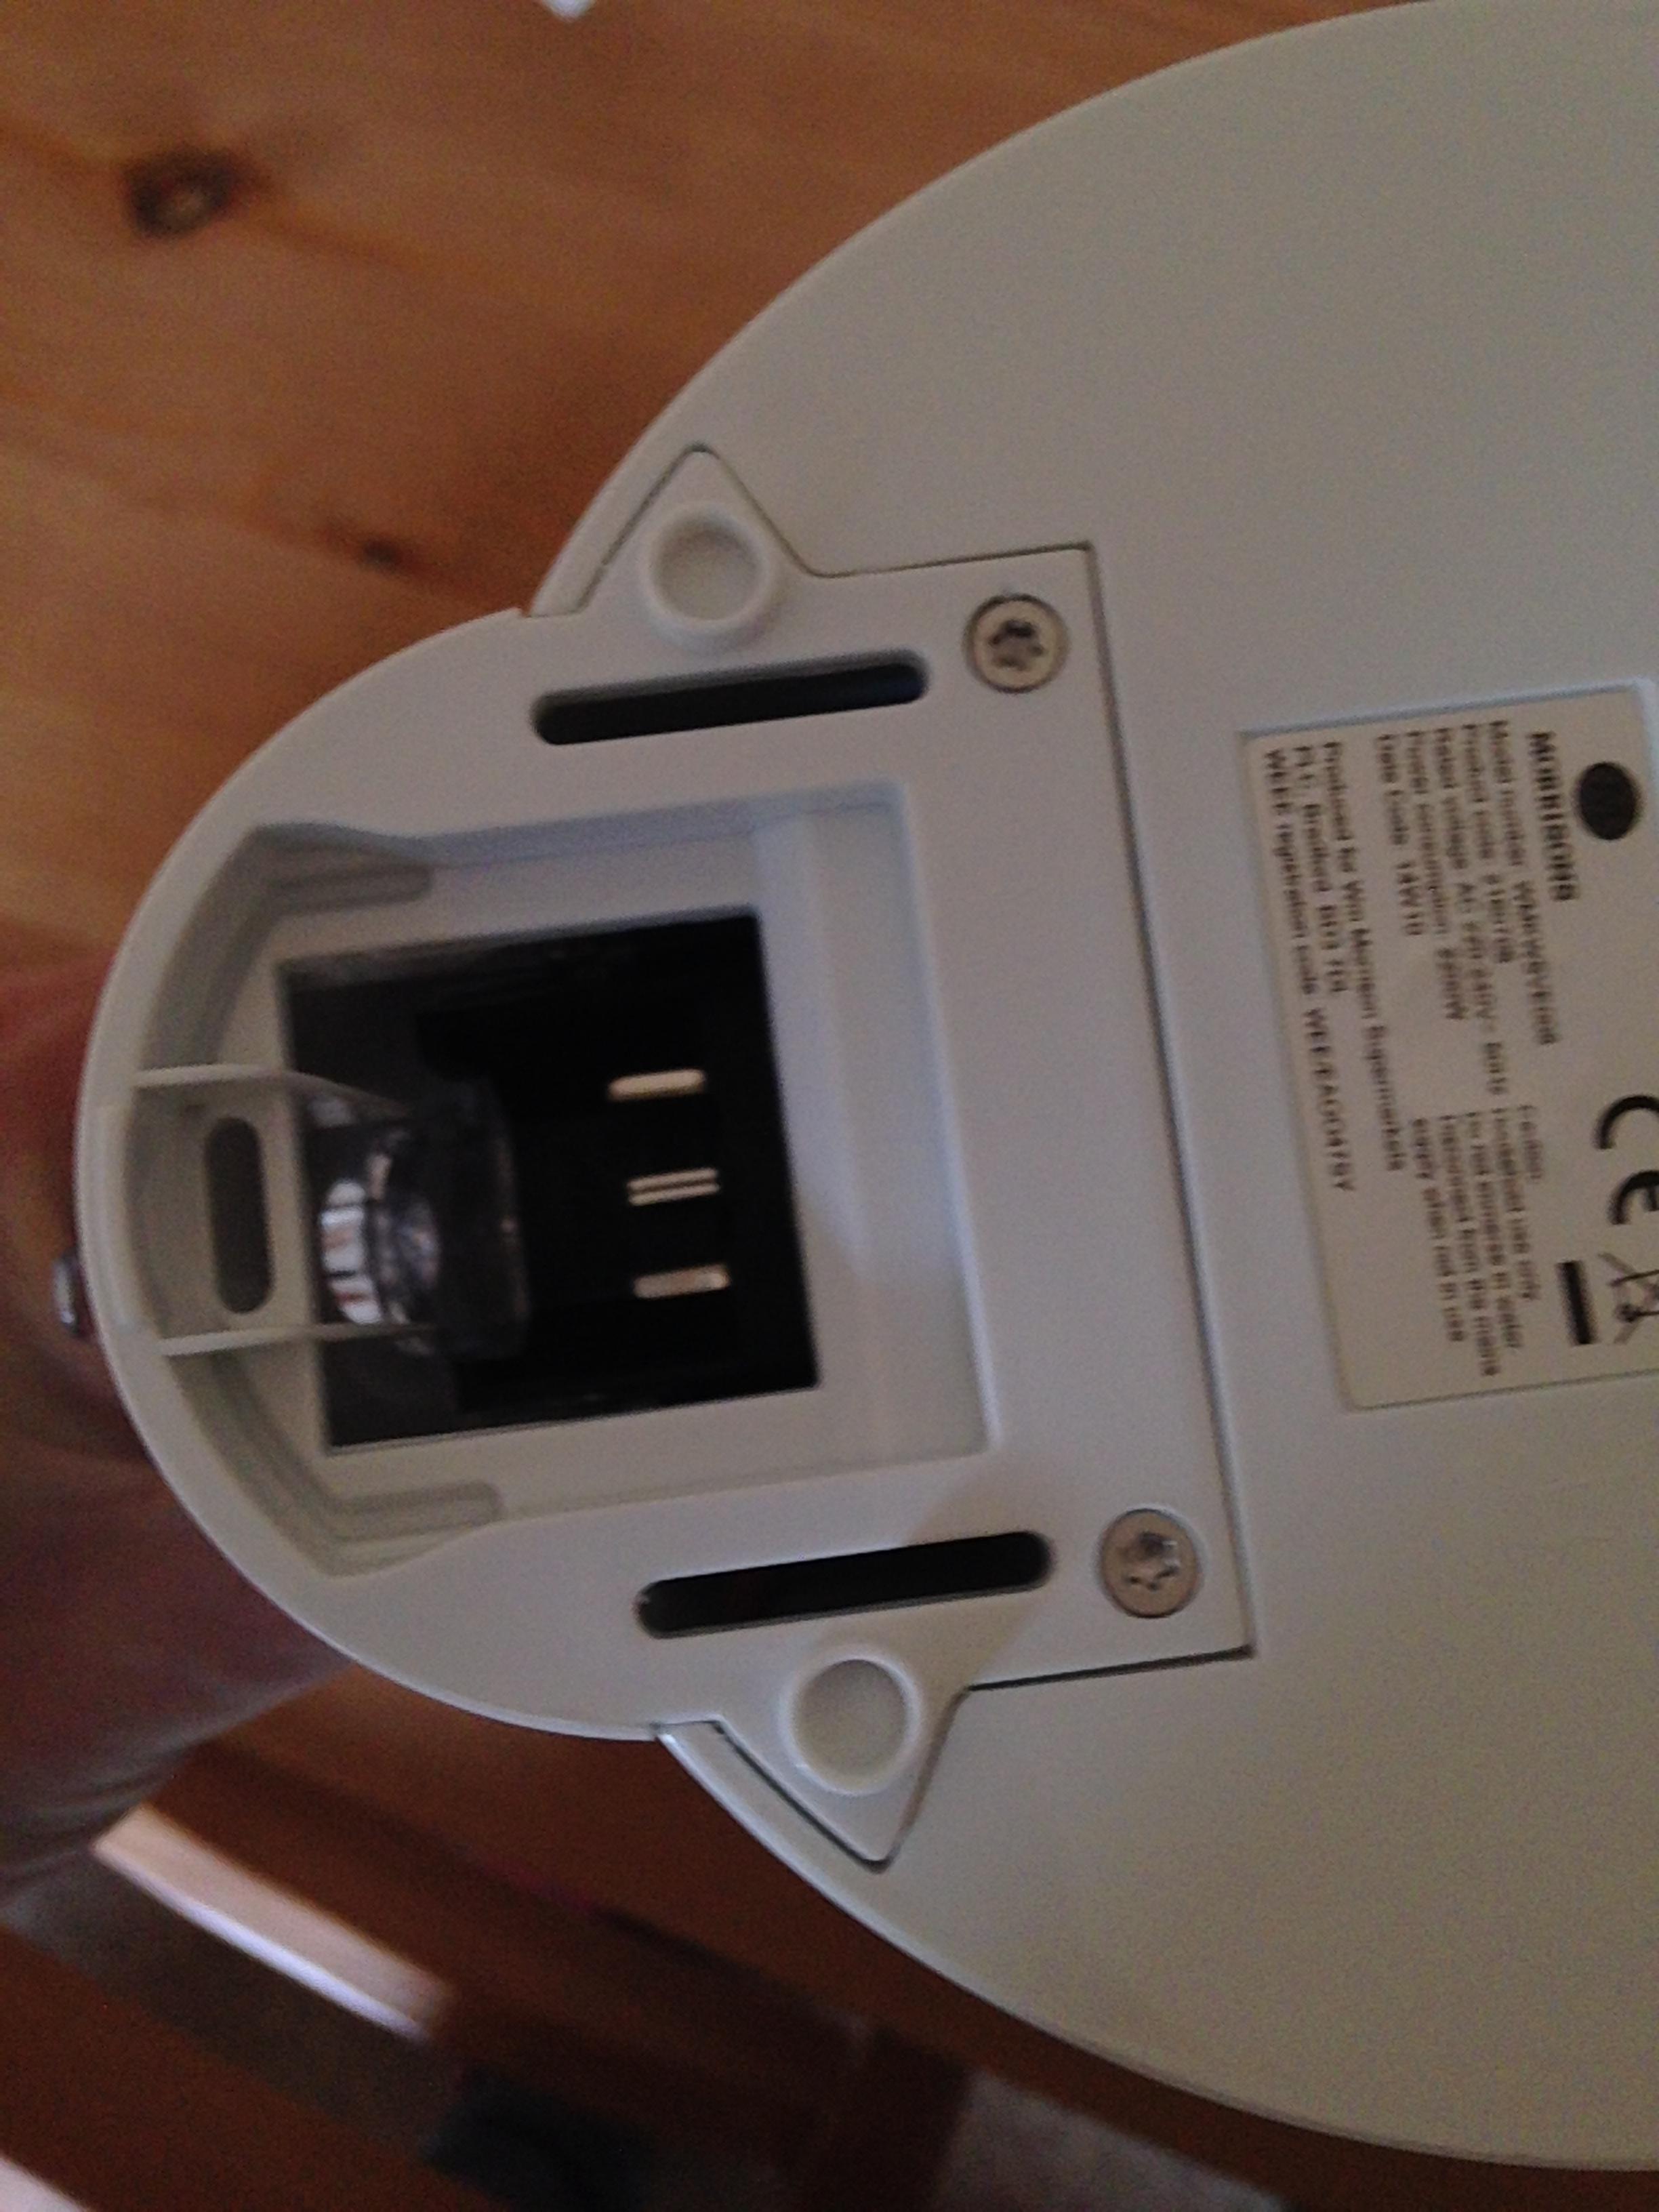
Next remove the two screws near the lid.
You should now be able to lever off the back of the handle to reveal the back of the heater element with a flat screwdriver.
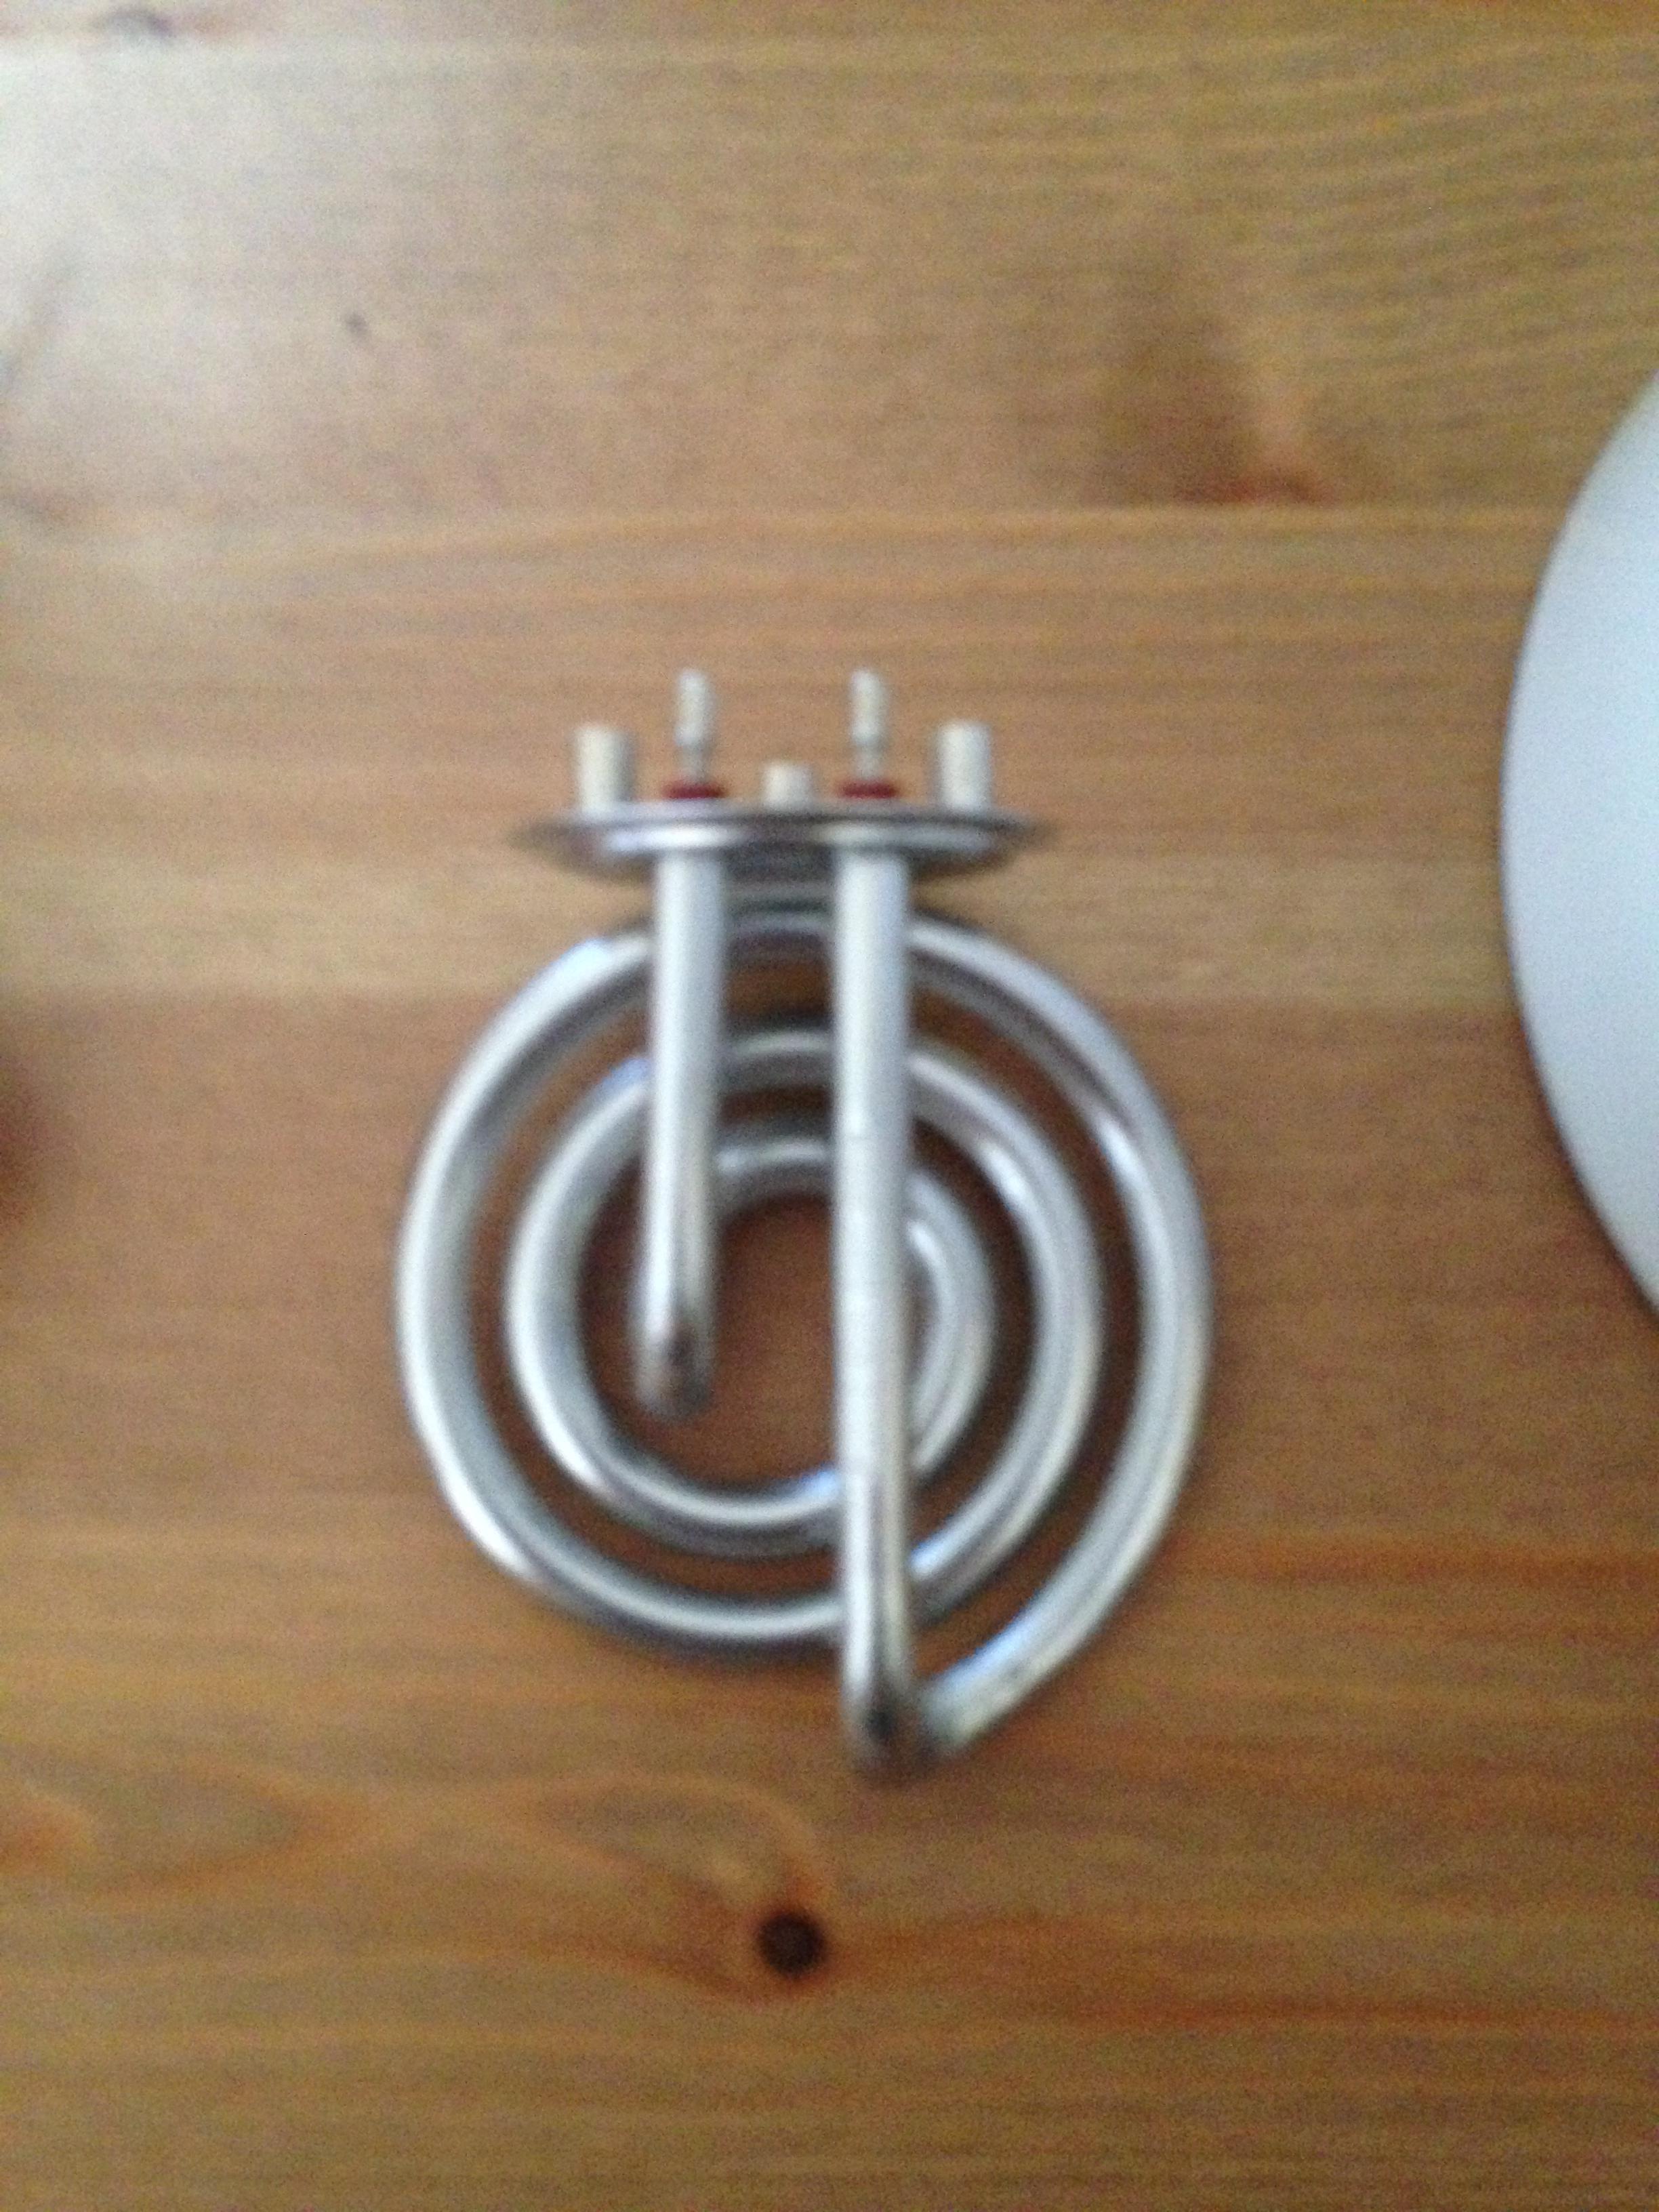
Undo the three posi-screws that hold the black plastic, (two of which can't be seen in this photo). Retain the washers that come off with them. Note which screw has the metal washer, as this is used for earthing the element.
Withdraw the element from the kettle, and recover the seal, making a note of which way round the seal fits (thick side is on the inside of the kettle).
Now remove the two screws that hold the clear plastic switch mechanism onto the black plastic.
Unclip the rocker switch lever from the clear plastic, and unwind the red wire from the retaining clips.
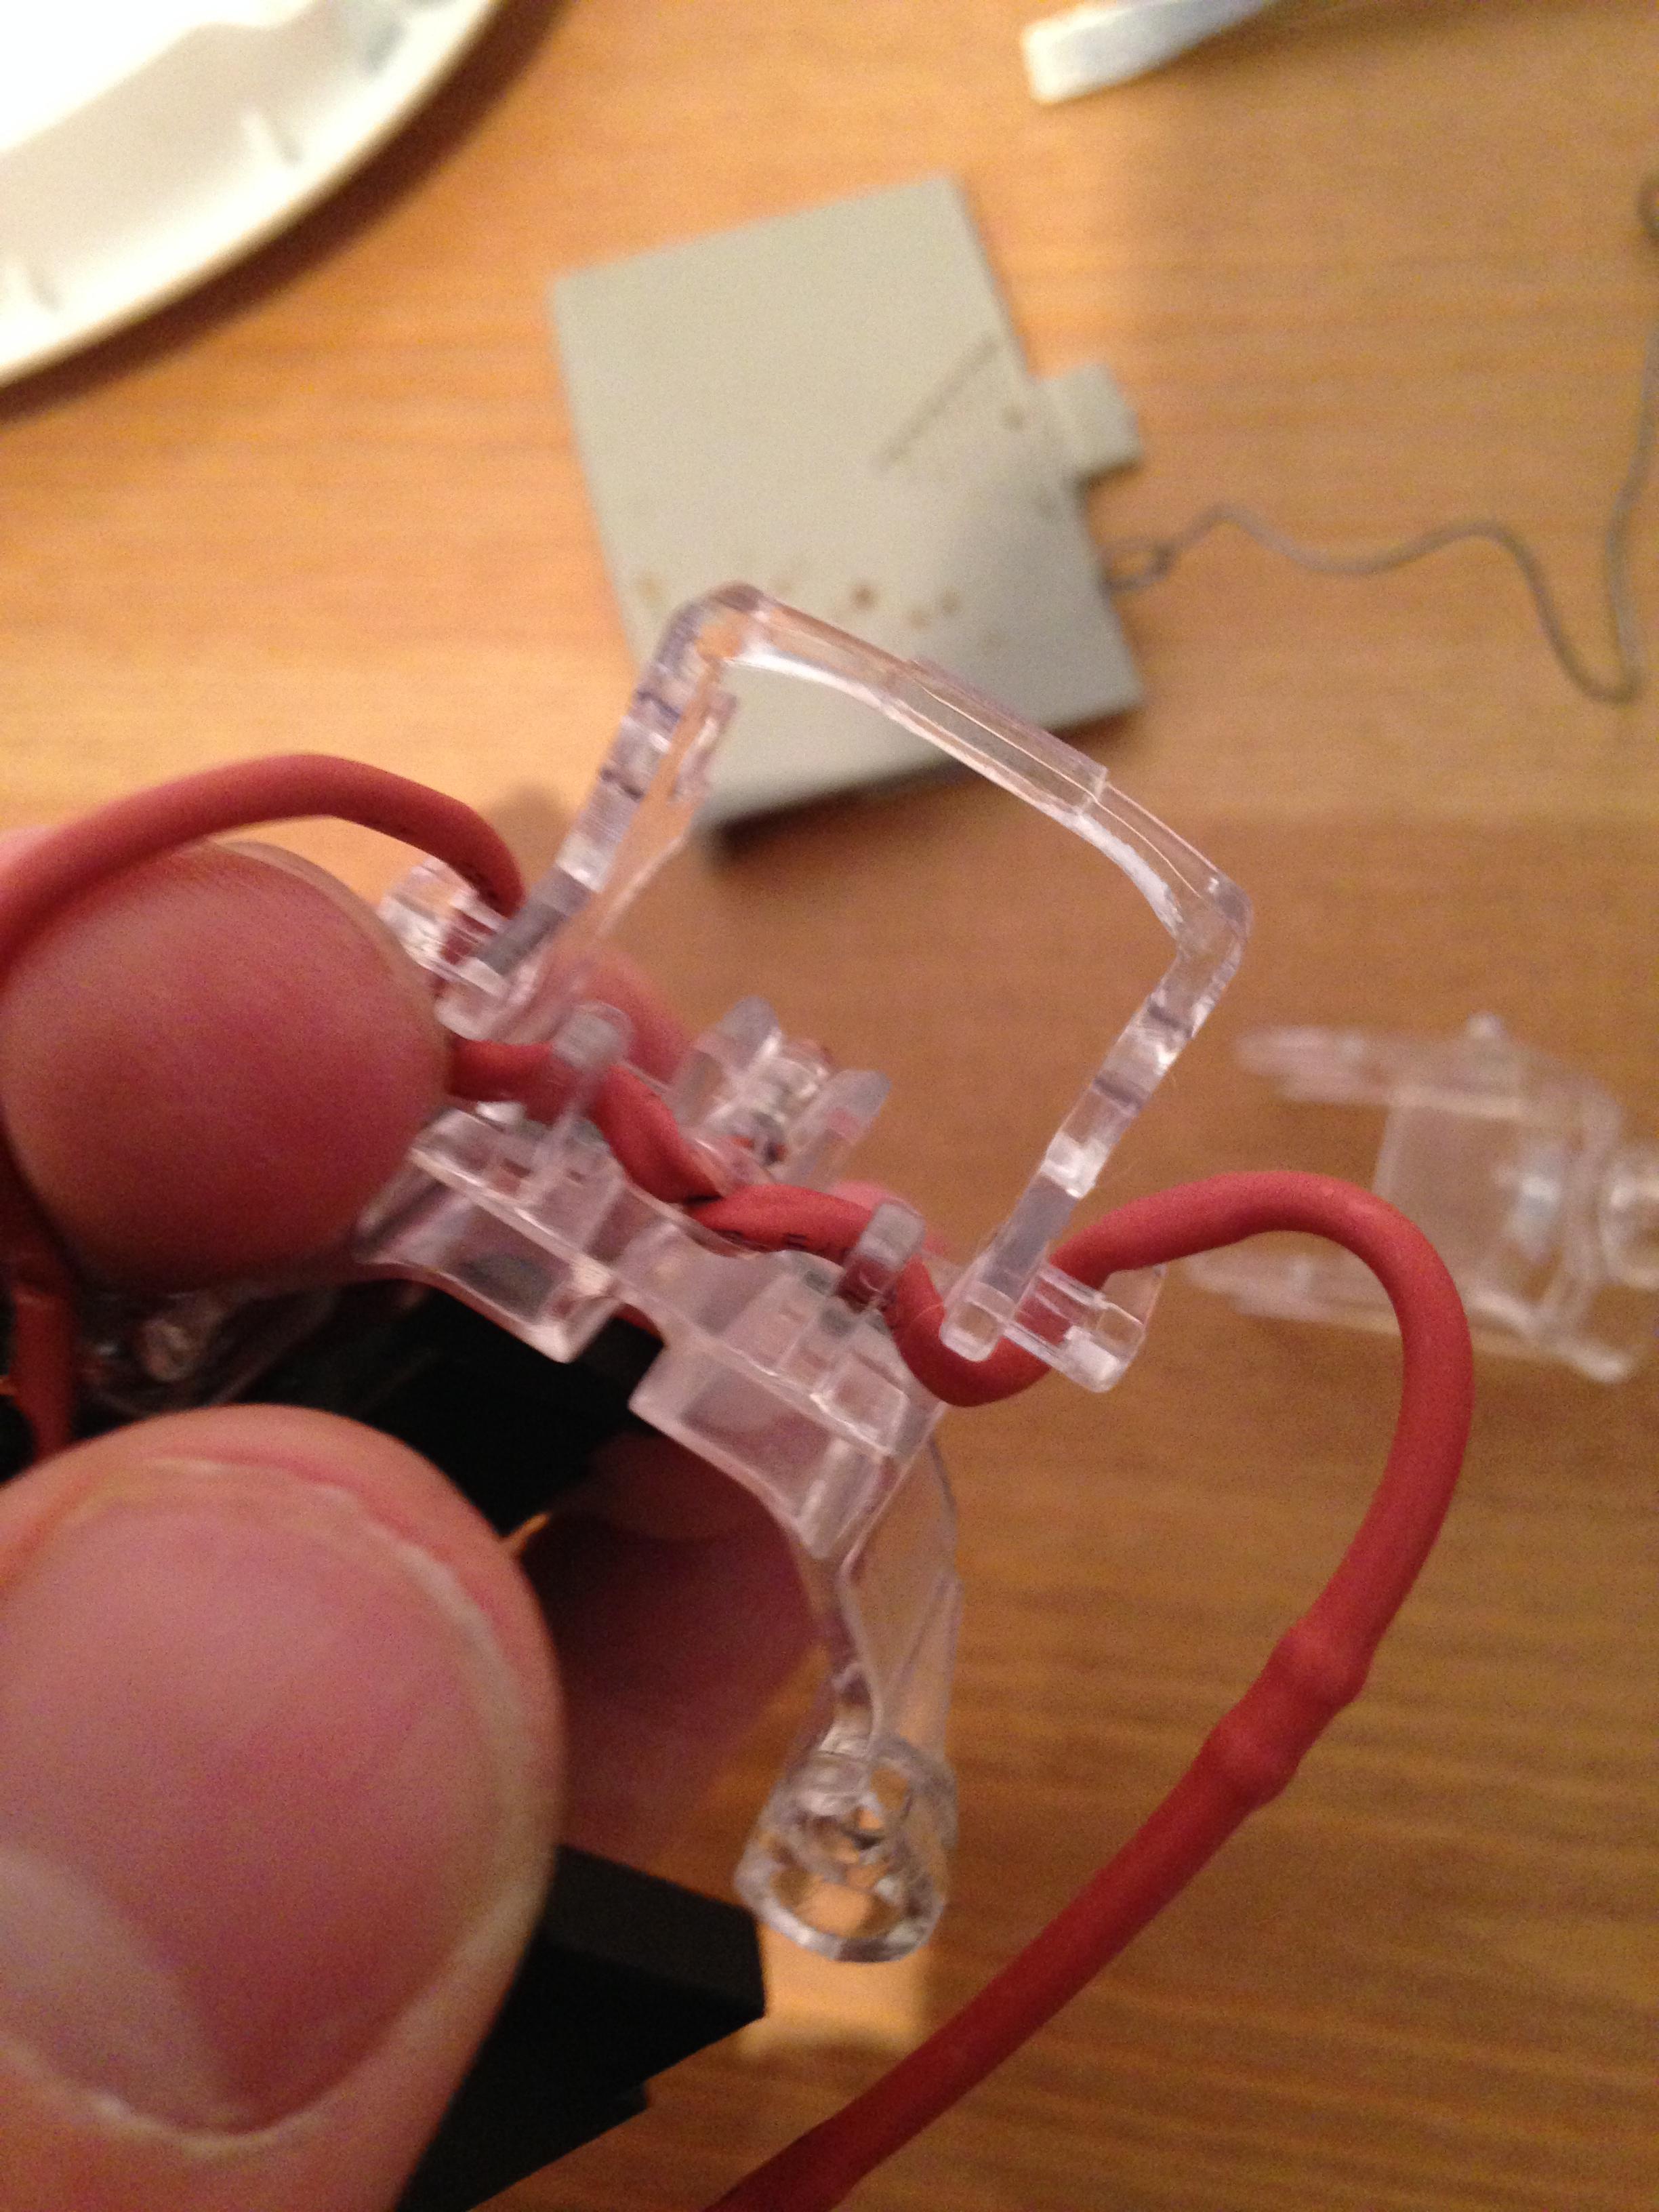
Lever the LED from the clear plastic clips with a small screwdriver.
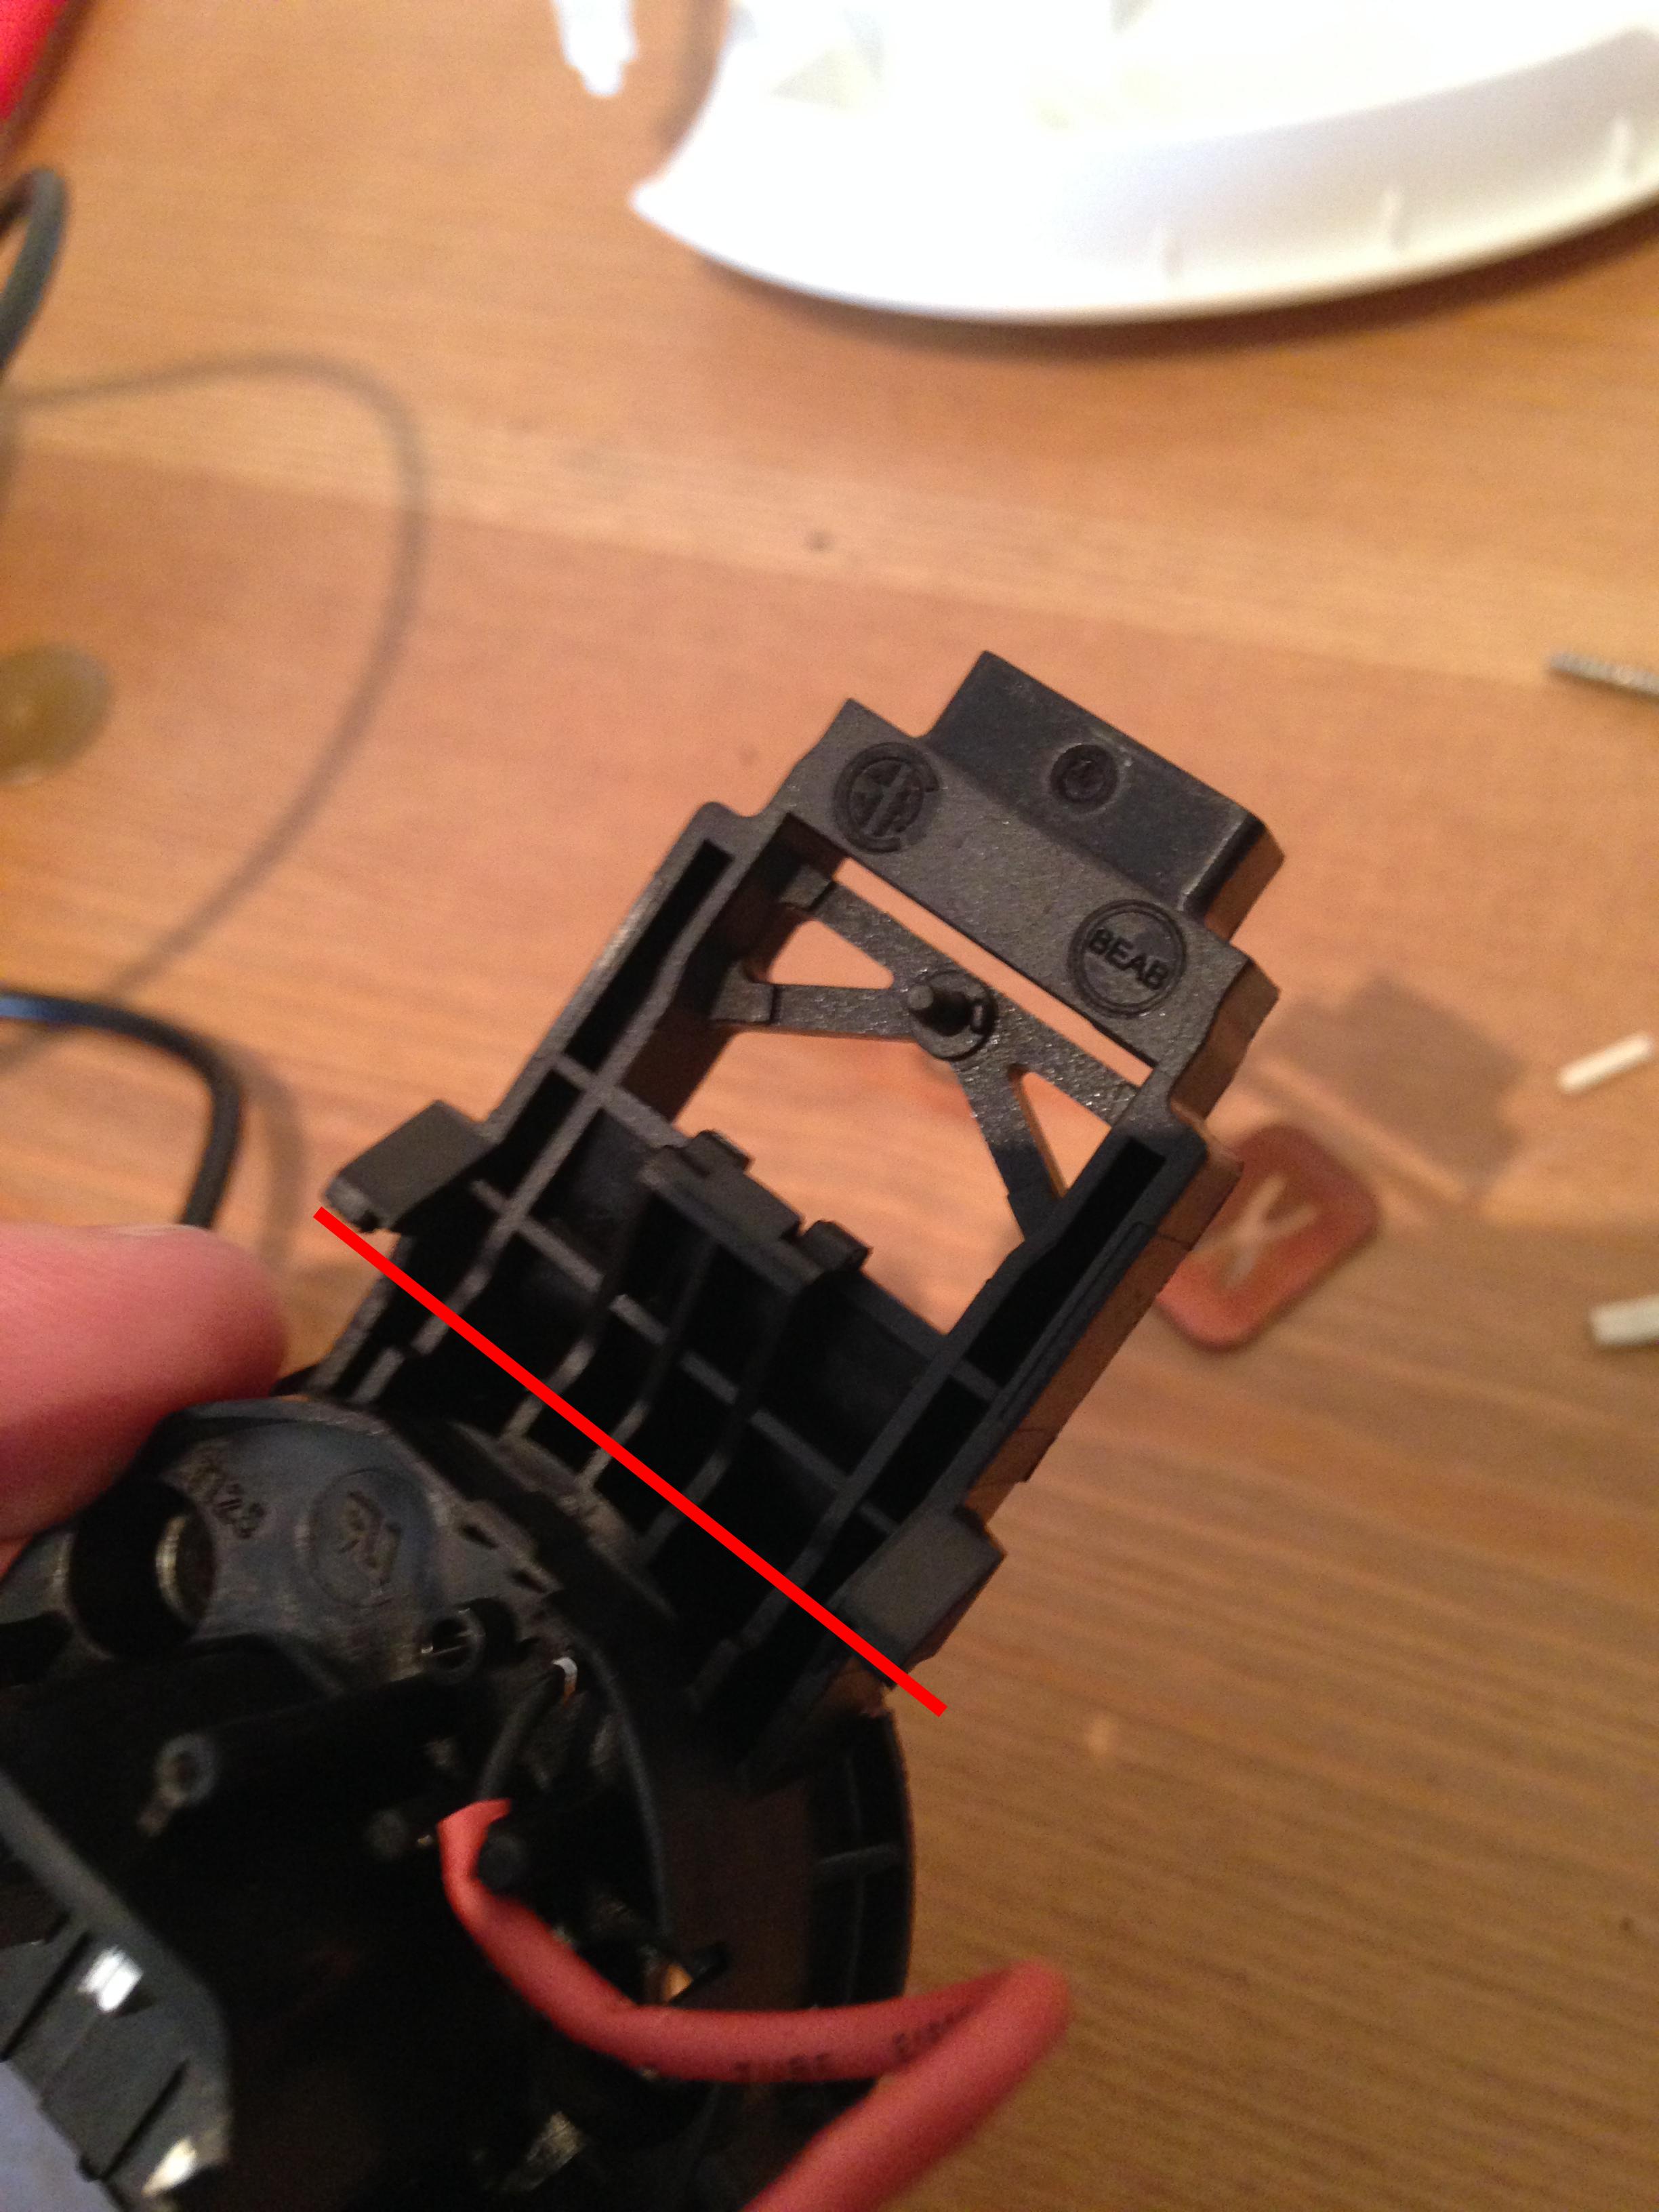
Next, use a hacksaw to cut off the rest of the switch mechanism (along the red line), our elements are going to be always on, so we don't need this.
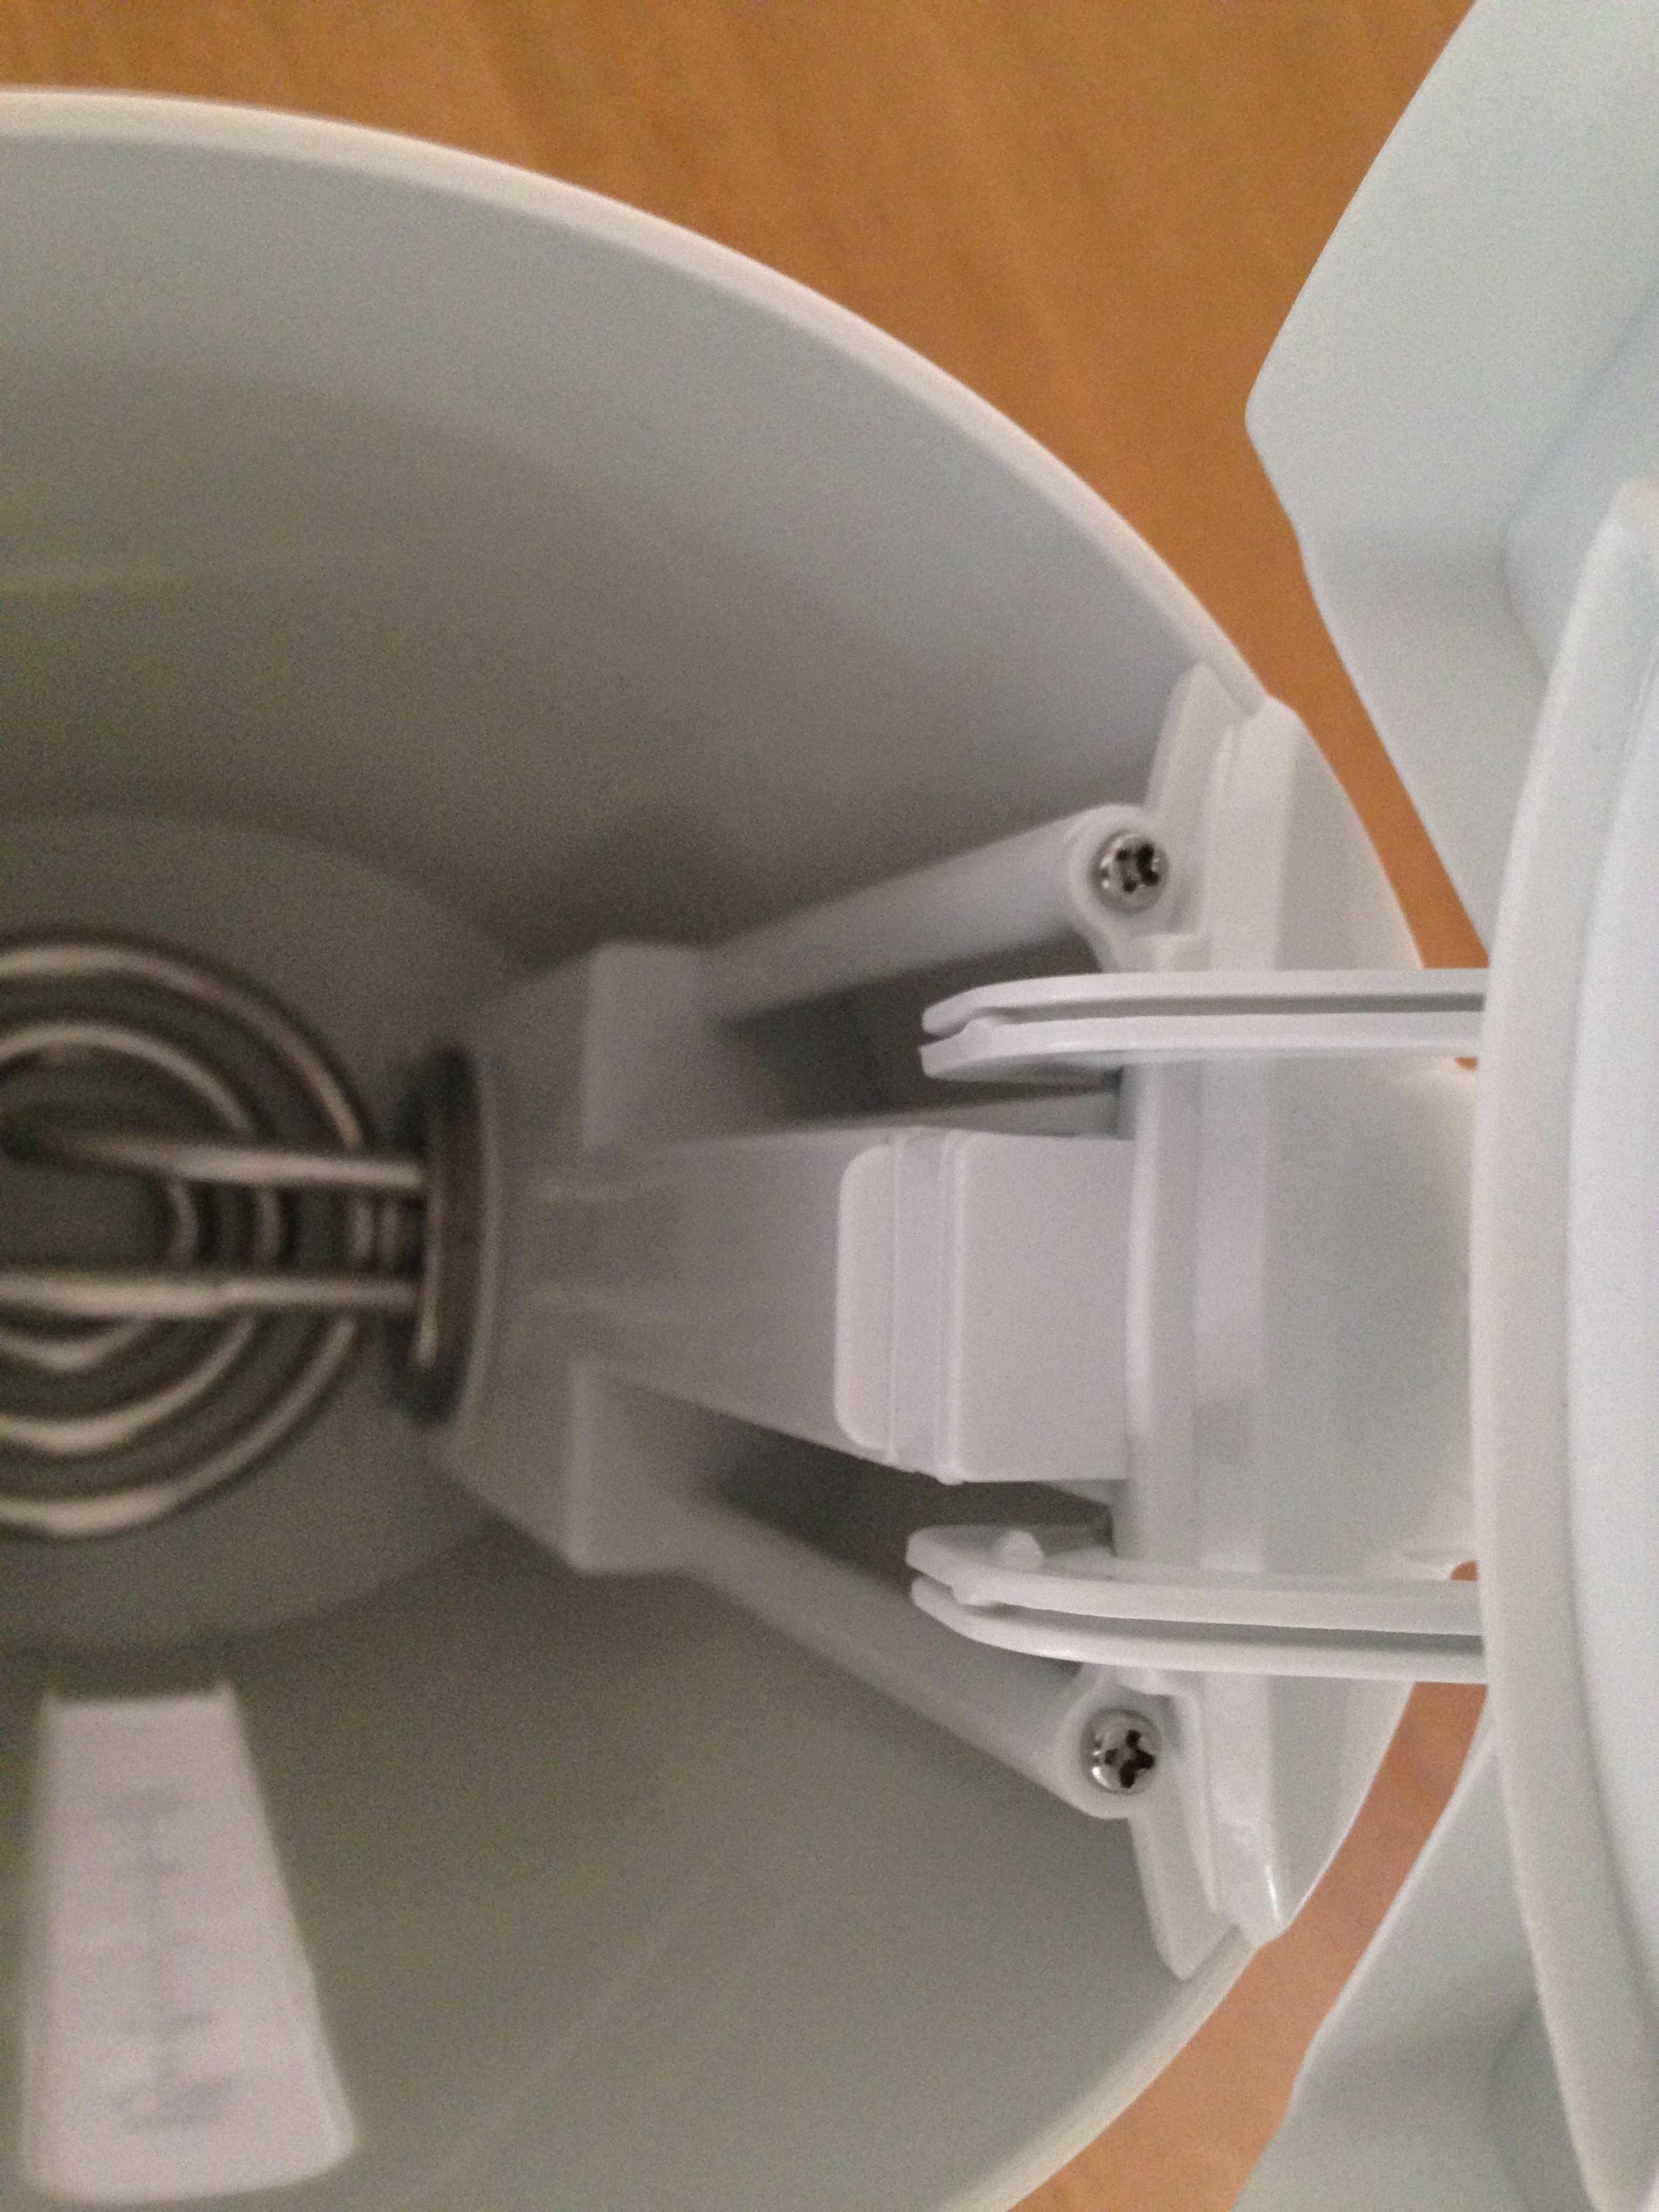
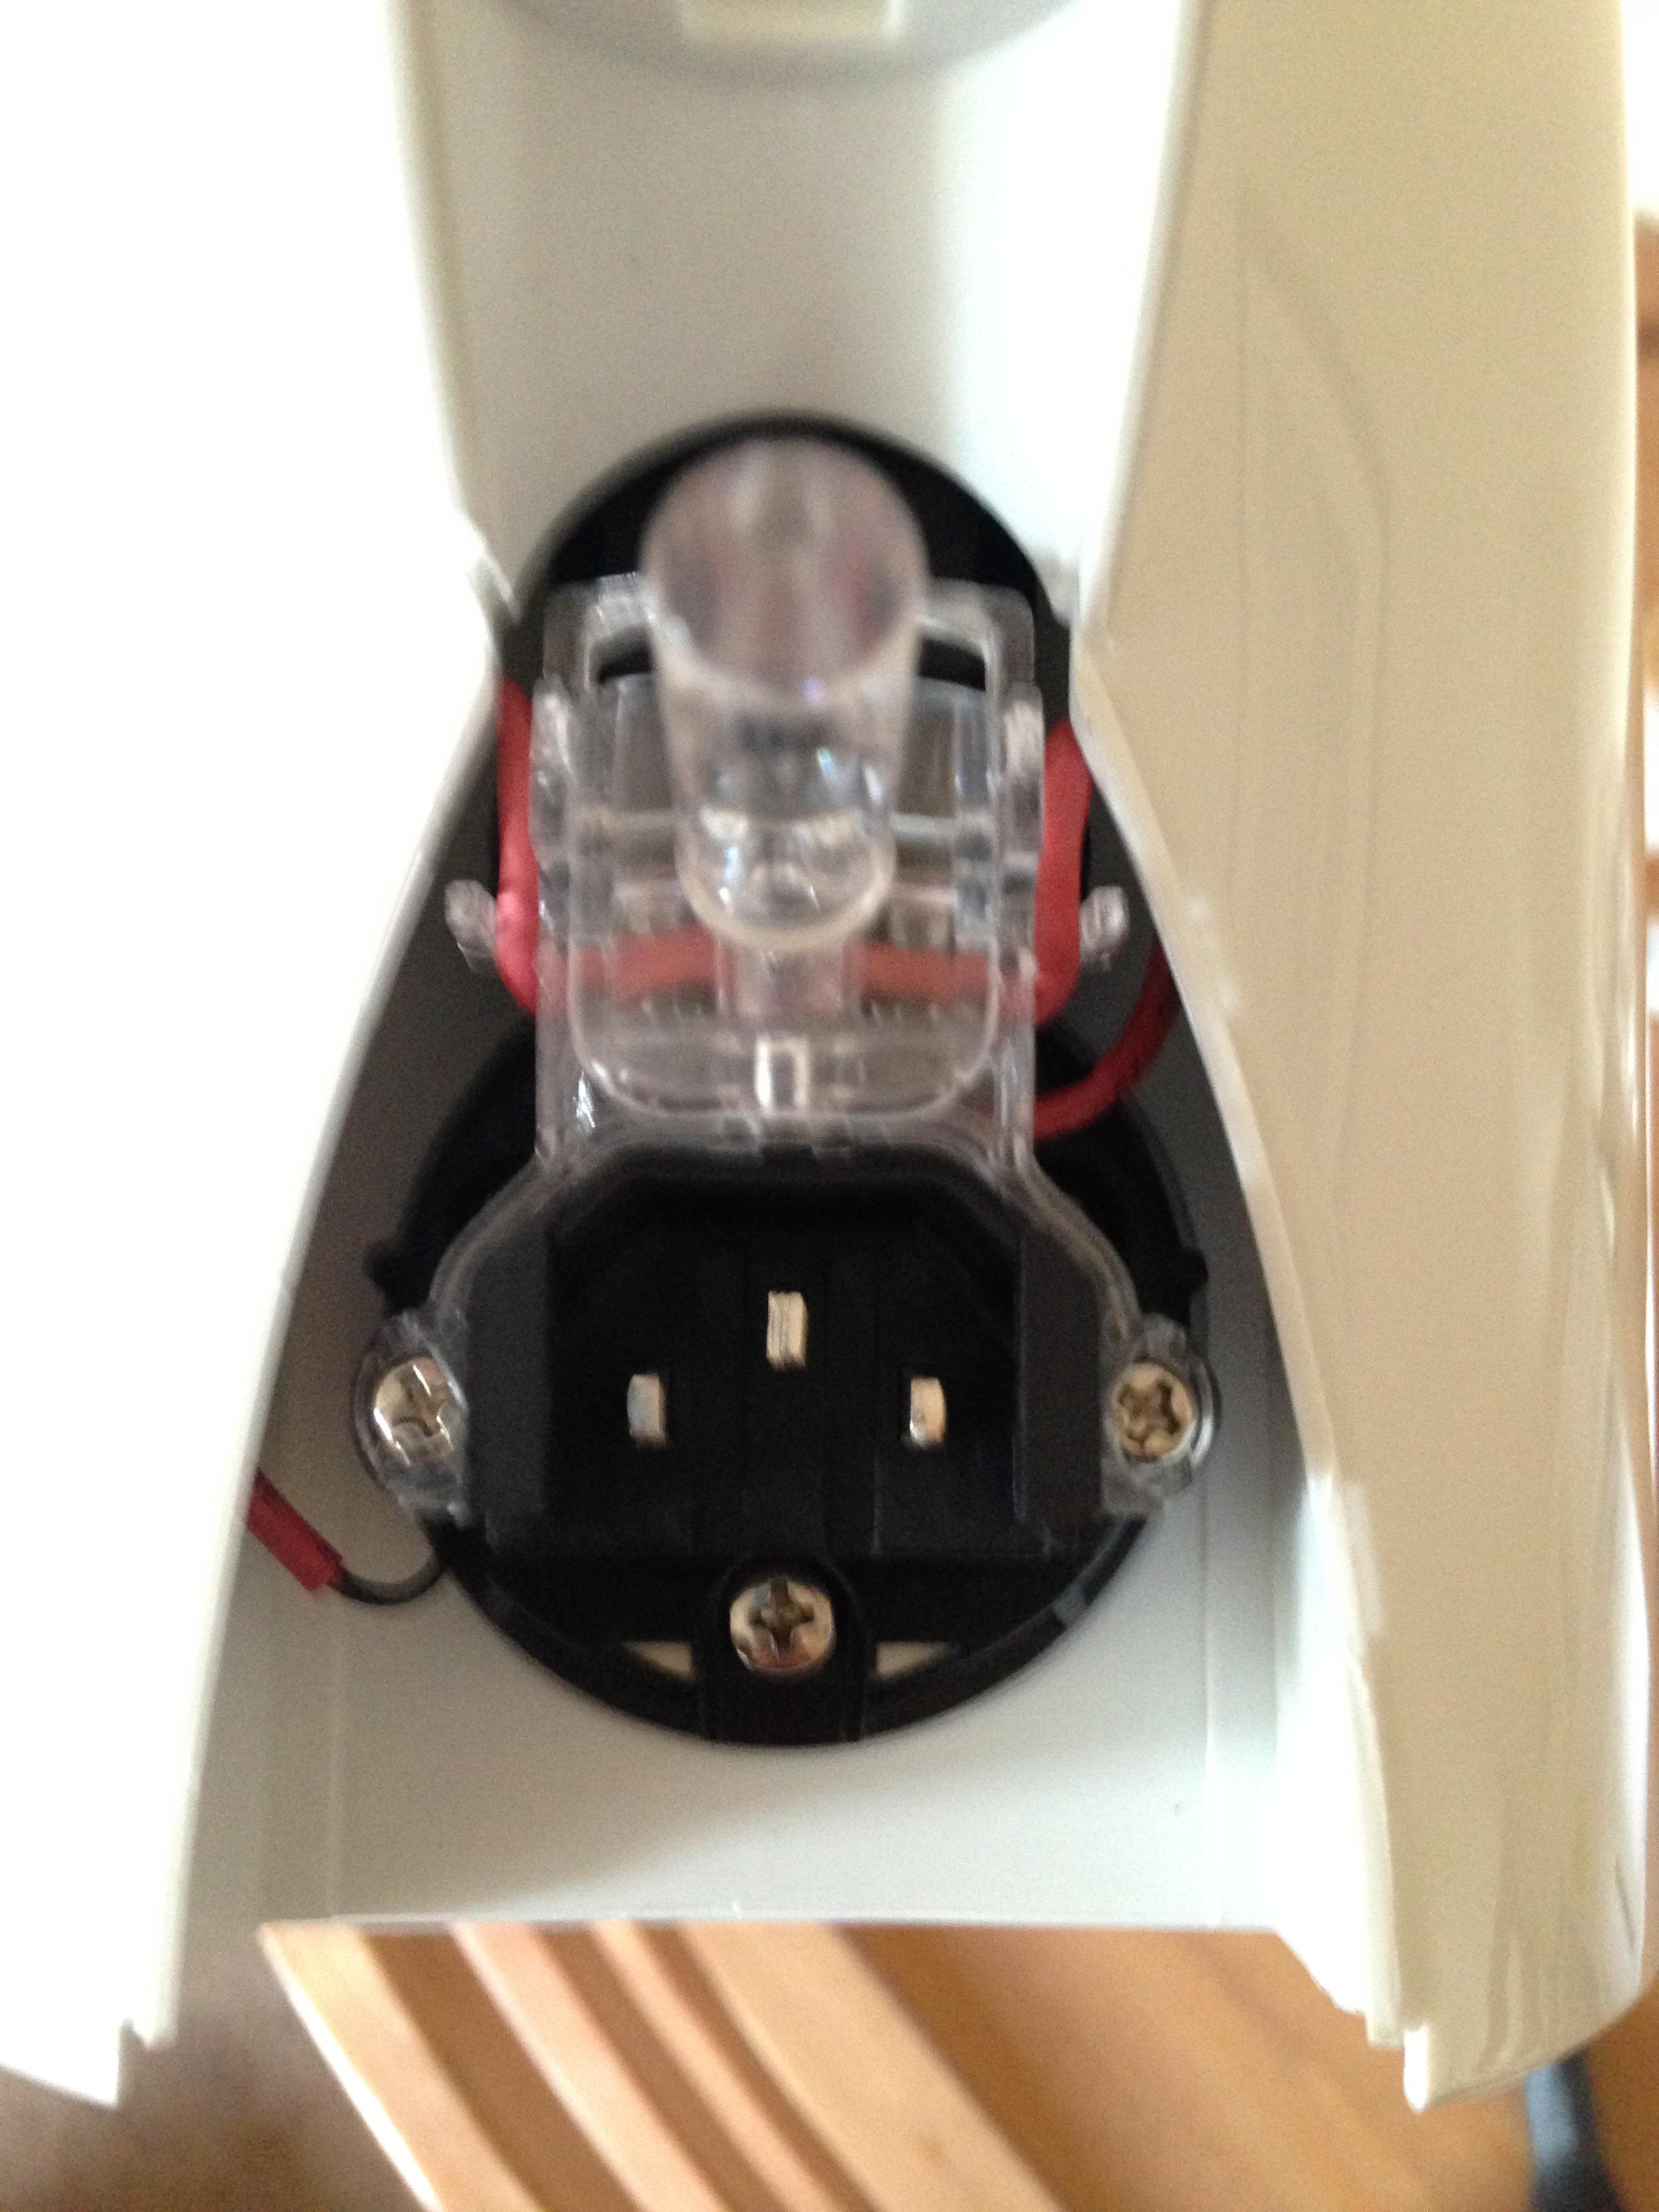
We now need to take apart the base unit to recover the cable. Remove the 5 screws from the bottom of the base unit. Pull away the cover to reveal the crimp connectors. Disconnect these connectors from the base unit.
Using a small flat screwdriver, bend out the crimp connectors to accommodate the larger pins on the back of the black element rear chassis.
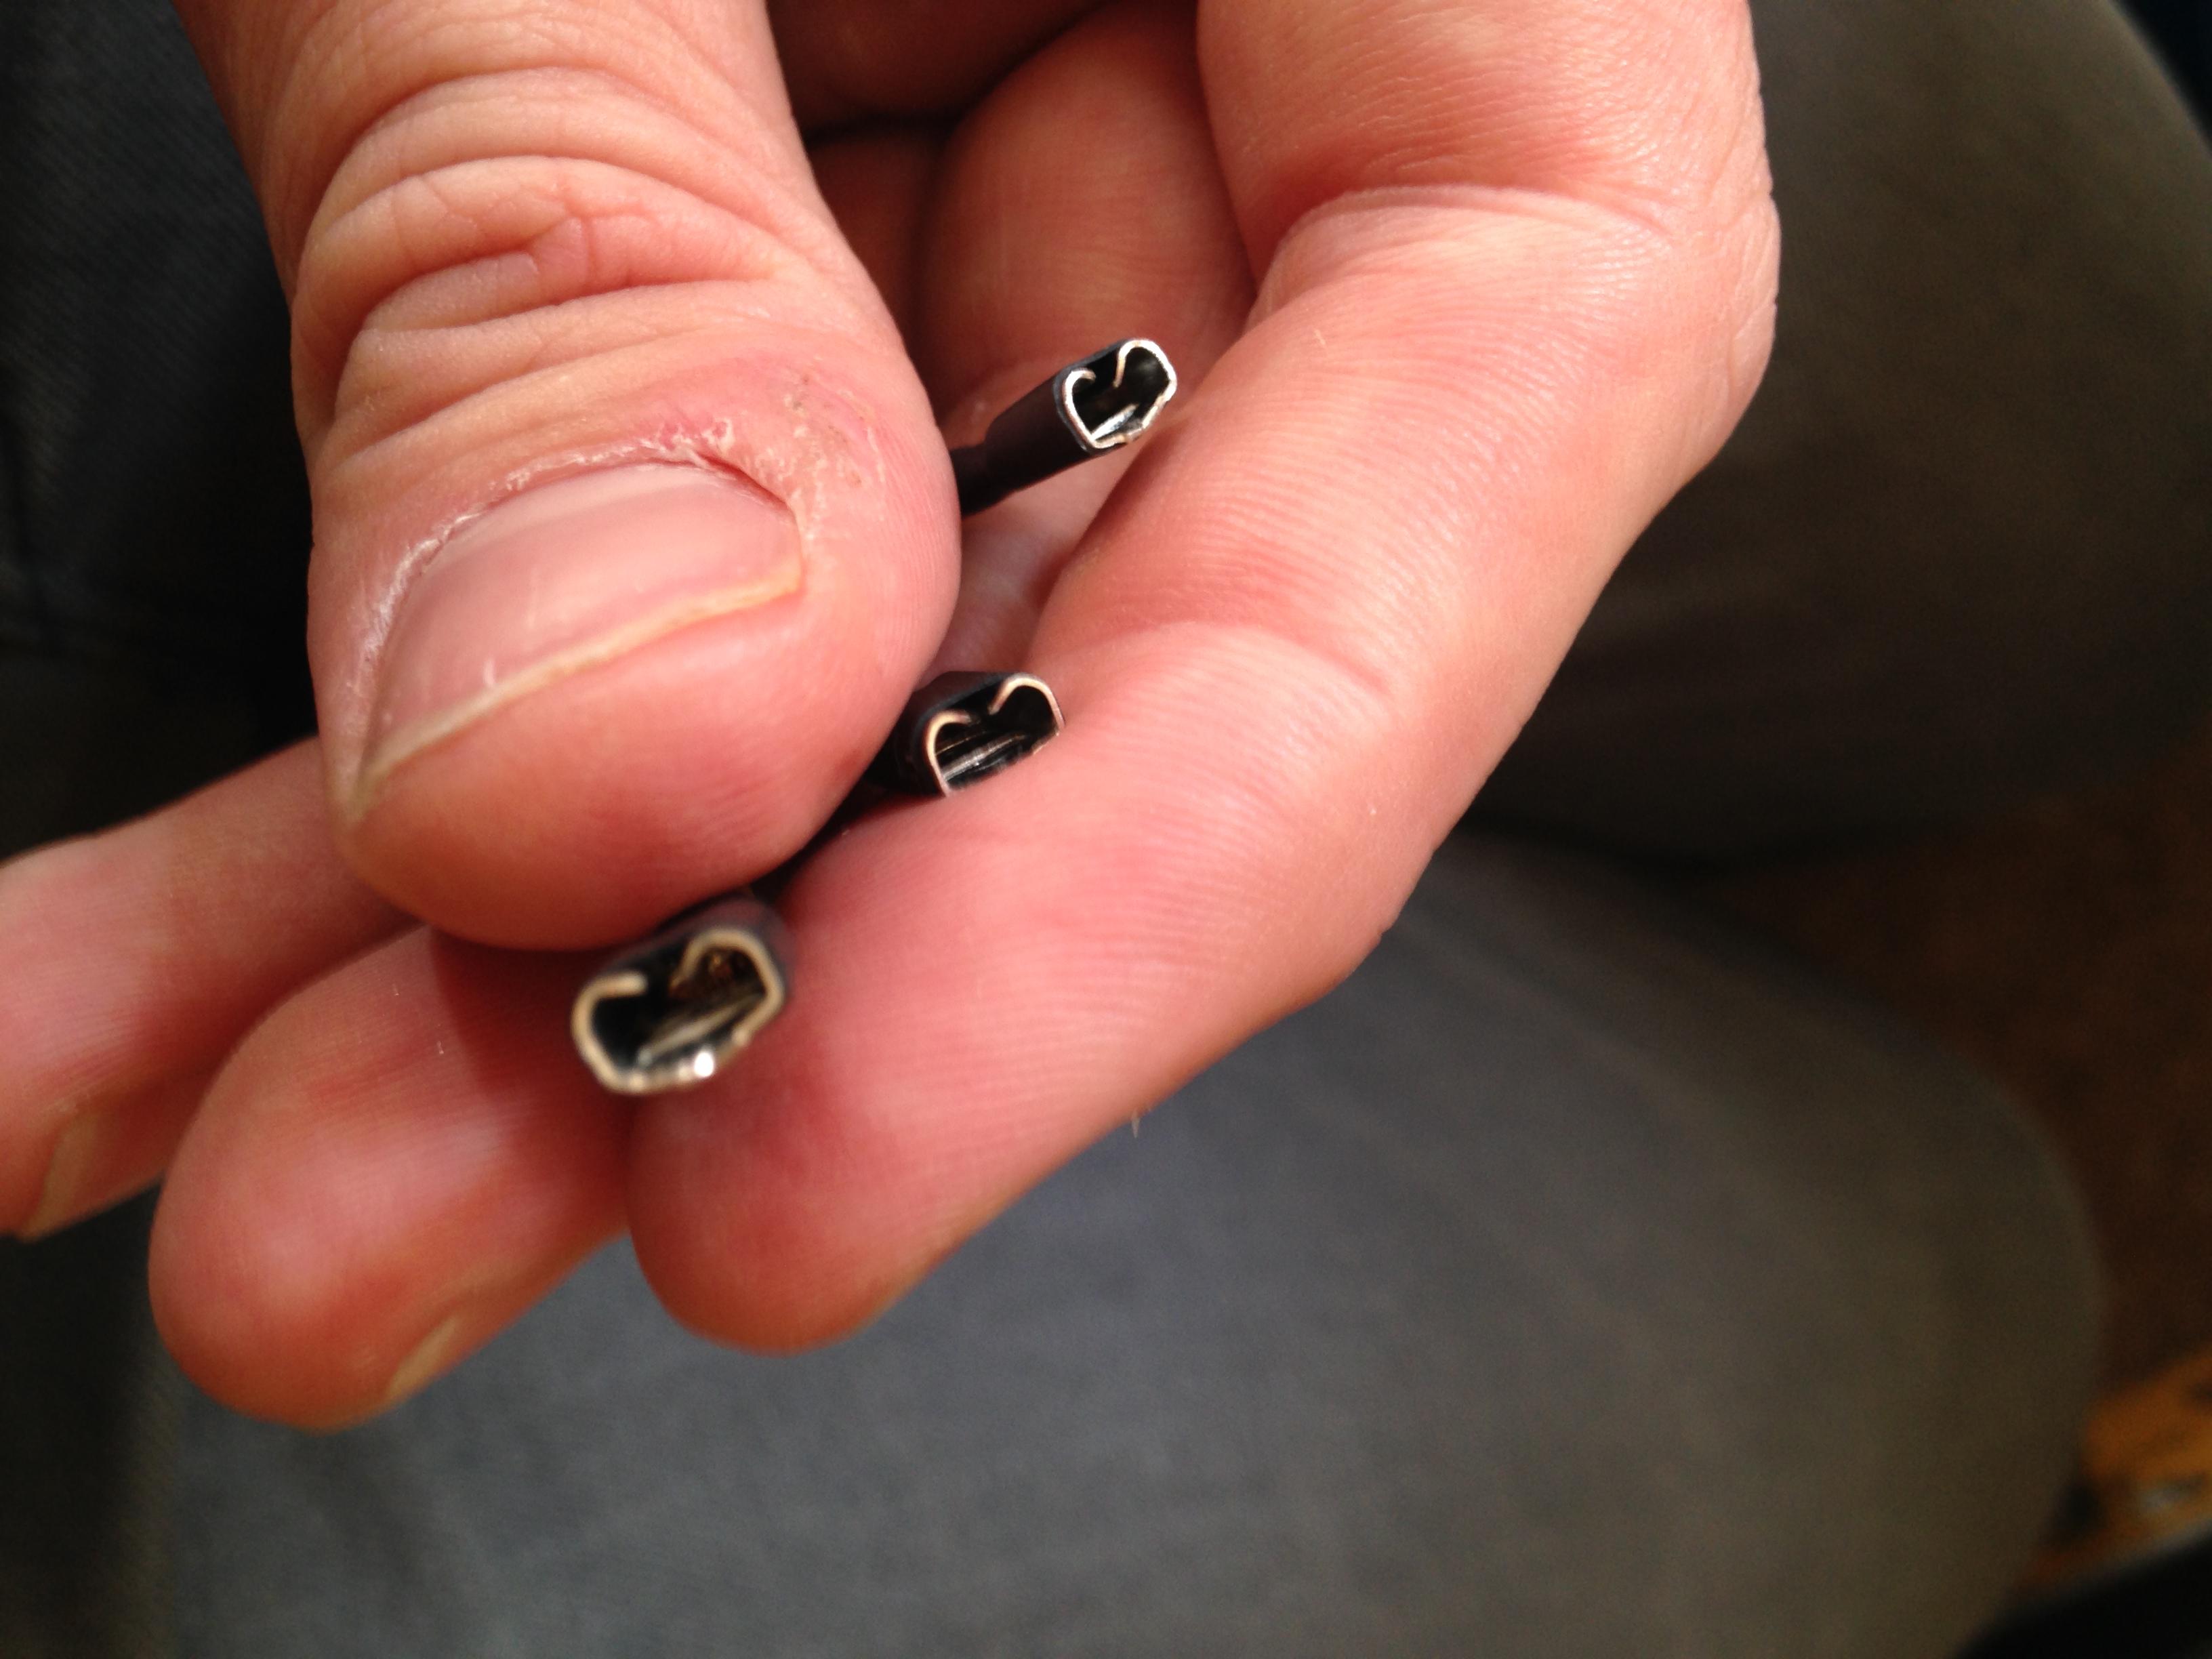
Trail fit these on to the pins to ensure a good fit.
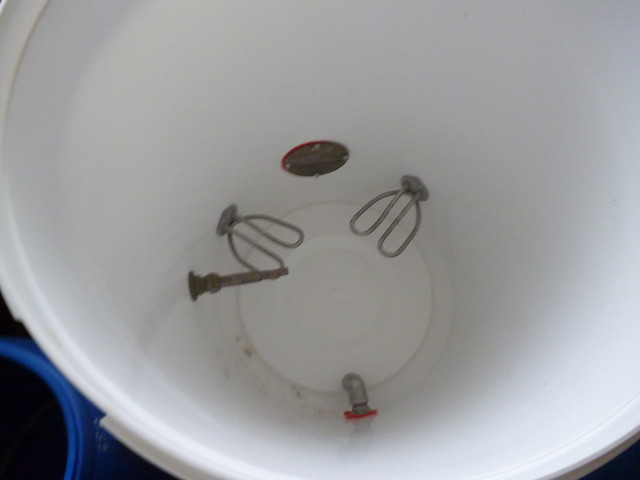
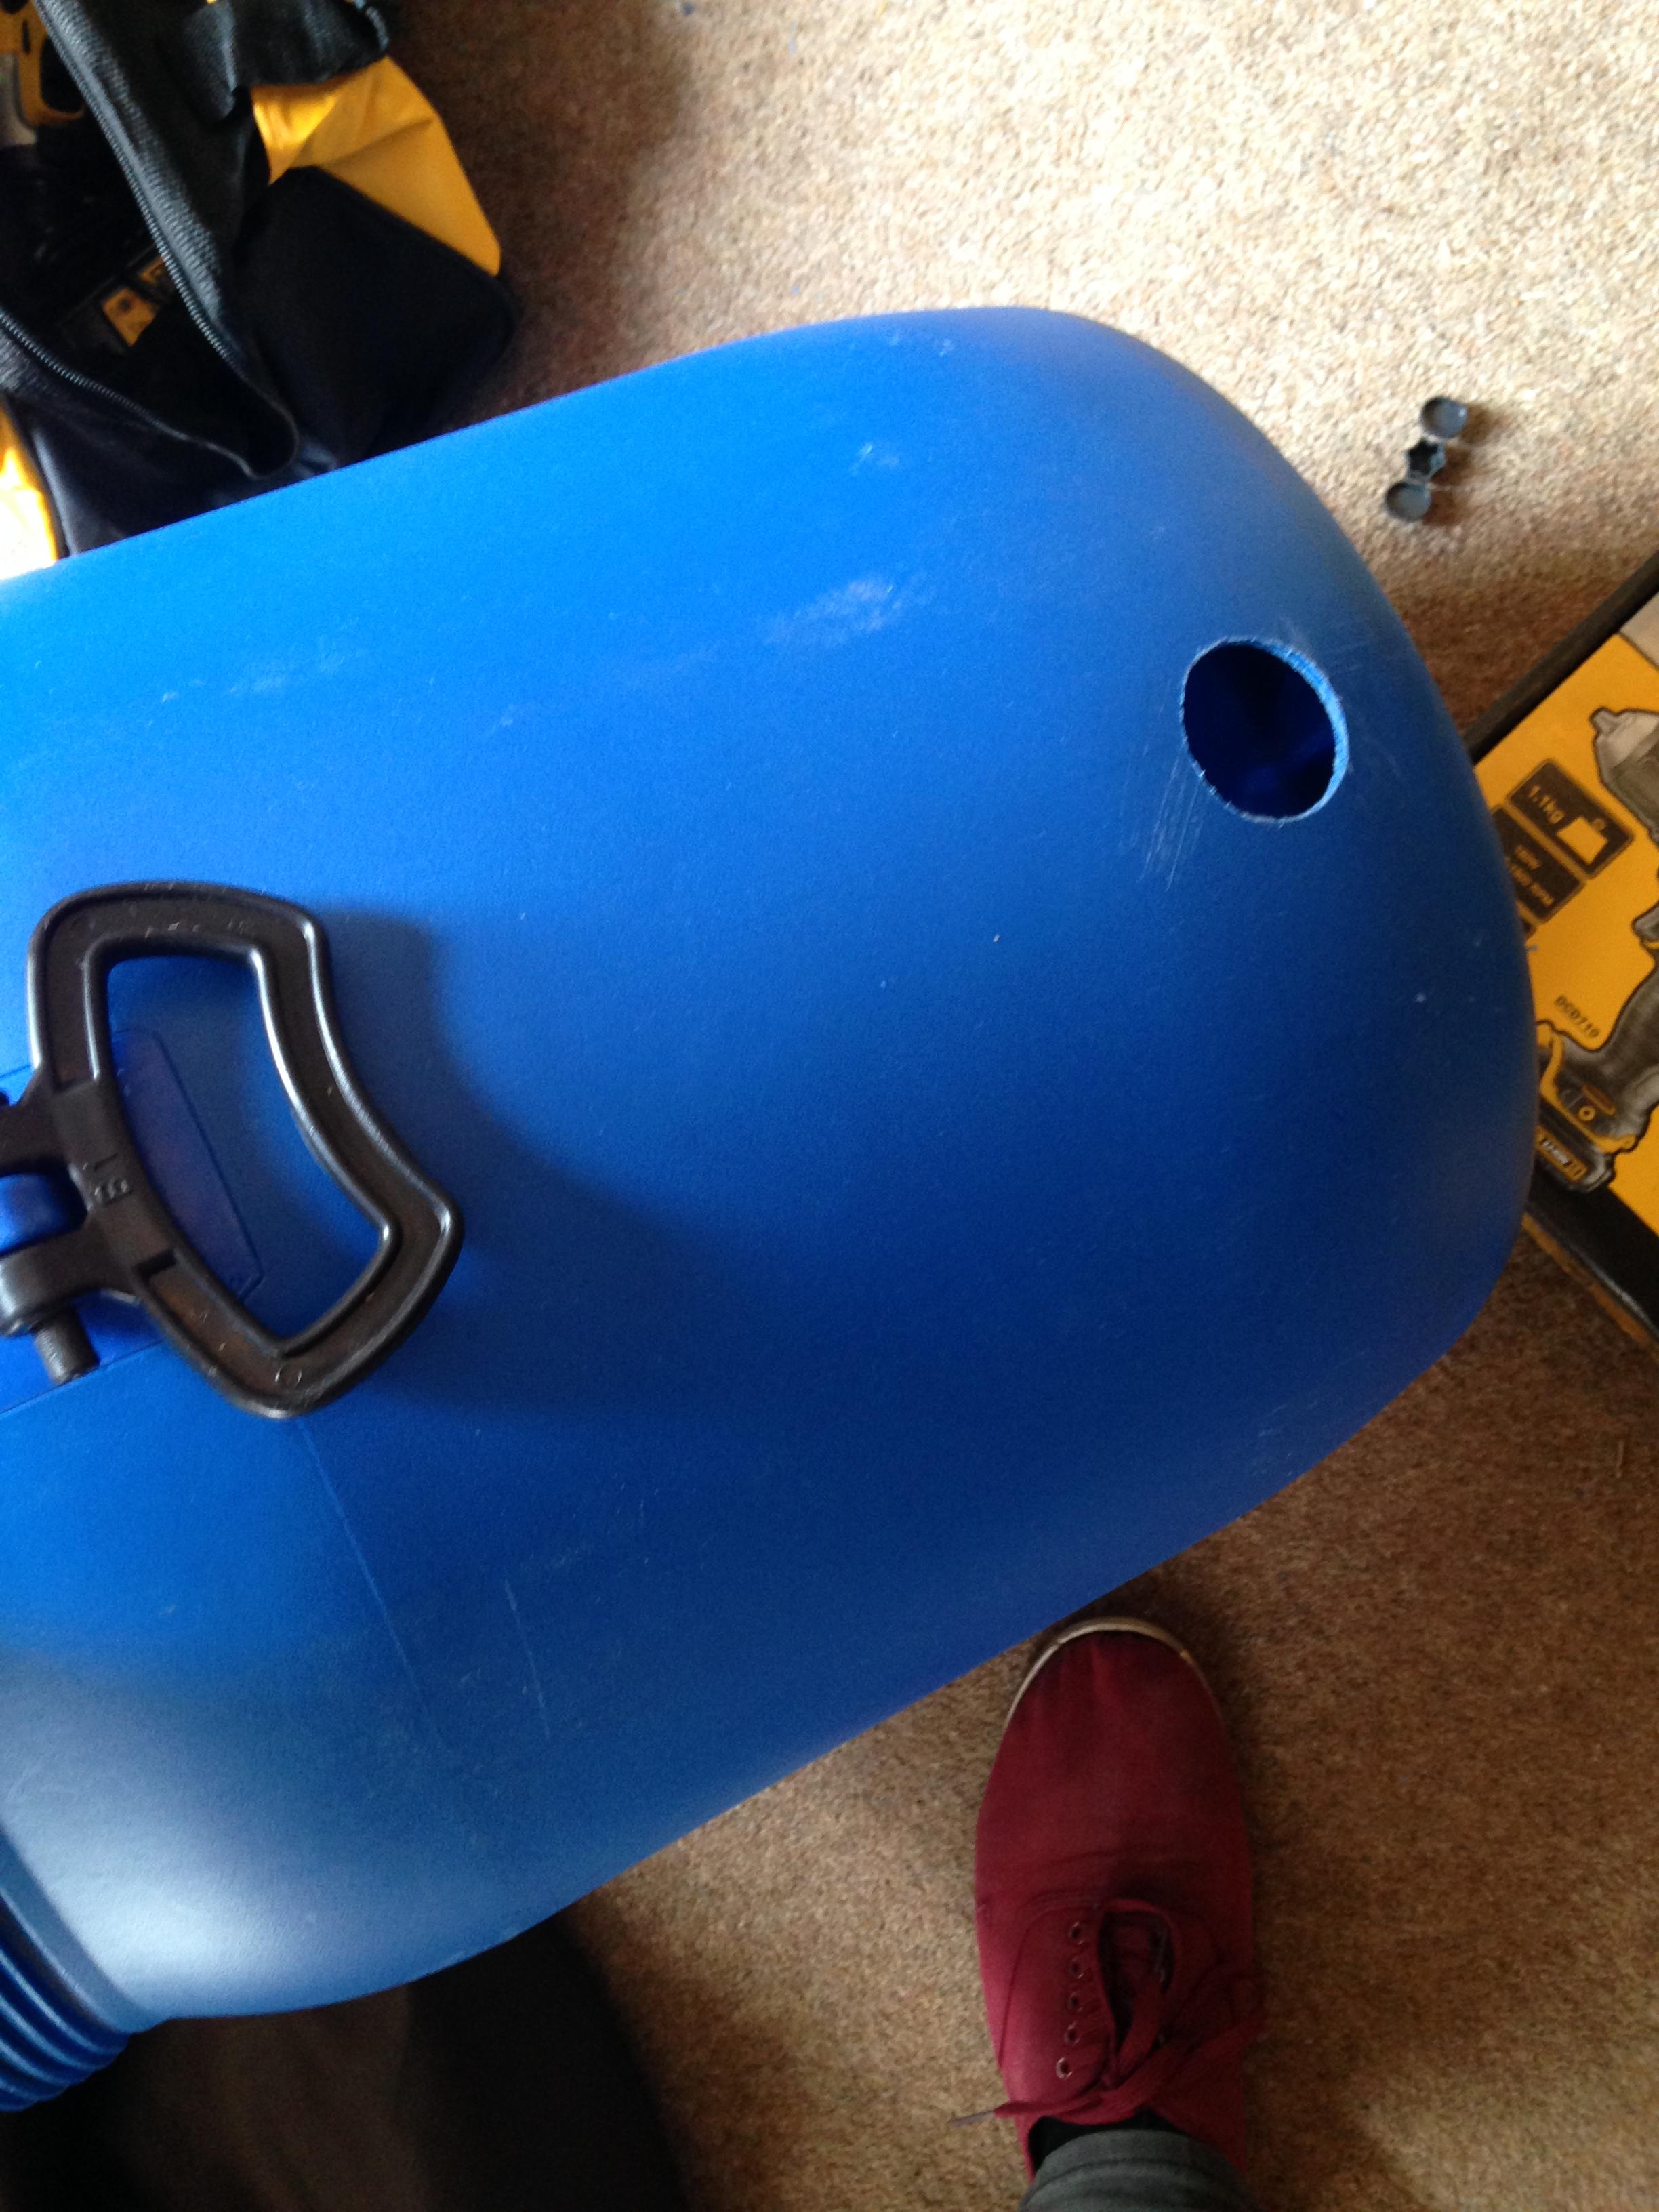
Now it's time to drill your holes in your boiler. I did these as low as I could without risking the element touching the bottom, but the curvature of the barrel meant the point slightly upwards.
A 44mm hole saw is required, once driller, clean off any burrs with a stanley knife and some emery cloth.
Fit the seal into the newly cut hole, and reassemble the element and black plastic back by fixing back in the three screws. (Make sure you put the metal washer back in the correct place!)
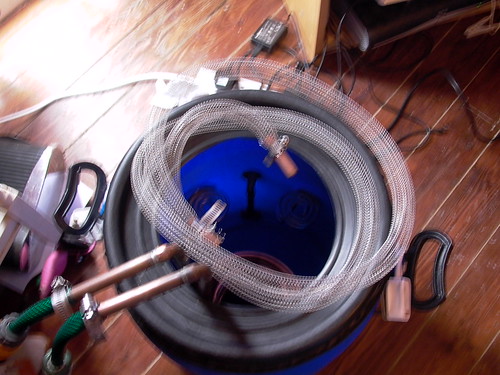
It would now be a good time to fill your boiler with water to check for leaks. Leave it a good half hour and make sure you put as much if not more water in the boiler than you would on your brew day. While you are testing for leaks, you can get one with making the wiring covers.
Drill out the back of the IP55 enclosure with a 51mm hole saw, and fit the cable gland into one of the openings.
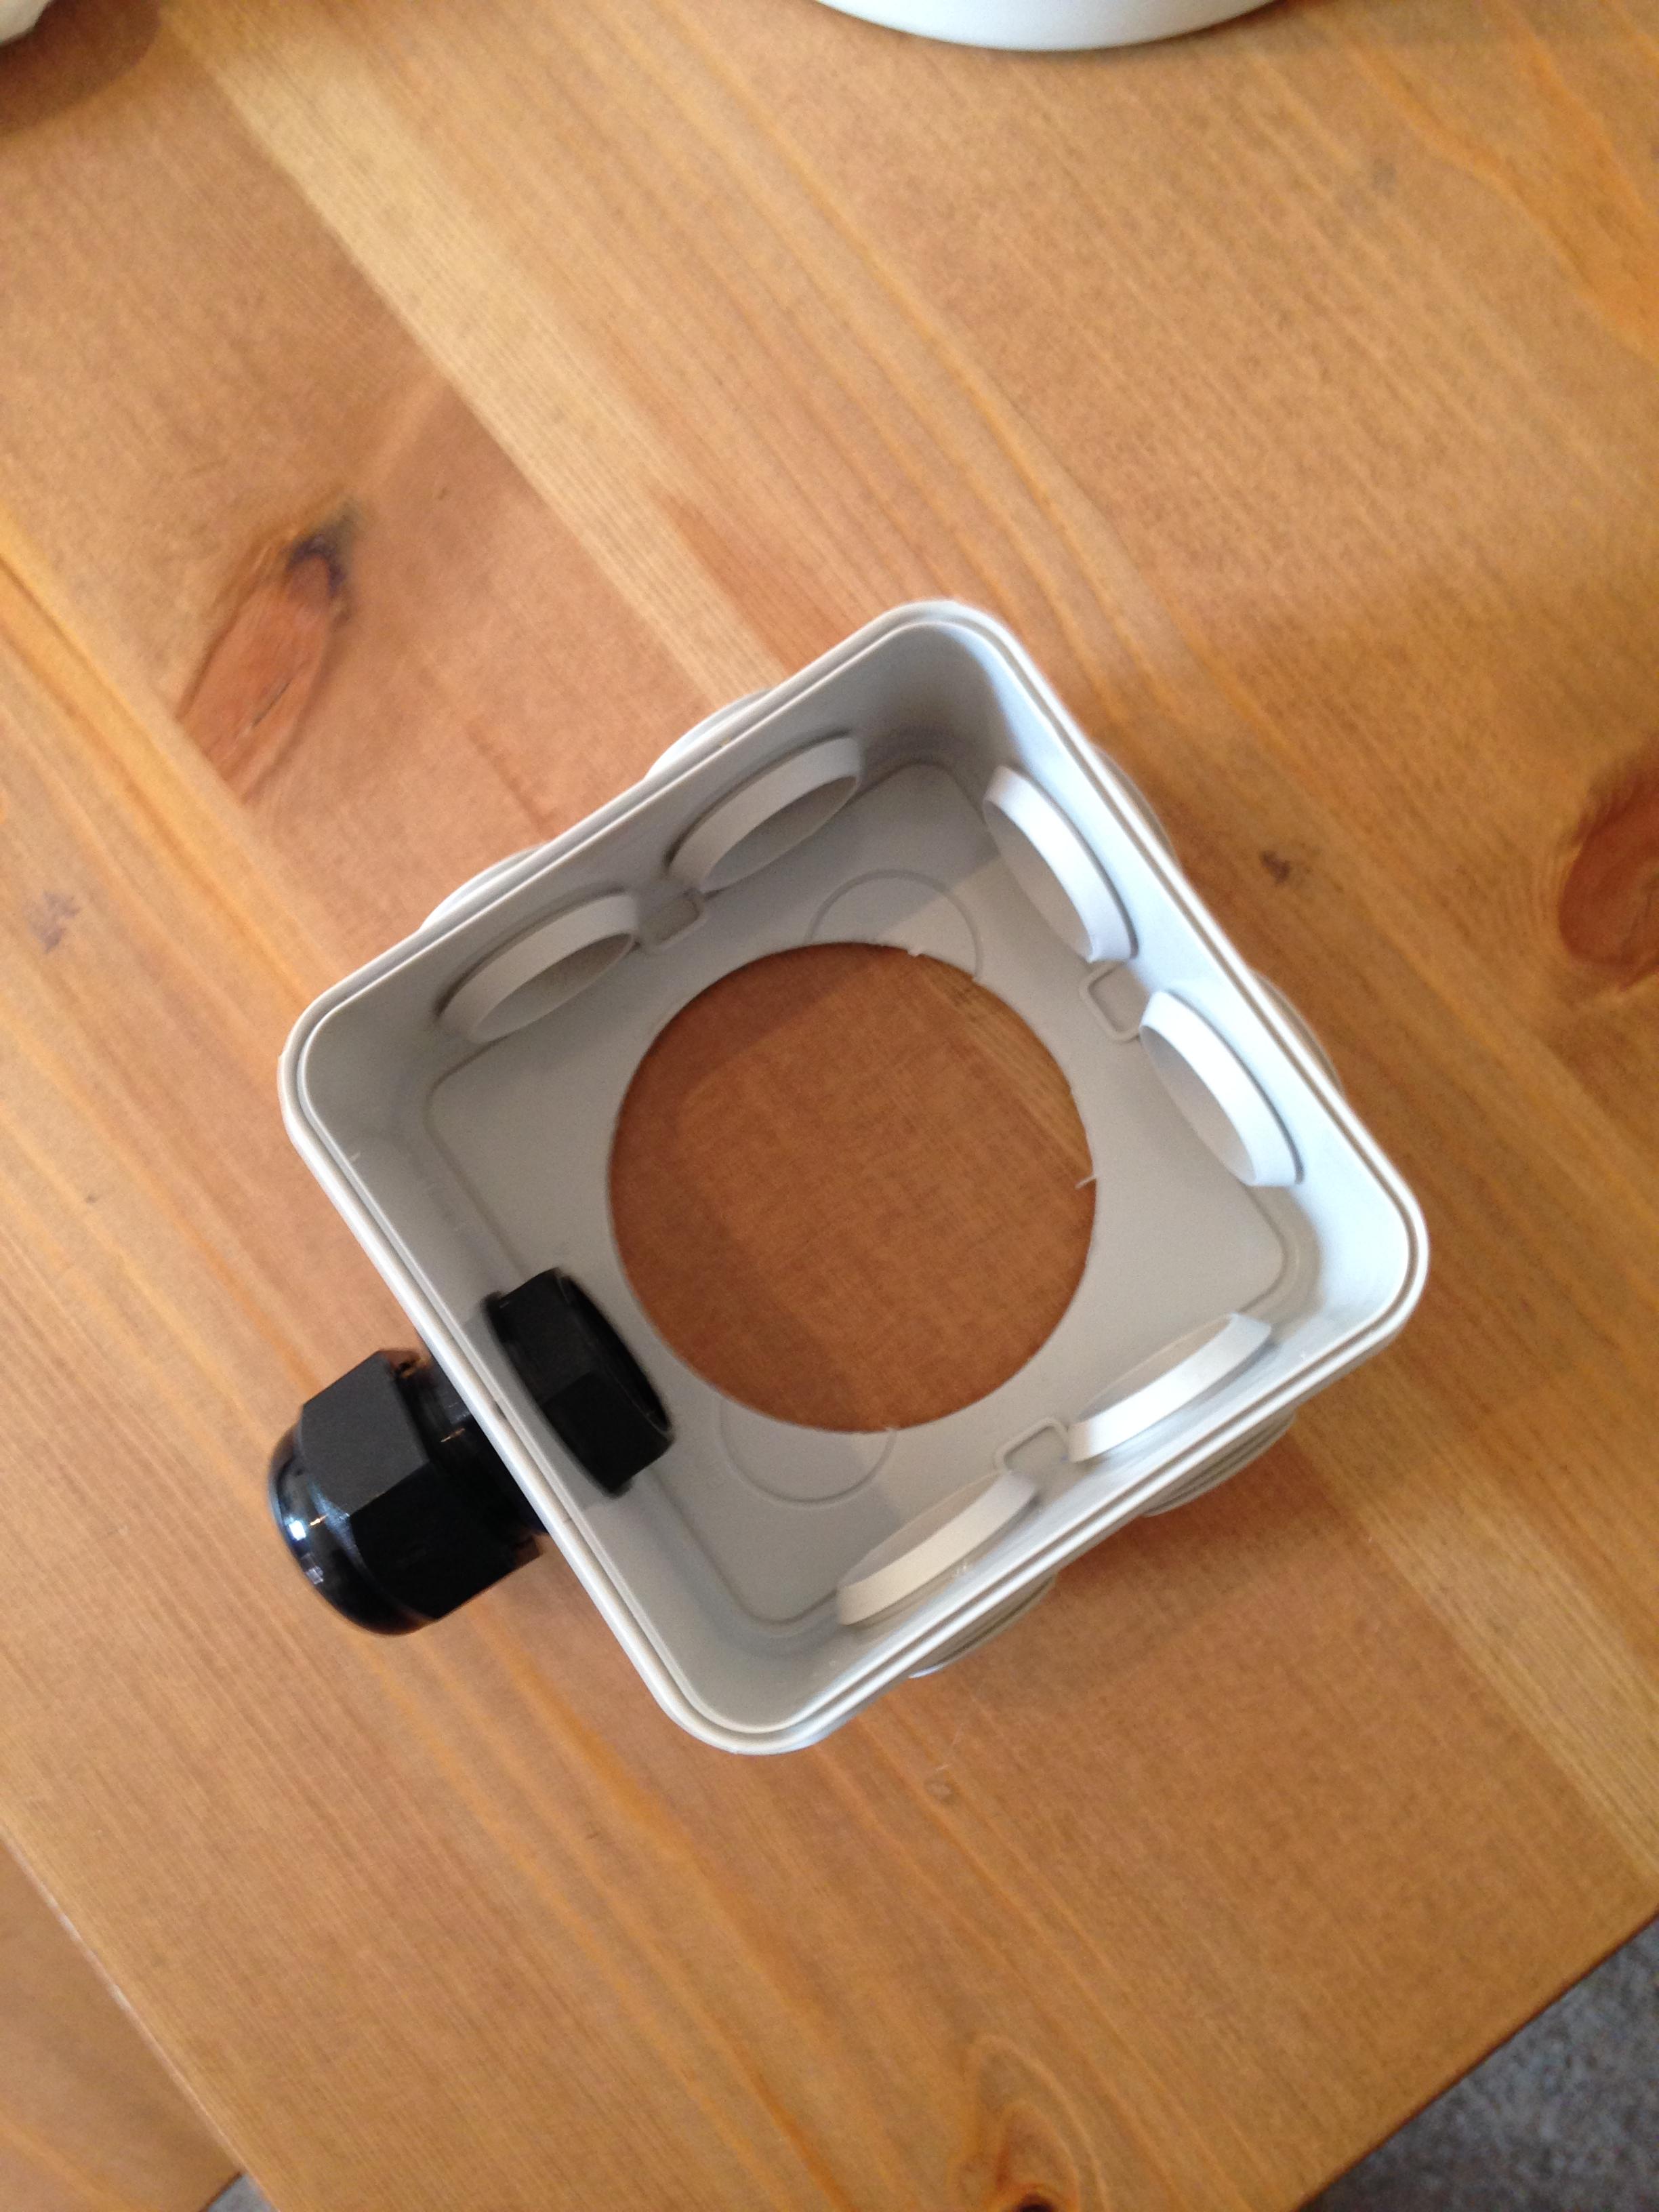
Pass your cable connectors through the gland.
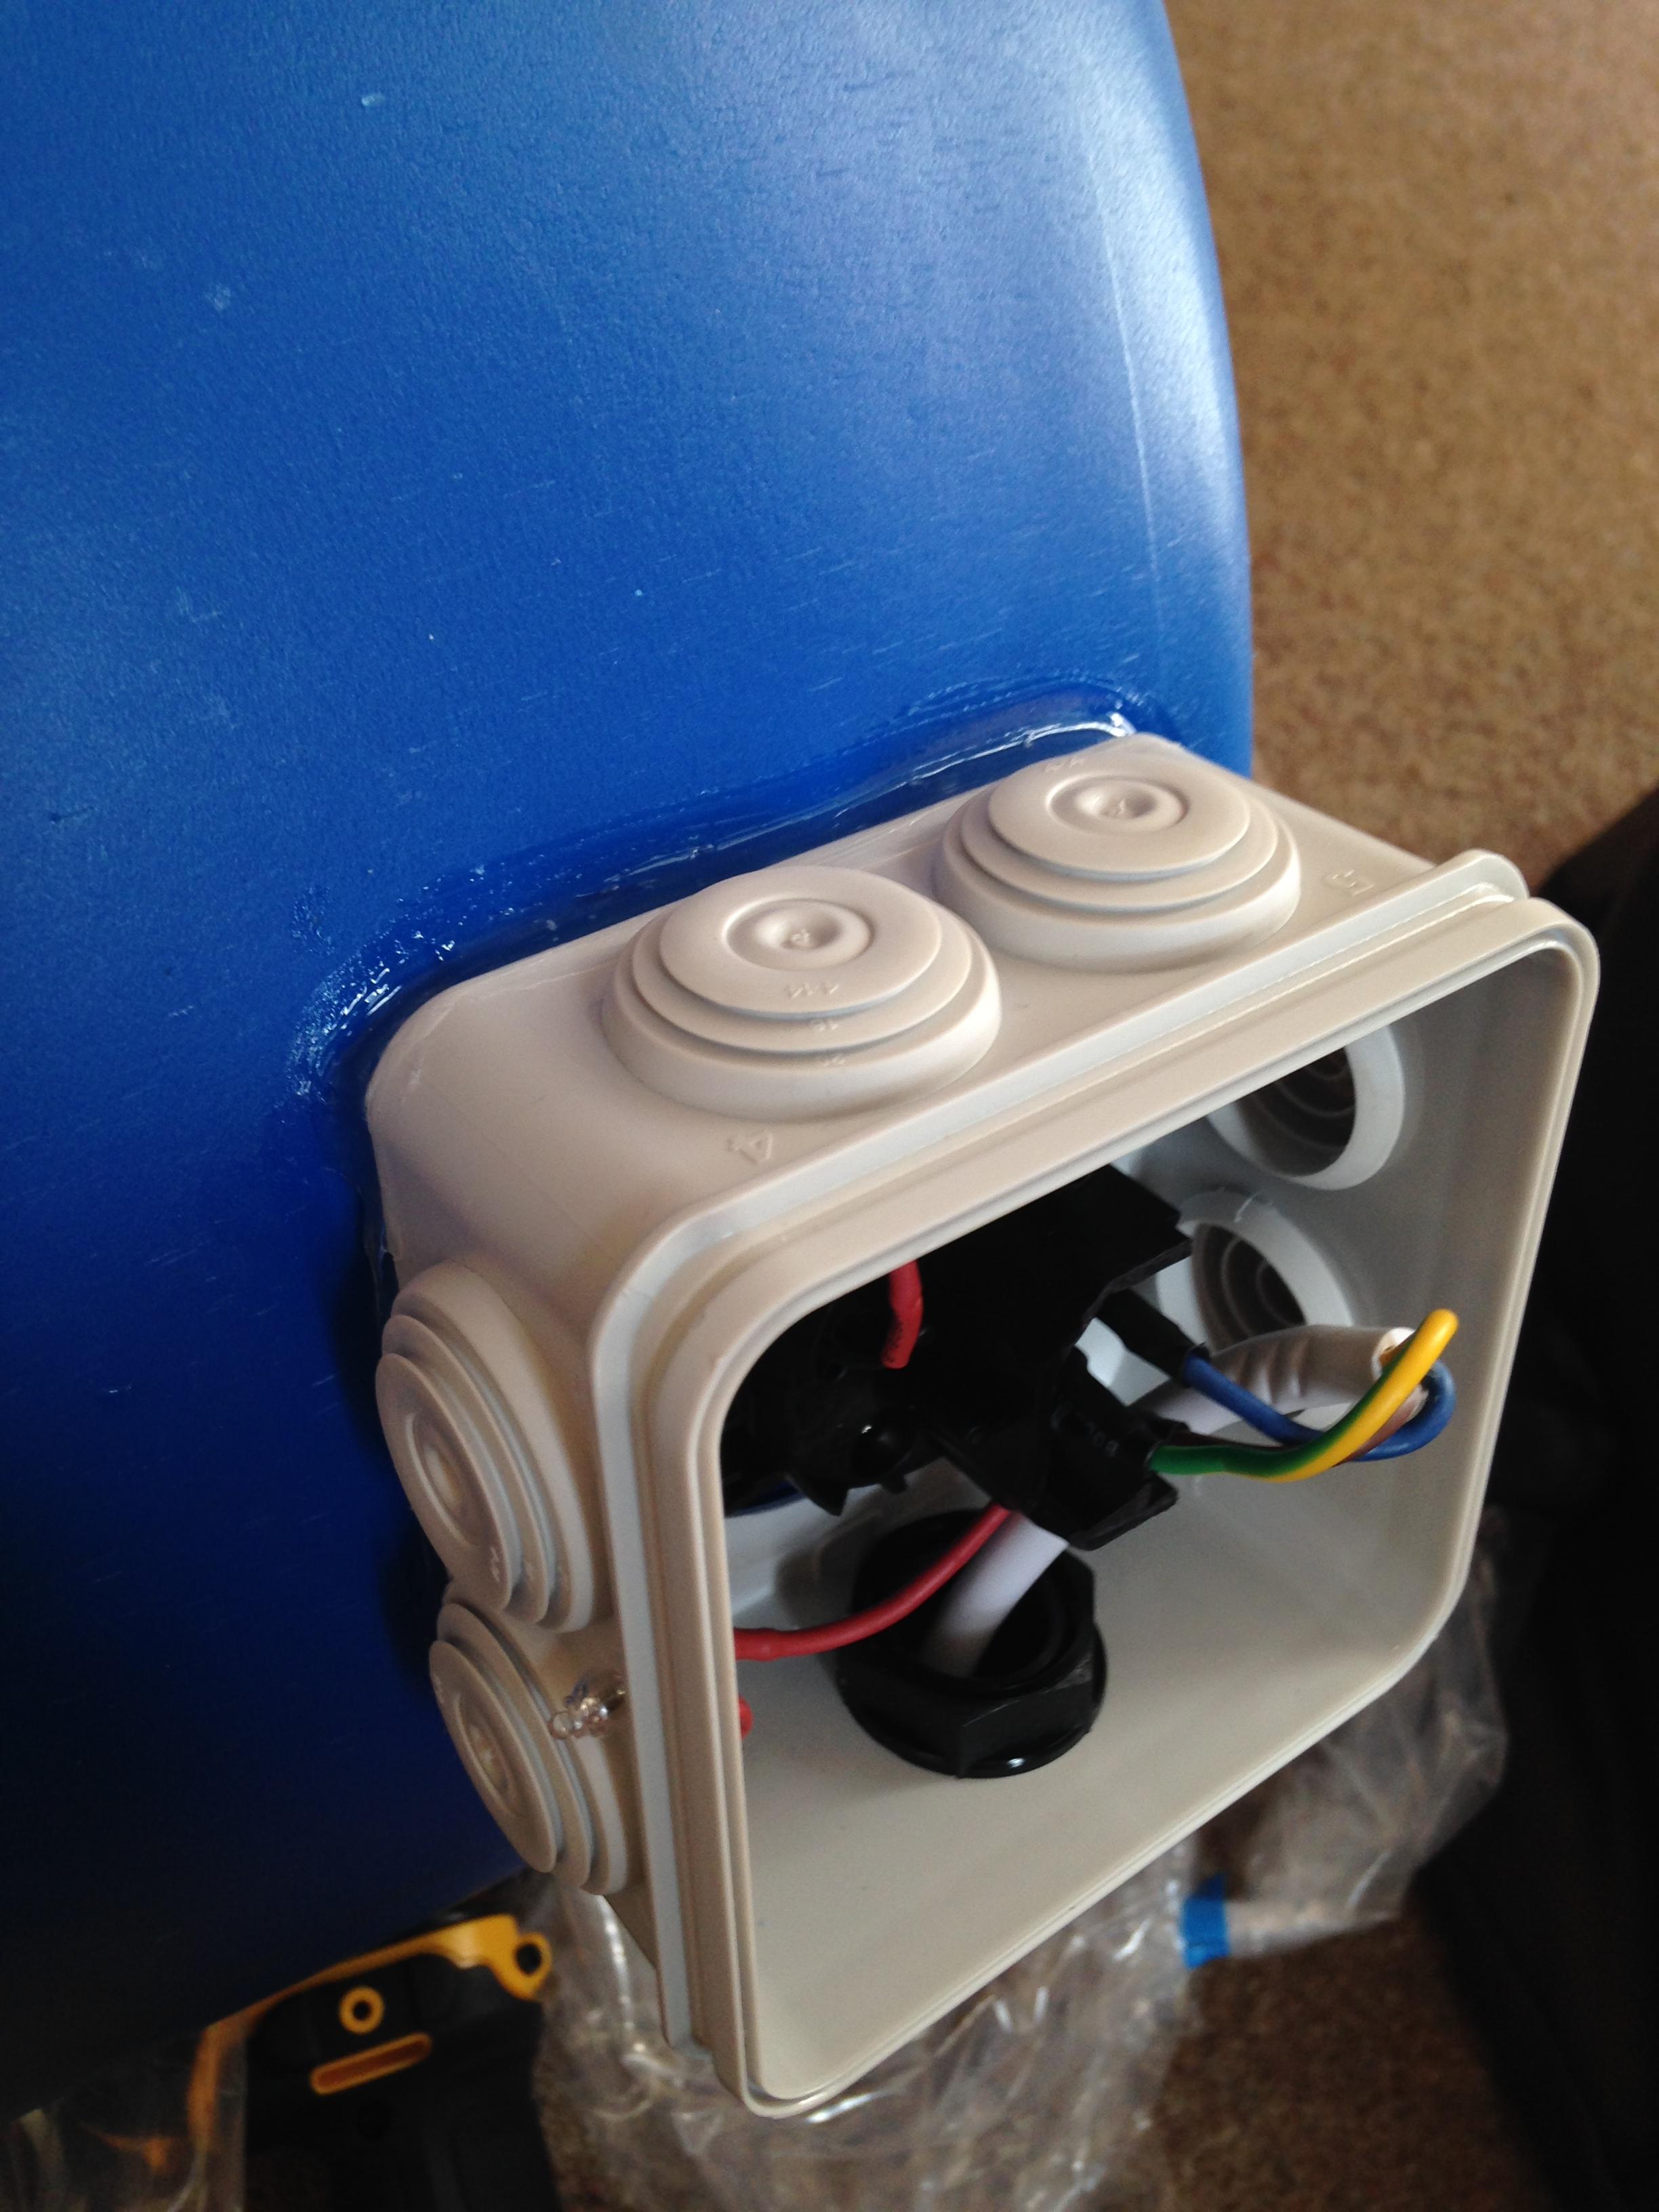
Once you are happy that the boiler is not leaking, you can start to wire up the elements.
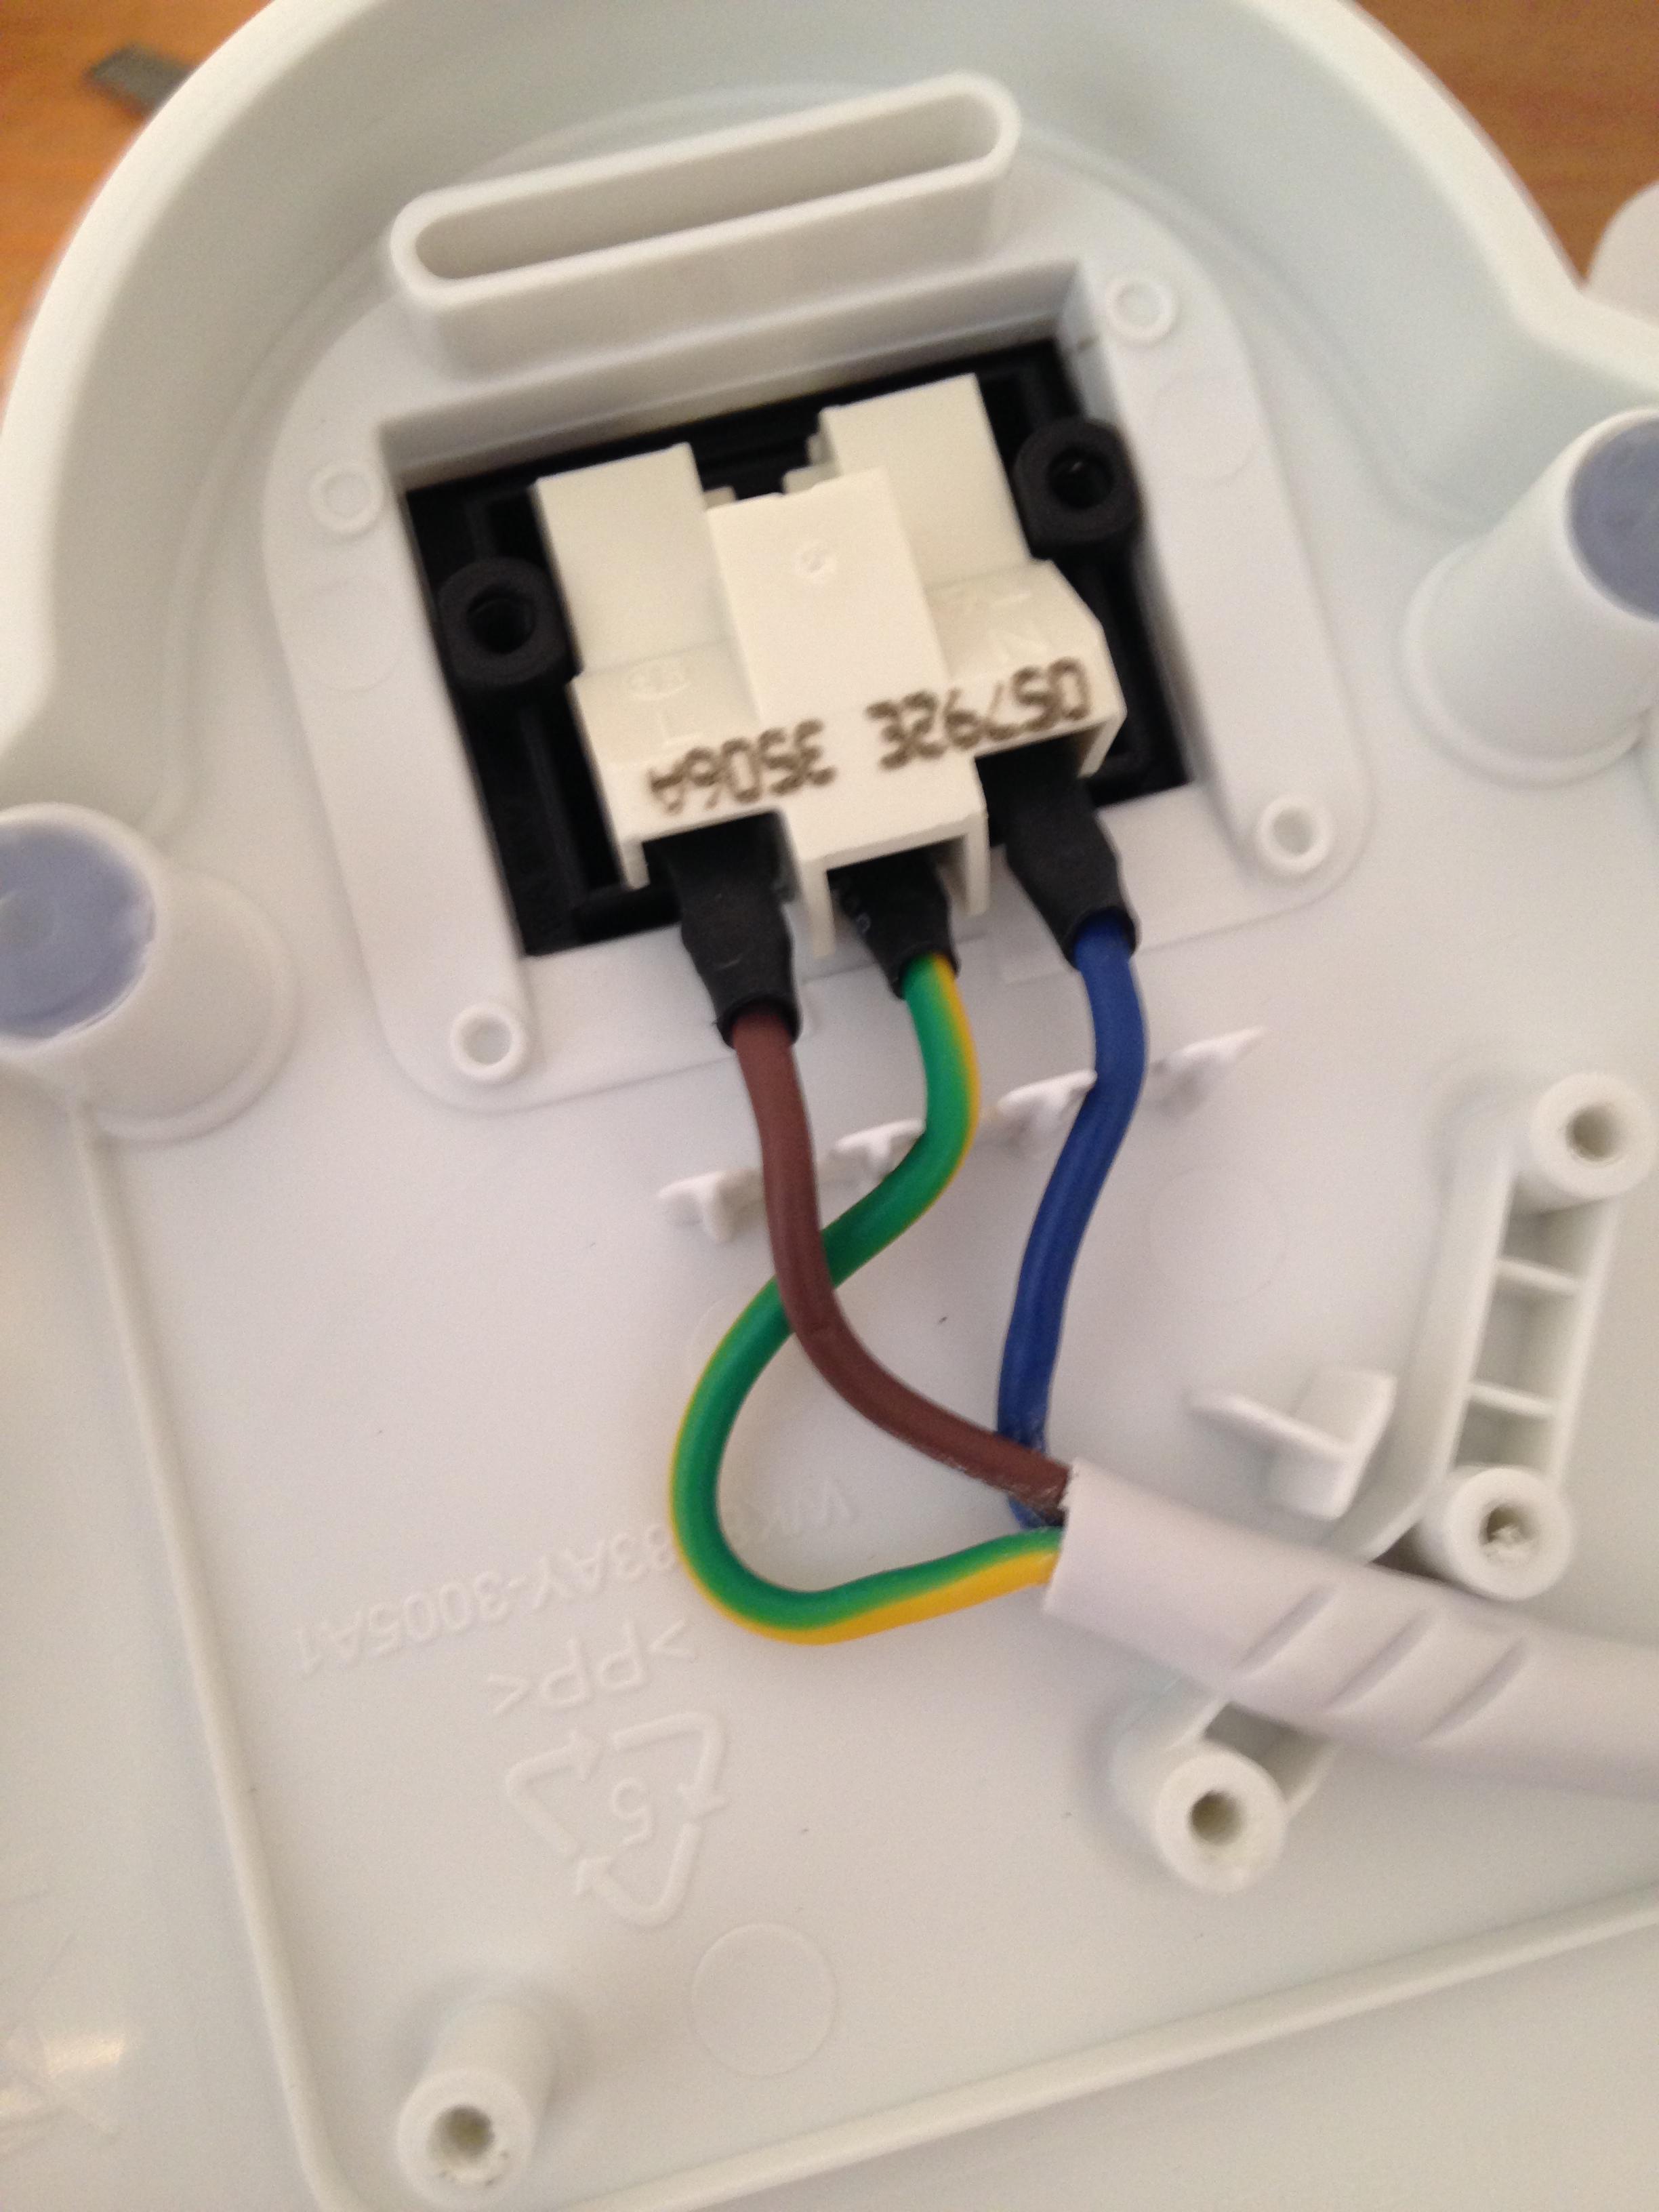
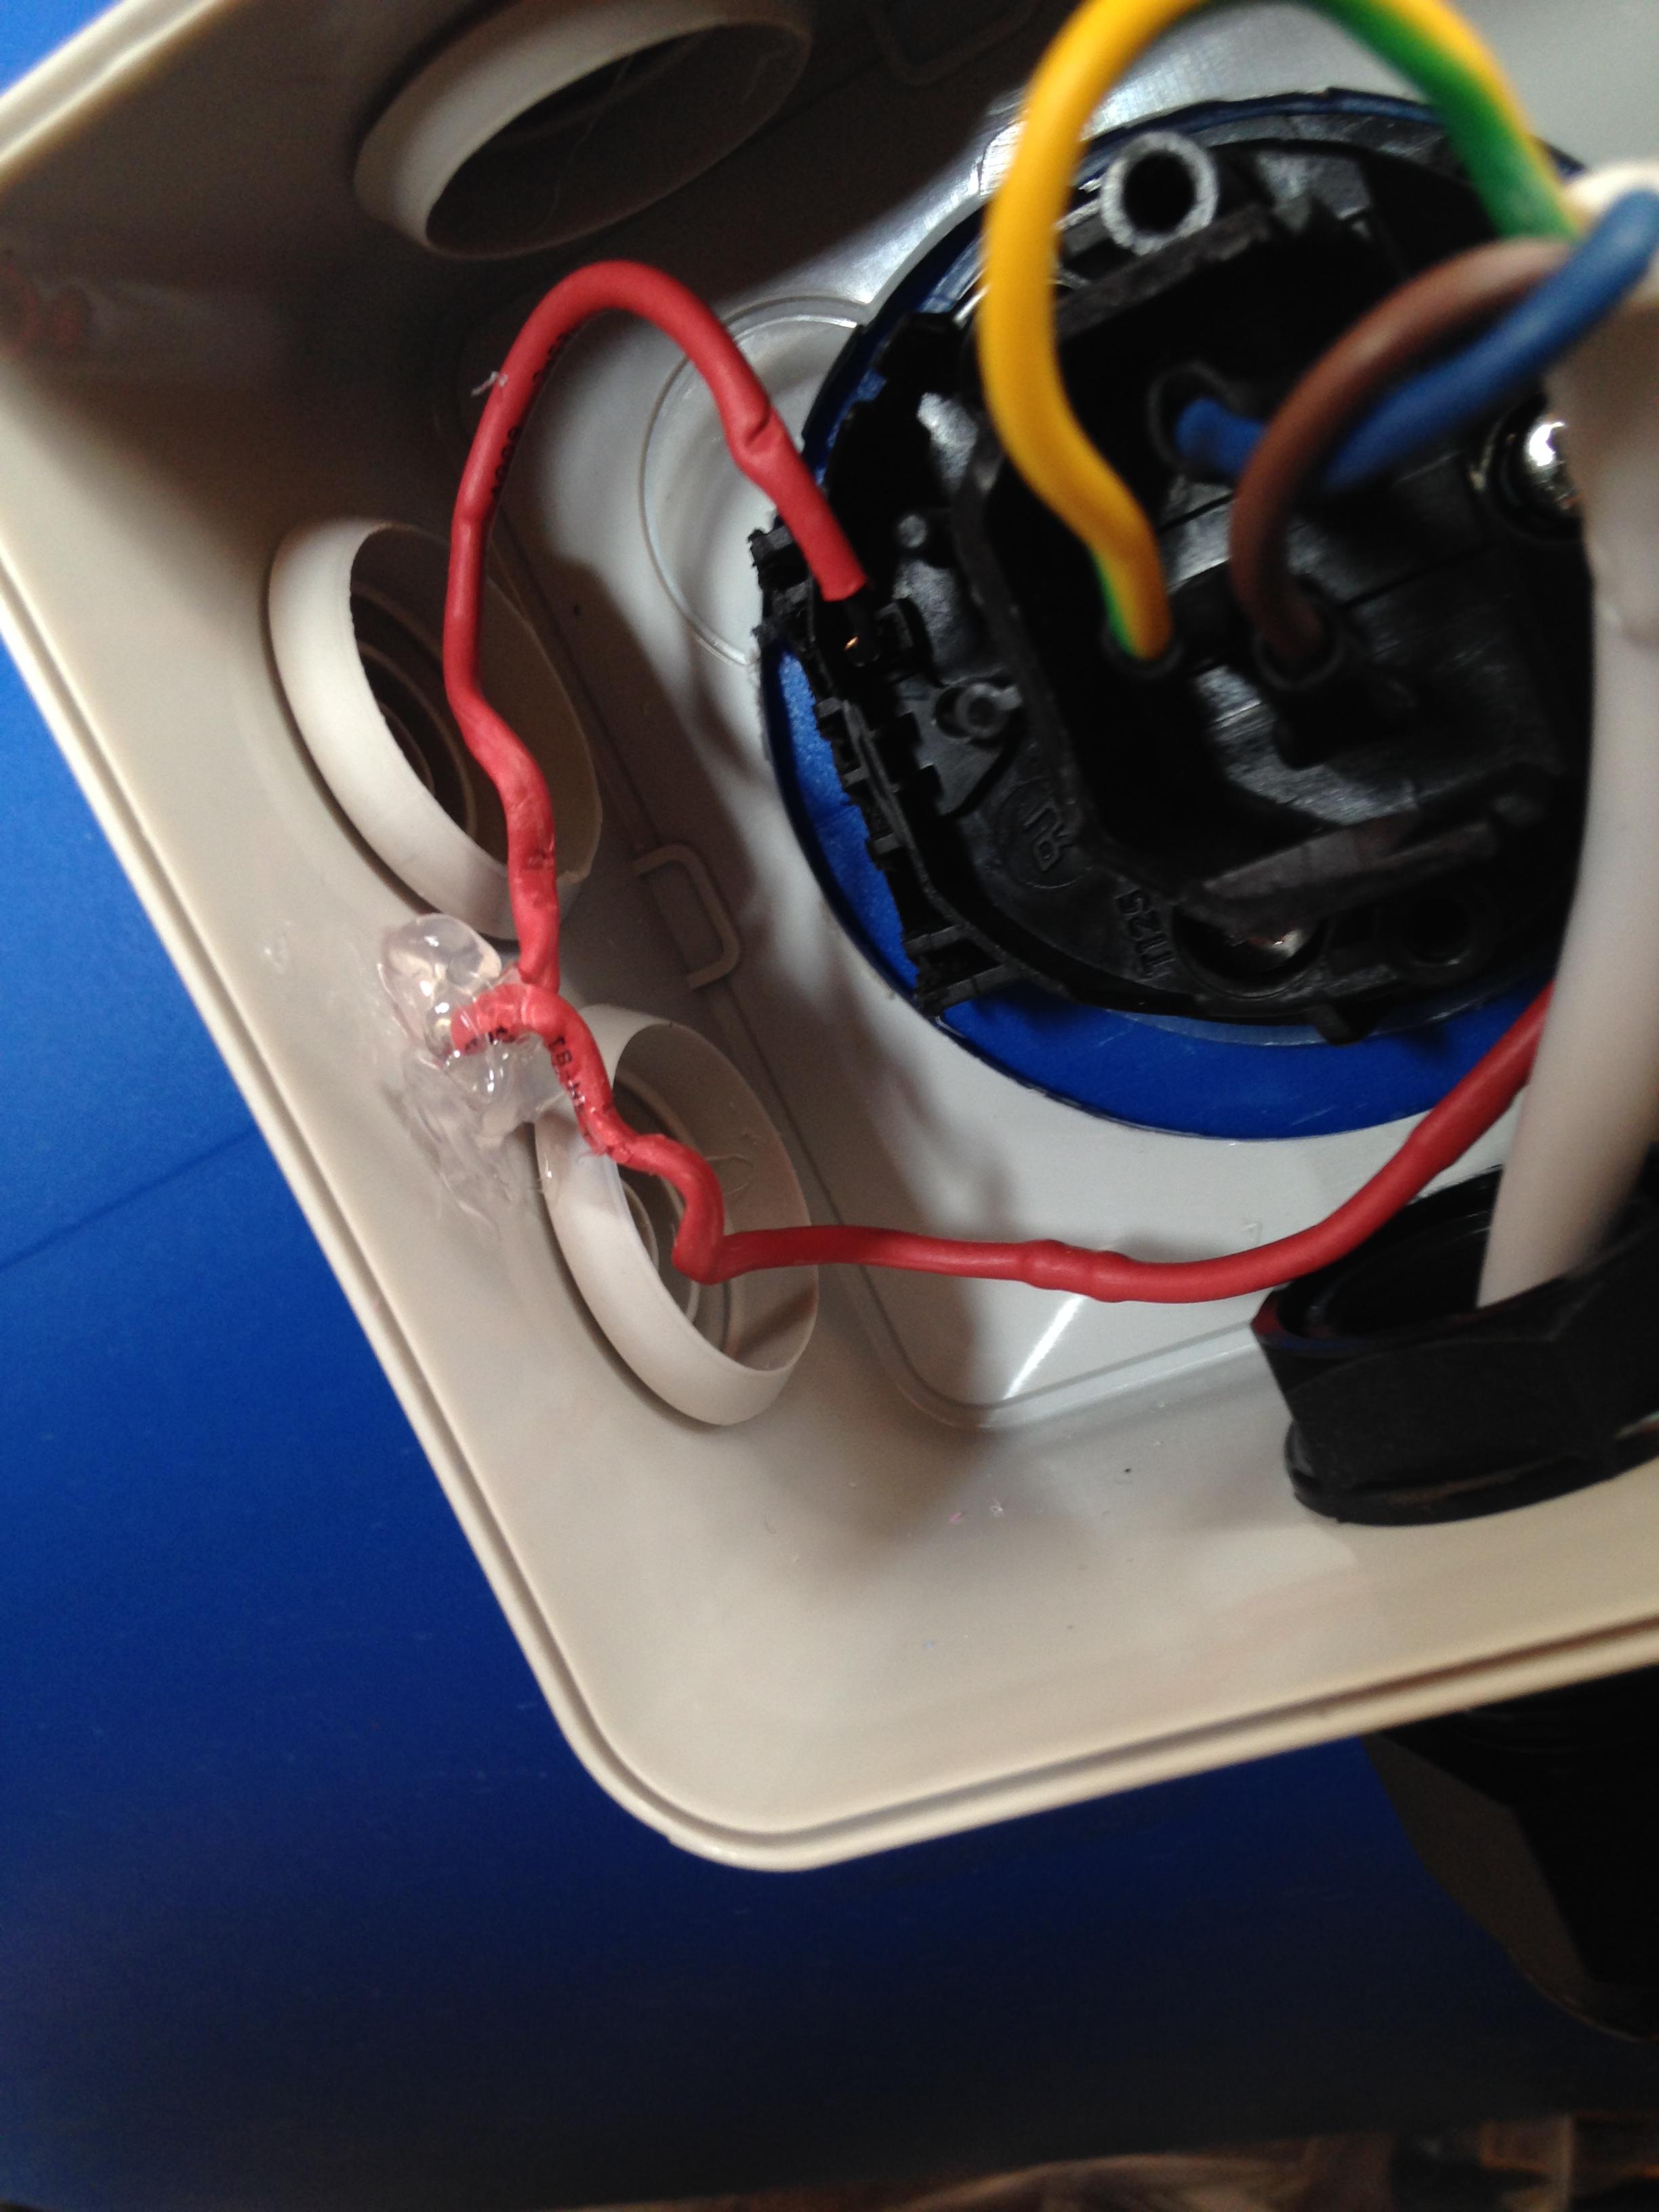
With the middle pin being at the top of the three pins, the left pin is live (brown), the middle pin is earth (green/yellow) and the right pin is neutral (blue).
Push the crimp connectors onto the pins ensuring a good fit, pinch up with needle nose pliers if you have a wobbly one.
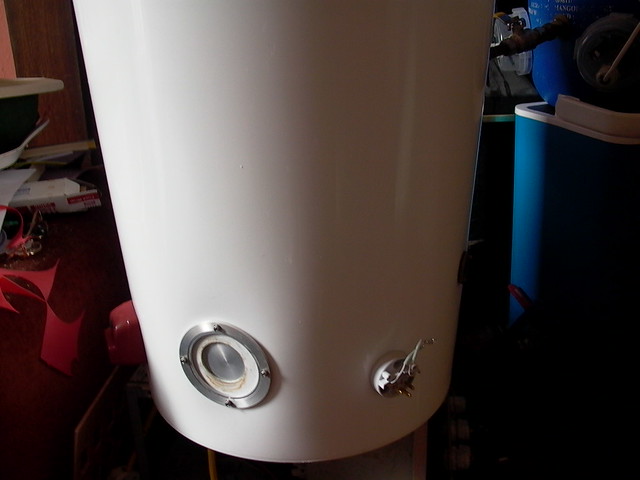
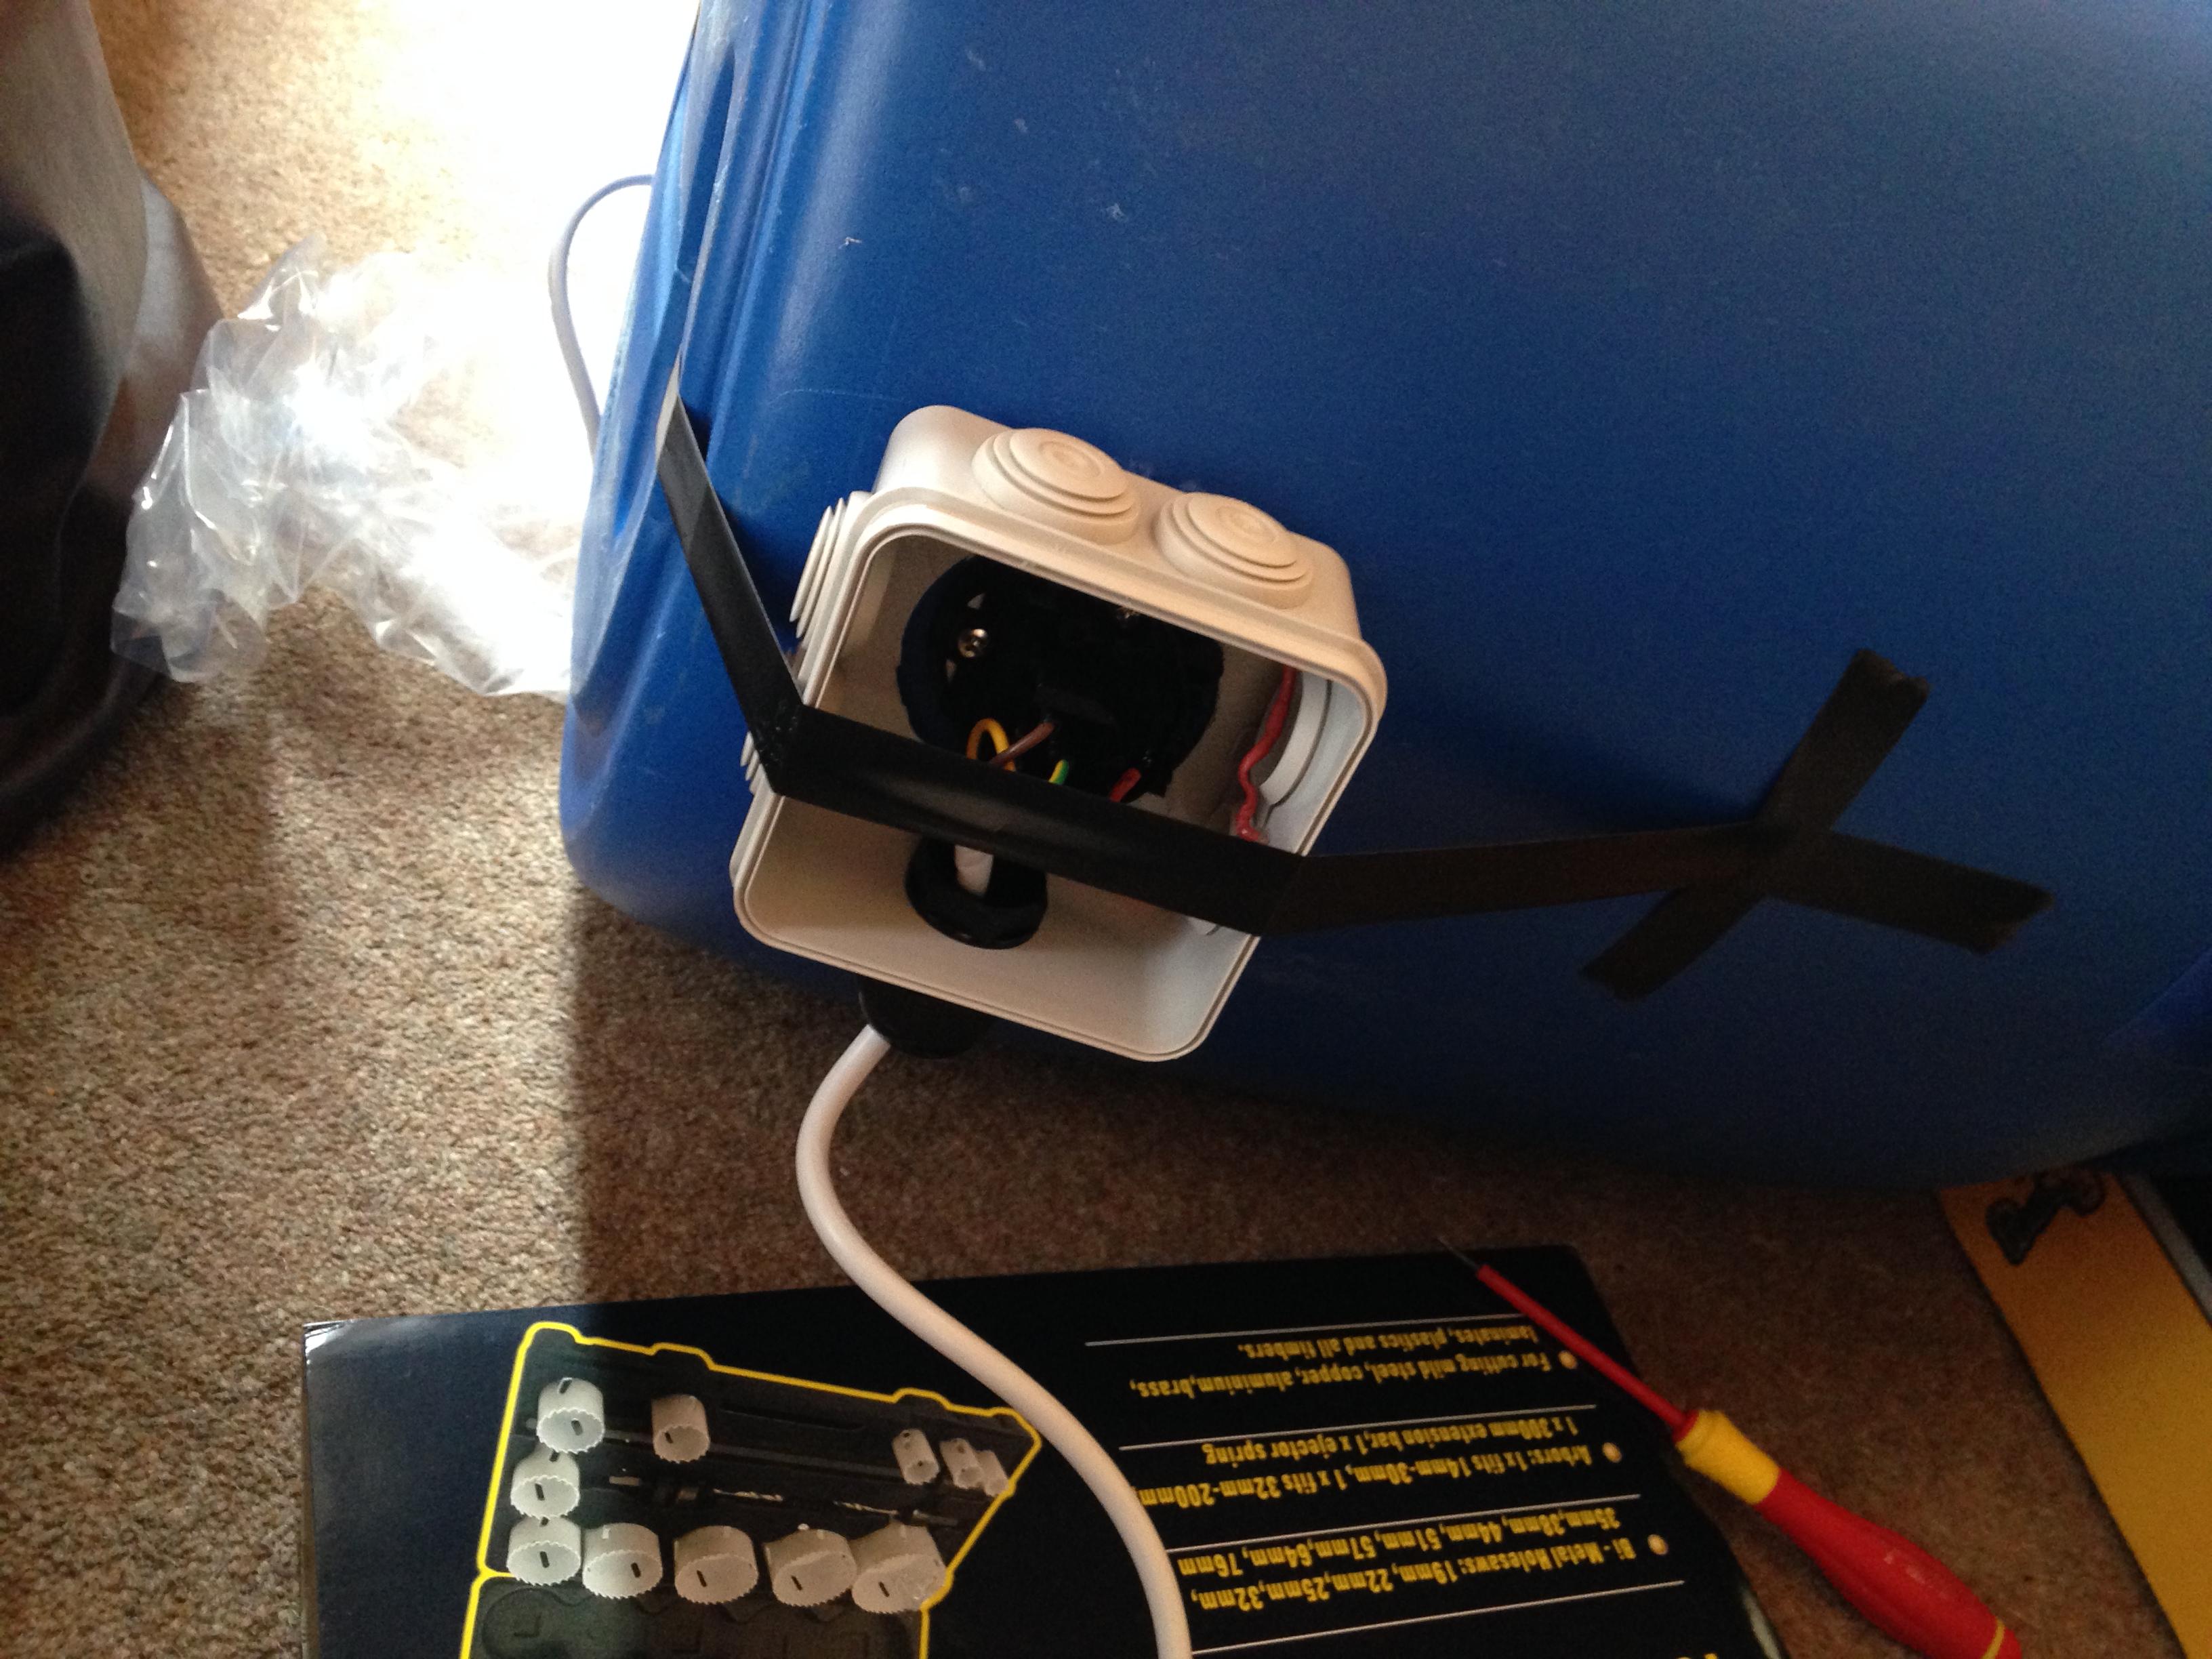
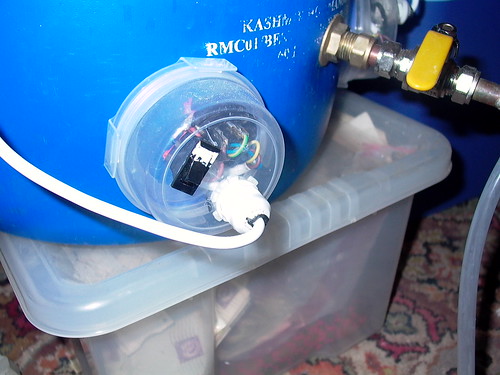
Apply a ring of silicone sealant around the hole cut in the back of the IP55 enclosure. Position the enclosure over the connectors and hold in place with some tape. Apply more sealant around the edges of the enclosure to secure it onto the barrel.
Wait for 2hrs for the silcone to go off.
Once the enclosures are securely stuck to the barrel, you can drill 2x 4mm holes, one in the top and one in the bottom of the enclosure. In the top hole, push through the led and apply a blob of sealant to the back to hold it in place.
The bottom hole is just for drainage in case of any small leaks.
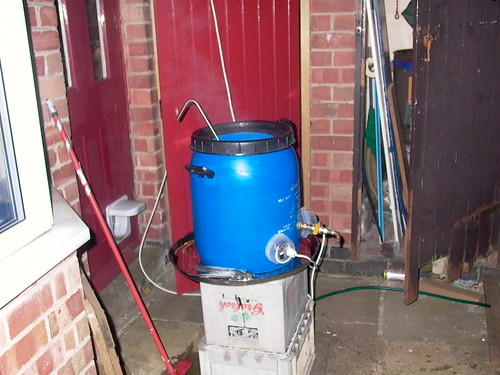
All that's left to do now is to test it!
I ran mine with the enclosure lids off for the first boil, in case of any massive seal failure, and to monitor any leaks.
With the lid on it, brought 30 litres to the boil in about 30minutes! There was some slight softening of the barrel when it was boiling, so I will be cutting a hole in my lid and using that to help maintain the shape during the boil.
Next thing I need to do is add a ball tap, but I don't know where is best to get the parts, anyone have any experience with doing this on a budget?
Here is my first guide, but hopefully someone will find it useful.
PLEASE NOTE ELECTRICITY CAN KILL, PLEASE ONLY FOLLOW THESE INSTRUCTIONS IF YOU ARE COMPETENT TO DO SO. I DO NOT ACCEPT ANY RESPONSIBILITY FOR ANY INJURIES OR DAMAGES THAT MAY OCCUR THROUGH FOLLOWING THESE INSTRUCTIONS, USE AT YOUR OWN RISK!
Equipment Required:
2 x Morrisons Savers Kettle £5 each
1 x 50L HDPE Food Safe Plastic Bucket (or similar) c£10 from ebay
2 x IP55 Enclosure (http://www.screwfix.com/p/7-entry-junction-box-with-knockouts-grey-95-x-95-x-51mm/30356) £1.79 each from Screwfix
2 x Compression Glands (http://www.screwfix.com/p/tower-male-comp-gland-black-20mm-pack-of-2/80851) £1.21 for two
Total Build Cost: £24.79
Tools required:
Posi and Flat Screwdrivers
Star Screwdriver (or small terminal driver)
Hacksaw
44mm & 51mm Hole Saw
Drill + 4mm bit
Silicone Sealant
------------------------------------------------------------------------
Unscrew the two star screws on the base of the kettle, I managed to do this easily with a terminal driver (small flat screw driver), but if you have the right sort of screwdriver even better!
Next remove the two screws near the lid.
You should now be able to lever off the back of the handle to reveal the back of the heater element with a flat screwdriver.
Undo the three posi-screws that hold the black plastic, (two of which can't be seen in this photo). Retain the washers that come off with them. Note which screw has the metal washer, as this is used for earthing the element.
Withdraw the element from the kettle, and recover the seal, making a note of which way round the seal fits (thick side is on the inside of the kettle).
Now remove the two screws that hold the clear plastic switch mechanism onto the black plastic.
Unclip the rocker switch lever from the clear plastic, and unwind the red wire from the retaining clips.
Lever the LED from the clear plastic clips with a small screwdriver.
Next, use a hacksaw to cut off the rest of the switch mechanism (along the red line), our elements are going to be always on, so we don't need this.
We now need to take apart the base unit to recover the cable. Remove the 5 screws from the bottom of the base unit. Pull away the cover to reveal the crimp connectors. Disconnect these connectors from the base unit.
Using a small flat screwdriver, bend out the crimp connectors to accommodate the larger pins on the back of the black element rear chassis.
Trail fit these on to the pins to ensure a good fit.
Now it's time to drill your holes in your boiler. I did these as low as I could without risking the element touching the bottom, but the curvature of the barrel meant the point slightly upwards.
A 44mm hole saw is required, once driller, clean off any burrs with a stanley knife and some emery cloth.
Fit the seal into the newly cut hole, and reassemble the element and black plastic back by fixing back in the three screws. (Make sure you put the metal washer back in the correct place!)
It would now be a good time to fill your boiler with water to check for leaks. Leave it a good half hour and make sure you put as much if not more water in the boiler than you would on your brew day. While you are testing for leaks, you can get one with making the wiring covers.
Drill out the back of the IP55 enclosure with a 51mm hole saw, and fit the cable gland into one of the openings.
Pass your cable connectors through the gland.
Once you are happy that the boiler is not leaking, you can start to wire up the elements.
With the middle pin being at the top of the three pins, the left pin is live (brown), the middle pin is earth (green/yellow) and the right pin is neutral (blue).
Push the crimp connectors onto the pins ensuring a good fit, pinch up with needle nose pliers if you have a wobbly one.
Apply a ring of silicone sealant around the hole cut in the back of the IP55 enclosure. Position the enclosure over the connectors and hold in place with some tape. Apply more sealant around the edges of the enclosure to secure it onto the barrel.
Wait for 2hrs for the silcone to go off.
Once the enclosures are securely stuck to the barrel, you can drill 2x 4mm holes, one in the top and one in the bottom of the enclosure. In the top hole, push through the led and apply a blob of sealant to the back to hold it in place.
The bottom hole is just for drainage in case of any small leaks.
All that's left to do now is to test it!
I ran mine with the enclosure lids off for the first boil, in case of any massive seal failure, and to monitor any leaks.
With the lid on it, brought 30 litres to the boil in about 30minutes! There was some slight softening of the barrel when it was boiling, so I will be cutting a hole in my lid and using that to help maintain the shape during the boil.
Next thing I need to do is add a ball tap, but I don't know where is best to get the parts, anyone have any experience with doing this on a budget?
") and after reading a post regarding thsi matter checked them to find them lacking the information??
and after reading a post regarding thsi matter checked them to find them lacking the information??