Being in my early sixties and now retired, I have decided to build my definitive brewery which will probably be the last one I build. I have determined that this will be the best one I have ever made, picking up from my experience of building stainless steel pots over the last five years and my home brewing of around 40 years, plus all the knowledge picked up from the Forum. I have tried to follow best practice and learn from my past attempts at working with Bergland pots. In this regard, I have decided to follow the build of The Electric Brewery (http://www.theelectricbrewery.com/) as best I can, bearing in mind their successful clones all around the world. I have changed their overall plan to cater for my own brewing preferences. For instance, this means incorporating a separate HERMS set up rather than a combined HERMS/HLT coil and not buying Blichman BoilerMaker pots, which are incredibly expensive in the UK. The pots I have bought are the high-end stainless steel 100L pots from mrlard, to which I will add my own taps and elements. This will give me a ½ barrel brewery size. Below I have shown pictures of the first stage of my efforts, which is building the control panel for the brewery. I will post my pot conversions as I work on them in later instalments.
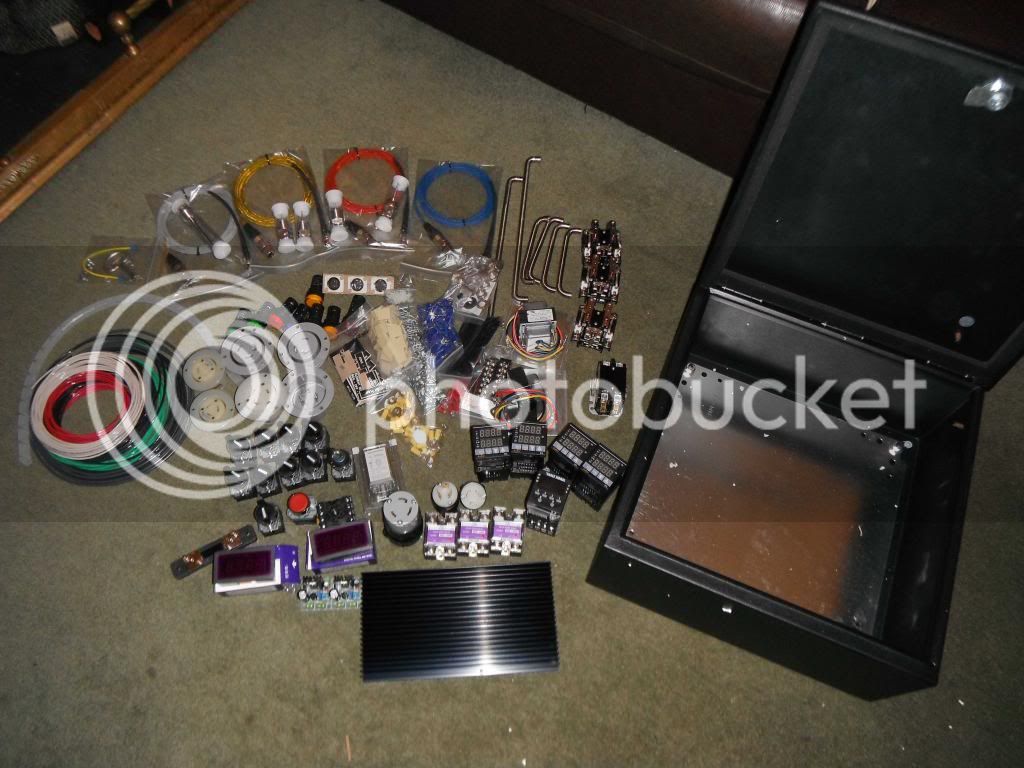
This is how all the bits looked before construction:
Working out where to put the receptacles:

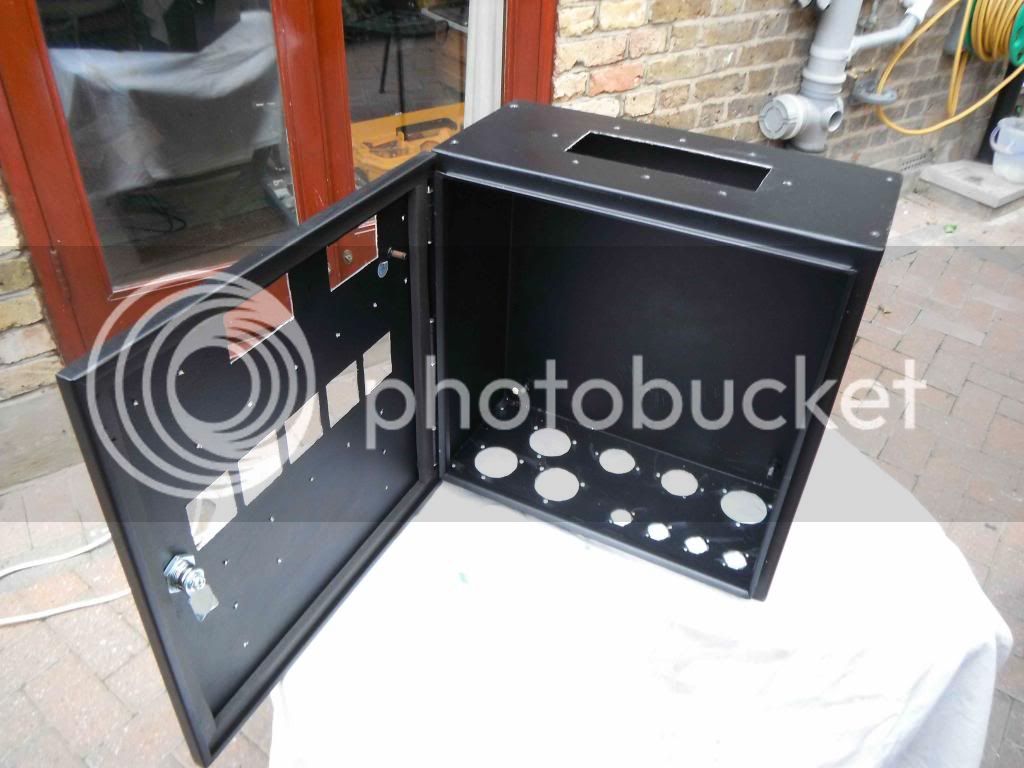
The holes in the case all cut out ready for mounting the switches and components:
Components mounted:
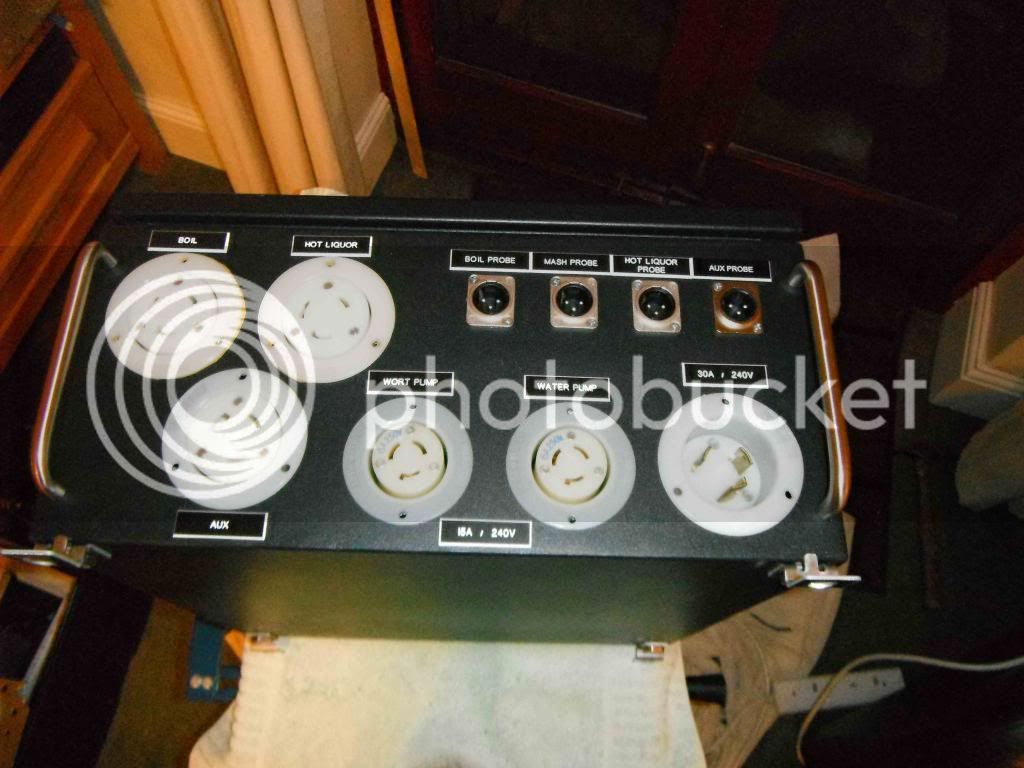
Receptacles fitted:
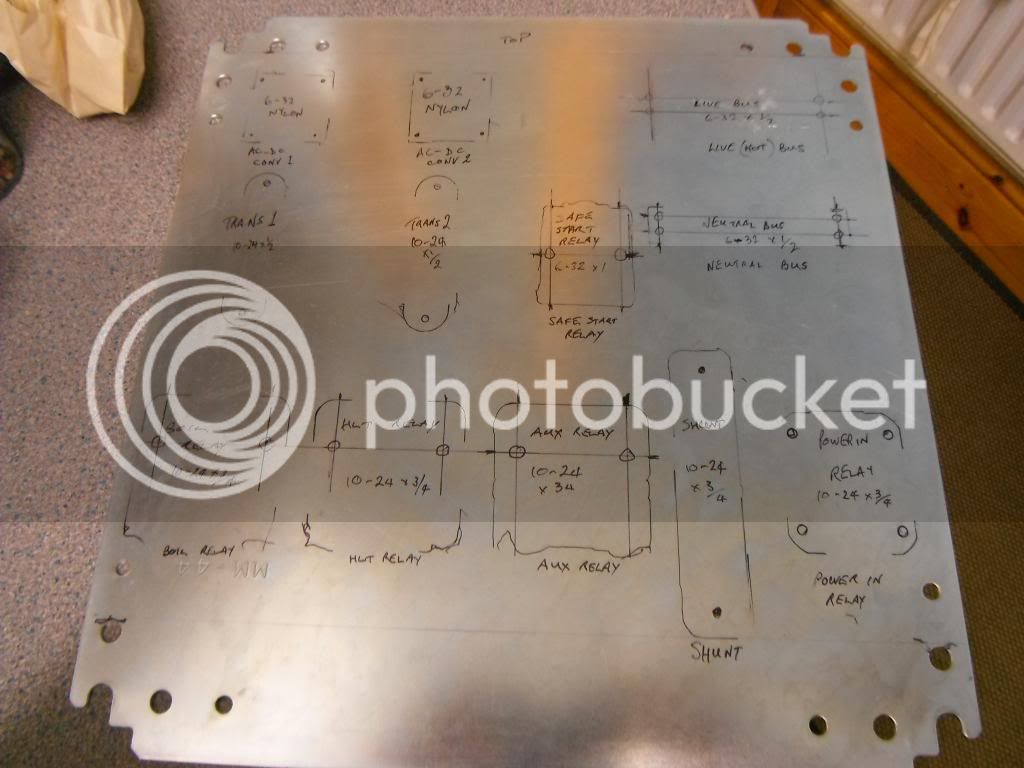
Working out where the relays and buses will go:
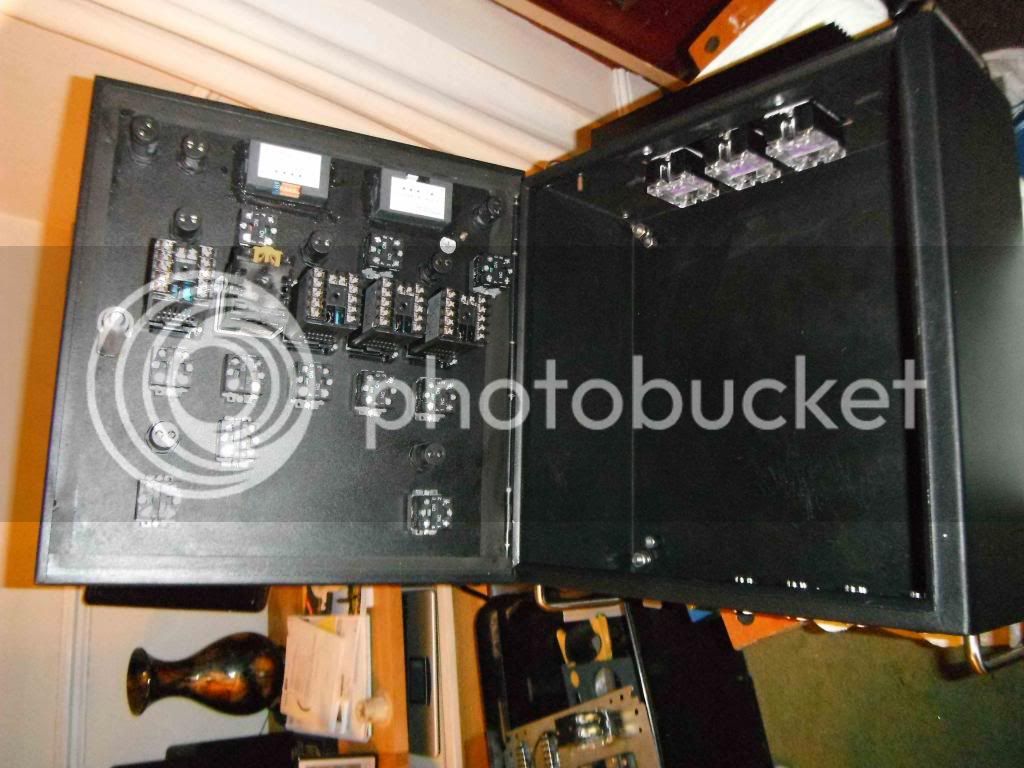
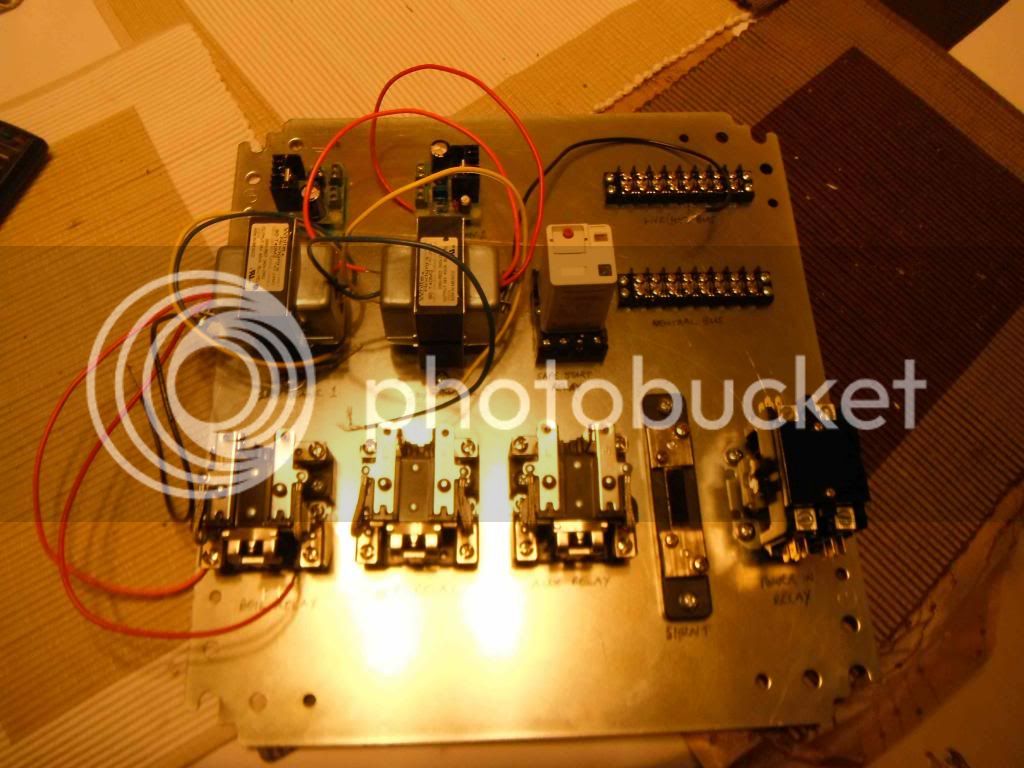
Relays and buses fitted to back plate:
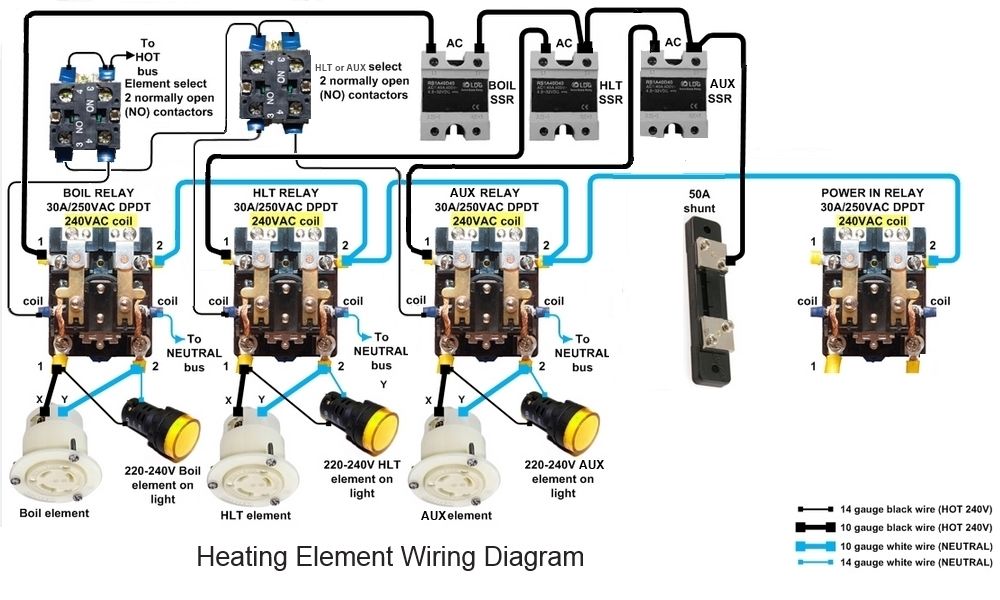
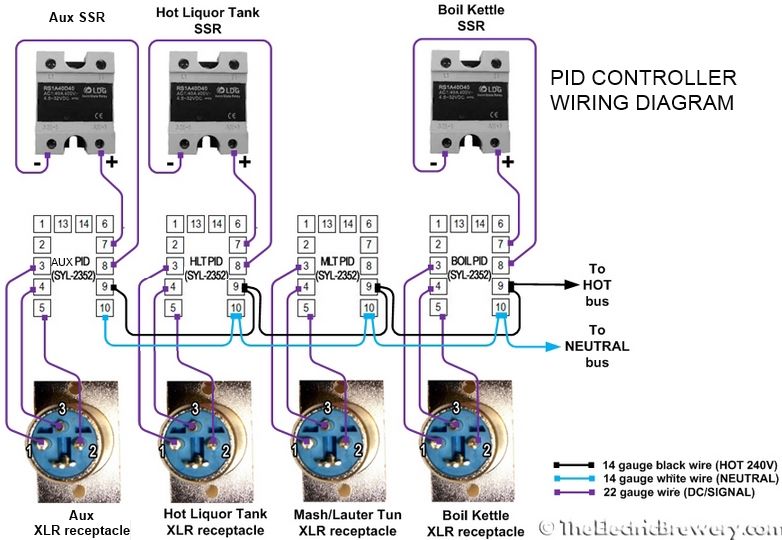
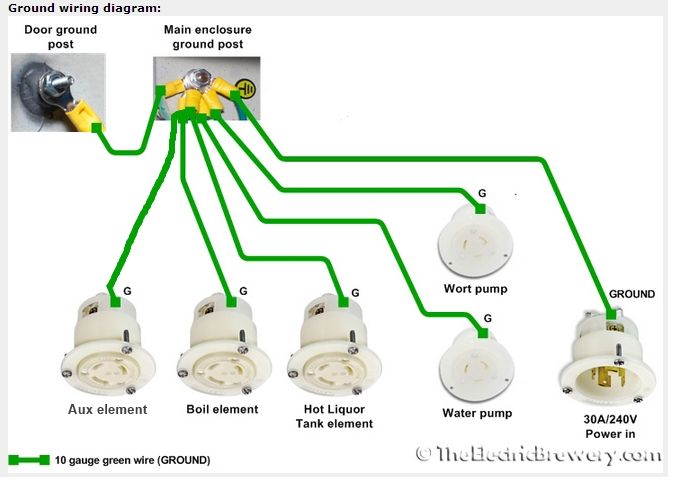
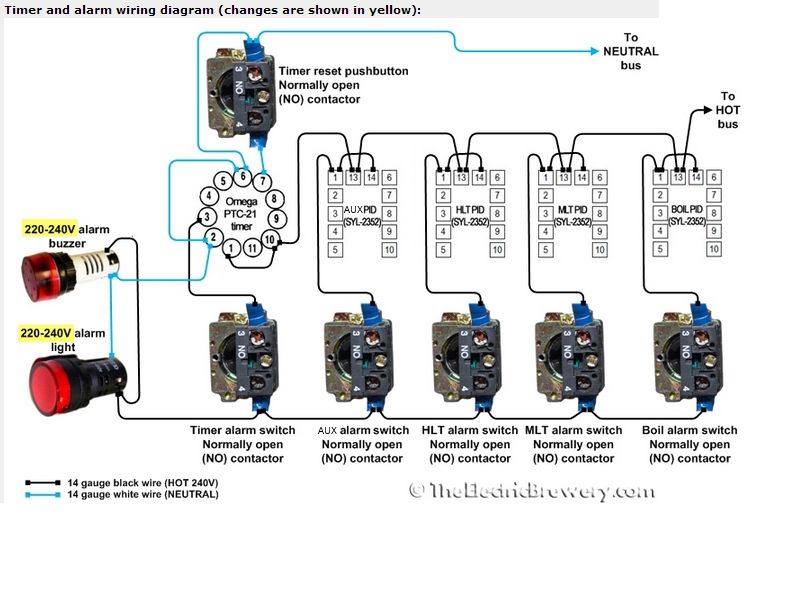
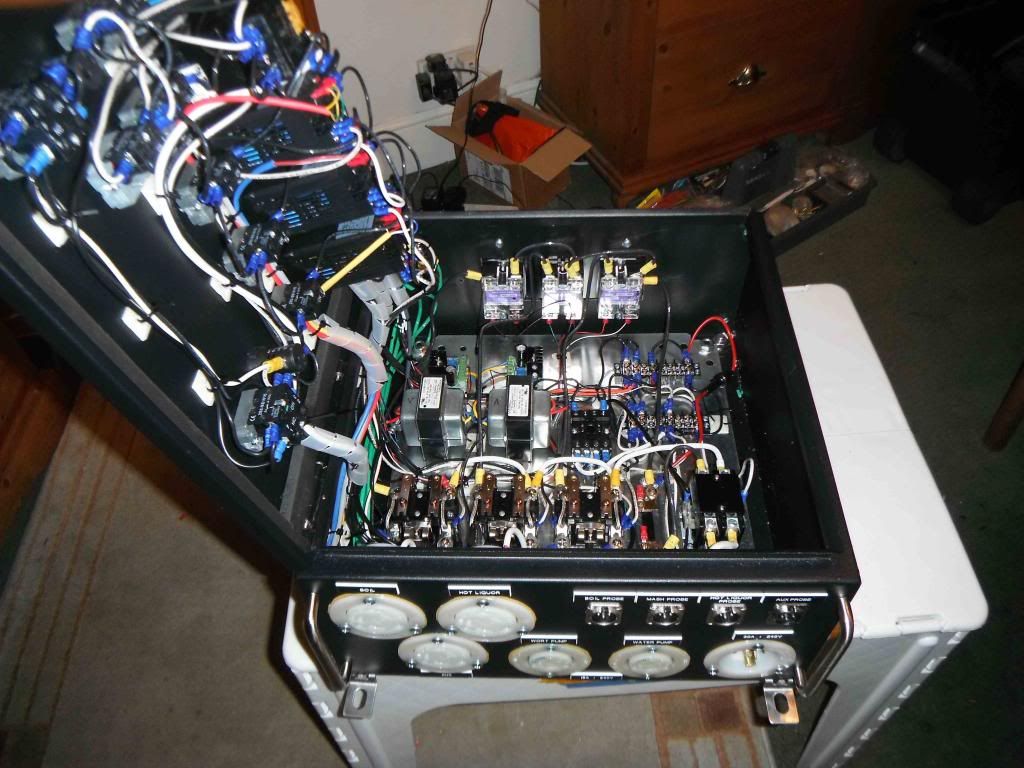
All the wiring completed:
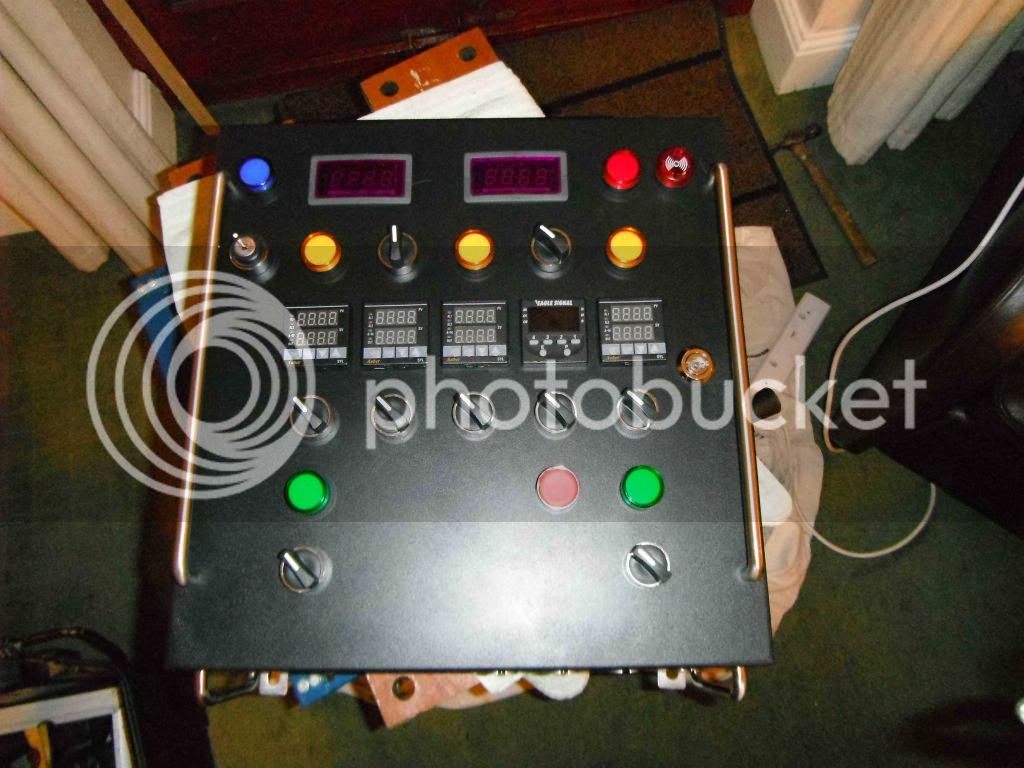
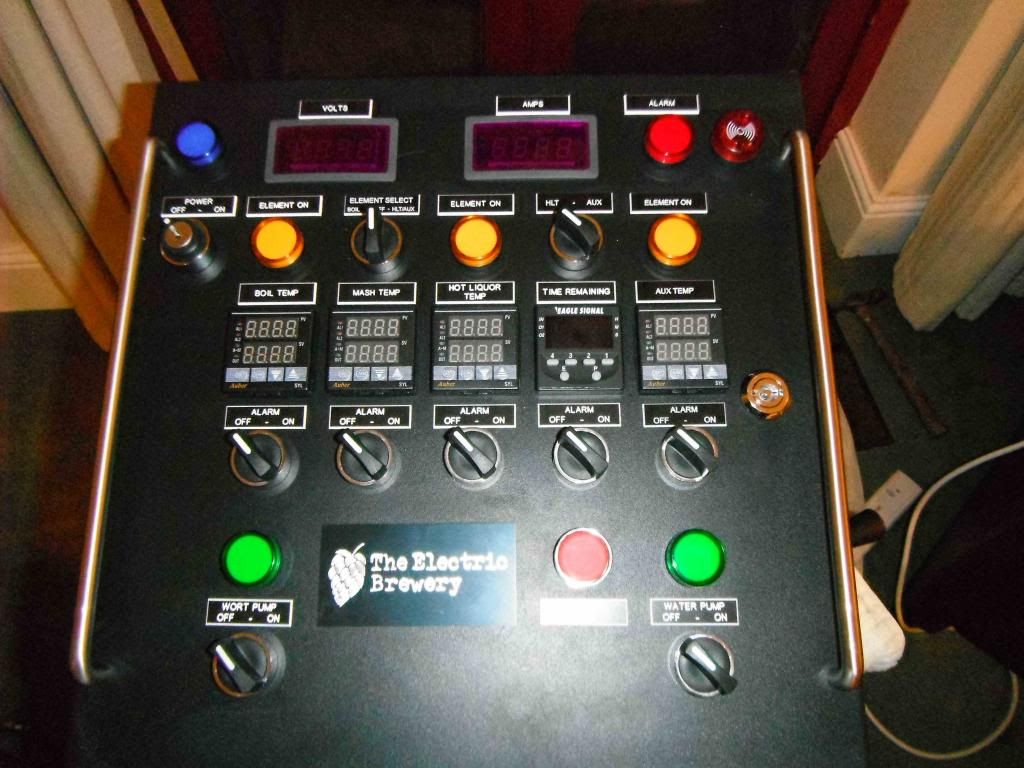
And finally, the finished look:
The next stage will be to work on the boil kettle and HLT, followed by the mash tun. I have all the stainless steel plumbing bits and Starrets that I need, so will start metal bashing next week. Watch out for Part 2 to see how I get on.
This is how all the bits looked before construction:
Working out where to put the receptacles:
The holes in the case all cut out ready for mounting the switches and components:
Components mounted:
Receptacles fitted:
Working out where the relays and buses will go:
Relays and buses fitted to back plate:
All the wiring completed:
And finally, the finished look:
The next stage will be to work on the boil kettle and HLT, followed by the mash tun. I have all the stainless steel plumbing bits and Starrets that I need, so will start metal bashing next week. Watch out for Part 2 to see how I get on.