


Hi All, first post so thought I'd try to make it a good un'! I thought it would be worth a fresh STC-1000 fermentation fridge thread as links and products disappear, this list is all current as of July '14.
I've not been home brewing long and while I've not got the time/funds/space for full grain I do want to get the best from 2-can and extract brews. So, I decided a fermentation fridge was a crucial bit of kit to manage temperatures in the garage which can occasionally get too warm and very often get too cold. Plus as I bottle it's useful to manage the temp' of those accurately too.
First off the kit list;
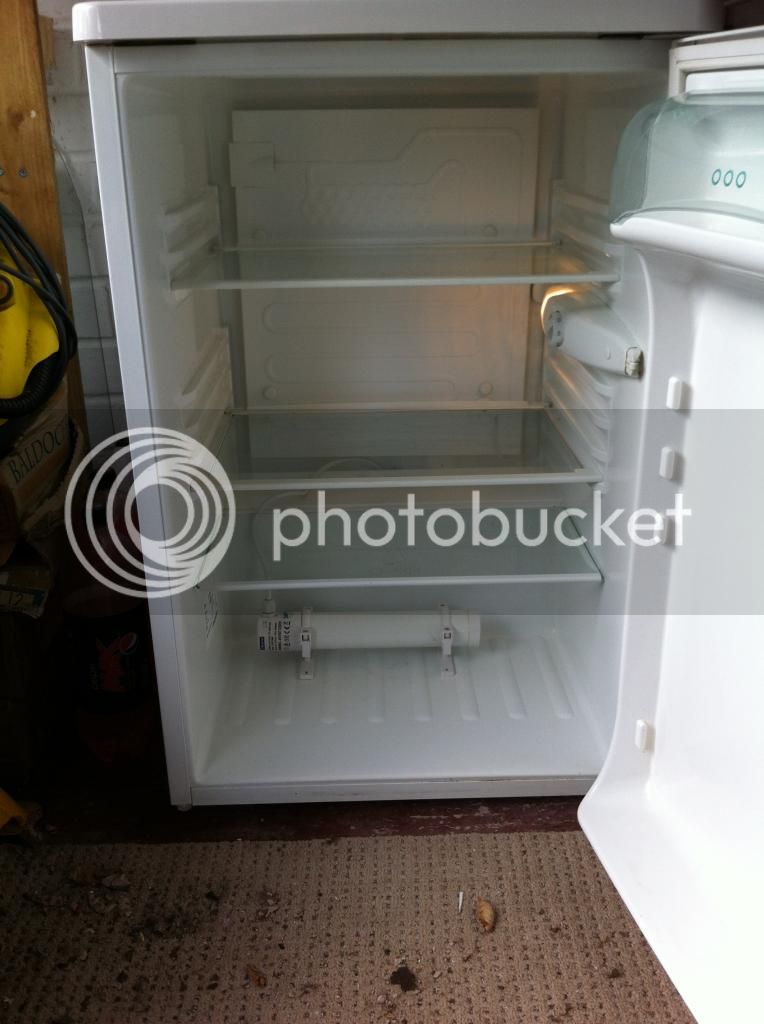
Fridge - Electrolux's finest no icebox and everything apart from the egg shelf at the top is removable - £20 gumtree
Heater - <a HREF=http://www.toolstation.com/shop/Heating/Electric+Heaters+Dryers/Tubular+Heater+60W+55+x+305mm/d230/sd3168/p32265>60w tubular heater from Toolstation or Screwfix - £16</a>
STC-1000 - http://www.amazon.co.uk/exec/obidos/ASIN/B009HKYZBY/ref=ox_ya_os_product_refresh_T1
- £14.50
Project box - took some finding but CPC were the cheapest in the end, enough room for the STC-1000 and two sockets - http://cpc.farnell.com/jsp/search/productdetail.jsp?SKU=EN83303
Good box and waterproof if needed - £9
Two power sockets - also CPC - http://cpc.farnell.com/jsp/search/productdetail.jsp?SKU=PL12840
Simple and cheap - £2.50
Dual socket back box - cheapest going from toolstation - http://www.toolstation.com/shop/Electrical/Boxes+Pattresses/Dry+Lining+Box+Dual/d190/sd2634/p41731
- £1
A few metres of 1.5mm flex - had a reel so no cost but cheap enough
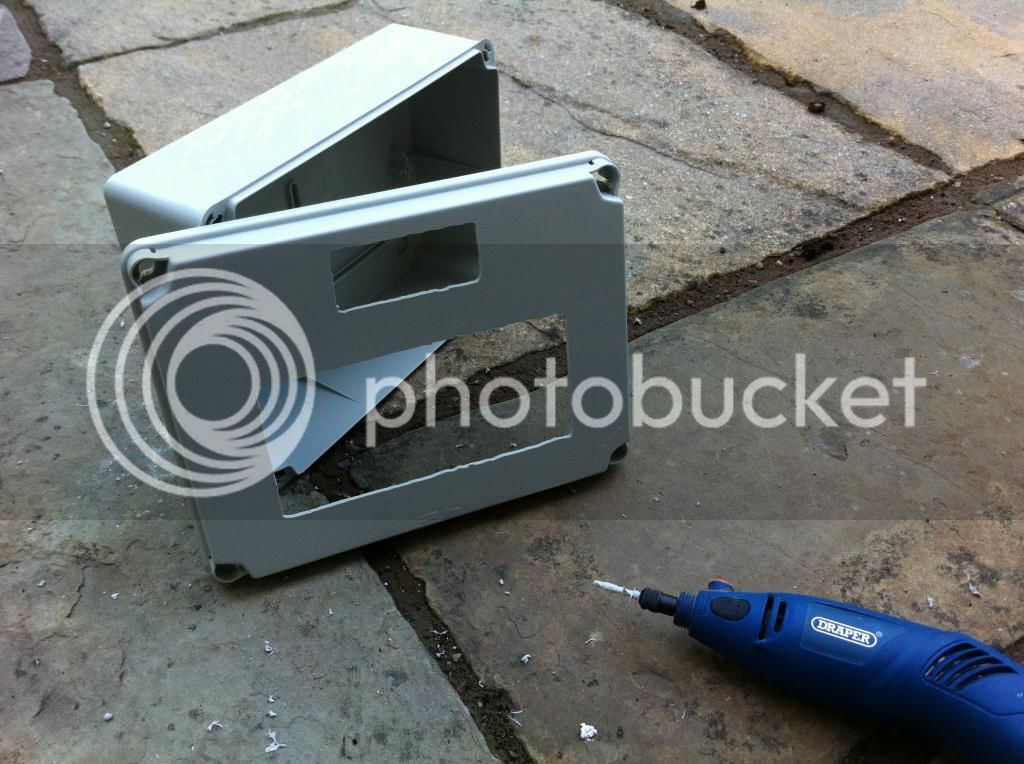
First task was to cut two holes out of the front of the project box. I marked the outline of the STC-1000 and dual-box on the inside of the box lid. I then used my draper 'dremmel' tool with a thin sidecutting drill bit to do the rest. I opted to use a back box for the sockets as I think it's safer, easier and neater.
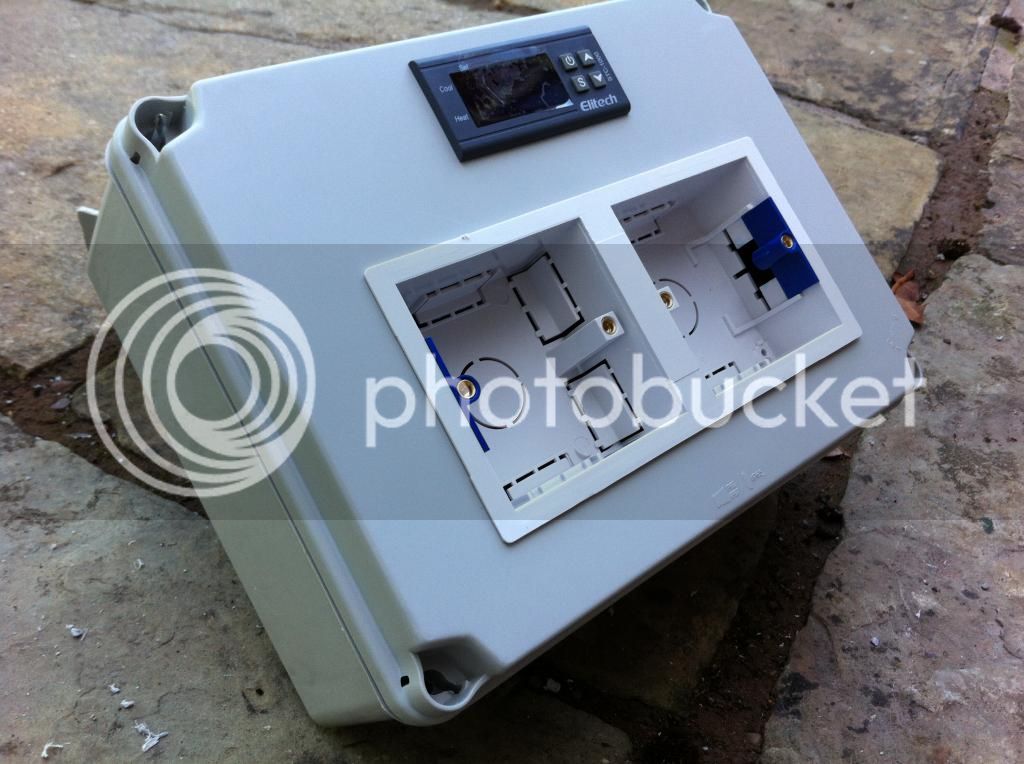
Next, I put the dual drylining back box in and moved the lugs forward to hold it. I found the lid of the box two thin for the lugs to hold firm, so cut a couple of strips of the bit I'd just cut out to make some 'shims' that I glued to each side of the big hole so the lugs could make a firm contact as the sockets are screwed in (imagine a pasterboard wall is 7-12mm thick whereas the lid on the project box is 3-4.

Then I dropped the STC-1000 in (remembering to remove the terminal cover and orange lugs first!) and secured it.
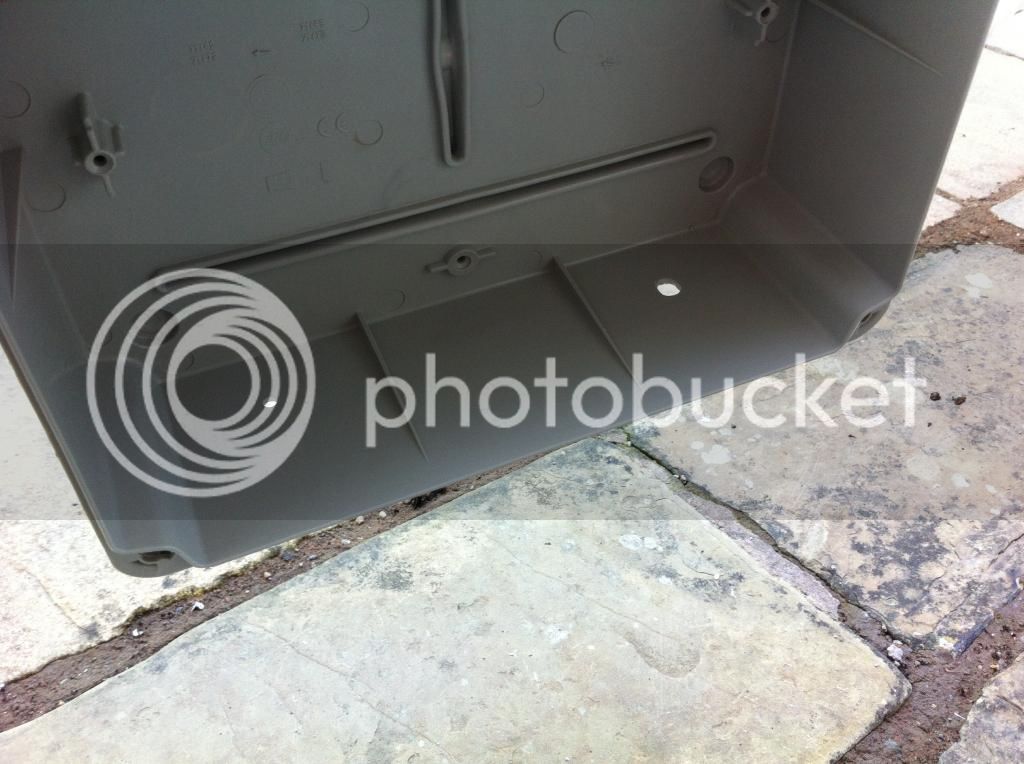
I also put two holes in the bottom of the box, one small one for the temp sensor wires and a larger one ready for the cable gland to take the incomer power lead (the gland came with the heater). I also put a hole through the back ready to hang in the garage.
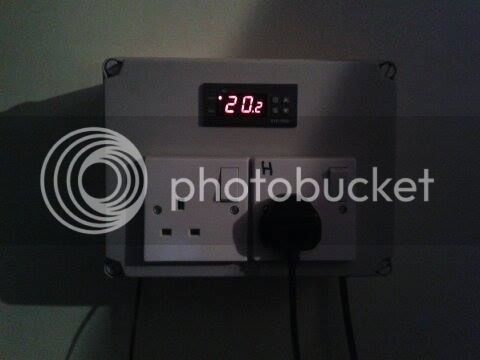
With the cutting and drilling done I moved inside to install the sockets.
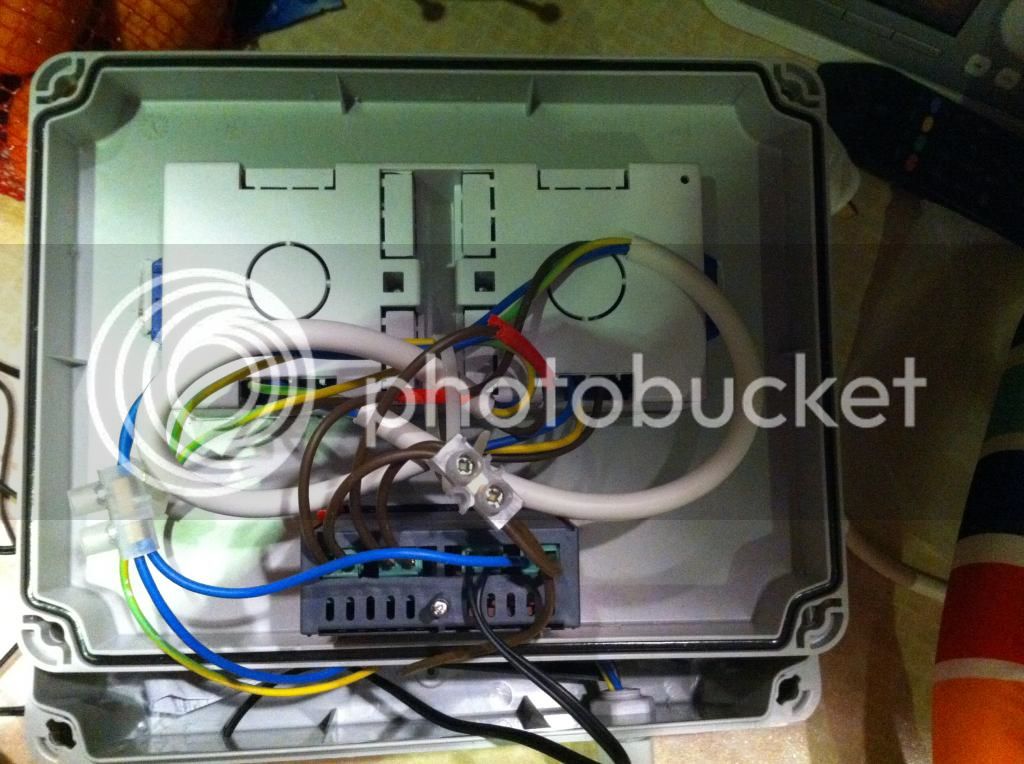
I started the wiring by putting a couple of tails on the sockets with all three terminals wired up on each.

Then the main wiring. I ran a length of flex with a plug on it into the box as the incomer and then I used three connector blocks all rated at 13amp or more. One connecting the earths together, one the neutrals together with a tail coming out into the STC-1000 and finally the lives into the third connector with a tail to the STC-1000 power and two more to each of the 'switching' terminals (see below for full STC-1000 wiring run down). I also put the sensor through the small hole and wired that in too.
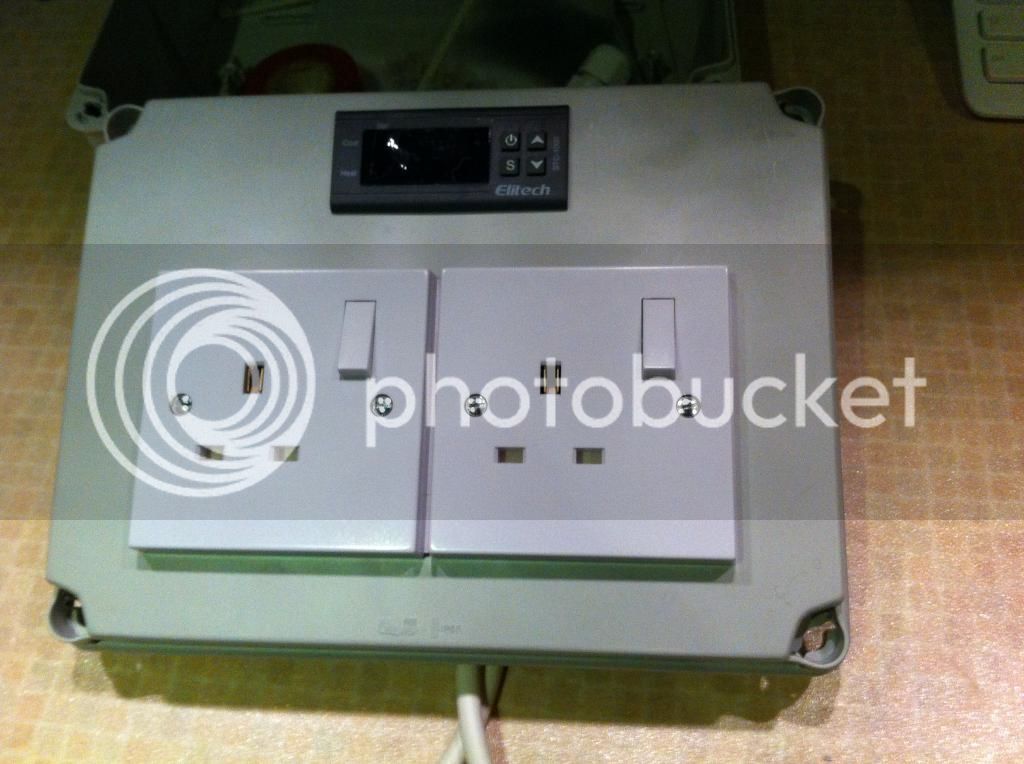
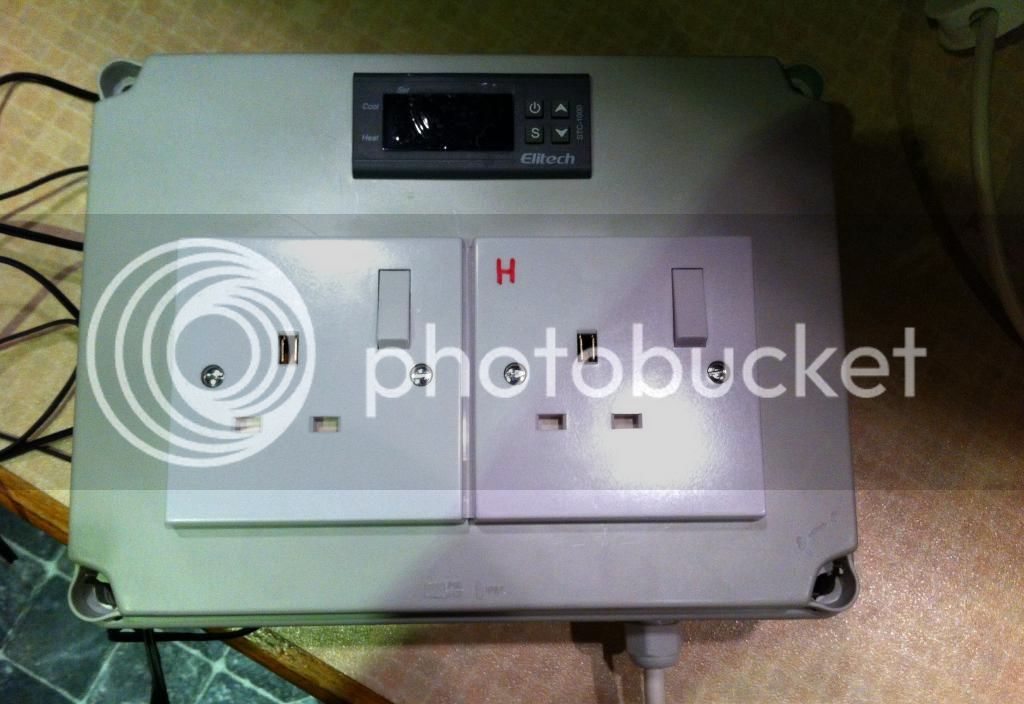
With the wiring done and the sockets in, I marked the heat one so I can tell them apart on install.
I put the cable from the heater through the drain plughole of the fridge (having made that a bit bigger with a drill bit). I then plugged the heater and fridge in and powered up.
Fridge inside, I've left the shelves in for now as I have some Wherry due to be cleared/conditioned over the next few weeks. I also have a wood shelf to go in the bottom with a gap for the heat to come up. I've also got a support to put in the middle to take the weight of the FV when full. I will use a small bit of polystyrene and a bungee cord to hold the sensor onto the FV. When the bottles are in I will just tape it on the side so it hangs in the air inside.
STC-1000 wiring
This unit can switch both heaters and fridges/freezers up to 10amps.
It is essentially two computer controlled switches so you feed power into them and get switched power out. Neutral and Earth wiring (apart from the one neutral into the unit) bypass it.
You put a constant or incoming live on the first terminal, incoming neutral on the second. The temp sensor on the third and fourth. The fifth terminal is then another constant live (joined off the incoming power) and the sixth is the live out to the cool socket. The seventh terminal is also a constant live. The eighth terminal is the live out to the heat socket.
To summarise the wiring;
You should have three earths (incomer and two sockets). Join them all together.
You should have four neutrals (incomer, two sockets and STC-1000 terminal 2). Join them all together.
You should have four constant lives (incomer, terminal 1, terminal 5 and terminal 7). Join them all together.
You then have two switch lives (terminal 6 and 8) take these one to each socket.
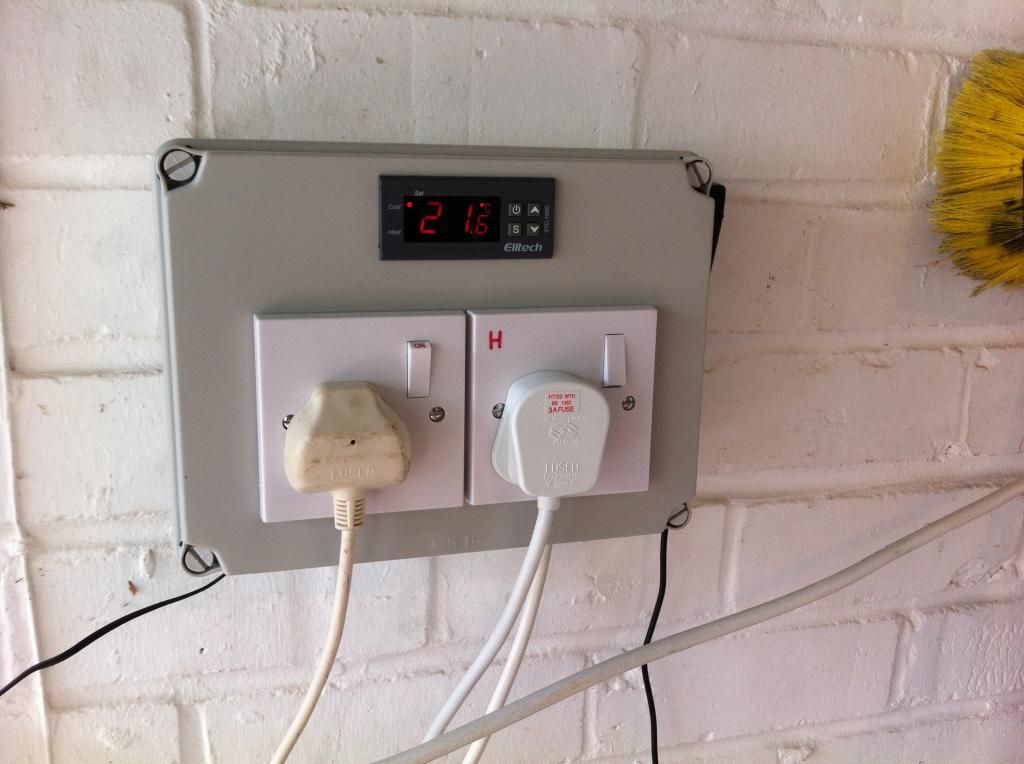
You can find instructions on the STC-1000 on a leaflet that came with it, just alter each of the four settings by pressing and holding the S button and the arrow keys. I set mine to have a compressor wait time of 7 and variance on temp of 0.5
Hope that helps/inspires and the current links help. Total cost of this project was around £65 and means my FV and bottles can now be at just the right temp' throughout.
I've not been home brewing long and while I've not got the time/funds/space for full grain I do want to get the best from 2-can and extract brews. So, I decided a fermentation fridge was a crucial bit of kit to manage temperatures in the garage which can occasionally get too warm and very often get too cold. Plus as I bottle it's useful to manage the temp' of those accurately too.
First off the kit list;
Fridge - Electrolux's finest no icebox and everything apart from the egg shelf at the top is removable - £20 gumtree
Heater - <a HREF=http://www.toolstation.com/shop/Heating/Electric+Heaters+Dryers/Tubular+Heater+60W+55+x+305mm/d230/sd3168/p32265>60w tubular heater from Toolstation or Screwfix - £16</a>
STC-1000 - http://www.amazon.co.uk/exec/obidos/ASIN/B009HKYZBY/ref=ox_ya_os_product_refresh_T1
- £14.50
Project box - took some finding but CPC were the cheapest in the end, enough room for the STC-1000 and two sockets - http://cpc.farnell.com/jsp/search/productdetail.jsp?SKU=EN83303
Good box and waterproof if needed - £9
Two power sockets - also CPC - http://cpc.farnell.com/jsp/search/productdetail.jsp?SKU=PL12840
Simple and cheap - £2.50
Dual socket back box - cheapest going from toolstation - http://www.toolstation.com/shop/Electrical/Boxes+Pattresses/Dry+Lining+Box+Dual/d190/sd2634/p41731
- £1
A few metres of 1.5mm flex - had a reel so no cost but cheap enough
First task was to cut two holes out of the front of the project box. I marked the outline of the STC-1000 and dual-box on the inside of the box lid. I then used my draper 'dremmel' tool with a thin sidecutting drill bit to do the rest. I opted to use a back box for the sockets as I think it's safer, easier and neater.
Next, I put the dual drylining back box in and moved the lugs forward to hold it. I found the lid of the box two thin for the lugs to hold firm, so cut a couple of strips of the bit I'd just cut out to make some 'shims' that I glued to each side of the big hole so the lugs could make a firm contact as the sockets are screwed in (imagine a pasterboard wall is 7-12mm thick whereas the lid on the project box is 3-4.
Then I dropped the STC-1000 in (remembering to remove the terminal cover and orange lugs first!) and secured it.
I also put two holes in the bottom of the box, one small one for the temp sensor wires and a larger one ready for the cable gland to take the incomer power lead (the gland came with the heater). I also put a hole through the back ready to hang in the garage.
With the cutting and drilling done I moved inside to install the sockets.
I started the wiring by putting a couple of tails on the sockets with all three terminals wired up on each.
Then the main wiring. I ran a length of flex with a plug on it into the box as the incomer and then I used three connector blocks all rated at 13amp or more. One connecting the earths together, one the neutrals together with a tail coming out into the STC-1000 and finally the lives into the third connector with a tail to the STC-1000 power and two more to each of the 'switching' terminals (see below for full STC-1000 wiring run down). I also put the sensor through the small hole and wired that in too.
With the wiring done and the sockets in, I marked the heat one so I can tell them apart on install.
I put the cable from the heater through the drain plughole of the fridge (having made that a bit bigger with a drill bit). I then plugged the heater and fridge in and powered up.
Fridge inside, I've left the shelves in for now as I have some Wherry due to be cleared/conditioned over the next few weeks. I also have a wood shelf to go in the bottom with a gap for the heat to come up. I've also got a support to put in the middle to take the weight of the FV when full. I will use a small bit of polystyrene and a bungee cord to hold the sensor onto the FV. When the bottles are in I will just tape it on the side so it hangs in the air inside.
STC-1000 wiring
This unit can switch both heaters and fridges/freezers up to 10amps.
It is essentially two computer controlled switches so you feed power into them and get switched power out. Neutral and Earth wiring (apart from the one neutral into the unit) bypass it.
You put a constant or incoming live on the first terminal, incoming neutral on the second. The temp sensor on the third and fourth. The fifth terminal is then another constant live (joined off the incoming power) and the sixth is the live out to the cool socket. The seventh terminal is also a constant live. The eighth terminal is the live out to the heat socket.
To summarise the wiring;
You should have three earths (incomer and two sockets). Join them all together.
You should have four neutrals (incomer, two sockets and STC-1000 terminal 2). Join them all together.
You should have four constant lives (incomer, terminal 1, terminal 5 and terminal 7). Join them all together.
You then have two switch lives (terminal 6 and 8) take these one to each socket.
You can find instructions on the STC-1000 on a leaflet that came with it, just alter each of the four settings by pressing and holding the S button and the arrow keys. I set mine to have a compressor wait time of 7 and variance on temp of 0.5
Hope that helps/inspires and the current links help. Total cost of this project was around £65 and means my FV and bottles can now be at just the right temp' throughout.
Last edited:

")
 i did with my #1