My 1st AG brew day

The Homebrew Forum

Help Support The Homebrew Forum:

This site may earn a commission from merchant affiliate links, including eBay, Amazon, and others.

Bigjas

Landlord.
Joined
Apr 13, 2016
Messages
548
Reaction score
294
Location
Fareham, Hampshire
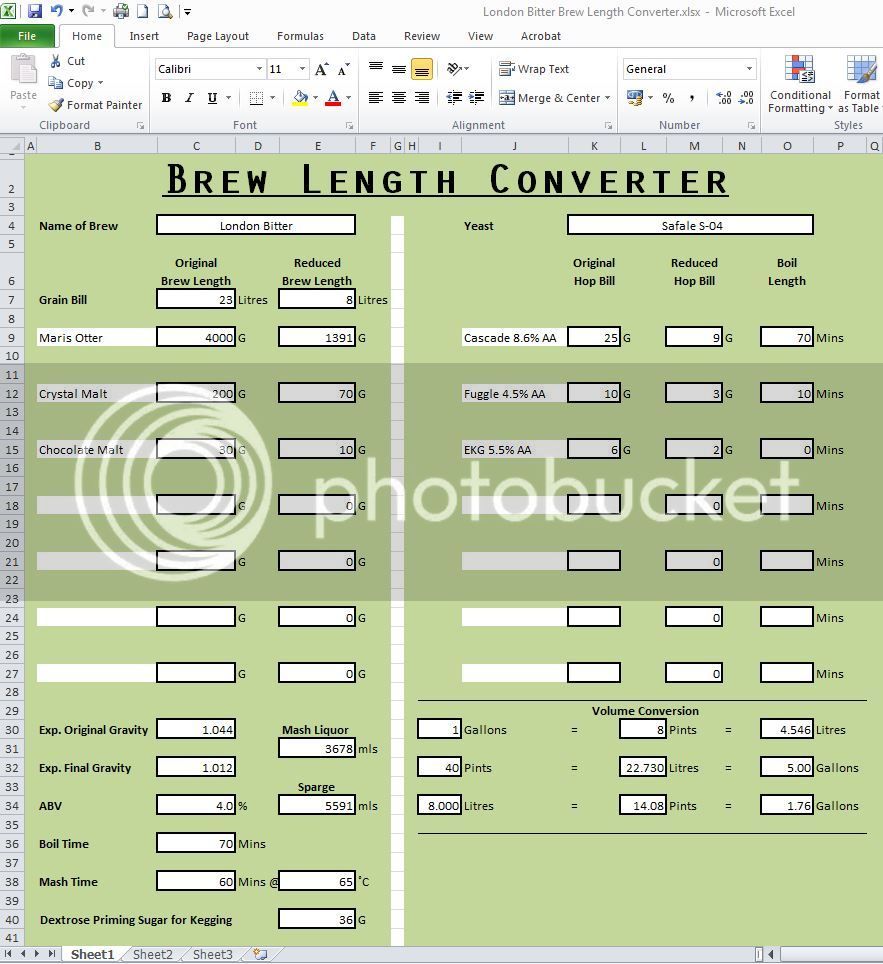
Yesterday was my first go at AG brewing after successfully making 2 kits over the last few months. I have been wanting to do this for a while now and have been reading and gathering bits and bobs over the last month. I got given an old tea urn/boiler from a mate, but it is only 8 litres in size. So I thought I could do some smaller batches and get the hang of AG brewing before spending out on a larger boiler (been looking at the ACE Boilers). I have got the Greg Hughes book so thought it would be best to use one of his recipies and plumped for the London Bitter. I had to scale down all the quantities so made up a spreadsheet that calculates the reduced grain bill and hops etc.

Spreadsheet.jpg


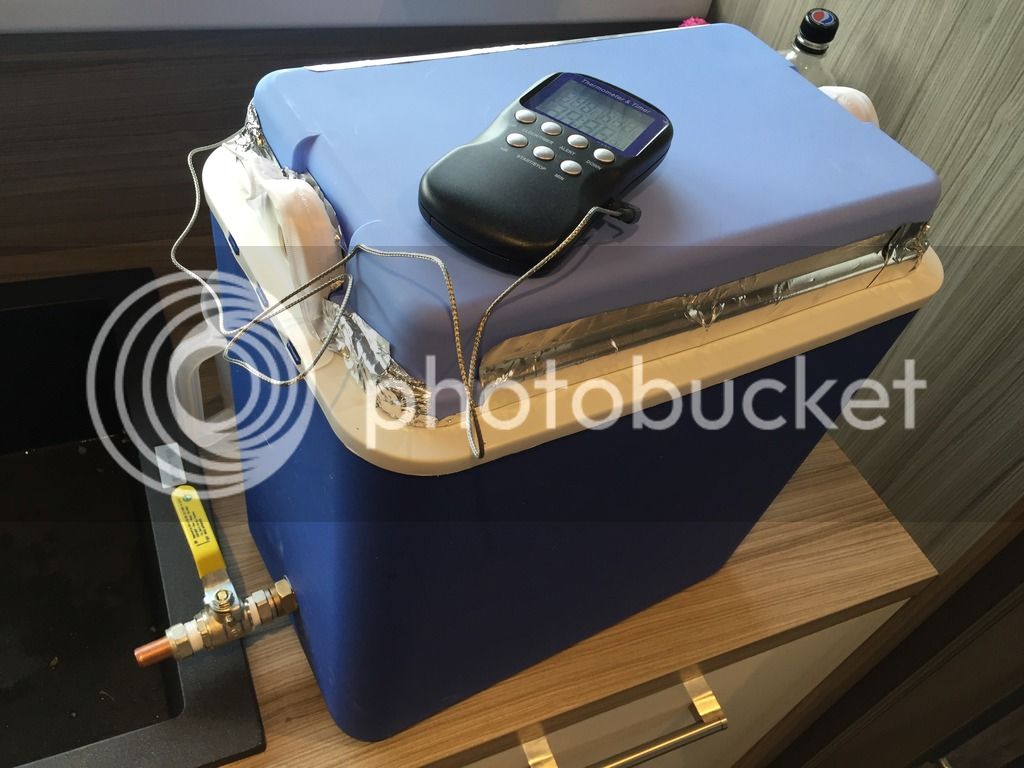
I made a mash tun from a cheap and cheerful ice box cooler and added a tap. I was going to add a strainer/filter but then thought about using a bag to make clearing up easier. I put the strike water in to the mash tun and started to add the grains, but there didn't seem enough water and the grain was clumping up. I added about another litre of water and then set it aside to mash for an hour at 65c. I have added more insulation to the ice box and was pleased that it only lost 3 degrees over the hour.
IMG_9411.jpg


IMG_9405.jpg


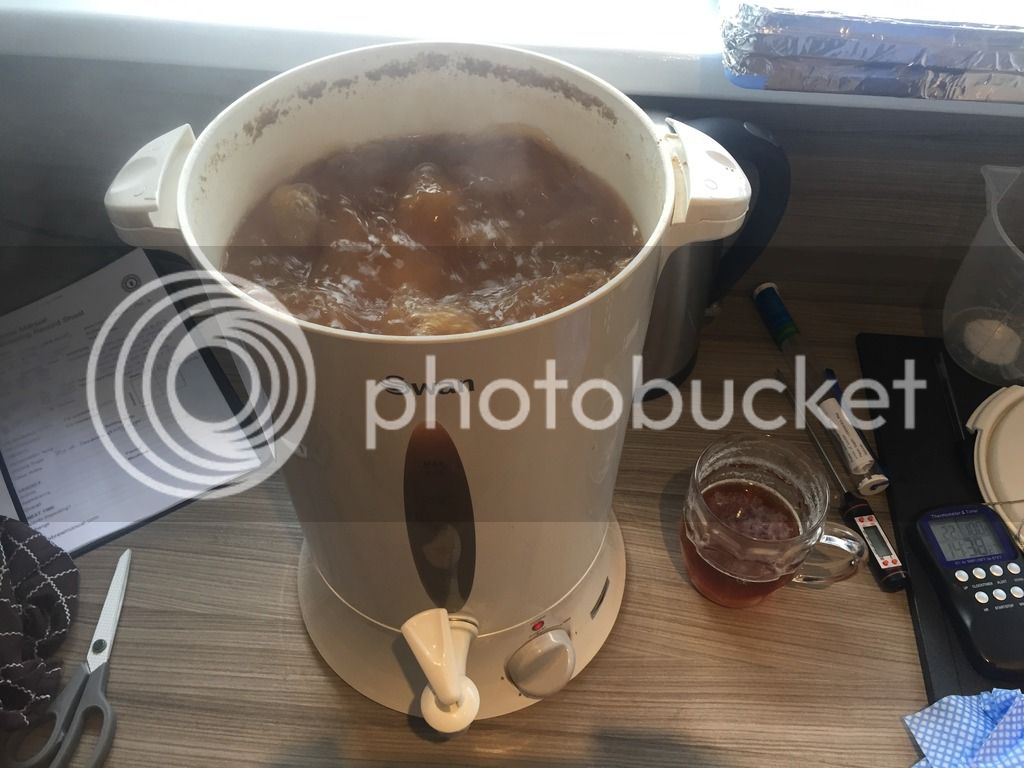
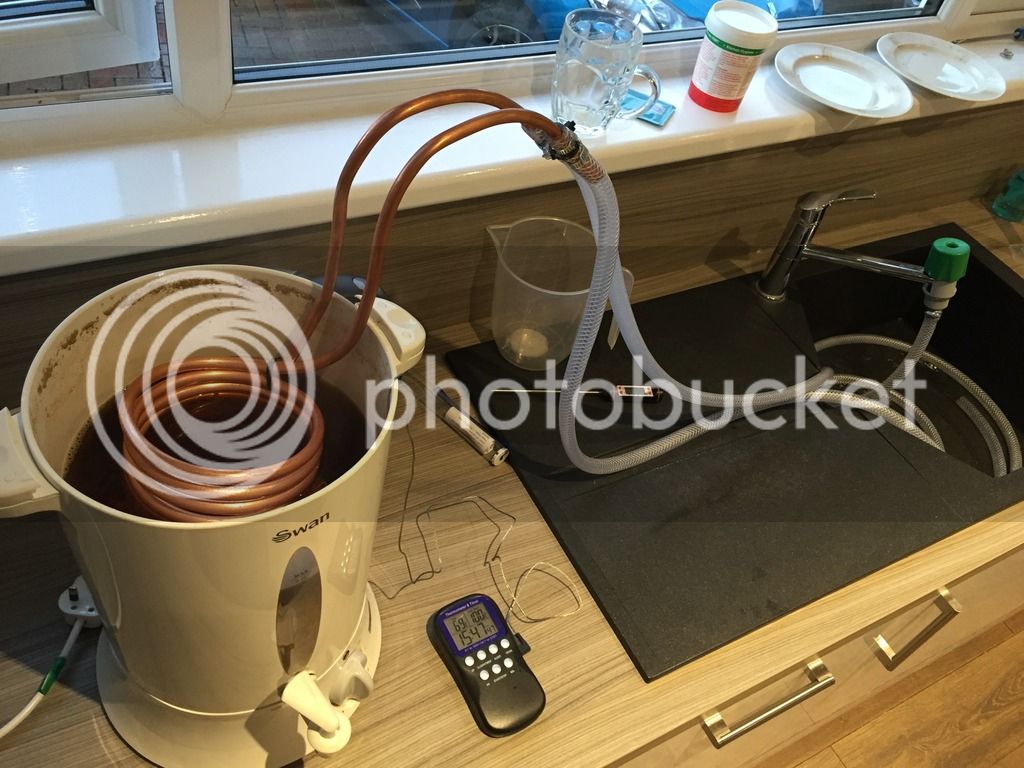
I then dunk sparged with 5 litres of water at 75c and transferred to the boiler. I had 9 litres in the boiler and it was quite near the top, but managed quite a vigorous boil for 70 mins adding the hops in hop bags at the required times.
IMG_9414.jpg


I have made myself a wort chiller which worked very well. I bought some 10mm coiled copper pipe from ebay for ��£22 and wrapped it round a paint pot to coil it up so it fits the boiler. It cooled the wort very quickly.
IMG_9419.jpg


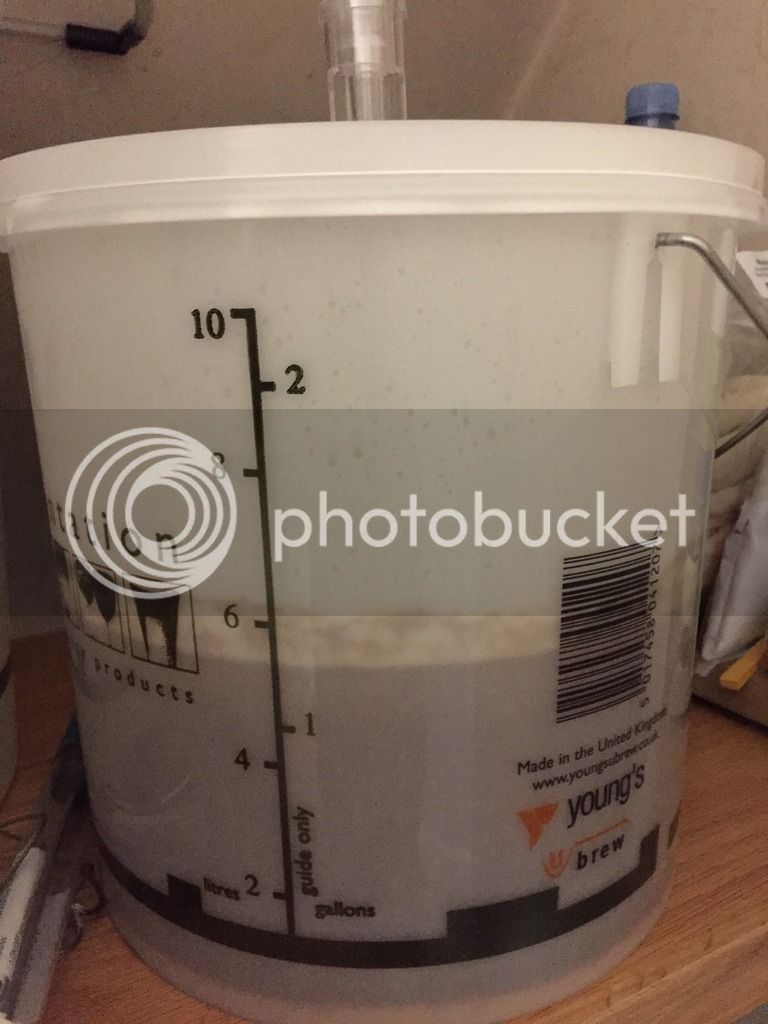
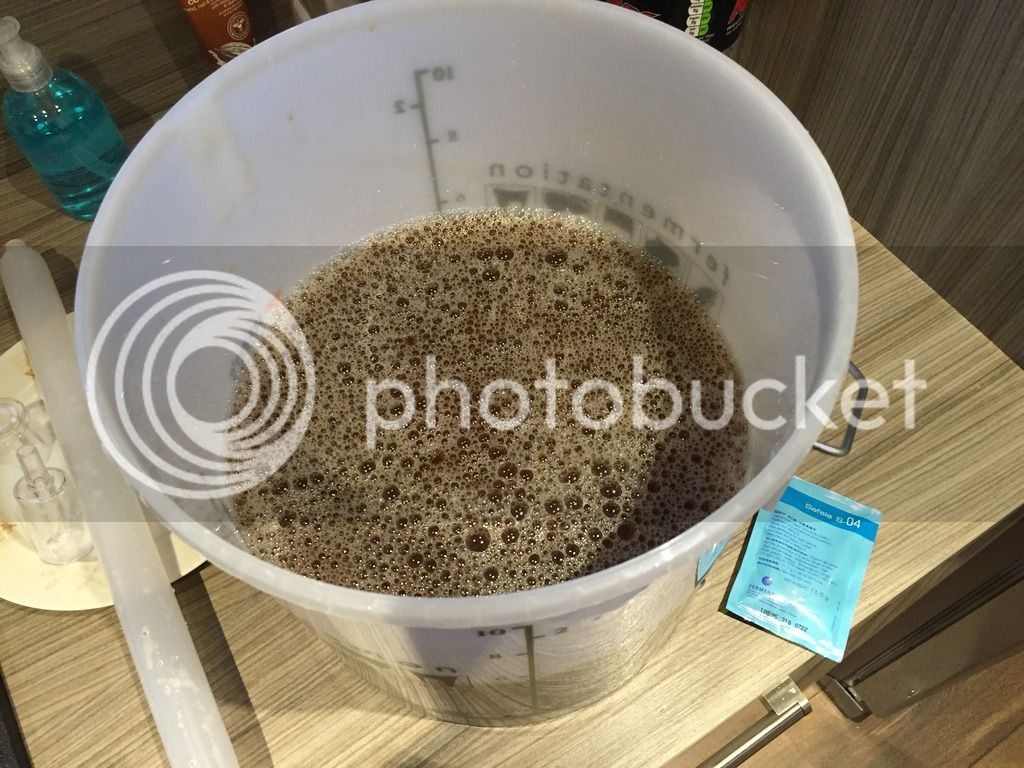
I put the cooled wort in to my 2 gallon FV and was a bit disappointed that I only ended up with about 5.5 litres. Not sure how I managed to lose 3.5 litres during the boil?
IMG_9421.jpg


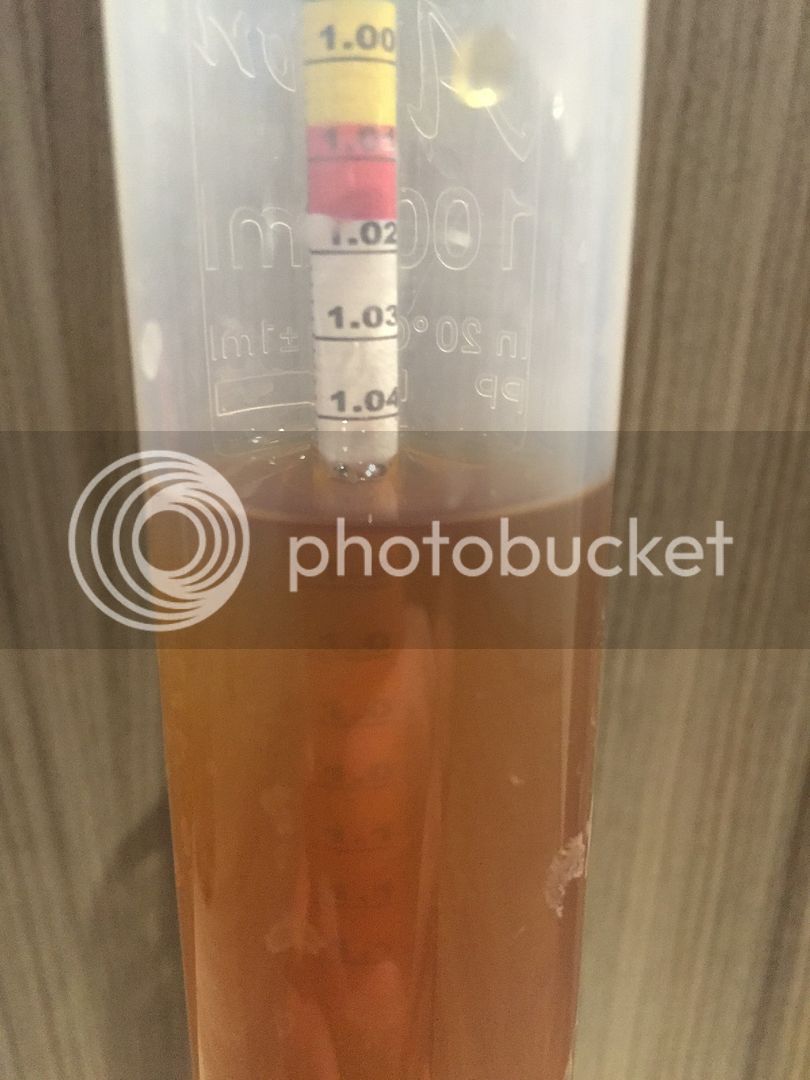
I took a gravity reading of 1.046 which was 2 points above the expected 1.044, so I was pleased with that. In hindsight I could of topped up the FV and bought the OG down a bit?
IMG_9423.jpg


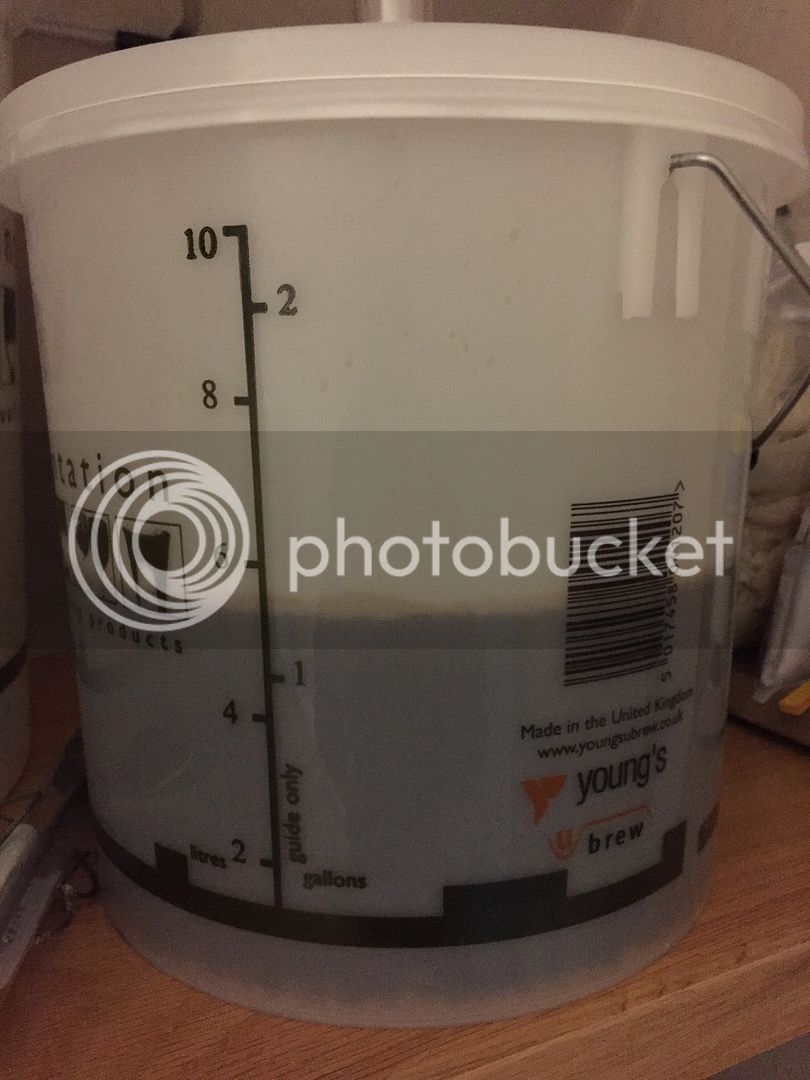
All in all I was pleased with the way my first AG brew went and can't wait to do another. That's the advantage of small batches I suppose? I have learnt a lot after doing my first one, which took approx. four and half hours from start to finish. Got up this morning 8 hours after pitching the yeast (S-04) and there is no airlock activity but I think I can see the Krausen forming. Fingers crossed it turns out ok, I have been very impressed with the quality of the kits I've done so far, so expecting this to be even better.......
IMG_9425.jpg


For anyone reading this that is thinking of trying AG brewing, give it a go. I am hopeless in the kitchen (ask Mrs Bigjas) but with a bit of planning and being organized, it went smoother than expected. I have got the All Grain Brewing bug and will be looking to plan the next one soon :thumb:

Any constructive feedback on my process is very welcome as I am keen to learn and develop my home brewing skills.

Thanks

Jas
 
Great stuff!
Really well done one everything but especially the cooling coil!

I always try to figure out my weakest link in the brewing process and work on that. Reading your brewday, I would make your mash tun my priority. Losing 3 degrees is quite a bit over an hour, if you mashed in at 65 and finished at 62 you could end up with a thin bodied beer. A few of us here use a picnic cooler and have tried to improve performance, the concensus seems to be to fill the head space with something. I've used a sheet of polystyrene wrapped in foil first and then cling film. This sits just underneath the lid and has massively improved thermal insulation. On a grain bill over 5kg I lose no heat over an hour. This leads to much more consistently when brewing.
Under 5kg I do lose a bit so will have to make another larger one at some point to fill the extra headspace.

But so far so good mate, you will love that beer!

Thanks for the tip, I bought a really cheap ice box from Tesco and put some more insulation between the inner and outer plastic sides. I also put 50mm of Celotex roof insulation in the lid as there was nothing there. I understand your thinking regarding head space in the tun, so will look at making up something that can be put in there. I might also look at wrapping the outside of the cool box, but I didn't feel much heat loss there.

Thanks

Jas
 
Good write up. You've already knocked up all the toys too :thumb:

Let us know how the rest of the process goes for you.

Whats up next?

Haha, it might look organised, but the Wort cooler was made just before I switched the boiler on and the Mash Tun was made as the water was heating.... :doh: I like making things, especially if it saves me a few quid :thumb:

I'll update on how this progresses.

The Wort on my AG brew smelt nice and malty, but not very hoppy compared to the kits I have made recently. Is this normal? Or should I be looking to dry hop?

Not sure on the next brew, I'm thinking a summer ale from Greg Hughes book as Mrs Bigjas likes these styles of Ale. He says to use Pale Malt, is Marris Otter similar?

Jas
 
Nice pictures and a great write-up. There is no way back to kits once you have tasted all grain !
 
Not sure on the next brew, I'm thinking a summer ale from Greg Hughes book as Mrs Bigjas likes these styles of Ale. He says to use Pale Malt, is Marris Otter similar?

Jas

Excellent write up and great pics :thumb:. Low Colour Maris Otter is the same as Pale Malt (see here).
 
Nice pictures and a great write-up. There is no way back to kits once you have tasted all grain !

Thanks, I like to see pictures to help explain things, so they might benefit others? I hope you're right about tasting all grain v kits, I'm just a little concerned about my first brew lacking in hop aroma as it went in to the FV.

Jas
 
Thanks, I like to see pictures to help explain things, so they might benefit others? I hope you're right about tasting all grain v kits, I'm just a little concerned about my first brew lacking in hop aroma as it went in to the FV.

Jas

Sure it will be fine. If you like a good 'nose' to your beer then you could always dry hop 4 days before bottling/kegging - adding say 8-10g of EKG would give a nice nose.

Even without the dry hop you will be impressed with the freshness of your first all grain brew.

Onwards and upwards from here.

Thanks for the Dry hop advice, I think I will do as you say and drop 10g of EKG in next week.

Day 2 and still no airlock activity but it looks as though there is a nice Krausen so will just leave it alone and take a gravity reading when I dry hop. I'm guessing the FV lid is not airtight?

Can't wait to taste it, everyone says how nice it will be compared to kits.....

Jas

IMG_9426.jpg

I wouldn't worry about the airlock. I haven't had a bubbling airlock yet and all my brews have worked out great.
 
Thanks for the Dry hop advice, I think I will do as you say and drop 10g of EKG in next week.

Day 2 and still no airlock activity but it looks as though there is a nice Krausen so will just leave it alone and take a gravity reading when I dry hop. I'm guessing the FV lid is not airtight?

Can't wait to taste it, everyone says how nice it will be compared to kits.....

Jas

IMG_9426.jpg

Same with my airlock. Guess my bucket doesn't seal completely but my brews ferment just fine.
 
10 days fermenting and I decided to dry hop 10grams of EKG today. I took a gravity reading and it is 1.006 so looking good at 5.2%. I couldn't resist a taste from the test jar and I am really impressed!! It is quite sweet but tasted really nice. I am hoping the dry hop will help, looking to keg it at the weekend. Can't wait to taste this when its complete.

Jas
 
I can vouch for the ace boiler, it's a great bit of kit for the money. Just done my second ever AG brew today start boil at 30ltrs right to the brim just avoiding a boil over and ended up with 23ltr in the FV. I changed to leaf hops as the first brew blocked the filter using loose pellets (very time consuming). Good luck with this one I'm sure it will turn out great.
 
Did you have to modify the boiler to stop it from cutting out once the boil was reached?
 
Did you have to modify the boiler to stop it from cutting out once the boil was reached?

No I didn't need to modify it at all. There is a temp control on it and once it got to the boil I could adjust the temp to keep a nice rolling boil.

It was also good for heating the water to striking temperature and holding it near the required temp until I was ready to Mash.

Jas
 
No I didn't need to modify it at all. There is a temp control on it and once it got to the boil I could adjust the temp to keep a nice rolling boil.

It was also good for heating the water to striking temperature and holding it near the required temp until I was ready to Mash.

Jas

Awesome! Sounds like a very useful bit of kit :thumb:
 
Back
Top