


DethApostle
Regular.
I'm putting a full write up on my website later today but thought I'd post a short version here too.
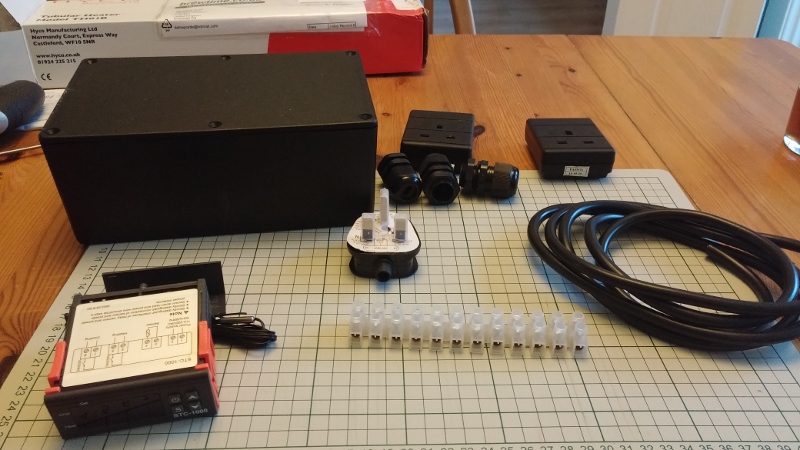
The shopping list:
ââ¬Â¢220V STC-1000
ââ¬Â¢3 20mm IP68 Weatherproof Cable Gland
ââ¬Â¢Plastic Electronics Project Box (216 x 130 x 85mm)
ââ¬Â¢2 Trailing Mains Extension Sockets
ââ¬Â¢15 AMP Block Connector Strip
ââ¬Â¢13 AMP Fused 3 Pin Plug
ââ¬Â¢1.5mm 3core Flex Cable
ââ¬Â¢1ft Electric Tube (Greenhouse) Heater
ââ¬Â¢Under-counter fridge
Total cost c. ã70 (including ã20 fridge off ebay)
The bits!
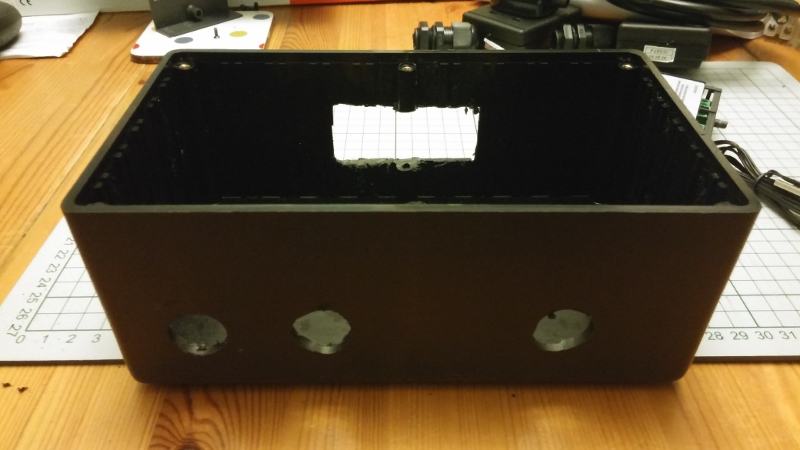
Drill the holes. (Buy. A. Dremel.)
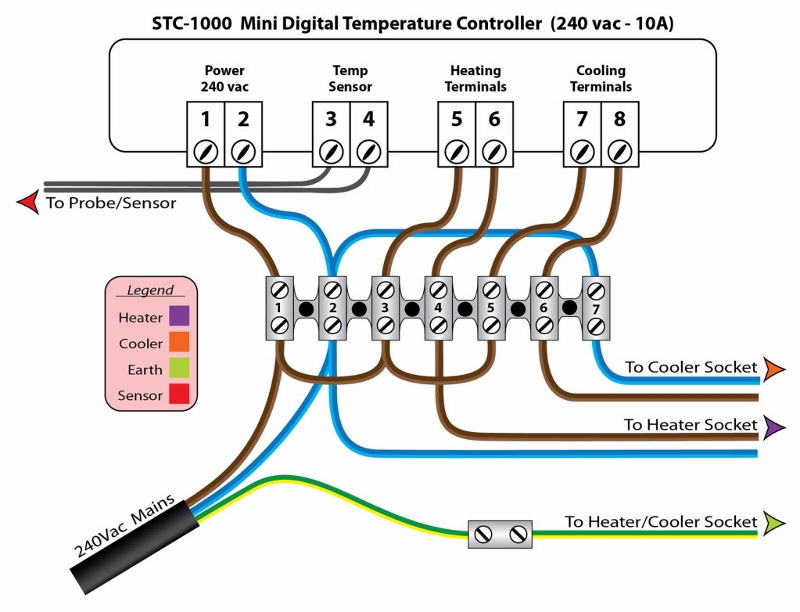
Wiring Diagram
My wiring!

All done! Simples!
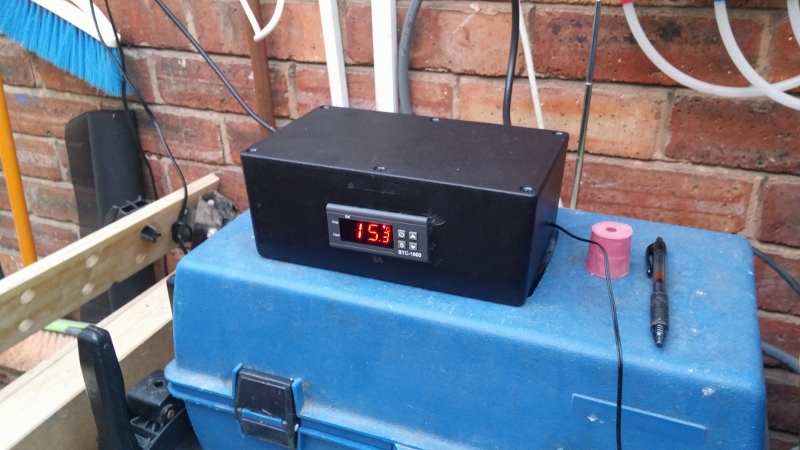
Once the build is complete the probe itself needs to be calibrated against a known temperature such as boiling water or in my case I used a thermometer that I had already verified as accurate.
The STC has 4 settings:
ââ¬Â¢F1 ââ¬â Temperature Setting
ââ¬Â¢F2 ââ¬â Temperature Variance Setting
ââ¬Â¢F3 ââ¬â Compressor Delay
ââ¬Â¢F4 ââ¬â Probe Calibration Value
F1 is set to the temperature you require (19C in my case for fermenting an IPA).
F2 allows you to define how accurately you want the STC to get to that temperature. For example a setting here of 0.5 degrees will send power the cooler when the temperature reaches 19.6C, a setting of 0.2 will turn the cooler on at 19.2C.
F3 controls the delay in turning the fridge compressor on and off. Rapid switching the compressor on and off can reduce its working life, a setting of 3 minutes is pretty standard here it seems.
F4 allows you to calibrate the probe. I found that the default probe was reporting 3.5C lower than my trusty thermometer so if I set my STC to 19C with no corrections I was actually only holding a temperature of 15.5C inside the fridge! Not ideal for fermenting beer! This was corrected by setting F4 to -3.5 and now 19C is actually 19C!
And thatââ¬â¢s all there is to it!
DA
The shopping list:
ââ¬Â¢220V STC-1000
ââ¬Â¢3 20mm IP68 Weatherproof Cable Gland
ââ¬Â¢Plastic Electronics Project Box (216 x 130 x 85mm)
ââ¬Â¢2 Trailing Mains Extension Sockets
ââ¬Â¢15 AMP Block Connector Strip
ââ¬Â¢13 AMP Fused 3 Pin Plug
ââ¬Â¢1.5mm 3core Flex Cable
ââ¬Â¢1ft Electric Tube (Greenhouse) Heater
ââ¬Â¢Under-counter fridge
Total cost c. ã70 (including ã20 fridge off ebay)
The bits!
Drill the holes. (Buy. A. Dremel.)
Wiring Diagram
My wiring!
All done! Simples!
Once the build is complete the probe itself needs to be calibrated against a known temperature such as boiling water or in my case I used a thermometer that I had already verified as accurate.
The STC has 4 settings:
ââ¬Â¢F1 ââ¬â Temperature Setting
ââ¬Â¢F2 ââ¬â Temperature Variance Setting
ââ¬Â¢F3 ââ¬â Compressor Delay
ââ¬Â¢F4 ââ¬â Probe Calibration Value
F1 is set to the temperature you require (19C in my case for fermenting an IPA).
F2 allows you to define how accurately you want the STC to get to that temperature. For example a setting here of 0.5 degrees will send power the cooler when the temperature reaches 19.6C, a setting of 0.2 will turn the cooler on at 19.2C.
F3 controls the delay in turning the fridge compressor on and off. Rapid switching the compressor on and off can reduce its working life, a setting of 3 minutes is pretty standard here it seems.
F4 allows you to calibrate the probe. I found that the default probe was reporting 3.5C lower than my trusty thermometer so if I set my STC to 19C with no corrections I was actually only holding a temperature of 15.5C inside the fridge! Not ideal for fermenting beer! This was corrected by setting F4 to -3.5 and now 19C is actually 19C!
And thatââ¬â¢s all there is to it!
DA