Well you may have wondered why the brew day session was postponed. :hmm: Very simply I spent two days replumbing the pico plant to use my nice new March May HS 809 pump, instead of the two huge cellar pumps . . . and then while I was at it I decided to take out some frustration on the two kegs that make up my kettle . . . and hacked away with an angle grinder . . . . lots of sparks . . . pretty 
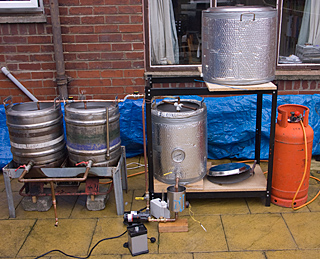
The first pic shows the complete brewery set up in recirculation / boiler transfer configuration
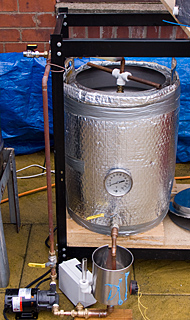
This is the mash tun under back and pump configured for RIMS operation
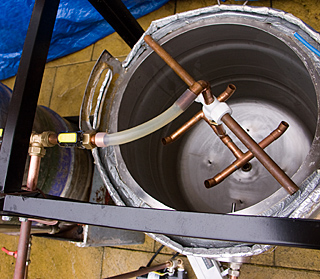
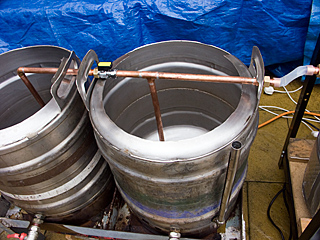
This is looking into the mash tun showing the RIMS (soon to be HERMS) return manifold
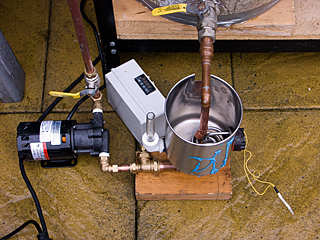
A close up of the under back and pump. The Value element can be clearly seen, and is used for step mashing . . . I adopted this approach because all the towel rail heaters I could find were of the temperature limiting variety. The PID which controls the heating means that the wort doesn't scorch or overheat, ball valve on the outlet of the pump to control the flow rate. Only thing I have forgotten to do is to put a drain on the lowest point of the pump . . . minor mod really.
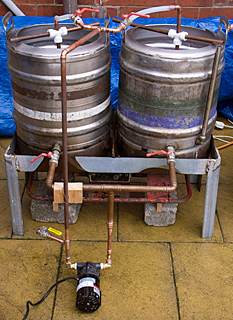
Ok so onto the kettle side, I decided to modify the kettles by removing this top supporting ring,
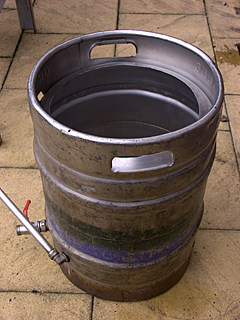
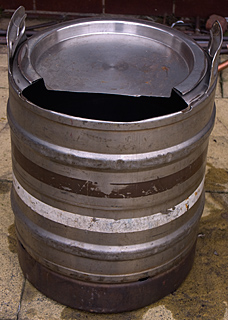
Leaving the handles the handles, and cut a bit out of the top to allow me to tip up the kettle and hose out the debris from inside . . . like this with the cut away lid in place
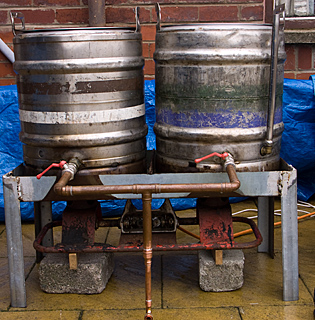
And here they are on the stand with Concorde underneath :). The bricks are there to raise the burner up . . . Trying to cut down on gas usage really.
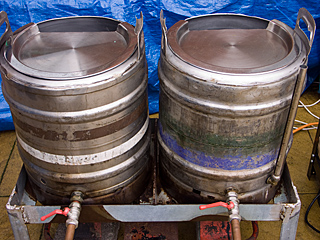
Looking from the top, yes I do boil with those lids on . . . But they only go on when the wort has come to the boil and the initial foaming has subsided . . . They heat up pretty well so don't trap volatiles in any condensate. . . . Tesco Stainless Steel Trays 4.87 each
This is the Kettles in transfer configuration . . . Yes the silicon tube is kinked . . . and I will sort it before using The valve between the two kettles allows me to control the fill level in each kettle and ensure I get the same gravity in each kettle more or less.
And here it is with the pump moved across and in wort cooling mode . . . I recirculate the wort across the Immersion coil . . . not shown . . . and by pumping I don't have to move the coil around in the kettle. . . . When its finished cooling I attach a piece of hose to the lower ball valve and run off via my in line aerator to the FV.
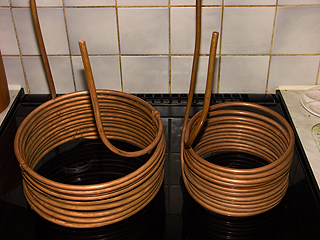
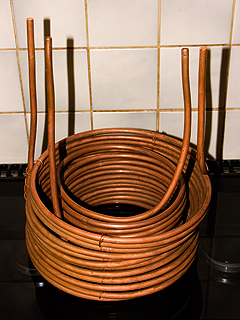
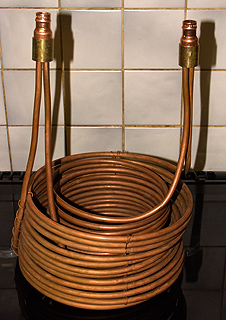
Further pics to follow of my new (bodged) double coil IC, and a few other bits and pieces . . . I must go and weigh out the grain for the inauguration brew day. And I must go and get a flapper wheel for the drill to make the kettles really shiney :lol:
The first pic shows the complete brewery set up in recirculation / boiler transfer configuration
This is the mash tun under back and pump configured for RIMS operation
This is looking into the mash tun showing the RIMS (soon to be HERMS) return manifold
A close up of the under back and pump. The Value element can be clearly seen, and is used for step mashing . . . I adopted this approach because all the towel rail heaters I could find were of the temperature limiting variety. The PID which controls the heating means that the wort doesn't scorch or overheat, ball valve on the outlet of the pump to control the flow rate. Only thing I have forgotten to do is to put a drain on the lowest point of the pump . . . minor mod really.
Ok so onto the kettle side, I decided to modify the kettles by removing this top supporting ring,
Leaving the handles the handles, and cut a bit out of the top to allow me to tip up the kettle and hose out the debris from inside . . . like this with the cut away lid in place
And here they are on the stand with Concorde underneath :). The bricks are there to raise the burner up . . . Trying to cut down on gas usage really.
Looking from the top, yes I do boil with those lids on . . . But they only go on when the wort has come to the boil and the initial foaming has subsided . . . They heat up pretty well so don't trap volatiles in any condensate. . . . Tesco Stainless Steel Trays 4.87 each
This is the Kettles in transfer configuration . . . Yes the silicon tube is kinked . . . and I will sort it before using
The valve between the two kettles allows me to control the fill level in each kettle and ensure I get the same gravity in each kettle more or less.
And here it is with the pump moved across and in wort cooling mode . . . I recirculate the wort across the Immersion coil . . . not shown . . . and by pumping I don't have to move the coil around in the kettle. . . . When its finished cooling I attach a piece of hose to the lower ball valve and run off via my in line aerator to the FV.
Further pics to follow of my new (bodged) double coil IC, and a few other bits and pieces . . . I must go and weigh out the grain for the inauguration brew day. And I must go and get a flapper wheel for the drill to make the kettles really shiney :lol:
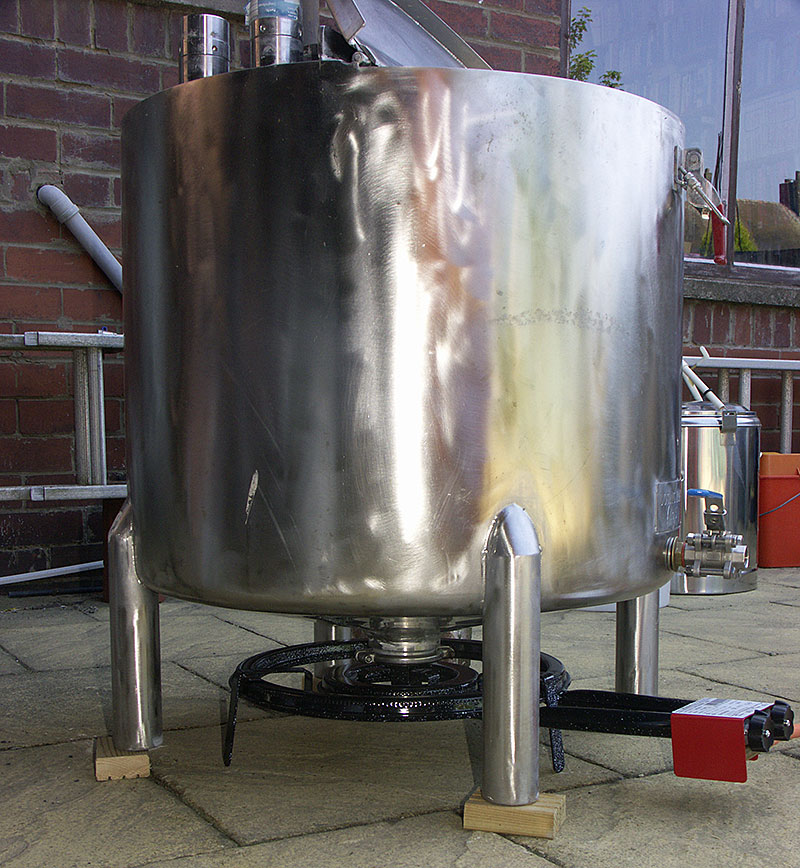
 . I actually do have a really nice brick built shed that it all gets stored in, and I reckon I can get 2.5BBL brewery in it . . . unfortunately its full of bikes . . . tools . . . . Kegereezer. Plans are afoot however for a new shed at the bottom of the garden for all the gardening stuff, Tools etc . . . . which should give me enough space for the brewery . . . or I can at least get it under the covered part . . .(After I move the 16" Precision Site Saw Bench