Me and a mate started (me really) making our kit about a year ago (Jan 09) and its evolved into a 10-11 gal brewery. I nicked most ideas from posts on here so thought I'd finally put some stuff on here now I've registered with photobucket. Will take a few edits so bear with me. I'll keep adding pictures and stuff to this as the brewery evolves further.
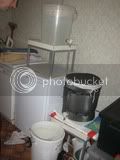
Basic 5 gal setup. 2 fermenting bins with taps. one as HLT, one as mash tun, electrim boiler.
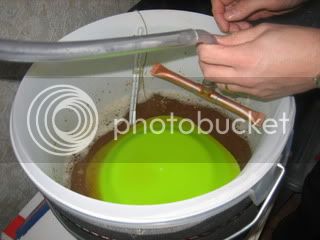
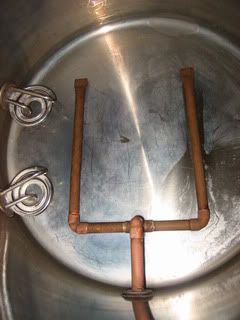
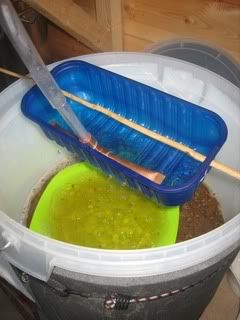
Inside the mash tun with very basic sparge arm, does the job. the green plate is to stop the sparge water disturbing the grain bed. The copper manifold, this picture was work in progress. The finished item has hack saw cuts about every 5mm halfway through the copper pipe on the underside. This attaches to the tap. This could really do with a false bottom to prevent stuck mashes but havn't made one yet. Usually works if the grain is stirred properly at the start of the mash.


Not getting the hang of this image re-sizing sorry.
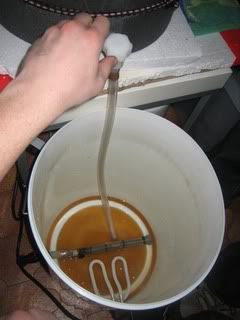
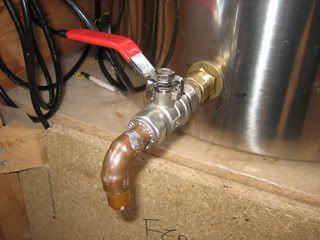
Collecting wort in the electrim boiler with home made hop strainer fitted. This was made of some soldered 15mm copper pipe and a section cut from a 'splatter guard' mesh from IKEA. The new boiler uses just a similar manifold to the mash tun instead. see other pictures. The new boiler is made from a 70L stock pot, available offof ebay France for about £50 inc. delivery. Kettle elements from cheapo ASDA kettles £4, I've disabled the safety cut outs to stop them switching off mid boil. The rule is, don't even plug in until theres water in the boiler. The leads were also from ebay, they may be computer leads and yes they do get warm but havn't got too hot and melted [edit, they're not computer leads and are rated 10A]. The tap is from 15mm tank connector and ball valves offof B&Q. Cutting the holes for the elements is the hard part. My dad managed it using a trephining? tool (home made), and a steel cutting blade in a jig saw, but you really need very hard hole cutting saws
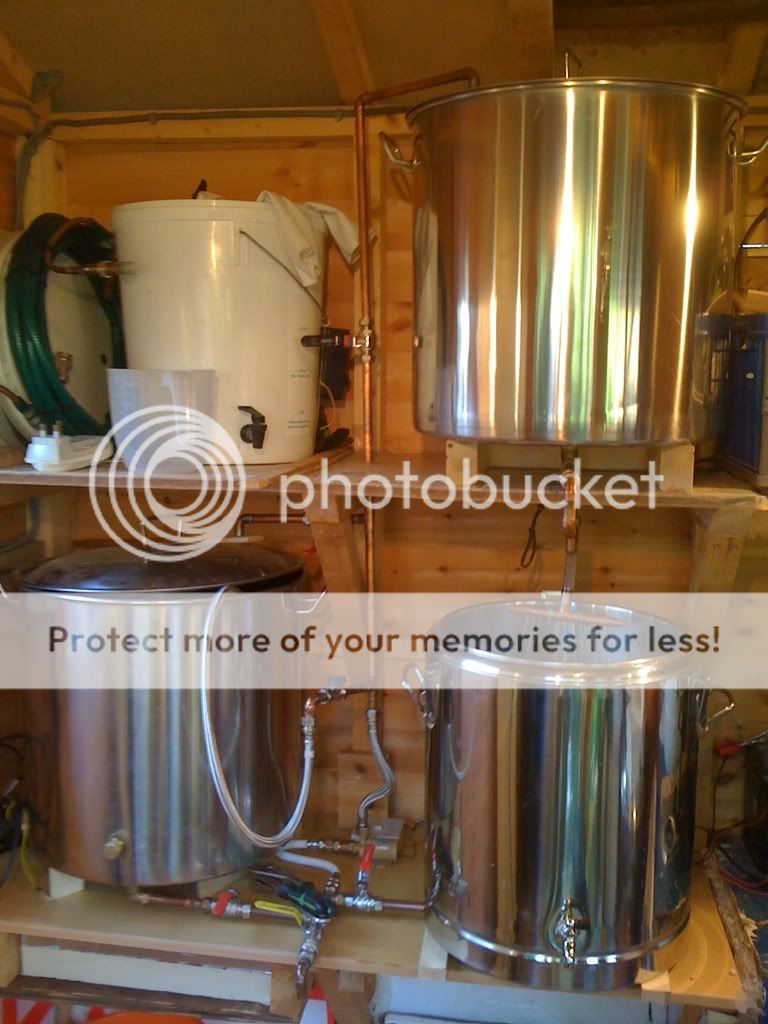
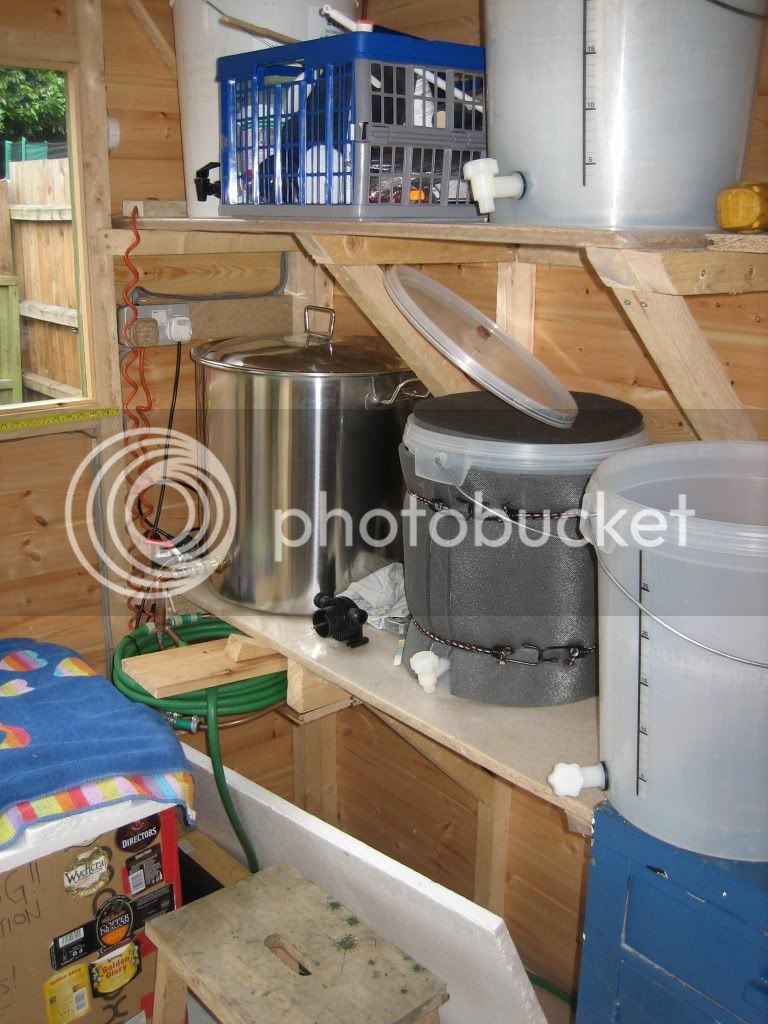
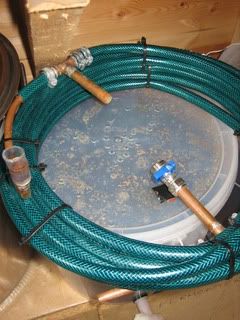
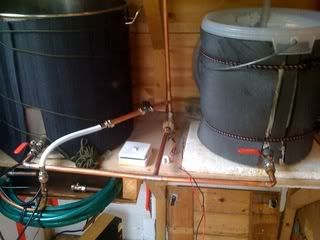
Heres the boiler in the purpose built shed/gym/brewery. I mounted a drill pump on the shelf between boiler and mash Tun but it leaked like a bit** so threw it away and use a small bucket instead. The green thing is an earlier generation of my counterflow cooler, it needed to be longer so I made a new one using 10m of 10mm microbore pipe, its not very neat but works well if a little slow. takes about an hour for 50litres to run through by gravity. Will get a pump eventually but they're expensive. On the lookout for a broken washing machine to salvage a pump? underneath the boiler I've insulated a space for 2x 25L FV's on little trolleys. I use an electric fan heater with a thermostat to maintain 20degrees. It gets too warm in the summer, not much I can do about it (at the moment).
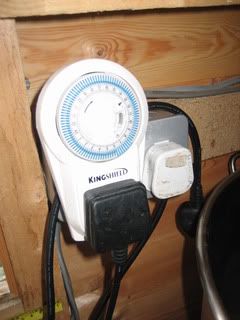
, and the timer switch I use to heat the liquor so its ready when I get up on brew days. Here's the mash tun wrapped up in sleeping bag, loses less than a degree (from the middle of the grain) in 90mins when doing a 10gal brew (holds about 11kg grain and 24L of water max)

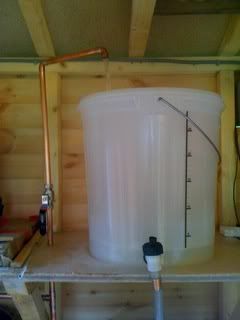
Sparging, I use the FV as a HLT, now I'm doing 10gal brews I use 2 of them side by side, connected with a bit of syphon tube as I need more than 25L. Will probably get another 70L stainless stock pot and make a proper heated HLT eventually. The blue thing is a mushroom container with holes poked in it. I don't use it now as for 10gal brews the grain comes almost to the top of the Mash tun. At the tap end of the mash tun I have an air-lock which allows me to collect the last runnings by syphoning (because the outlet is not right on the bottom of the tun like on a proper one). I run this through a cone of 'splatter' guard mesh to filter out the grain bits (underback). The little grey bucket is 5L and just the right size to pour into the boiler when its full.
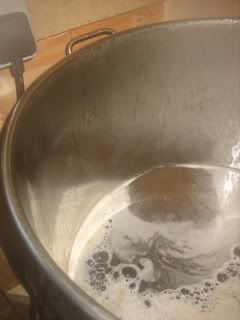
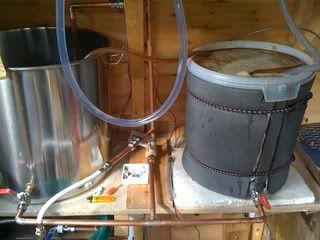
The boiler in action, this was a test run with only 5 gallons, it comes about 2inches from the top with 64litres in it, any more and it spills over onto the electrics. I use both elements to bring up to temperature (2.2Kw each) but it boils quite happily with just the one. Dark Green coil = A later incarnation of the counterflow cooler, and (light Green) the earlier one being used before the brewery was built. The early fermenting chamber, can't remember why there was only half an FV full. I used an insulated (with polystyrene) cardboard box with the fan heater in it as I didn't have a conveniently placed cupboard. This is now replaced with the insulated space underneath the boiler and mash tun in the brewery shed.
The Finished article.
Edit for brew #26 May2010, addition of a pump from solar-project.co.uk
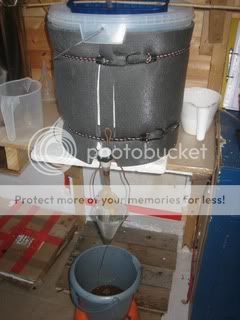
1 = Set up showing outlet connected to counterflow cooler, reduces time to collect wort in fermenter from over and hour to 28minutes (55.5L). Efficiency of cooler checked this time. wort at 65 degC leaves cooler at 21 degC and 0.5L/min. Cooling water at 15 degC leaves cooler at 40 degC and 2L/min
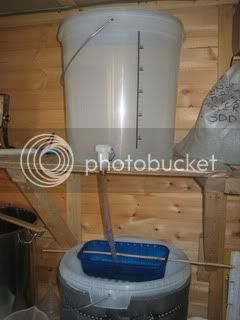
2 = Filling HLT from boiler, ready for sparging
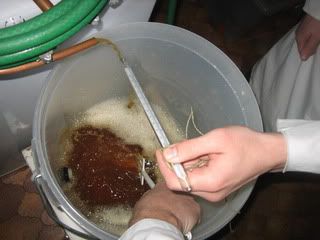
3&4 = Recirculating wort through grain in mash tun prior to collection and sparging
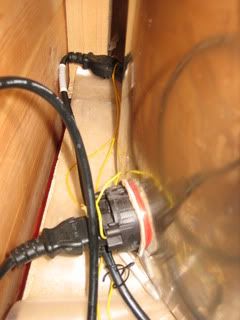
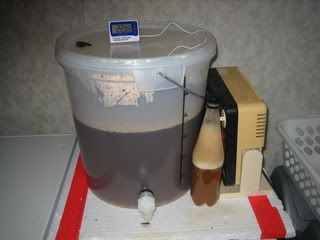
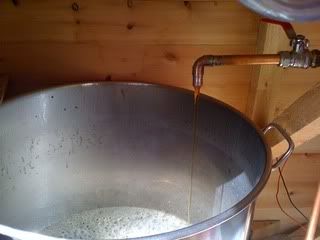
5 = collecting the wort in the boiler, outlet regulated using a 15mm ball valve restricting flow to around 900ml/min. I don't yet have a resistor controlling voltage to the pump so using a knackered 12V motorcycle battery thats has a damaged cell, voltage is reduced therefore less strain on the pump working agains the restricted flow. I've fitted a switch to the pump (photos show work in progress).
1.
 2.
2.
 3.
3.

4.
 5.
5.
Edit 21Jul10
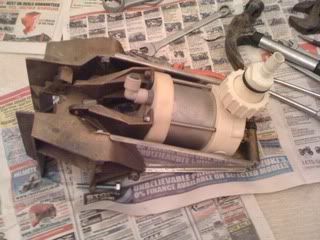
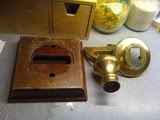
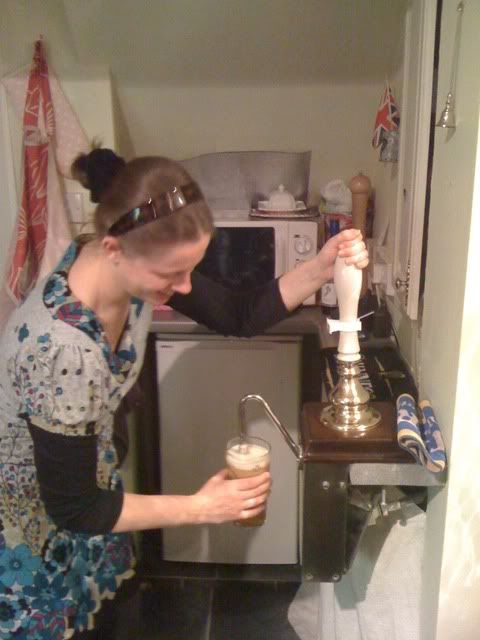
Not really 'brewing' but I've got a beer engine cheap off ebay and in the process of refurbishing it. It leaks a bit, needs a new o-ring on the piston rod and a John Guest swivel elbow on top of the piston.
Edit 6Jan11
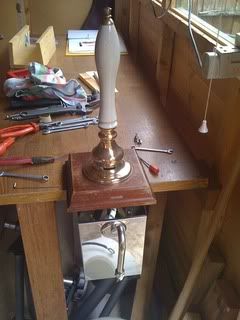
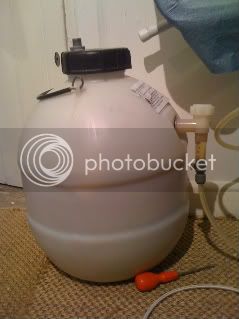
Hand pump fitted in the Kithen and connected to a King Keg for New Years eve party.
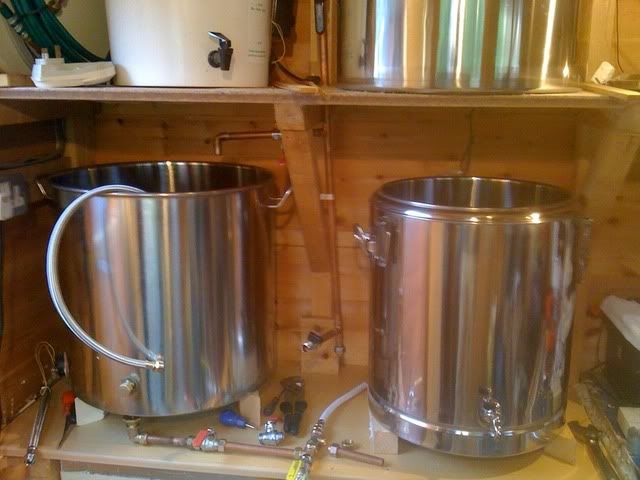
The Brewery is going fully stainless steel. Just waiting for Q-Max Cutters to put holes in vessels. I'm converting all vessels to bottom drains to help with air-locks and priming of pump. More Photos when it is finished.
Basic 5 gal setup. 2 fermenting bins with taps. one as HLT, one as mash tun, electrim boiler.
Inside the mash tun with very basic sparge arm, does the job. the green plate is to stop the sparge water disturbing the grain bed. The copper manifold, this picture was work in progress. The finished item has hack saw cuts about every 5mm halfway through the copper pipe on the underside. This attaches to the tap. This could really do with a false bottom to prevent stuck mashes but havn't made one yet. Usually works if the grain is stirred properly at the start of the mash.
Not getting the hang of this image re-sizing sorry.
Collecting wort in the electrim boiler with home made hop strainer fitted. This was made of some soldered 15mm copper pipe and a section cut from a 'splatter guard' mesh from IKEA. The new boiler uses just a similar manifold to the mash tun instead. see other pictures. The new boiler is made from a 70L stock pot, available offof ebay France for about £50 inc. delivery. Kettle elements from cheapo ASDA kettles £4, I've disabled the safety cut outs to stop them switching off mid boil. The rule is, don't even plug in until theres water in the boiler. The leads were also from ebay, they may be computer leads and yes they do get warm but havn't got too hot and melted [edit, they're not computer leads and are rated 10A]. The tap is from 15mm tank connector and ball valves offof B&Q. Cutting the holes for the elements is the hard part. My dad managed it using a trephining? tool (home made), and a steel cutting blade in a jig saw, but you really need very hard hole cutting saws
Heres the boiler in the purpose built shed/gym/brewery. I mounted a drill pump on the shelf between boiler and mash Tun but it leaked like a bit** so threw it away and use a small bucket instead. The green thing is an earlier generation of my counterflow cooler, it needed to be longer so I made a new one using 10m of 10mm microbore pipe, its not very neat but works well if a little slow. takes about an hour for 50litres to run through by gravity. Will get a pump eventually but they're expensive. On the lookout for a broken washing machine to salvage a pump? underneath the boiler I've insulated a space for 2x 25L FV's on little trolleys. I use an electric fan heater with a thermostat to maintain 20degrees. It gets too warm in the summer, not much I can do about it (at the moment).
, and the timer switch I use to heat the liquor so its ready when I get up on brew days. Here's the mash tun wrapped up in sleeping bag, loses less than a degree (from the middle of the grain) in 90mins when doing a 10gal brew (holds about 11kg grain and 24L of water max)
Sparging, I use the FV as a HLT, now I'm doing 10gal brews I use 2 of them side by side, connected with a bit of syphon tube as I need more than 25L. Will probably get another 70L stainless stock pot and make a proper heated HLT eventually. The blue thing is a mushroom container with holes poked in it. I don't use it now as for 10gal brews the grain comes almost to the top of the Mash tun. At the tap end of the mash tun I have an air-lock which allows me to collect the last runnings by syphoning (because the outlet is not right on the bottom of the tun like on a proper one). I run this through a cone of 'splatter' guard mesh to filter out the grain bits (underback). The little grey bucket is 5L and just the right size to pour into the boiler when its full.
The boiler in action, this was a test run with only 5 gallons, it comes about 2inches from the top with 64litres in it, any more and it spills over onto the electrics. I use both elements to bring up to temperature (2.2Kw each) but it boils quite happily with just the one. Dark Green coil = A later incarnation of the counterflow cooler, and (light Green) the earlier one being used before the brewery was built. The early fermenting chamber, can't remember why there was only half an FV full. I used an insulated (with polystyrene) cardboard box with the fan heater in it as I didn't have a conveniently placed cupboard. This is now replaced with the insulated space underneath the boiler and mash tun in the brewery shed.
The Finished article.
Edit for brew #26 May2010, addition of a pump from solar-project.co.uk
1 = Set up showing outlet connected to counterflow cooler, reduces time to collect wort in fermenter from over and hour to 28minutes (55.5L). Efficiency of cooler checked this time. wort at 65 degC leaves cooler at 21 degC and 0.5L/min. Cooling water at 15 degC leaves cooler at 40 degC and 2L/min
2 = Filling HLT from boiler, ready for sparging
3&4 = Recirculating wort through grain in mash tun prior to collection and sparging
5 = collecting the wort in the boiler, outlet regulated using a 15mm ball valve restricting flow to around 900ml/min. I don't yet have a resistor controlling voltage to the pump so using a knackered 12V motorcycle battery thats has a damaged cell, voltage is reduced therefore less strain on the pump working agains the restricted flow. I've fitted a switch to the pump (photos show work in progress).
1.
4.
Edit 21Jul10
Not really 'brewing' but I've got a beer engine cheap off ebay and in the process of refurbishing it. It leaks a bit, needs a new o-ring on the piston rod and a John Guest swivel elbow on top of the piston.
Edit 6Jan11
Hand pump fitted in the Kithen and connected to a King Keg for New Years eve party.
The Brewery is going fully stainless steel. Just waiting for Q-Max Cutters to put holes in vessels. I'm converting all vessels to bottom drains to help with air-locks and priming of pump. More Photos when it is finished.
")