Hobby Horse Brewery Evolution

The Homebrew Forum

Help Support The Homebrew Forum:

This site may earn a commission from merchant affiliate links, including eBay, Amazon, and others.
Started fabricating the heat exchanger using a Tesco Kettle and a length of 10mm copper and compression fittings. Had a devil of a job bending it so tight, expecially as the copper pipe had got frost damaged and stretched in places last winter. I managed to coil about 2metres in it. Hoping its going to be enough for the HERMS unit. Still to cut the side of the Mash tun and place the temperature sensors.

a few pics

d7a5710e.jpg

341e63ce.jpg

92a64ac8.jpg

8c1c5c49.jpg
 
Nice job on that 10mm, it took me a while with 8mm, had to coil it around a cornie first the a wine bottle by twisting the coil and tightening it up.
 
Got the first PID working the HERMS ok now and built a second one to control the HLT and Kegerator when I'm not brewing. The earlier temperature controller melted a bit during the last brew so I binned it. This one has 2 units, one of which will just be a thermometer because I accidentally put 240V through the 12V SSR output circuit and blew it up.

1. Bits and pieces for building. IP66 box from B&Q, other electrical bits from ebay. PID, SESTOS from Hong Kong, 25A SSR, will post links later.
50b7bf67.jpg

2, High current side wired up with good quality high load rubber coated wire. I'm missing a IXR socket for the other sensor, ordered one from ebay. Theres a shop I've been using that seems to deliver next day every time. 'Audiospares'
83e8fa52.jpg

3
1628610e.jpg

4. In my left hand is a 240V 12V transformer that is meant to run LEDs. Usual ebay hong kong. I got it to run a small 12V computer chip fan which I've attached to the heat sink. My multimeter says it's only putting out 5.8V though, its still turning the fan which is probably overkill anyway with the massive heat sink I've got. (top left, picture 1)
5a3858f8.jpg

5
104b9011.jpg

6. All fitted together, it aint pretty but I can tidy it up later after I've fitted the other socket. Will seal everything with silicon and hopefully get the PIDs wedged in a bit tighter and sealed.
c5d20bfa.jpg

7. Run an autotune with my HERMS set up. Seems to work OK. Now got 2 PID units and unit to monitor whichever PT100 I plug into it.
9d61178f.jpg


Think I'll test it out on the next brew. I think I've been getting the strike temp too high as the the last brew finished at 1.018 with more accurate mash temperature control and monitoring I should be able to avoid that.

Clickies to stuff used.
leads
XLR plug
XLR socket
IEC connector
switches
IEC outlet
probes
PID control
chip fan 12V
SSR
12V (5.8V) transformer
Heat sink
wire
connector block (15A)
Plus IP66 junction box and 13A flex from B&Q
 
The read out from the PID on the right worries me a bit :shock: :lol:
have you been programming it beyond the realms of brewing pj....come on... :rofl:
was so tempted ...pj.....you know what abbreviation was going there :rofl: :rofl: :rofl:
.
.
.
.
.
.
.
.
forgive me :grin:
 
Vossy1 said:
The read out from the PID on the right worries me a bit :shock: :lol:
have you been programming it beyond the realms of brewing pj....come on... :rofl:
was so tempted ...pj.....you know what abbreviation was going there :rofl: :rofl: :rofl:
.
.
.
.
.
.
.
.
forgive me :grin:

Mrs PJ said the same. It's abbreviation for 'out of range alarm' apparently. Maybe the programmers have a sense of humour.
 
Just a word of warning for peeps = some of the links on ebay for PIDS are showing some cheaper ones with free postage - but if you look closely at the specs a lot of them only cater for K-type probes and not the PT-100's most seem to buy? :thumb:
 
screamlead said:
Just a word of warning for peeps = some of the links on ebay for PIDS are showing some cheaper ones with free postage - but if you look closely at the specs a lot of them only cater for K-type probes and not the PT-100's most seem to buy? :thumb:

I've got one of those. It turns out the RKC 'REX C100' and variants are programmable if you know how, and now i do. Can explain if anyone wants to buy one.
 
See this post on other thread about first test of HERMS system.
viewtopic.php?p=209171#p209171
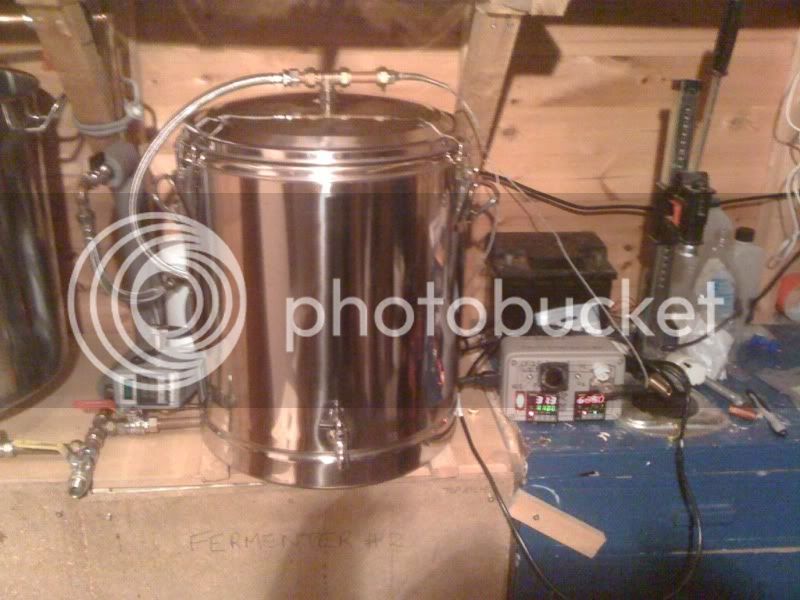
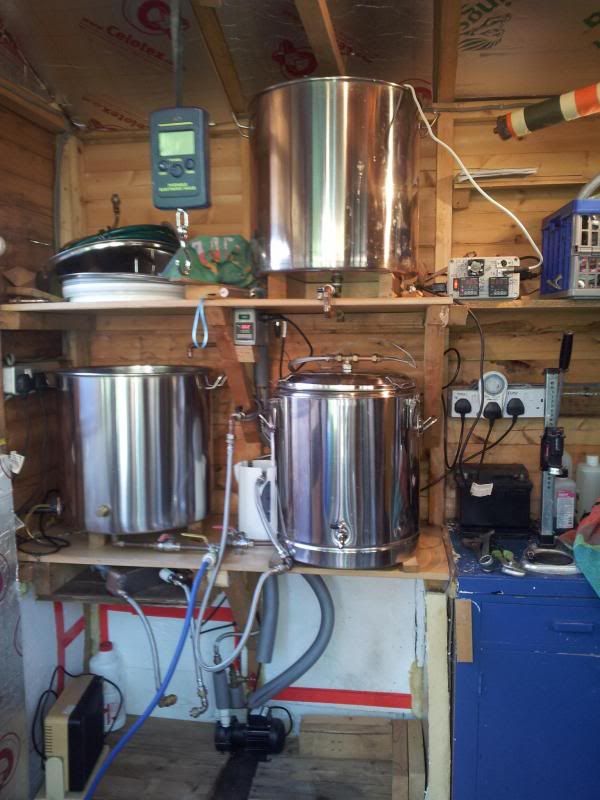
First time out with my new HERMS system. I struggled with the flow rate (0.6-0.9L/m) and didn't really achieve a clear wort. I also started with too cool a mash (60 deg) which I was unable to get up to a reasonable mash temperature (as measured at the outflow) for over an hour. My efficiency was definitely down though I've not worked out exactly how much, probably around 65%.
The brew fermented down OK and tastes good and is clear.
Several things to try next time.
1. thinner mash (I usually use just over 2:1 ratio because my mash tun is a bit too small TBH) therefore, less grain.
2. let mash settle 10mins before pumping.
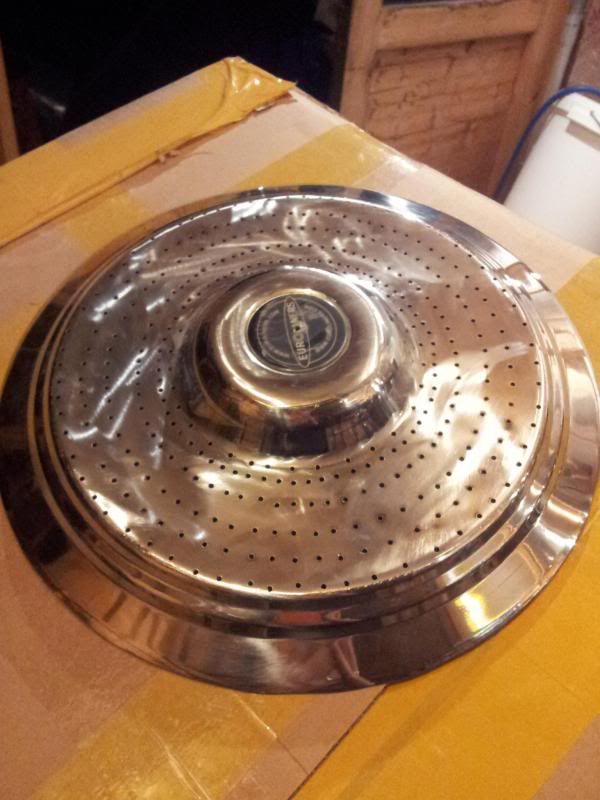
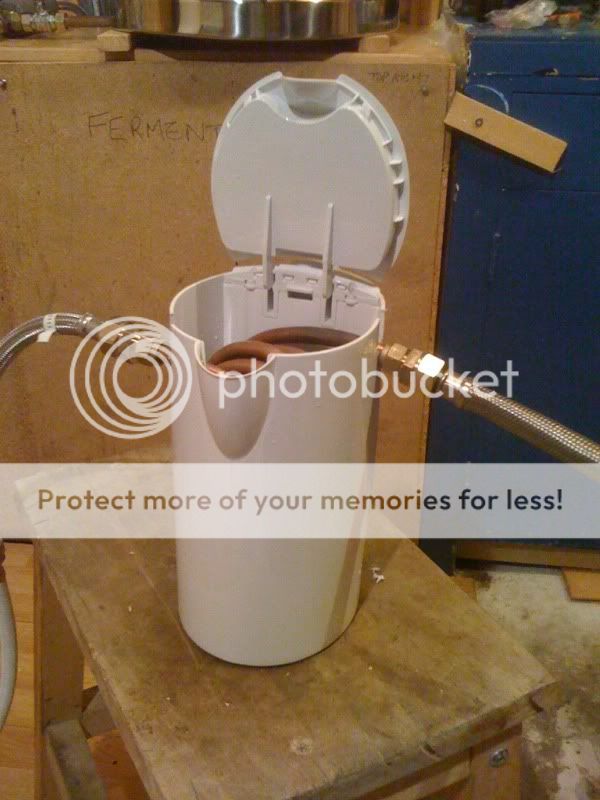
3. Invest in a false bottom, as currently my strainer is a 900mmx15mm SS braided hose with the hose cut out.
4. be more careful with the strike temperature and initial mixing.

Its all part of the experimentation.
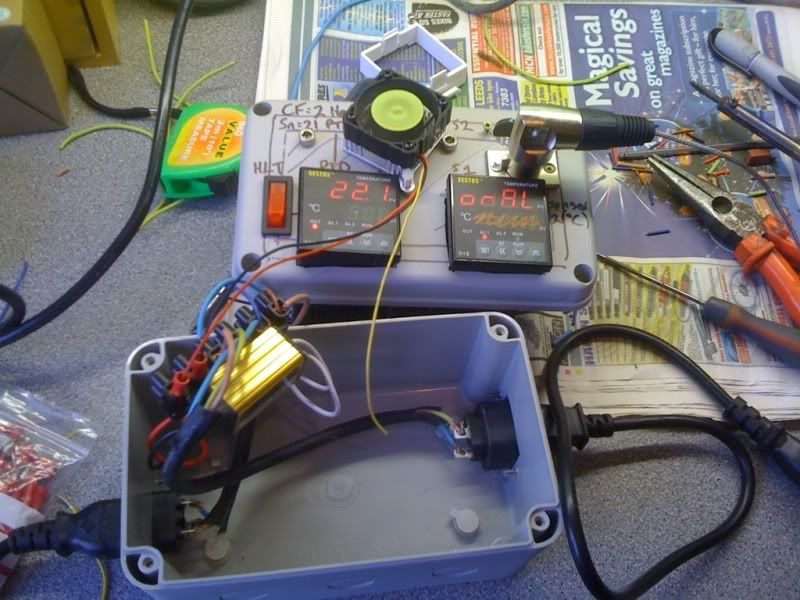
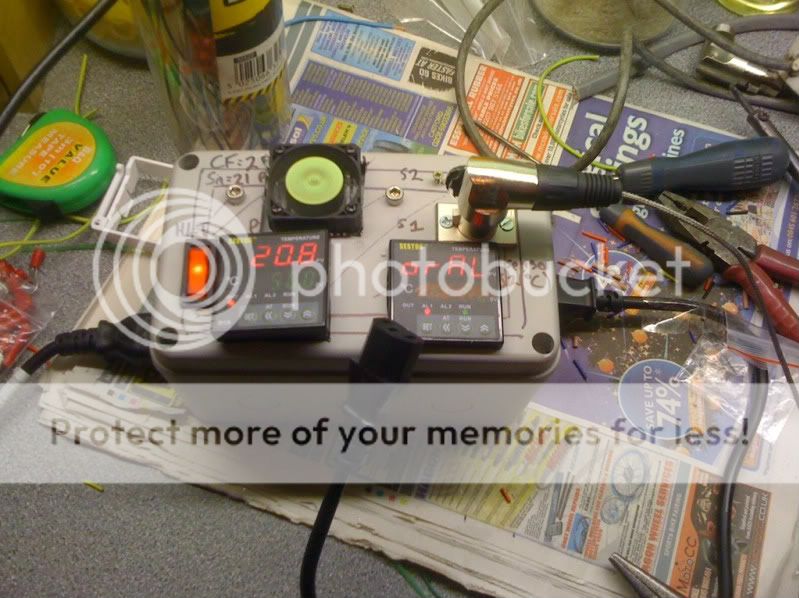
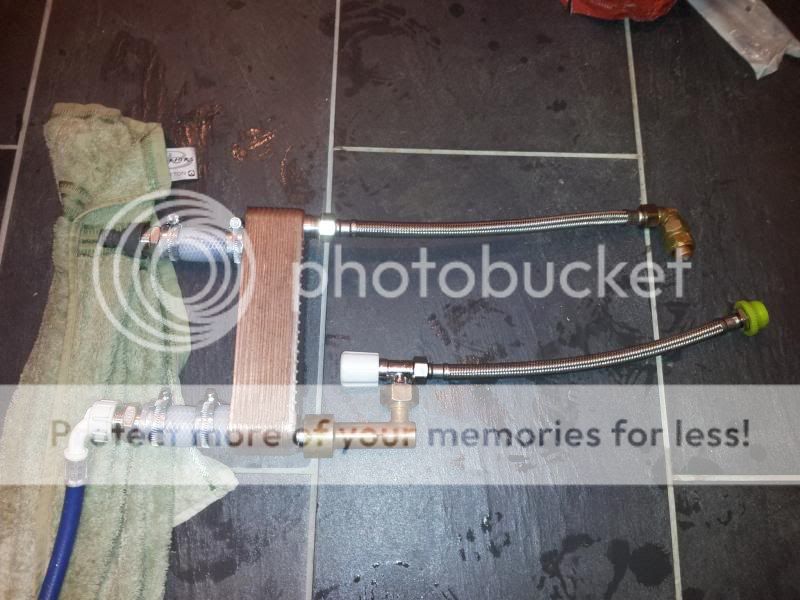
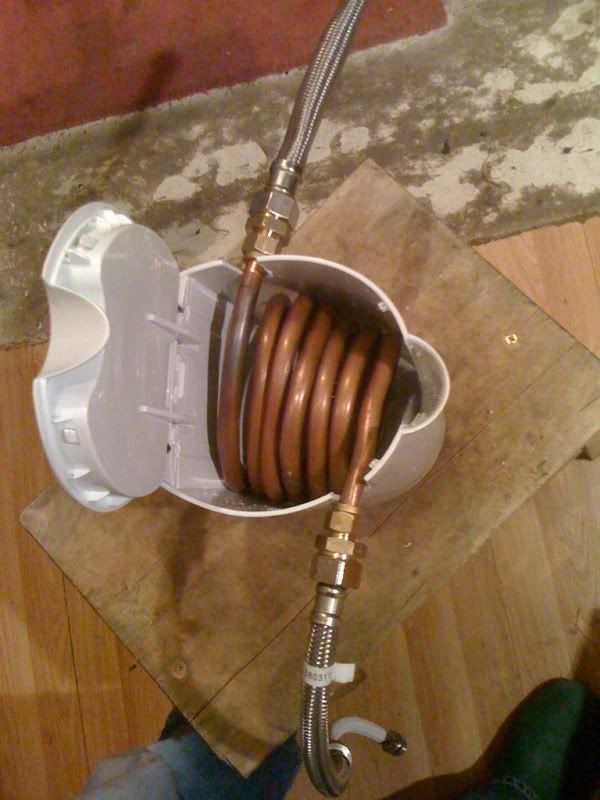
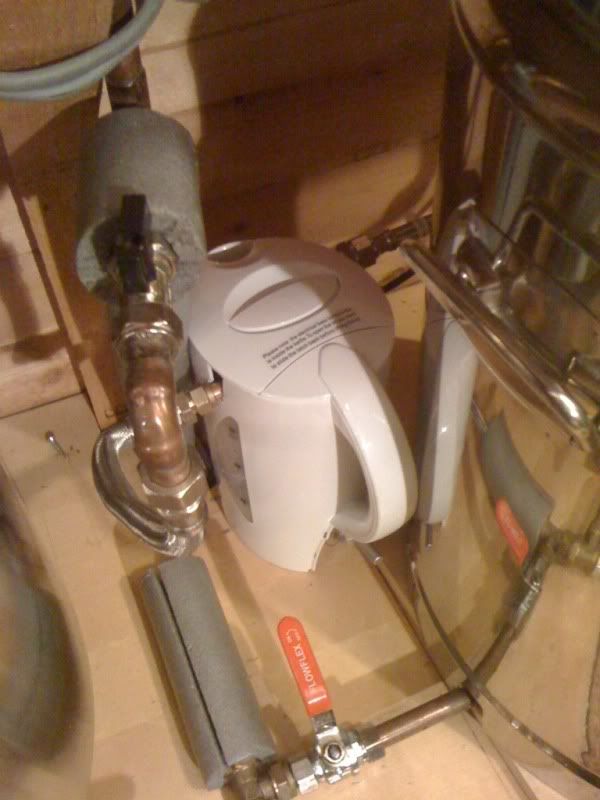
I was very pleased how the actual HE and PID performed. It's outflow was bang on the whole time, just the flow rate was low.

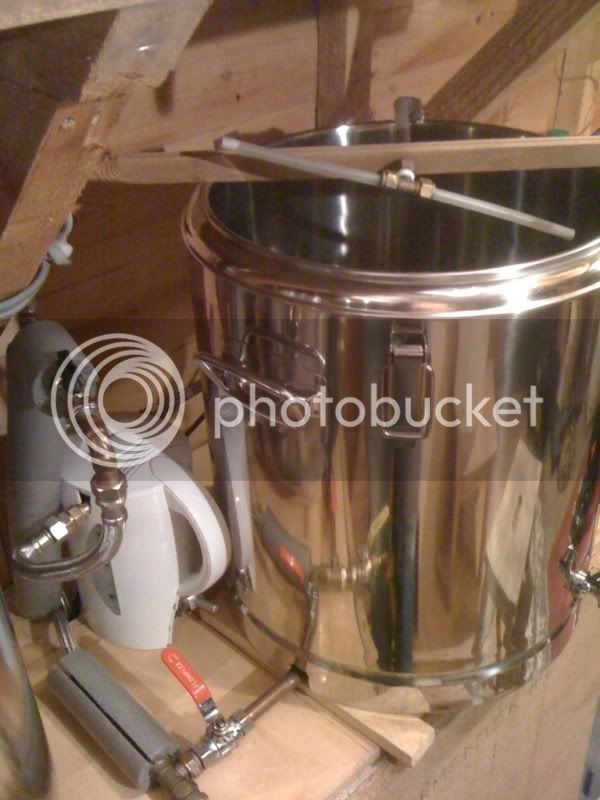
Second test, on 22Jan12 went much better.
1. 9.3Kg grain and ~26L liquor.
2. stirred and adjusted to 64degrees for 10mins before starting pump
3.continued with current strainer. Achieved a measured 2.2L/min flow rate without pumping at maximum with no sticking problems and clear wort.

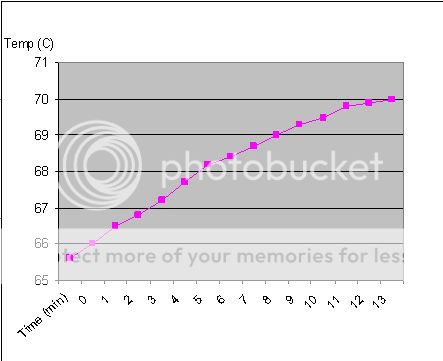
Additionally, now the HERMS was working properly, I conducted an experiment that Springer and I had been discussing. I compared mash inlet and outlet temperatures over time for the temperature increase at ‘mash out’. I set the PID for 70 deg C and monitored the increase in outflow temperature. The flow rate was 2.2L/min and circulating volume around 26L (not precisely measured unfortunately). 9.3Kg stationary phase (grain).
TIME Mash exit T (Celsius)
0 65.6
1 66
2 66.5
3 66.8
4 67.2
5 67.7
6 68.2
7 68.4
8 68.7
9 69
10 69.3
11 69.5
12 69.8
13 69.9
14 70

Will knock up a graph somehow. :geek: I did a video but it will take ages before I get round to editing it.
tempexpJan12.jpg
Excel is rubbish for graphs.
So, I’ll check it again but I guessed that the time to circulate the entire volume through the HEX at the desired temperature, plus some (25%) of that time to heat the stationary phase would be in the right ball park.
Rough rule of thumb from this experiment in this system is time to increase from 65 to 70 is, the time to circulate full volume x 116%. I will test how repeatable this is. There will obviously be a proper physics formula involving temperature differences and specific heat capacities. I’ll leave that to someone with the time and inclination to work it out.

Overall, the brew went well and achieved around 80% efficiency including losses to deadspace and hops etc.
 
Hello, it's been a while. First brew since last August. Made some modifications. A new 'false bottom' made from a stainless steel truck hub cap found by a road.
 
Cant remember how this thing works now

false bottom


20140223_185643.jpg


cooler, pinched from my deceased combi boiler DHW heat exchanger
20140225_195452.jpg


now looks like this

20140322_162314.jpg
 
that cooler looks bad ass, nice job there, is can it be taken apart to clean or is it just like the popular type of plate chiller.
 
Dj the chiller is jusk like the plate chillers you can buy, needed a bit of fettling to get it connected up with pipes
 
Out of interest how did you adjust the pid to take a pt100 probe. I have one and not sure it's reacting well to it
 
Out of interest how did you adjust the pid to take a pt100 probe. I have one and not sure it's reacting well to it

The instructions with the PID aren't quite correct or complete.

I got some better instructions after hunting around on the forum, think I've got a link to it somewhere but to select PT100 with the cheap chinese 'REX C100'

I think you need to set the 'LCk' value to '1000' to allow changes.

then

press and hold 'set' and '<' until the display says 'cod'. Scroll through using 'set' and change SL1 to '1000' (K-type setting is '0000'), also switch between heat and cool modes using SL6 either '0001' (heat) or '0000' (cool).
 
Back
Top