Fermenter fridge lives!

The Homebrew Forum

Help Support The Homebrew Forum:

This site may earn a commission from merchant affiliate links, including eBay, Amazon, and others.

Spud

Born again brewer
Joined
Mar 12, 2015
Messages
93
Reaction score
32
Location
Suffolk
It's taken a little time to gets the bits together, but I've finally finished the fermenting fridge in my home nano brewery.

Basically it's along the same lines as most other STC-1000 controlled fridges. However I've added one or two touches that I feel make the build mildly unique. The main bit is the power source for the fan. Most people seem to use an old plug in transformer from devices like cordless phones etc. But I wanted just the two plugs to contend with. So to get my 12v, I used a 12v led driver from eBay. Essentially it's a 240v ac to 12v dc stabilised transformer. This takes its power source from the tube heater, meaning the fan comes on with the heater. I figured the refrigeration part of the fridge has been designed to distribute cold air efficient, so there's only need to assist the distribution of the warm air.

The enclosure is a supermarket own brand Tupperware box, it's cheap, and easy work.

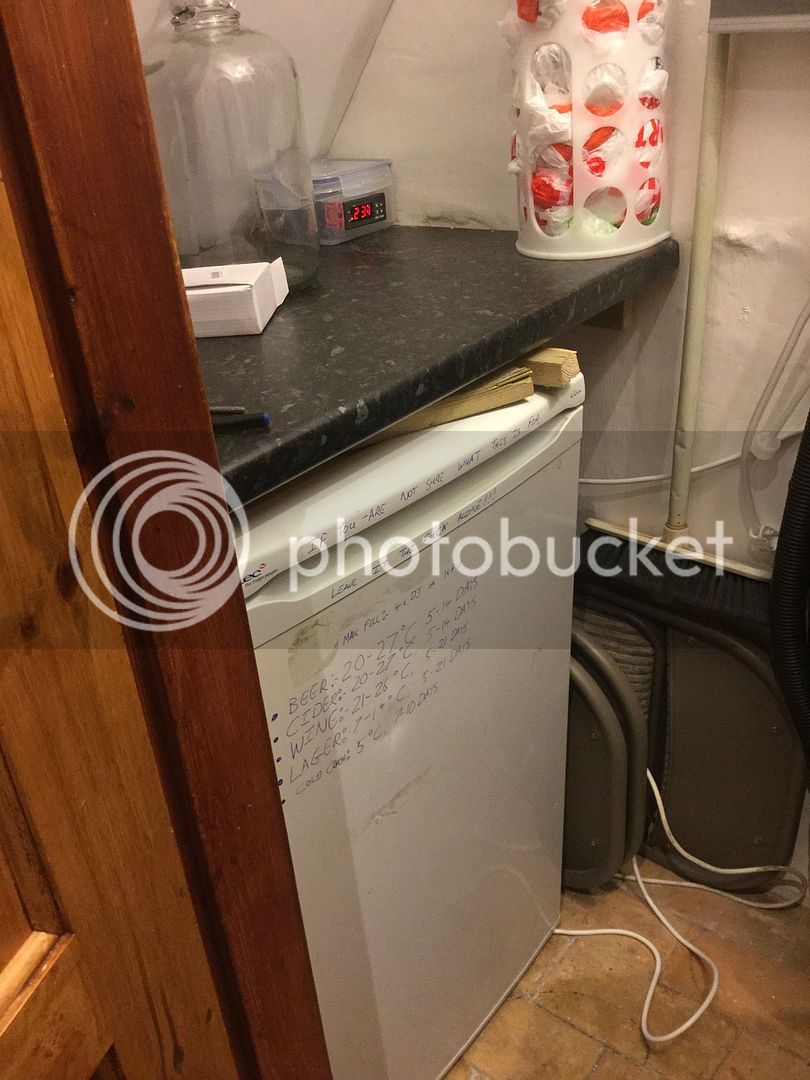
Here's a couple of pictures:


Jealous, jealous, jealous :sulk:

Mind you I've managed to convince SWIMBO that our larder fridge needs replacing. New fridge being ordered this weekend :-D, old fridge heading for the shed.

One thing, is that the temperature sensor stuck to the side ? I'd have it stuck to one of the DJs or have them sitting in a bath (if you could find a container of the right size and shape) and stick the probe in the bath.

Depends how anal you want to be about temperature.
 
Yes the temp probe I'd blu-tak'd to the side, but that's as far as the temp probe will reach at the moment. Eventually it will get extended, but I needed to get those 4 WOW's on the go, and it works fine for the moment. It's on my to-do list.

As for sticking in a bath, not so sure the probe is water proof.

But if you've an opportunity to make one out of your old fridge, then start planting that seed that your other half and family deserves a new fridge!
 
Has your fridge got a drain hole at the back? I managed to get all the wiring through mine. Bit fiddly but I got some string through it, taped the wires to it and pulled them inside.
 
Going from the stc, down the back to the drain holes even further so it wouldn't gain anything.
 
Love a post with pictures, nice work :thumb:

Figures on the door caught my eye. Beer 20-27 seems awful high? Although I'm newish to beer, I though 18-22 was the norm? In fact, I aim for 19.5 myself but am not using kit yeasts (Saf 05 & Notty) :wha:
 
You're right Bill, some of the temps may not be right.

It's just a baseline set of figures, from info picked up from flicking through various websites. Near as I can make out, owing to the way the fridge is setup it won't be right yet. As its a free floating temp probe, with a solid base on the heating chamber, the heat will rise onto the probe, (minor design flaw). So it needs to be 2-3 degrees up from what I want at the moment to get the right brewing atmosphere.

The next step is to get a digi thermometer along with an extended probe, so I can confirm actual brew temps and bring some accuracy to it all. Might sound odd, but it seems to work on the WOW's I'm brewing (currently 24.5C on the stc but bubbling happily away at one bubble every 2-3 seconds). As I fine tune my setup, I'll wipe the figures on the door and update. Once I've learned how it behaves in real time.
 
The stc probes are plastic and seem ok in liquid so far.

I mentioned in another thread I was doing some monitoring using one of those temper2 USB probes which was working fine for about 4 days and then became fixated with 20.13 degrees, seemed to latch on to it. I could take the probe out and it would show the temp dropping but when I put it back in the bath ( or another bath) it would quickly go back to 20.13. I suppose it is possible that two baths were exactly the same but you would have thought there would be at least .01 difference. It also didn't register a difference between the surface and the bottom.

Switched off the old laptop I had it connected to overnight to see if it just needed a rest :(

I'll try it again later.
 
The next step is to get a digi thermometer along with an extended probe, so I can confirm actual brew temps and bring some accuracy to it all. Might sound odd, but it seems to work on the WOW's I'm brewing (currently 24.5C on the stc but bubbling happily away at one bubble every 2-3 seconds). As I fine tune my setup, I'll wipe the figures on the door and update. Once I've learned how it behaves in real time.

Got my brew fridge finished today :-D

I decided to see what was happenning temp wise before putting a brew in there. Rigged up the STC controlling the fridge and the lightbulb heater. Decided to have the fan run constantly. Put a 10 litre FV full of water in and did some tests.

I used a USB extender cable so that I could use the temper2 probe to monitor both the temp in the FV and the air temp in the fridge.

With the stc probe in the FV the air temp bounced up and down by 5+ degrees in each direction (10 degrees in total) cycling between fridge on and heater on. The water temp varied by over a degree.

Moved the stc probe out and stuck it to the side like in your picture. The air temp only varied by around one degree and the water temp varied by less than 1 tenth of a degree. Only the heater light was activating, the fridge stayed off.

I was very surprised but when you think about it, that's how fridges work. They control the air temp and everything inside goes to that temperature.

I've got some nice graphs which I'll upload.
 
The below should be of interest to anyone with (or in the process of getting) a brew fridge.

Below are graphs from a temper2 USB temperature probe. It was set up to measure the temperature of water in a 10 litre bucket and the temperature within the fridge. They show how temperature varies in a brew fridge and the FV depending on whether you are controlling the heating/cooling from a probe in (or attached to) the FV or just sticking the probe to the side of the fridge.

Graph 1. Probe in the FV. Purple line is temperature within the fridge. Yellow line is temperature of the contents of the FV :-

graph1cropped-99.jpg


The fridge temperature swings up and down by 10 degrees. The FV by over a degree.

Graph 2. Probe on the wall of the fridge. Again purple is fridge temperature and yellow is contents of the FV :-

graph2cropped-100.jpg


Fridge temperature varies by around 1 degree with the FV varying by a fraction of a degree.

(There isn't a real temperature difference between the two probes by the way, I left them un-calibrated so that the two lines on each graph didn't obscure each other).

Probe stuck to the side wall of the fridge is clearly the best (and easiest) option.

I must be being dense - I can't understand why with probe in liquid the fridge temp seesaws up and down, but outside the liquid it doesn't? I would have expected the temp to stabilise within the limits set by the temp controller?
 
Yes, it seemed wrong to me at first so I looked it up. It's thermal lag/thermal mass.

It takes longer for the contents of the FV to warm up or cool down than the air around it. So with the probe in the fv by the time FV has reached the correct temperature the fridge is a lot hotter/colder and the contents continue to warm up or cool down. In my example to get the FV down to 16 the fridge has already hit around 13 and the cooler air will continue to cool the FV until it has to switch to heating.

You can see the peaks and troughs of the FV lagging behind those of the FV.

When the probe from the stc is not in the FV the stc is controlling the air temperature which warms up/cools down quickly. Because the FV takes longer to change temperature it only moves a fraction of a degree in that time.

My gut feeling was it would have been better to use the FV to control the temperature. One of those counter intuitive things.

There's probably a lot of maths involved :-?
 
I think it's along the lines of turning a speed boat around and turning an oil tanker around. If you control (measure) the air temp you can make quick changes like a speed boat whereas measuring a liquid temperature means by the time you've seen a change required it will take some time to bring that into affect, so in the meantime the temp carries on swinging that way. It then over corrects in the same way. Imagine a tank slapper on a bike, gentle adjustments is all that is really needed but panic causes late over corrections that result in a bigger issue.
 
to avoid overchilling/heating imho you want to place the temp probe close to where the change is being effected, and since thats via the air measuring the temp at the side of the fv behind an insulation patch will do just that.

any change effected will register relatively quickly, and if the mass of the beer normalises off target the input will be triggered again without any over application,

it may be slower to get to target with lots of small steps towards the goal but your much less likely to overshoot in either direction and way less likely to cycle between the 2 types of input.

:wha::electric:

If the probe is behind insulation then it will be more affected by the temp if the FV than the air temperature won't it ?

If you think about it you put cheese, butter and milk in your fridge and you know they are all going to be the temperature the fridge is set to. Why should and FV be any different :hmm:

(Just uses a good analogy).

Seriously folks just stick the probe somewhere in the fridge.
 
This seems to have gone the route of a science project.

So like Jennifer Aniston with her hair products, here's the science:

Here's the thing, not everyone seems to get: I don't want to directly measure the temp of an fv or demi John or wort. I'm looking to maintain a fairly constant ambient air temperature around the fv. Which works via the heating and cooling sections of the fridge, the STC maintains a 1 degree window of air temperature, at the present set temp I pick.

Now why do I not want to measure the fv? Because I'm not directly interested in that. I'm interested in maintaining a stable ambient air temperature around the fv. The air temp which is maintained fairly constant then becomes the temperature which my fv will attempt to match, via the magic of thermodynamics. So if my wort is cold, the relatively warm air will warm the wort until they match more or less the same temperature. Now if my wort is hot, the relatively cool air will cool the wort, until it matches the ambient air temperature.

Once the wort reaches the similar temperature of the ambient air, I'm relying on a different property of the wort. Specific heat capacity is the property by which a material will change its temperature with the application of a cooling or heating source. Let's take an example, place a glass of water and a piece of steel in a cold place at the same time, come back half an hour later, and feel them. The steel will feel colder, because it's specific heat capacity is lower, so it's more ready to change its temperature, with a given input of heat or cooling. Now my wort is mostly water which has an incredibly high specific heat capacity. So once the wort adjusts temperature in my fermenting fridge and matches the ambient air temperature which is held stable to within one degree Celsius, the high specific heat capacity means that the heater kicking in for a minute or two has little effect on the temperature of my wort, because it requires a huge amount of energy to get a temperature change in the wort, the same when the refrigeration section kicks in.

The result of this setup? A setup that allows for a very stable fermentation temperature in my wort.

Now let's consider what happens if I was to ignore the ambient air temperature and concentrate on the wort temperature. Let's start by considering the wort being read as too cool by my STC. Well on will come my heater and fan the surrounding air temperature will begin to rise, but it would need to rise significantly higher to get a temperature change in the wort. All that now warm air contained in my insulated fridge will stay there, and when the wort finally reaches temperature and the STC shuts off the heating, the air will be considerably warmer than had I just measured the ambient air temperature. This warm air will also still continue to heat my wort, added to by my heating element that will by now be toasty. The result is two fold, my wort will over swing on its temperature meaning it goes higher than I'd like outside of my 1 degree temperature range, the other result is I've used more energy to achieve this (which costs me money). Then the wort will keep warming now with the abundance of warm air, until my STC decides that's too warm, so on comes the fridge. So now it starts chilling, the air gets lower than we need (costing more money again) and eventually the wort catches up. The STC turns off the refrigeration, but the temperature keeps falling because of the abundance of cold air in the fridge. Then the wort gets too cold and we go back to the start of this paragraph.

The result is you're paying more money to get a wort that is less stable in its fermentation temperature, because now its oscillating in its temperature, always trying to catch up.

Hopefully this is a bit more enlightening, and the principals I've explained are essentially topics covered briefly in senior school physics, so there's plenty available via the magic of Google if you'd like to know a bit more. The understanding of a little bit of science will not only get you a more stable brewing temperature, but will save you money.

In terms of where to stick the probe, there's no ideal place, you want it not directly in a position where it will detect the heat from your element, or cold from the refrigeration,and away from the direct airflow of your fan. Find that nice dead spot where it's just picking up the background ambient temperature, and not being overly affected by the working parts of the fermentation fridge. A lot of this will be dictated by the design of your own setup.
 
I'm fairly sure me and Spud are in agreement :thumb:. I think the thing that gave me pause for thought was the bit Fil said about having the probe behind insulation attached to the FV. In my mind that would mean it would be affected more by the FV temp than air temp.

I like science projects, by the way, that's exactly what a brew fridge is (you could make the same argument for brewing itself).

I constructed my experiment as there was such a variety of advice on various forums as to where to place the probe for the STC - in the FV, attached to the FV, in a small jar of water and in the fridge. Didn't want to go to the trouble of making a brew fridge for it to either inefficient or (worse) ineffective.

The thing that has really amazed me is that the the way it works means that a device that can control temperature + or - .3 degrees actually keeps the FV within a range of around ten times less variation.

My Missus reckons I used to fancy Jennifer Aniston :whistle:
 
fwiw my experimentation was way less scientific, and relied on me sat a few evenings monitoring what happened out of the corner of my eye, the atc800+ i use clicks and shows a bright cooling or heating light ;)

after reading thru spuds explaination a few times i am now doubting my original thoughts, memory of school physics lessons however other than Amanda Smiths profile in the summer sun (PHOAARR!!!) have dimmed into obscurity..

ps my X was convinced i fancied everyone.. and she wasnt far off..

the one thing i am happy with tho is my fridge dosent cycle or chase itself as is.. tho an experiment similar to twostages may be in order to determine what the fridge temp is doing compared to the beer now strikes me as a good idea.. ..

i luv this place....
 

Latest posts

Back
Top