I just wanted to share my hop stopper filter project with you all in case it helps anyone else.
Its not turned out perfect but itâs a good working prototype I hope, as Iâve yet to use it.
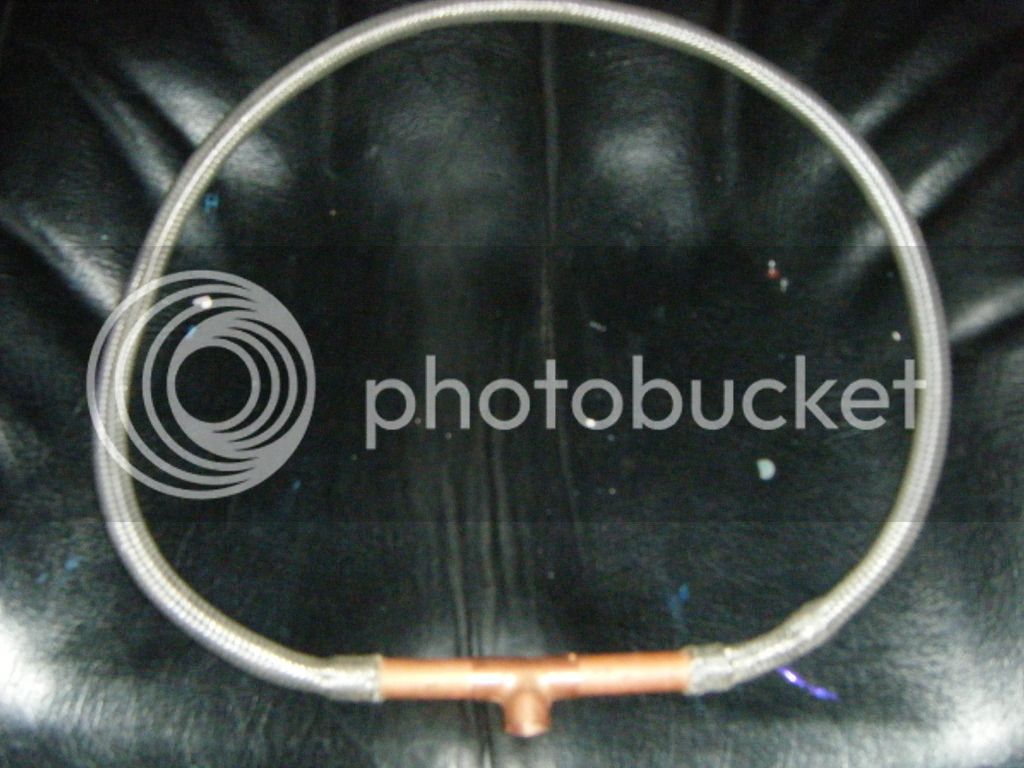
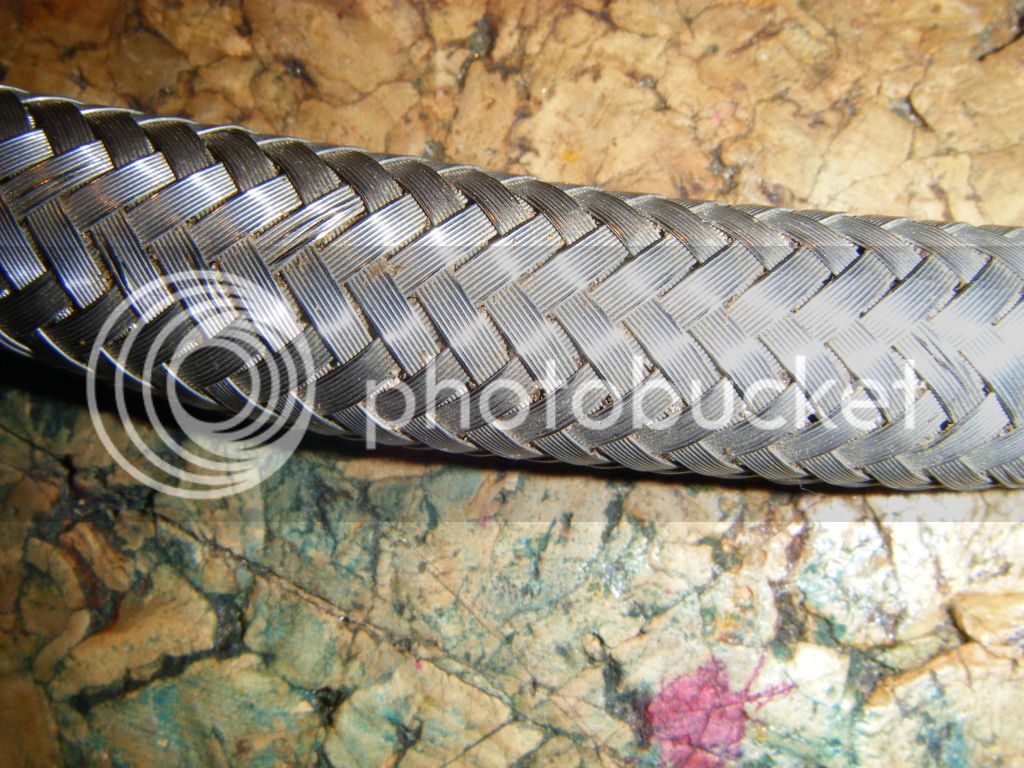
After getting a plate chiller I wanted to try and make sure it wouldnât block when chilling the wort. I am using a stainless steel braded hose just now which has worked well with my immersion coil chiller but some of the holes in that are at least 1mm now so didnât want to take the risk. I would like to go from 5 gallon to 10 gallon batches sometime which means more wort going through the plate chiller so I thought it safer to upgrade the boiler sooner rather than later.
The idea was to create a frame and cover it with a fine mesh. I wanted to make the surface area of the mesh as large as possible to try and reduce the chances of it clogging up. I bought 2 x A4 sheets of 40 gauge stainless steel mesh which has a hole size on 0.4mm.
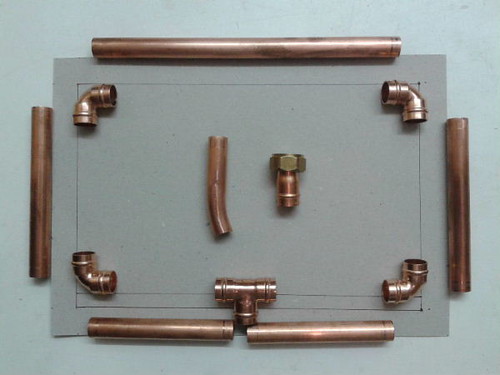
To check what size of frame I could use made out of 15mm copper pipe I drew a 2cm margin around an A4 sized piece of card. The 2cm margin would be the amount of mesh I was going to fold over to make the join. After checking this a 2 cm wide section around the copper tee fitting looked a little short so I change that side to a 3 cm margin. This was to allow more room to clamp the mesh to the central pipe that leads to the boilers tap. If I was doing this again I would have made this margin 4cm instead of 3 cm which would have given me more space to work with along that side.
Using the card drawing with the copper fittings laid on it I measured the length of each section between each of the fitting and added 3cm to each pipe as this was to allow the pipe to be pushed into each fitting for soldering. I used an adjustable pipe cutter from Screwfix as itâs a cheap tool and well worth the money as it gives nice clean straight cuts. I used a pipe bender to bend a small length of pipe which will go between the tee fitting on the frame to the 15mm to ½ inch screw tap fitting which screwing on the back of the boilers tap.
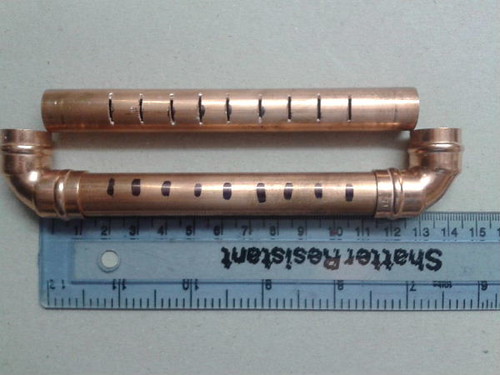
With all sides cut I roughly measured and marked lines 1cm apart a long the pipe, excluding the 15mm from each pipe end as this would be going inside the pipe fittings. I clamped the pipe in a vice a used a hack saw to cut down into the pipe a few millimetres on each marking, I didnât want to cut too deeply as this will raise the lowest point in the boiler and potentially leave more wort behind in the boiler when draining it. This leaves copper swarf hanging down inside the pipe so a rolled up piece of steel wool pushed up and down the inside of the pipe using a length of rod soon shifted most of it.
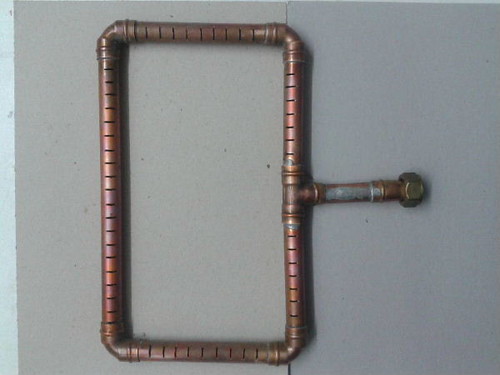
With all pipes cut I was ready to solder it together. I used copper solder ring fittings which basically contains the solder in it already and it just needs a blow torch to melt it. After cleaning the pipe ends and inside each fitting with steel wool I coated the ends with soldering flux before fitted them together. After using the blow torch and an old concrete paving slab as a heatproof work surface each fitting was quickly fixed in place. I soldered all the elbows but left the tee fitting so I could check the best angle to allow the frame to sit 5 to 10 mmâs of the bottom of the boiler. With the bent section of pipe (now trimmed to the correct length after a trial fitting) and the tap connector in the right place I finished soldering them. Its not 100% square but the wort wonât know that.
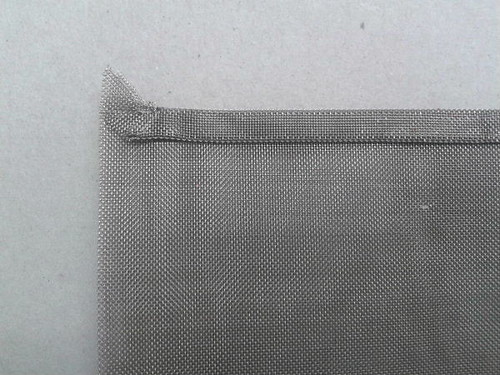
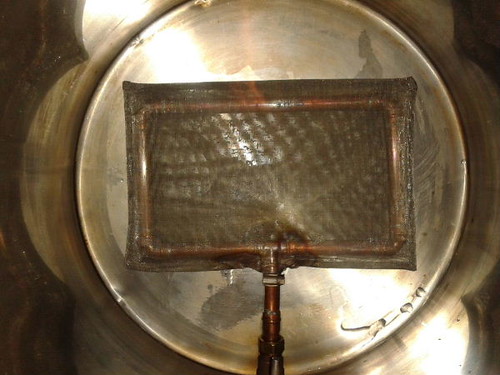
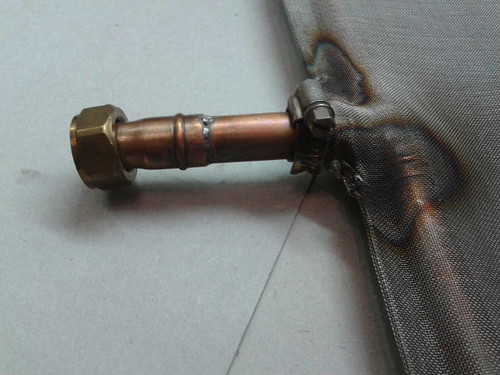
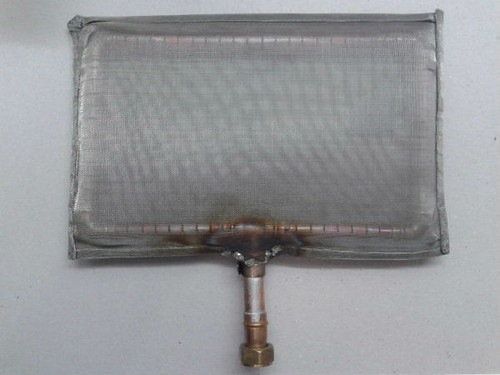
With the pipe work frame made I started on the mesh. I used a ruler to start off the first fold in the mesh and used the jaws of a vice to help crimp them together tightly which really helped give it a straight edge. I originally thought it might be good to cut a diagonal line into each corner to help when trying to fold 2 sides over where they meet but it turned out that its was not necessary as the vice was able to give a good neat edge on each fold. I found it tricky when trying to fit the mesh around the pipe where it was going to be clamped to the centre pipe. I ended up making 2 cuts, one each side of the centre pipe, and this gave me a little room to clamp the hose clamp round it. Doing this made the mesh a little uneven at this point so, to help seal it and add strength, I applied a little solder around the edges of the mesh here in case it opened during a boil. It should be OK but just wanted to make sure.
And that its. I have boiled it up twice to clean out the flux and plan to run it thought the dishwasher before using on my next brew, I will post up a note on how I got on with it.
Approximate cost
£12 for pipe and fittings (with extra parts left over)
£12 for the mesh.
Total £24
Shopping list
All the copper 15mm pipe, solder ring fitting and flux was from Screwfix
The 40 gauge A4 stainless steel mesh was from http://www.themeshcompany.com.
The stainless steel hose clamp from an eBay seller.
Tools
I used a pipe cutter, ruler, marker pen, hack saw, bench vice, pliers, screwdriver and wire wool.
Its not turned out perfect but itâs a good working prototype I hope, as Iâve yet to use it.
After getting a plate chiller I wanted to try and make sure it wouldnât block when chilling the wort. I am using a stainless steel braded hose just now which has worked well with my immersion coil chiller but some of the holes in that are at least 1mm now so didnât want to take the risk. I would like to go from 5 gallon to 10 gallon batches sometime which means more wort going through the plate chiller so I thought it safer to upgrade the boiler sooner rather than later.
The idea was to create a frame and cover it with a fine mesh. I wanted to make the surface area of the mesh as large as possible to try and reduce the chances of it clogging up. I bought 2 x A4 sheets of 40 gauge stainless steel mesh which has a hole size on 0.4mm.
To check what size of frame I could use made out of 15mm copper pipe I drew a 2cm margin around an A4 sized piece of card. The 2cm margin would be the amount of mesh I was going to fold over to make the join. After checking this a 2 cm wide section around the copper tee fitting looked a little short so I change that side to a 3 cm margin. This was to allow more room to clamp the mesh to the central pipe that leads to the boilers tap. If I was doing this again I would have made this margin 4cm instead of 3 cm which would have given me more space to work with along that side.
Using the card drawing with the copper fittings laid on it I measured the length of each section between each of the fitting and added 3cm to each pipe as this was to allow the pipe to be pushed into each fitting for soldering. I used an adjustable pipe cutter from Screwfix as itâs a cheap tool and well worth the money as it gives nice clean straight cuts. I used a pipe bender to bend a small length of pipe which will go between the tee fitting on the frame to the 15mm to ½ inch screw tap fitting which screwing on the back of the boilers tap.
With all sides cut I roughly measured and marked lines 1cm apart a long the pipe, excluding the 15mm from each pipe end as this would be going inside the pipe fittings. I clamped the pipe in a vice a used a hack saw to cut down into the pipe a few millimetres on each marking, I didnât want to cut too deeply as this will raise the lowest point in the boiler and potentially leave more wort behind in the boiler when draining it. This leaves copper swarf hanging down inside the pipe so a rolled up piece of steel wool pushed up and down the inside of the pipe using a length of rod soon shifted most of it.
With all pipes cut I was ready to solder it together. I used copper solder ring fittings which basically contains the solder in it already and it just needs a blow torch to melt it. After cleaning the pipe ends and inside each fitting with steel wool I coated the ends with soldering flux before fitted them together. After using the blow torch and an old concrete paving slab as a heatproof work surface each fitting was quickly fixed in place. I soldered all the elbows but left the tee fitting so I could check the best angle to allow the frame to sit 5 to 10 mmâs of the bottom of the boiler. With the bent section of pipe (now trimmed to the correct length after a trial fitting) and the tap connector in the right place I finished soldering them. Its not 100% square but the wort wonât know that.
With the pipe work frame made I started on the mesh. I used a ruler to start off the first fold in the mesh and used the jaws of a vice to help crimp them together tightly which really helped give it a straight edge. I originally thought it might be good to cut a diagonal line into each corner to help when trying to fold 2 sides over where they meet but it turned out that its was not necessary as the vice was able to give a good neat edge on each fold. I found it tricky when trying to fit the mesh around the pipe where it was going to be clamped to the centre pipe. I ended up making 2 cuts, one each side of the centre pipe, and this gave me a little room to clamp the hose clamp round it. Doing this made the mesh a little uneven at this point so, to help seal it and add strength, I applied a little solder around the edges of the mesh here in case it opened during a boil. It should be OK but just wanted to make sure.
And that its. I have boiled it up twice to clean out the flux and plan to run it thought the dishwasher before using on my next brew, I will post up a note on how I got on with it.
Approximate cost
£12 for pipe and fittings (with extra parts left over)
£12 for the mesh.
Total £24
Shopping list
All the copper 15mm pipe, solder ring fitting and flux was from Screwfix
The 40 gauge A4 stainless steel mesh was from http://www.themeshcompany.com.
The stainless steel hose clamp from an eBay seller.
Tools
I used a pipe cutter, ruler, marker pen, hack saw, bench vice, pliers, screwdriver and wire wool.