


Intelekt
Regular.
This is a "How I did it" guide more than a "How to".
Many thanks to Vossy for his how to on converting a thermo pot to a bottom draining mash tun, which inspired me to do my own similar but slightly modified version.
Parts list.
Note that Tappatalk users may have to use web view to view these links, annoying or what!
1 x Brass Bulkhead fitting.
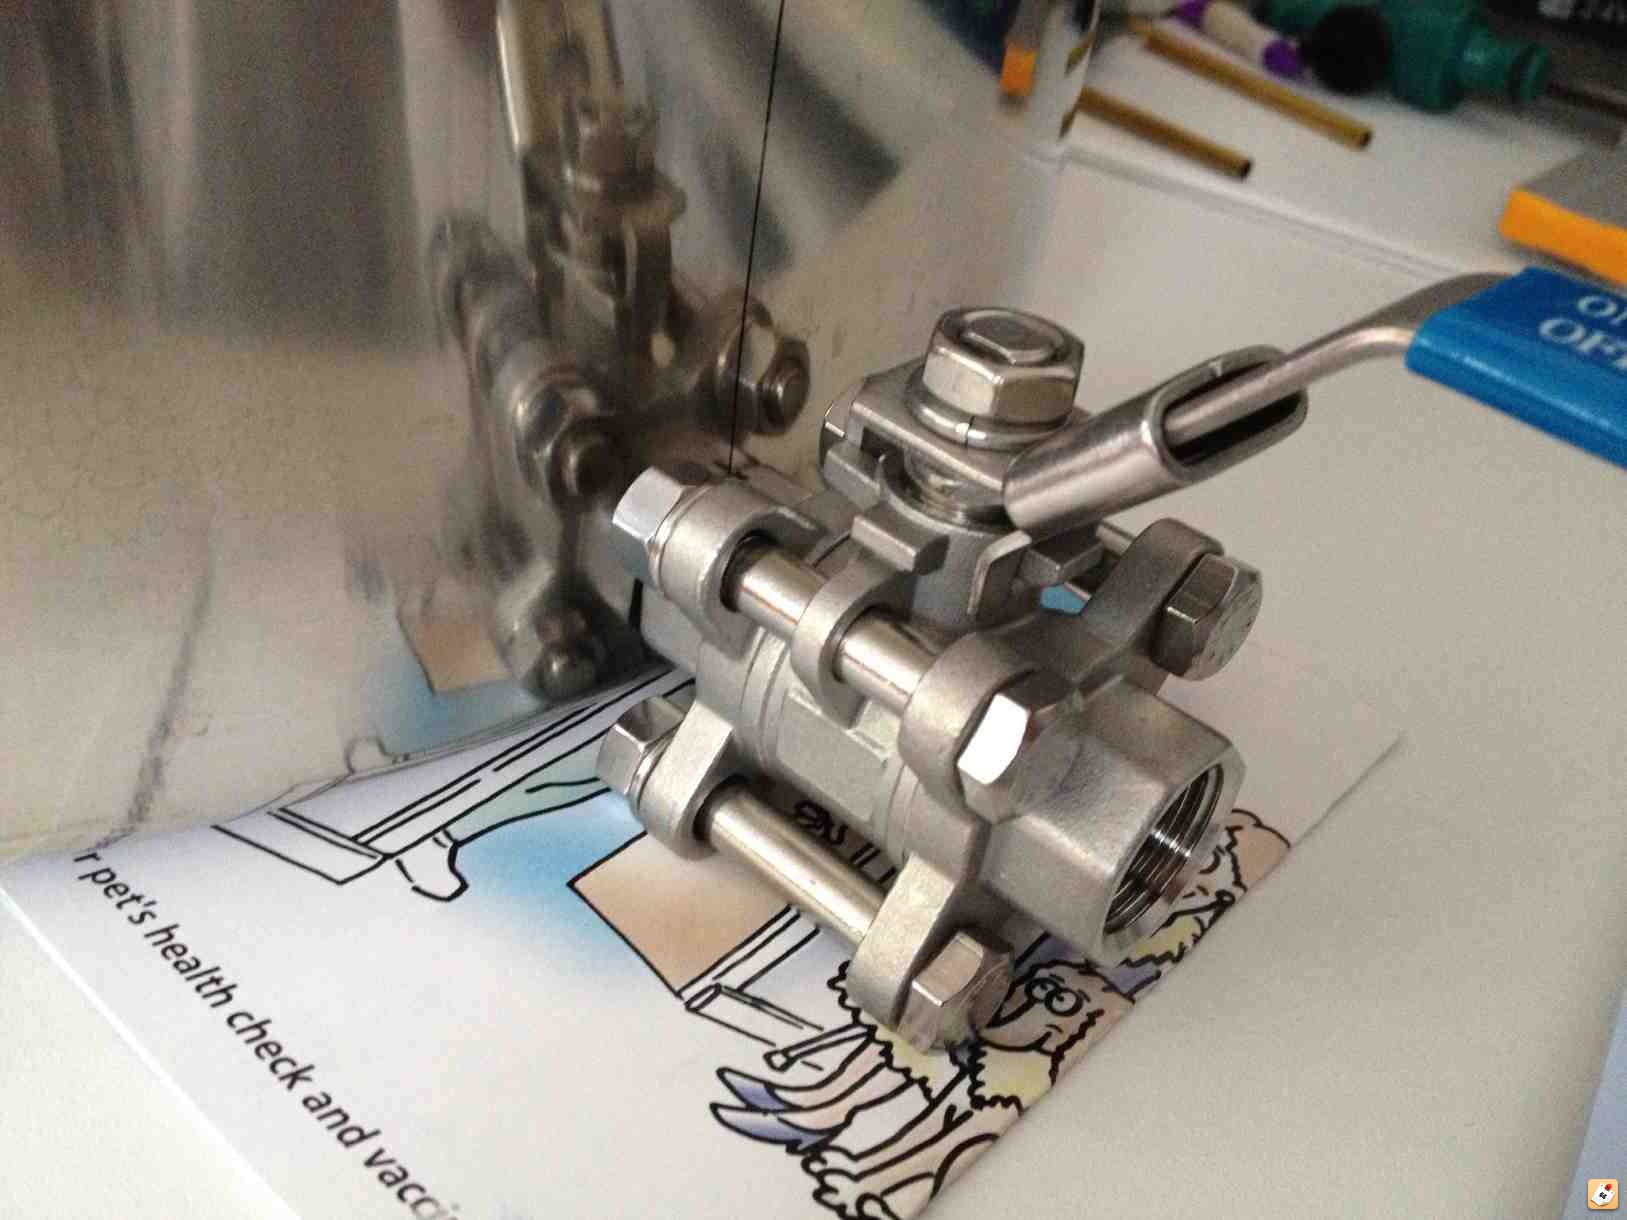
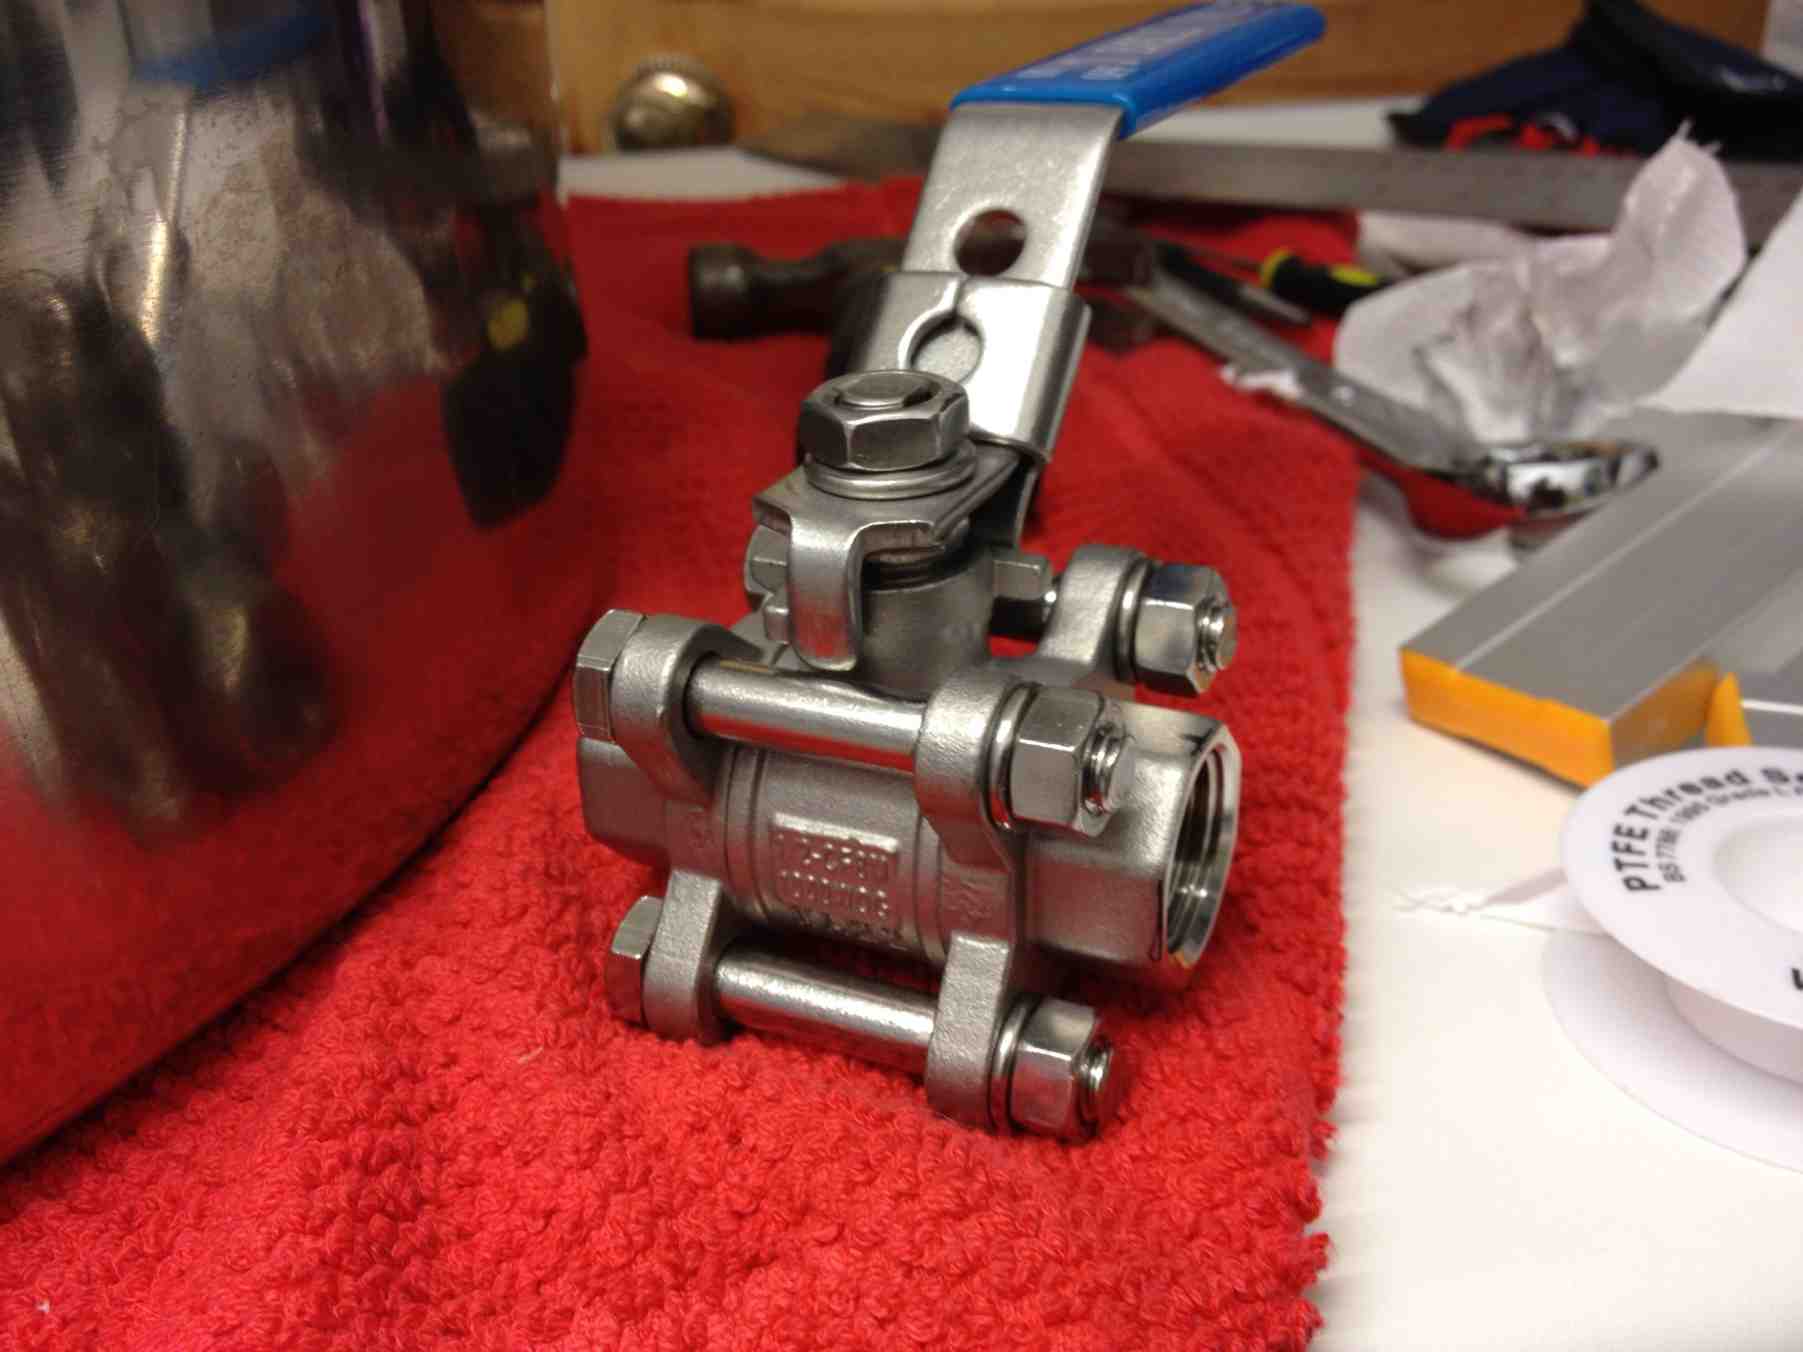
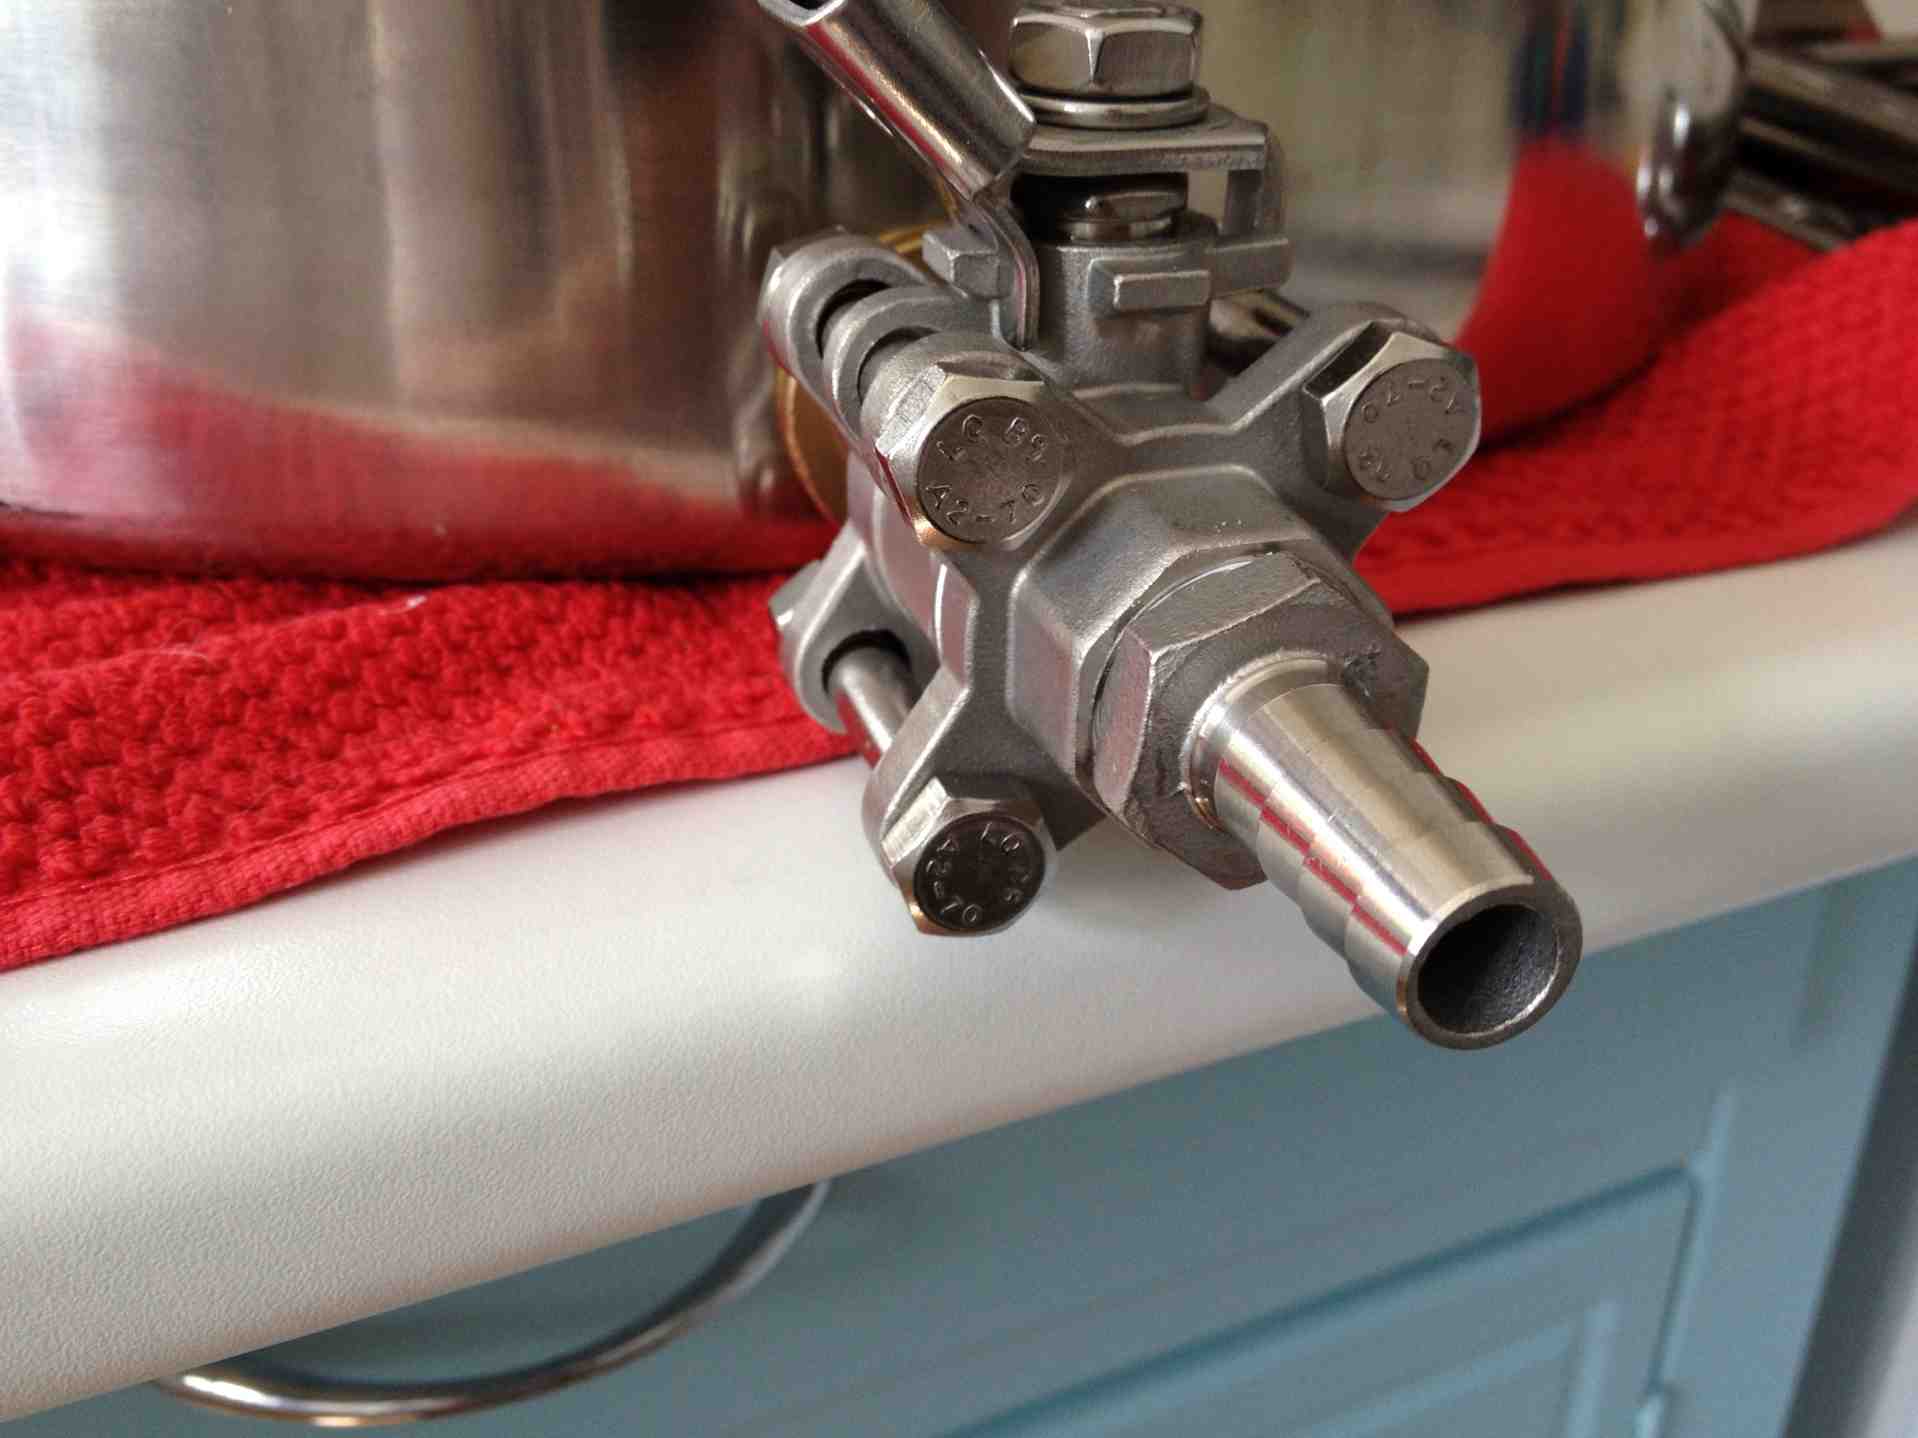
1 x Stainless Steel 3 piece lever tap (valve).
Bought as a kit or seperate from here:
http://www.themaltmiller.co.uk/index.ph ... ductId=194
1 x Sight Glass Kit:
http://www.the-home-brew-shop.co.uk/aca ... s-Kit.html
1 x Thermometer with Thermowell:
http://cgi.ebay.co.uk/ws/eBayISAPI.dll? ... 1197864329
1 x Stainless Steel hose connector:
http://www.themaltmiller.co.uk/index.ph ... ductId=341
1x Q.max 21mm Punch Cutter:
http://www.ebay.co.uk/itm/400364350325? ... 1439.l2649
1 x 8mm Hex Key (Allen Key) for Q.max
1x Step Drill Bit.
Various Spanners to fit.
Centre Punch.
Hammer.
PTFE tape.
Various Files.
Pipe Cutter.
Oil (drill bit lubricant).
I repeated this same process on my 35 litre HLT.
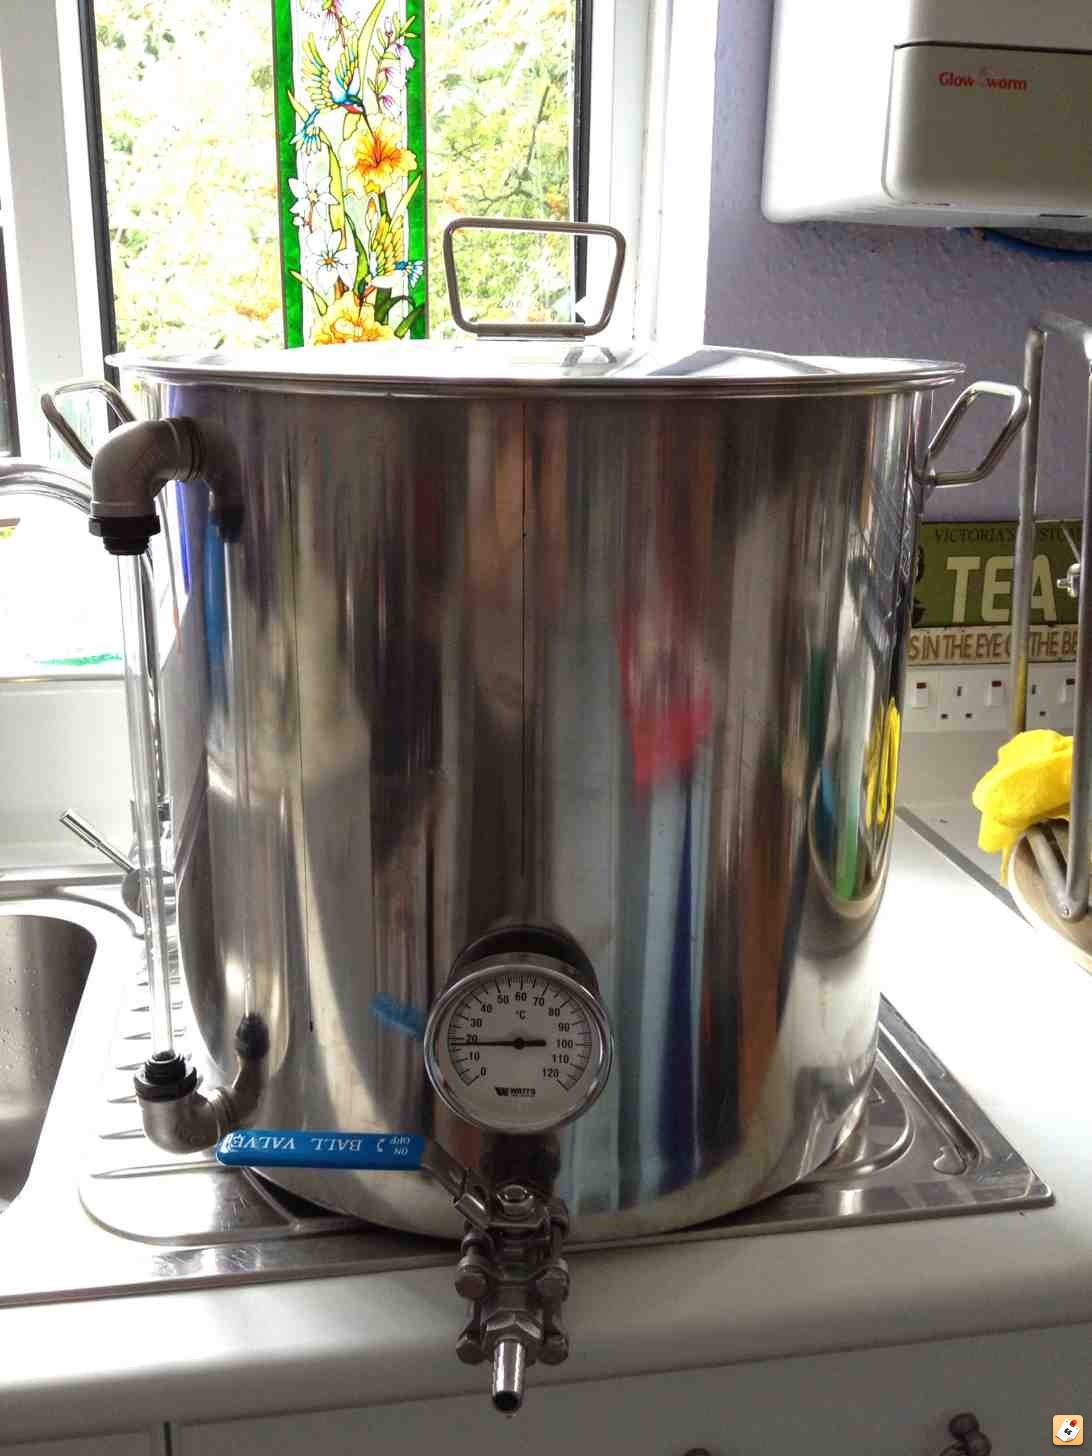
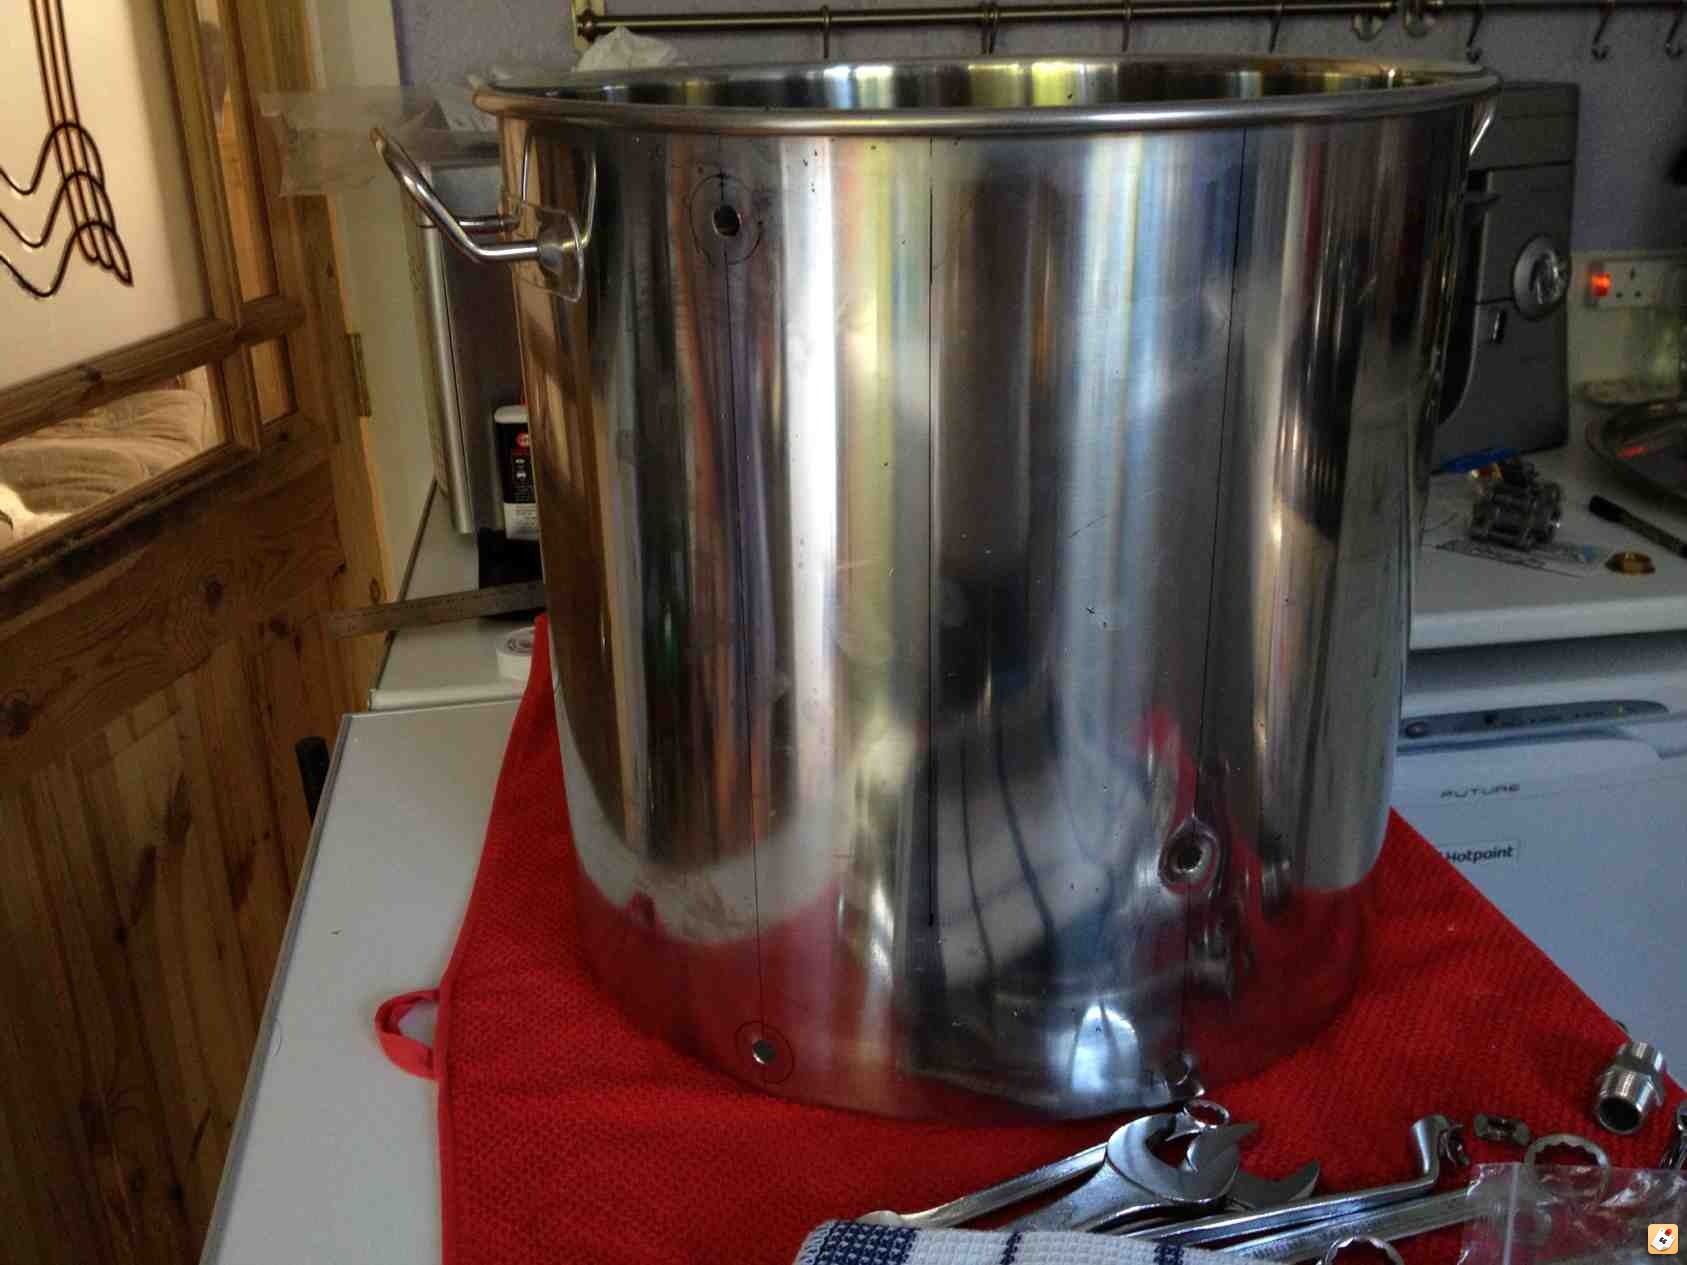
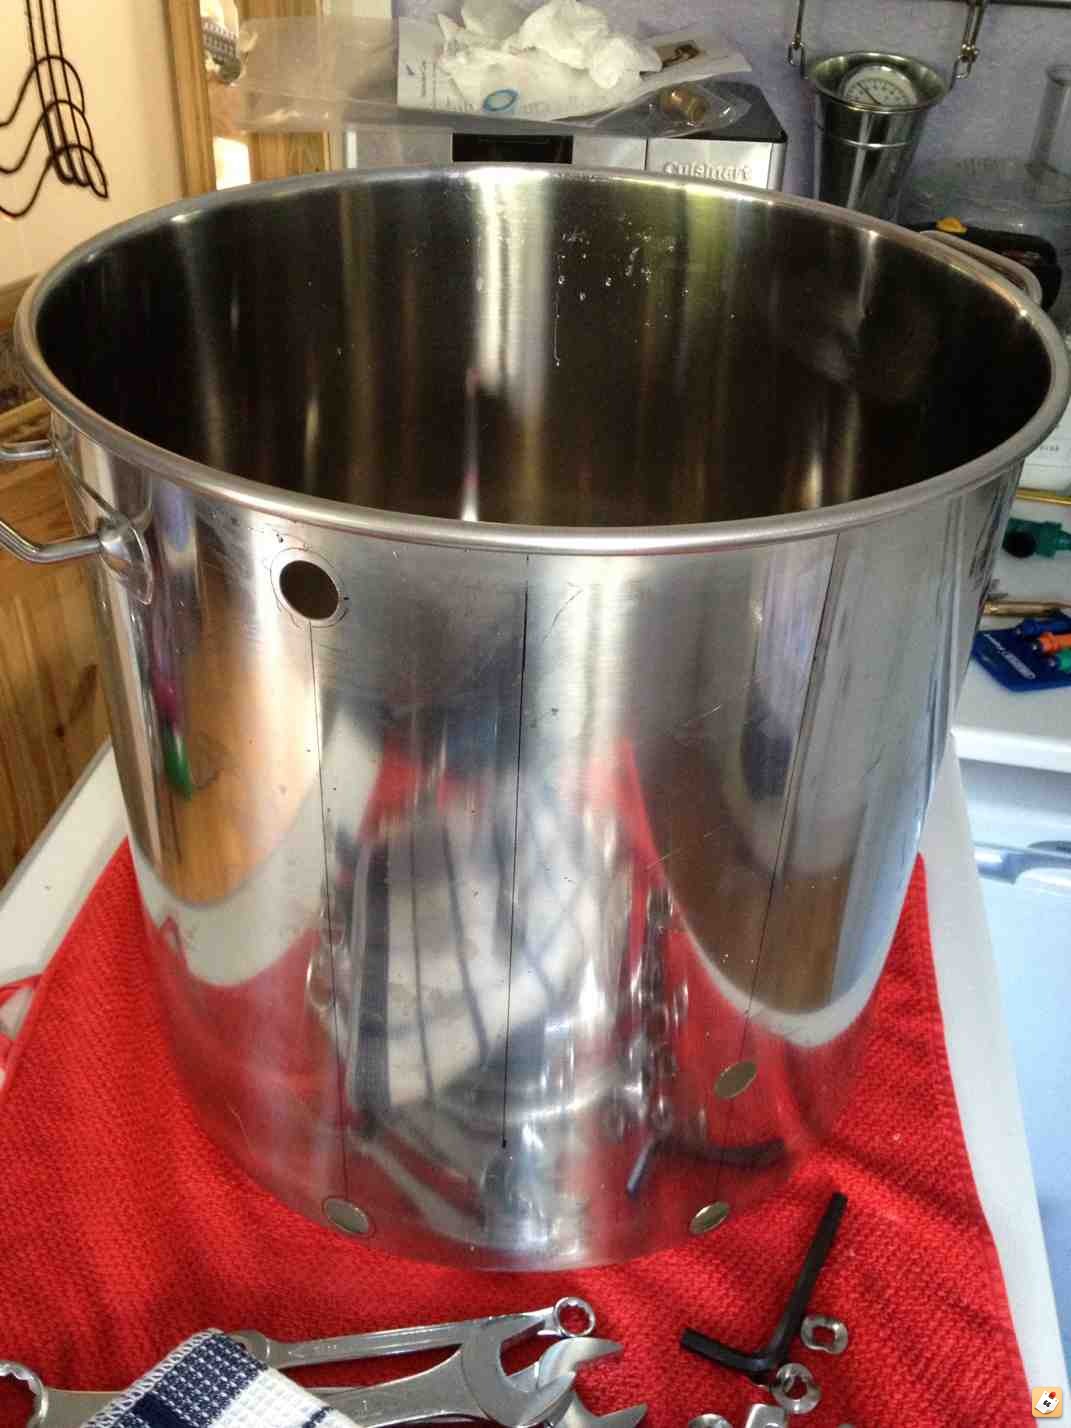
First off is my boiler:
This is a 50 litre Boiler pot.
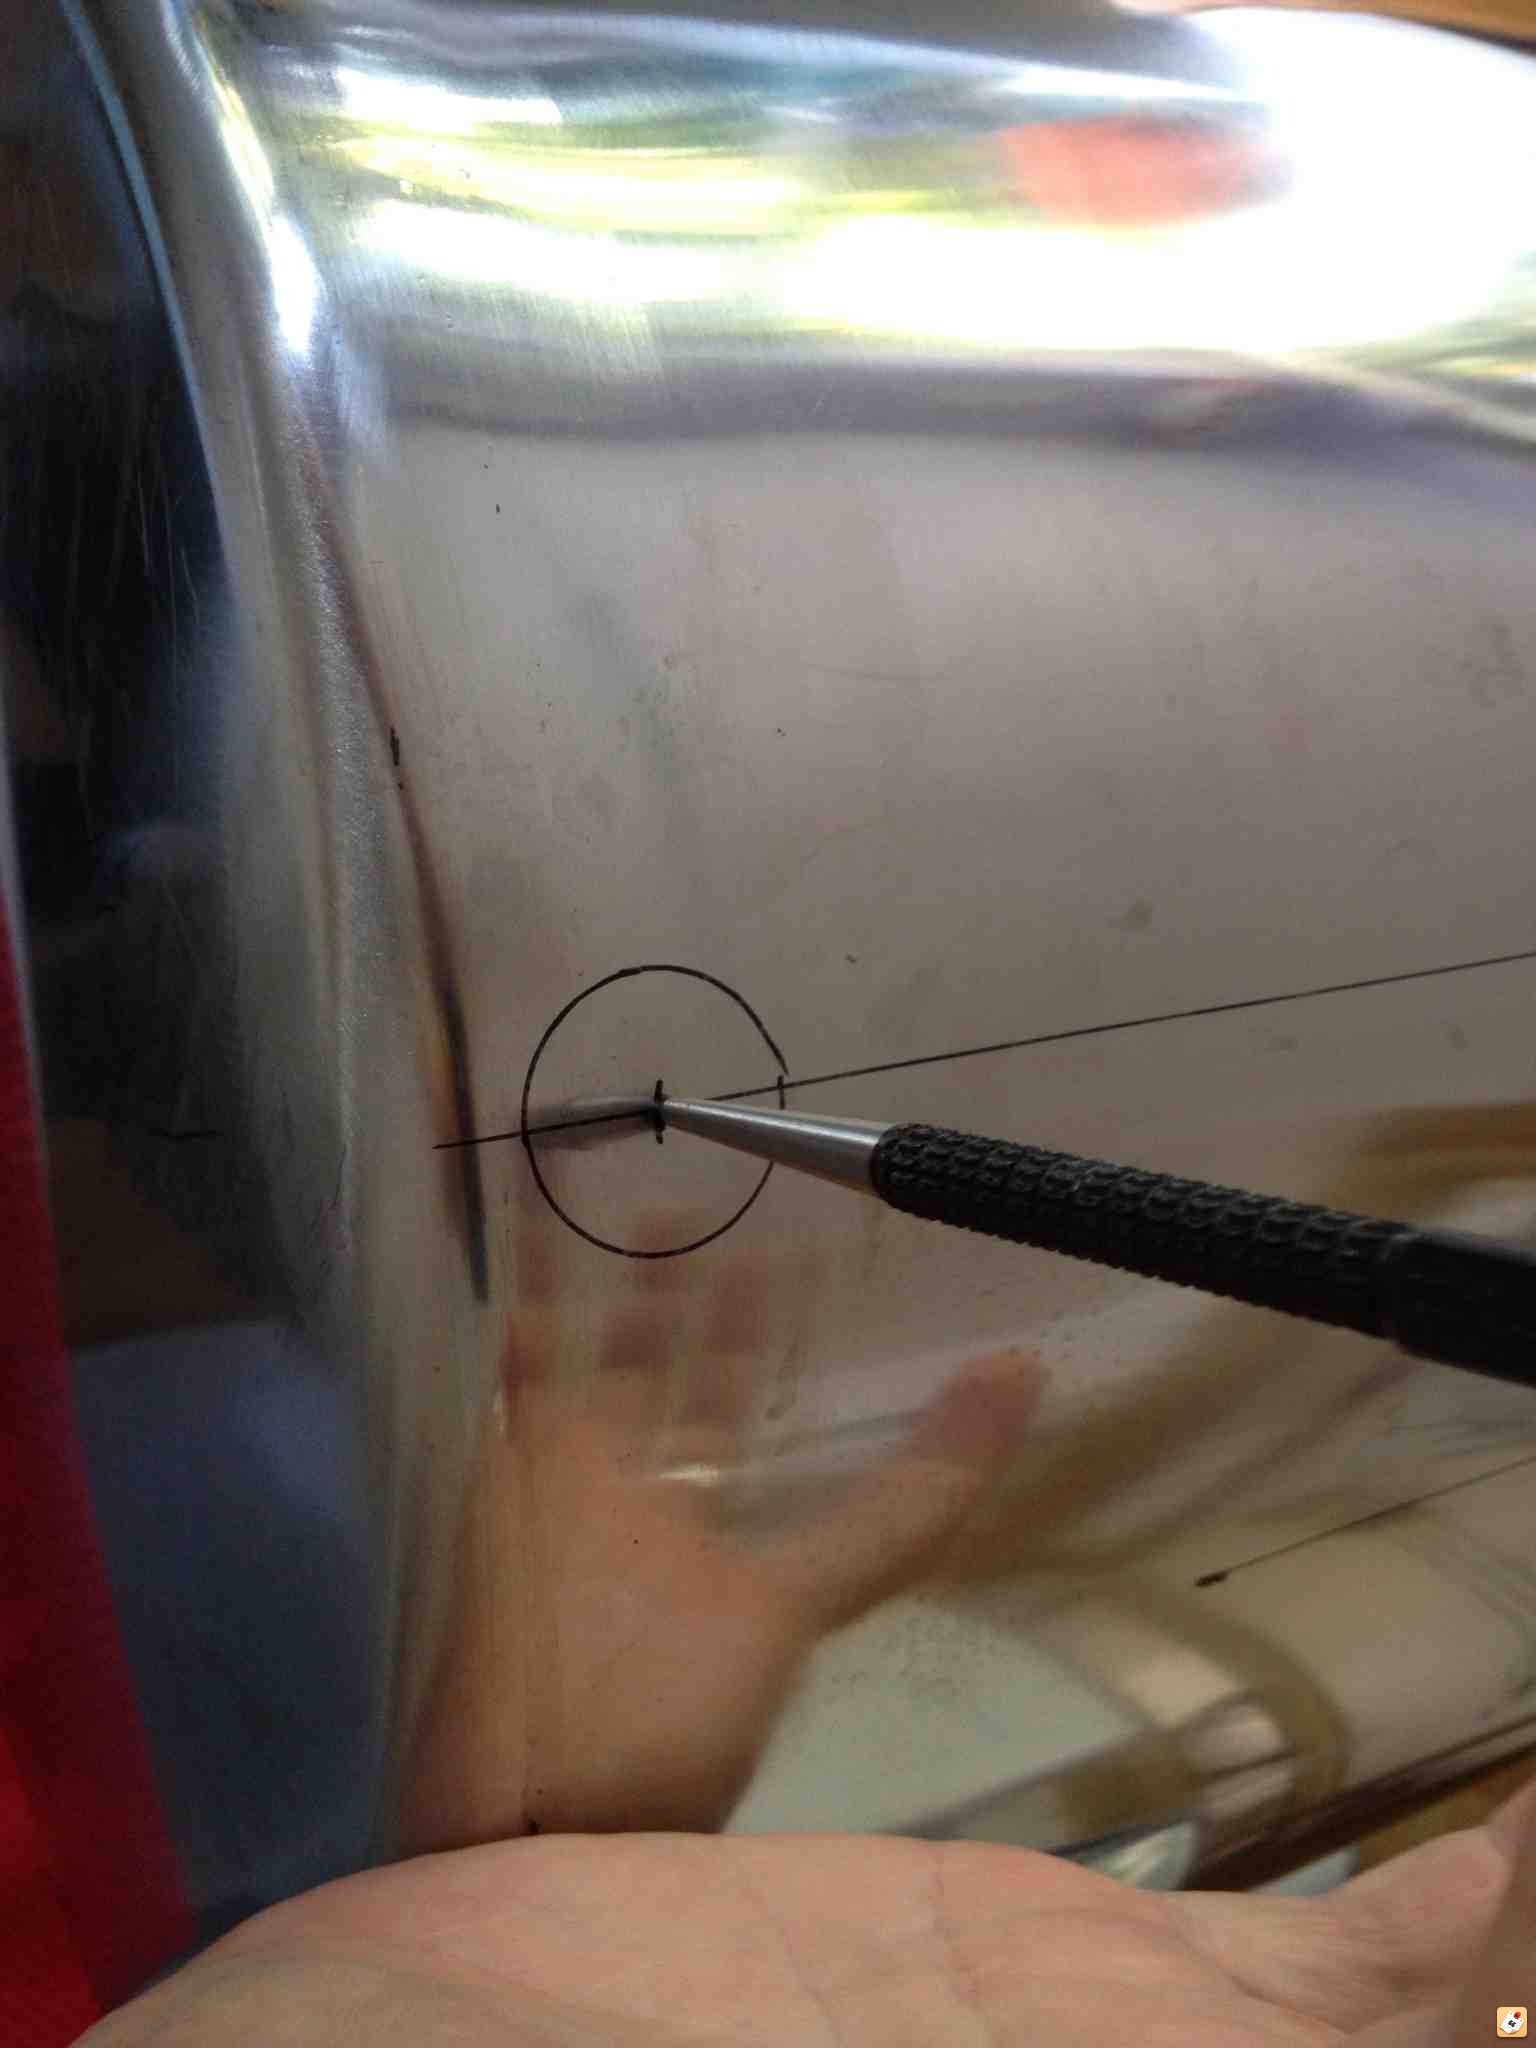
The first thing is to mark all of the holes to be drilled or cut.
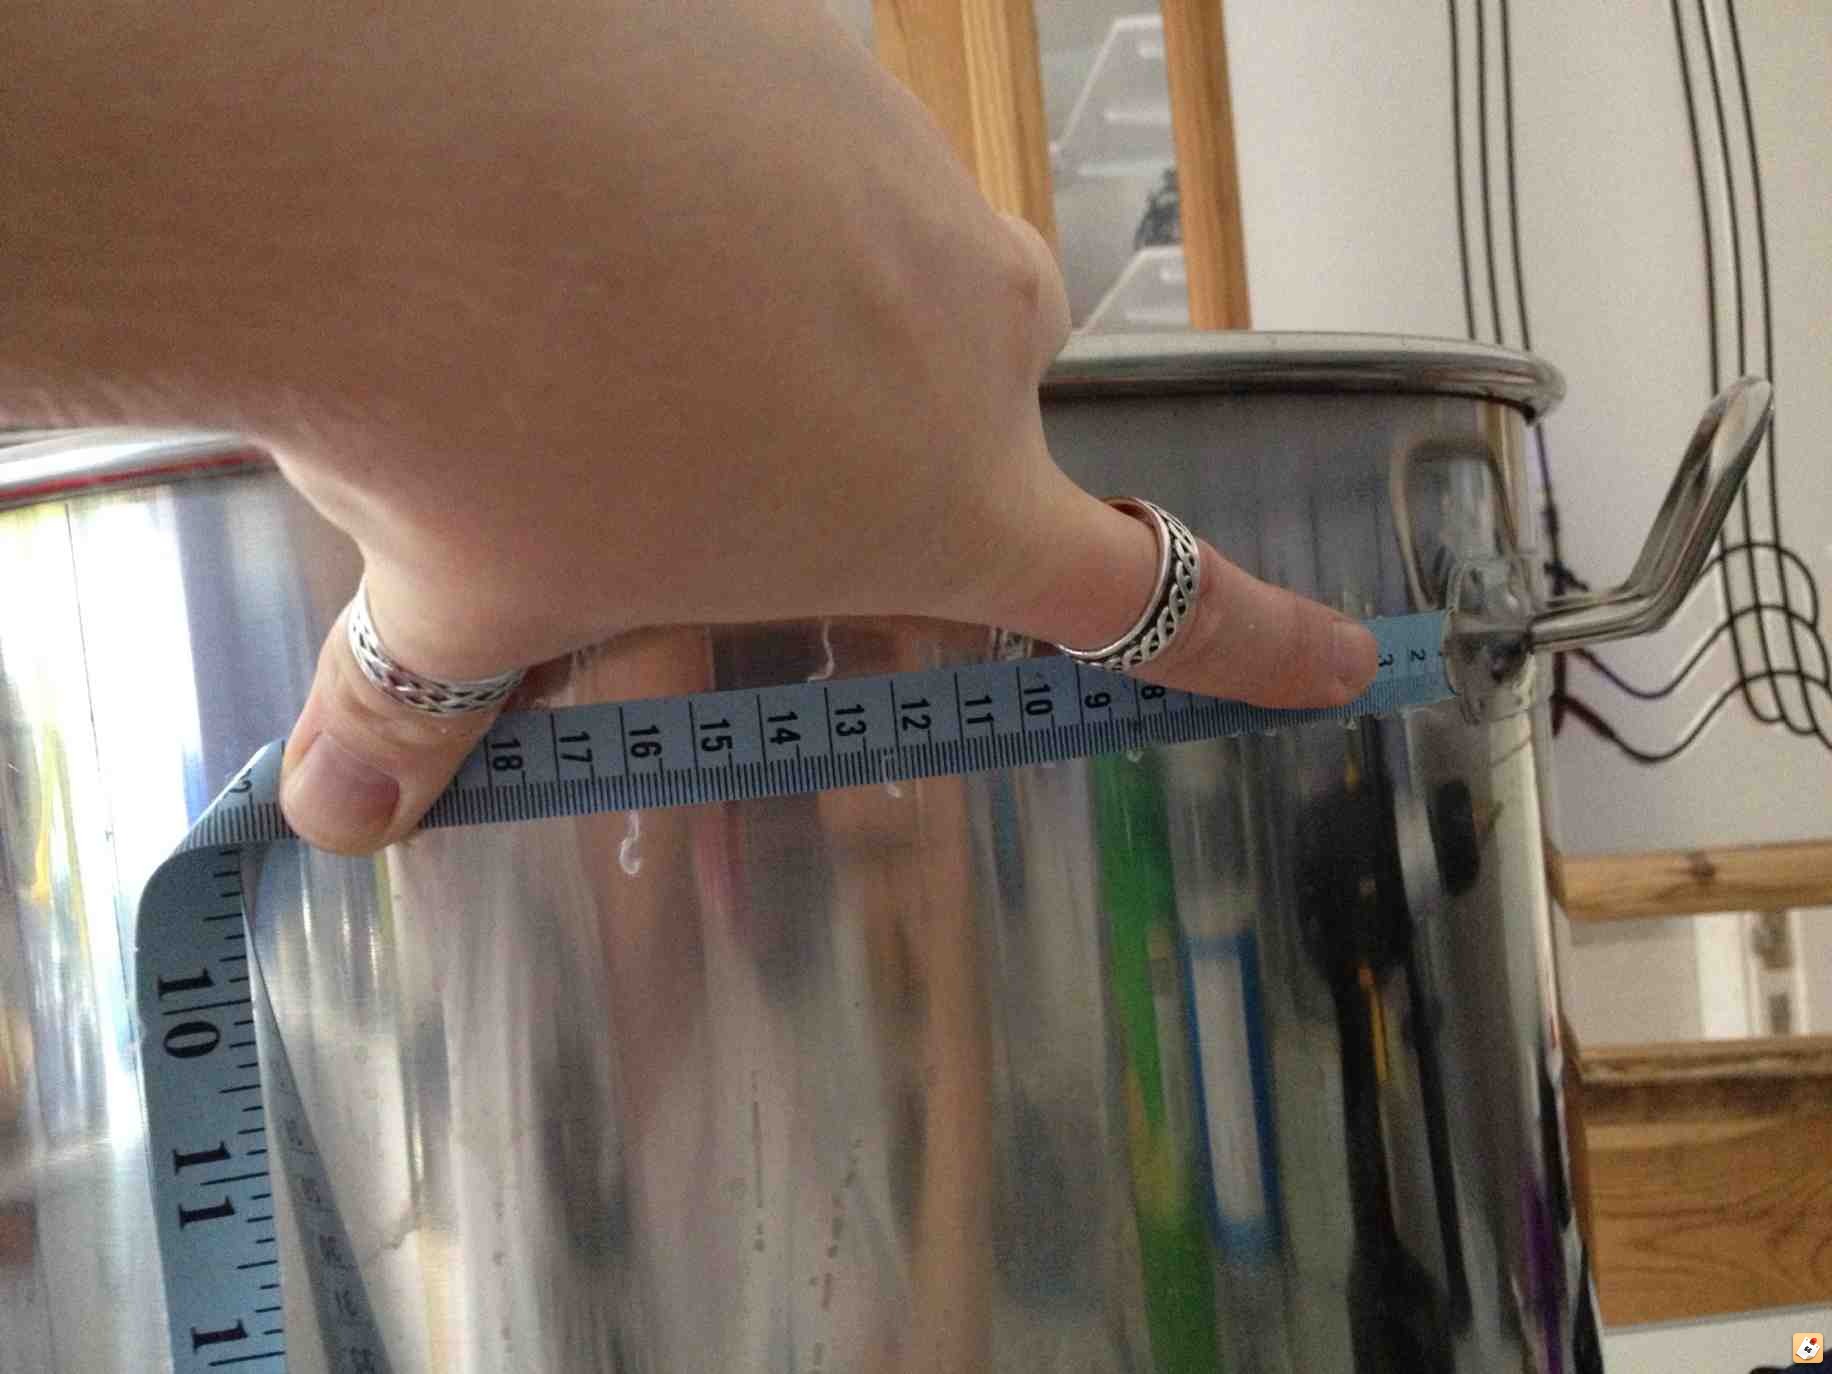
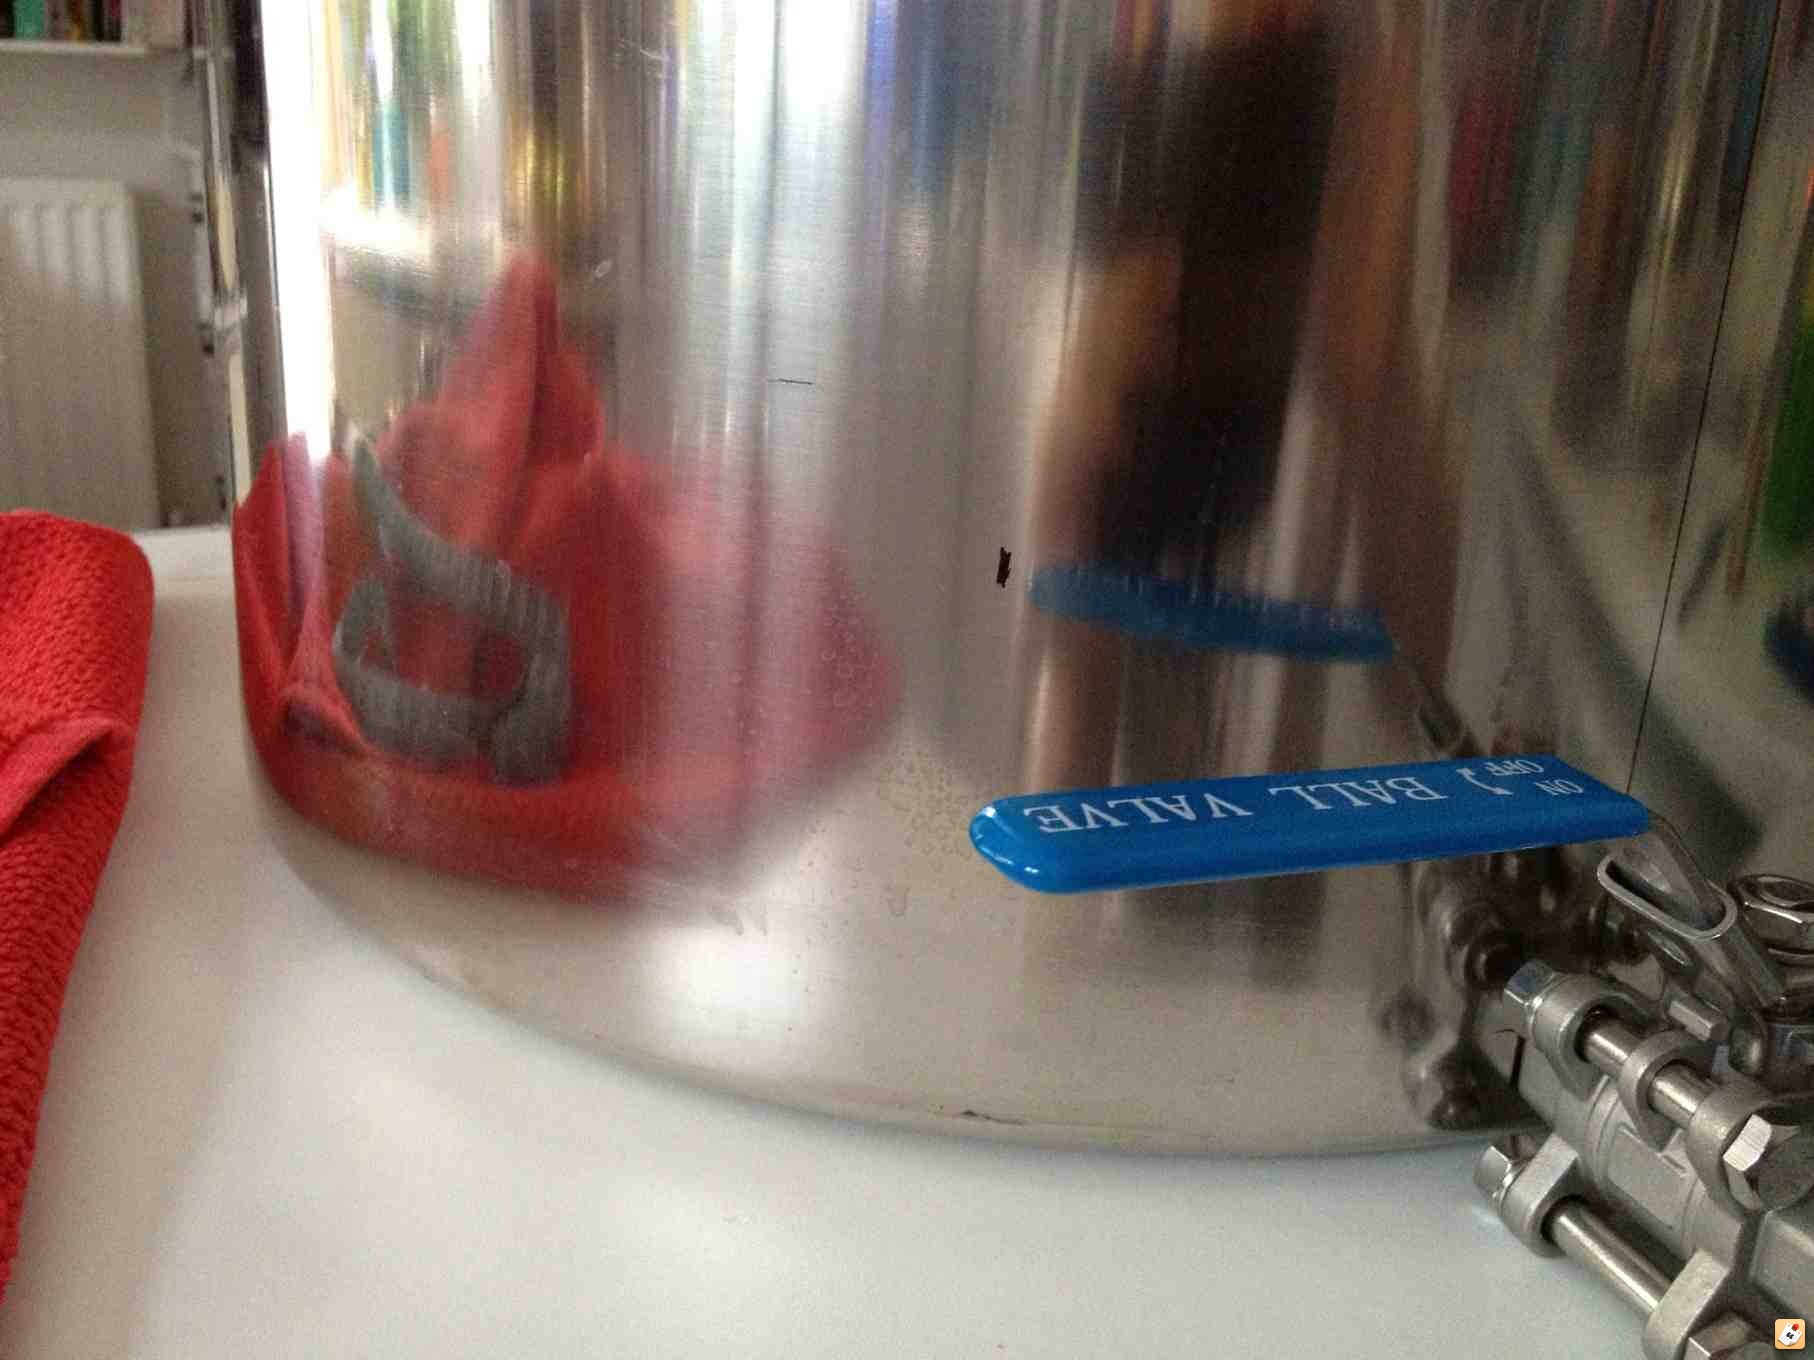
1. I measured between the handles and marked the exact middle.
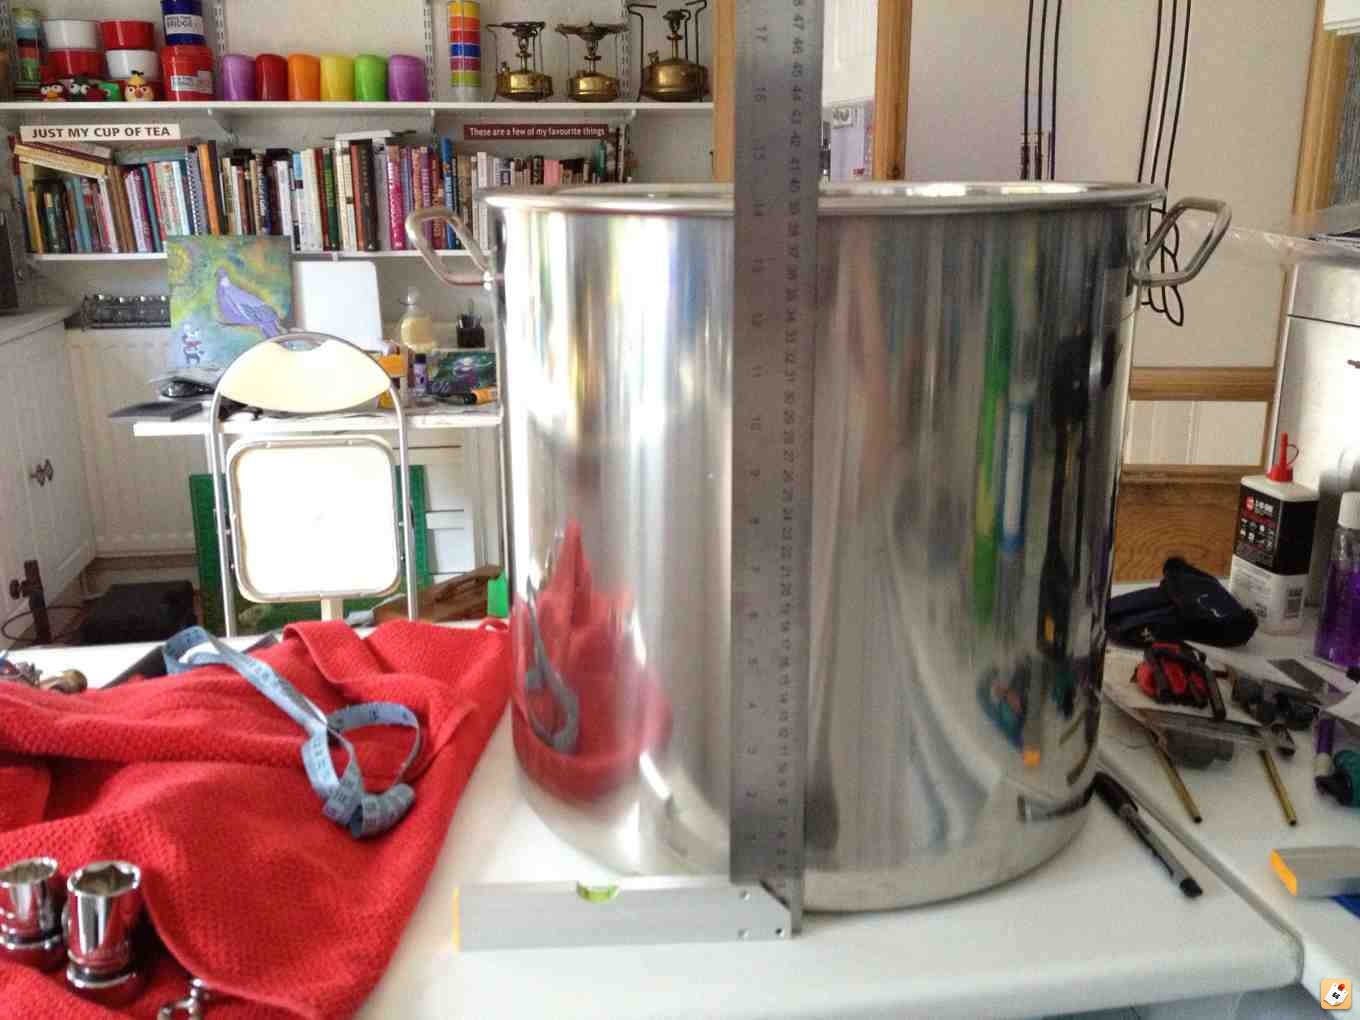
2. I then transferred this mark down to the bottom with a set square.
3. With the pot level on a flat surface I placed the tap onto a piece of card to raise it up a couple of millimetres from the bottom, so the weight of the full pot doesn't press on it.
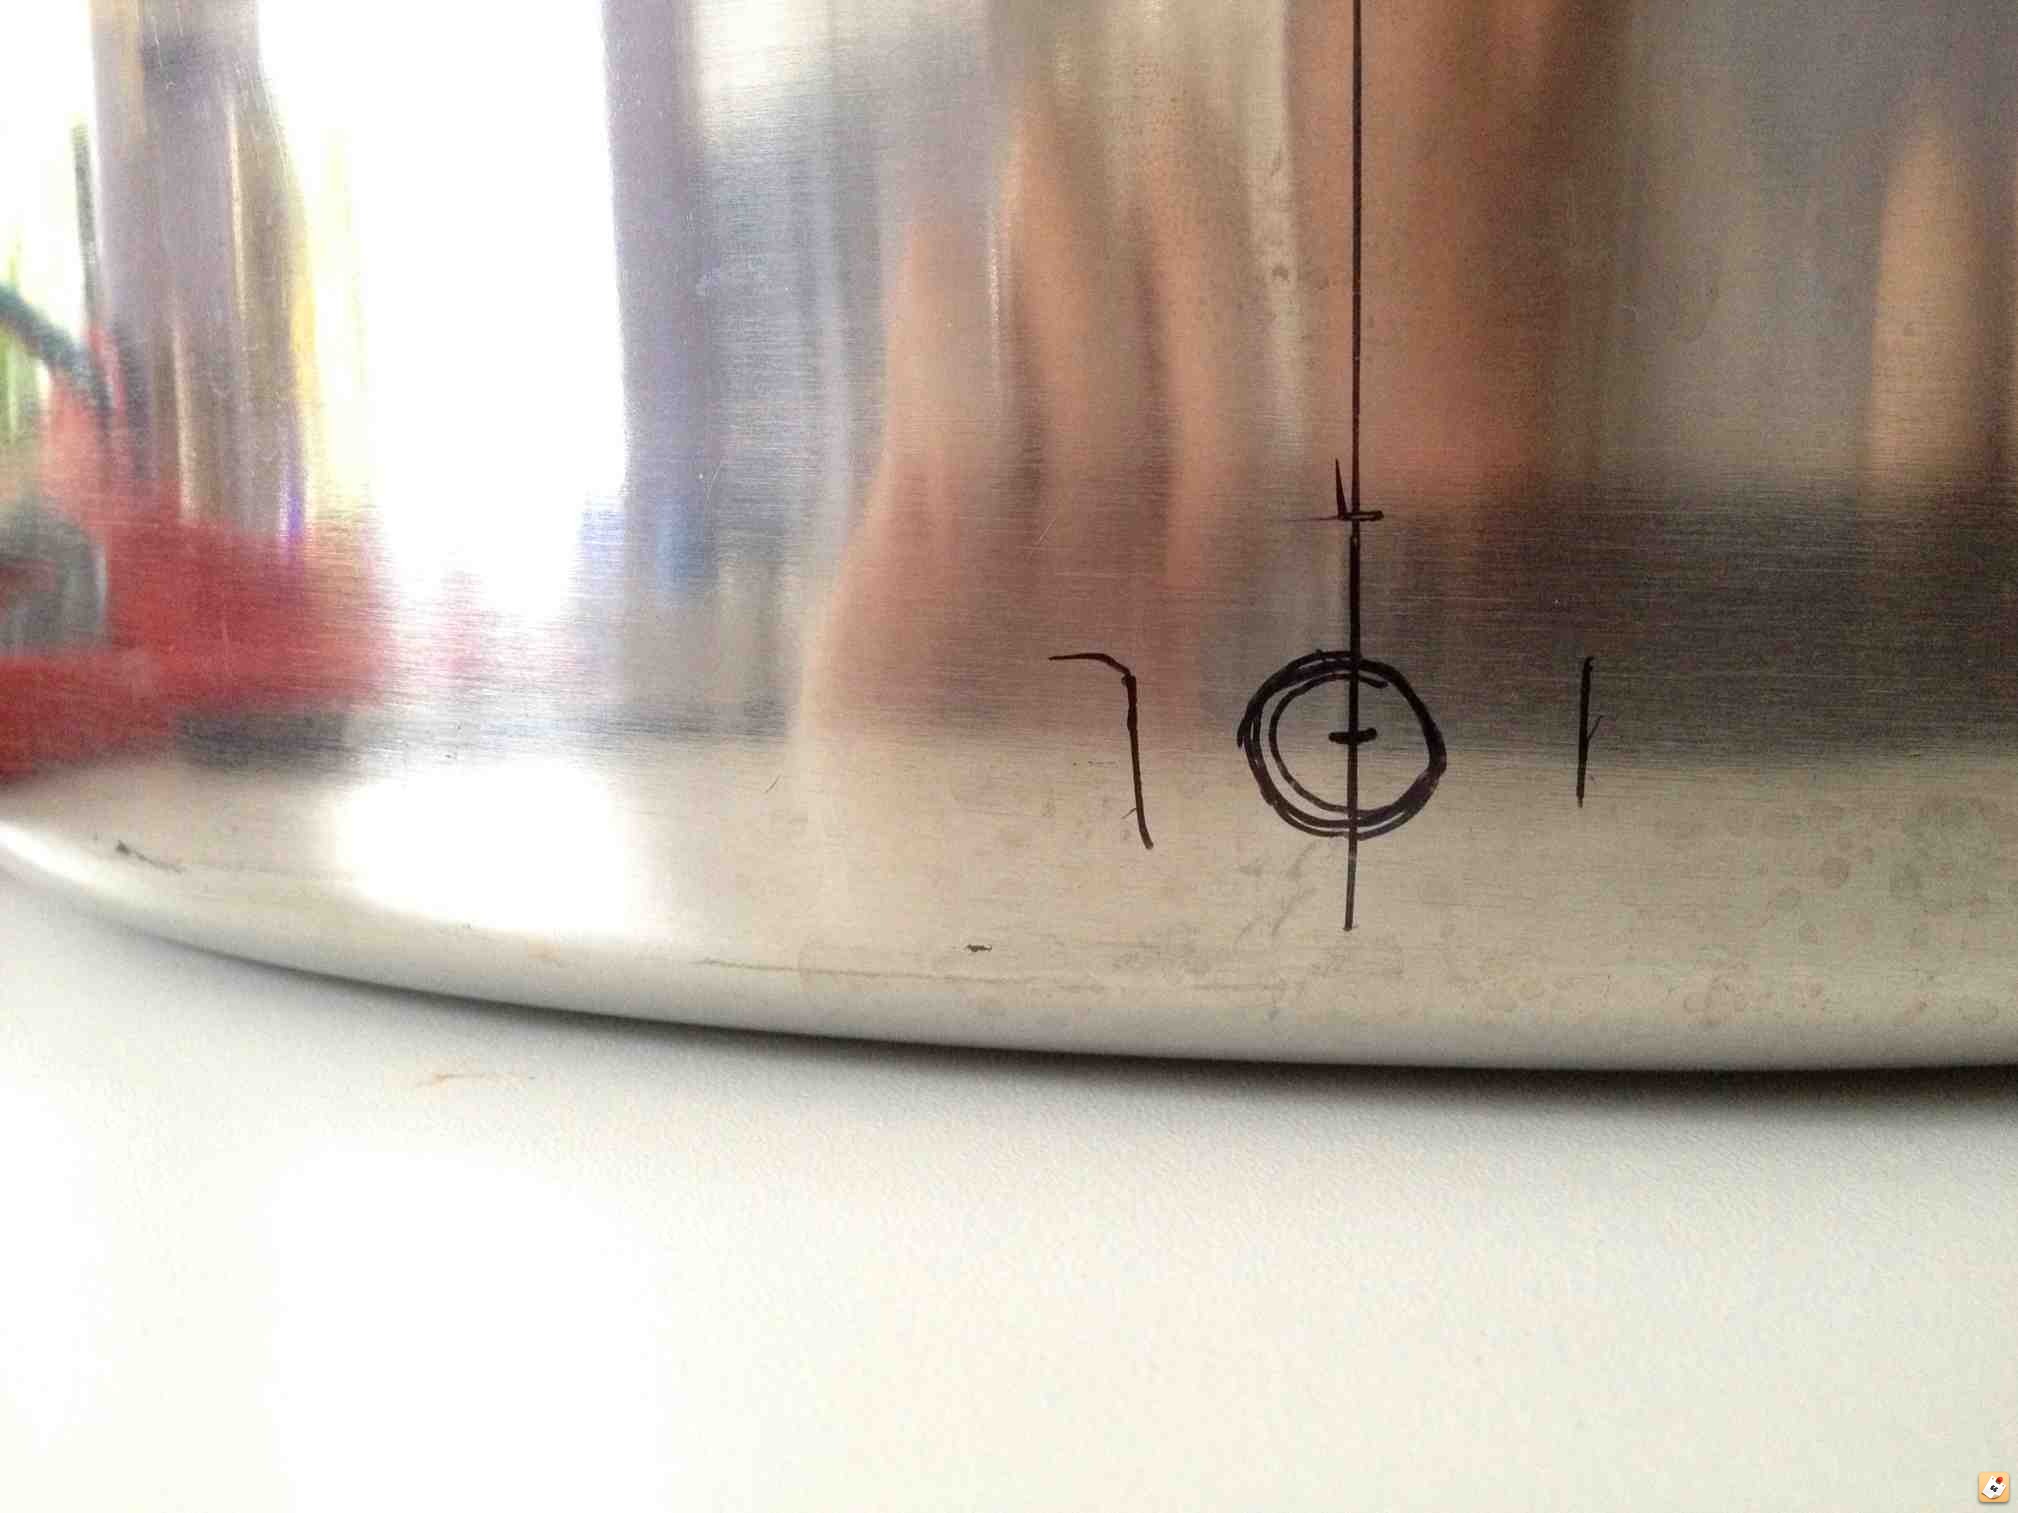
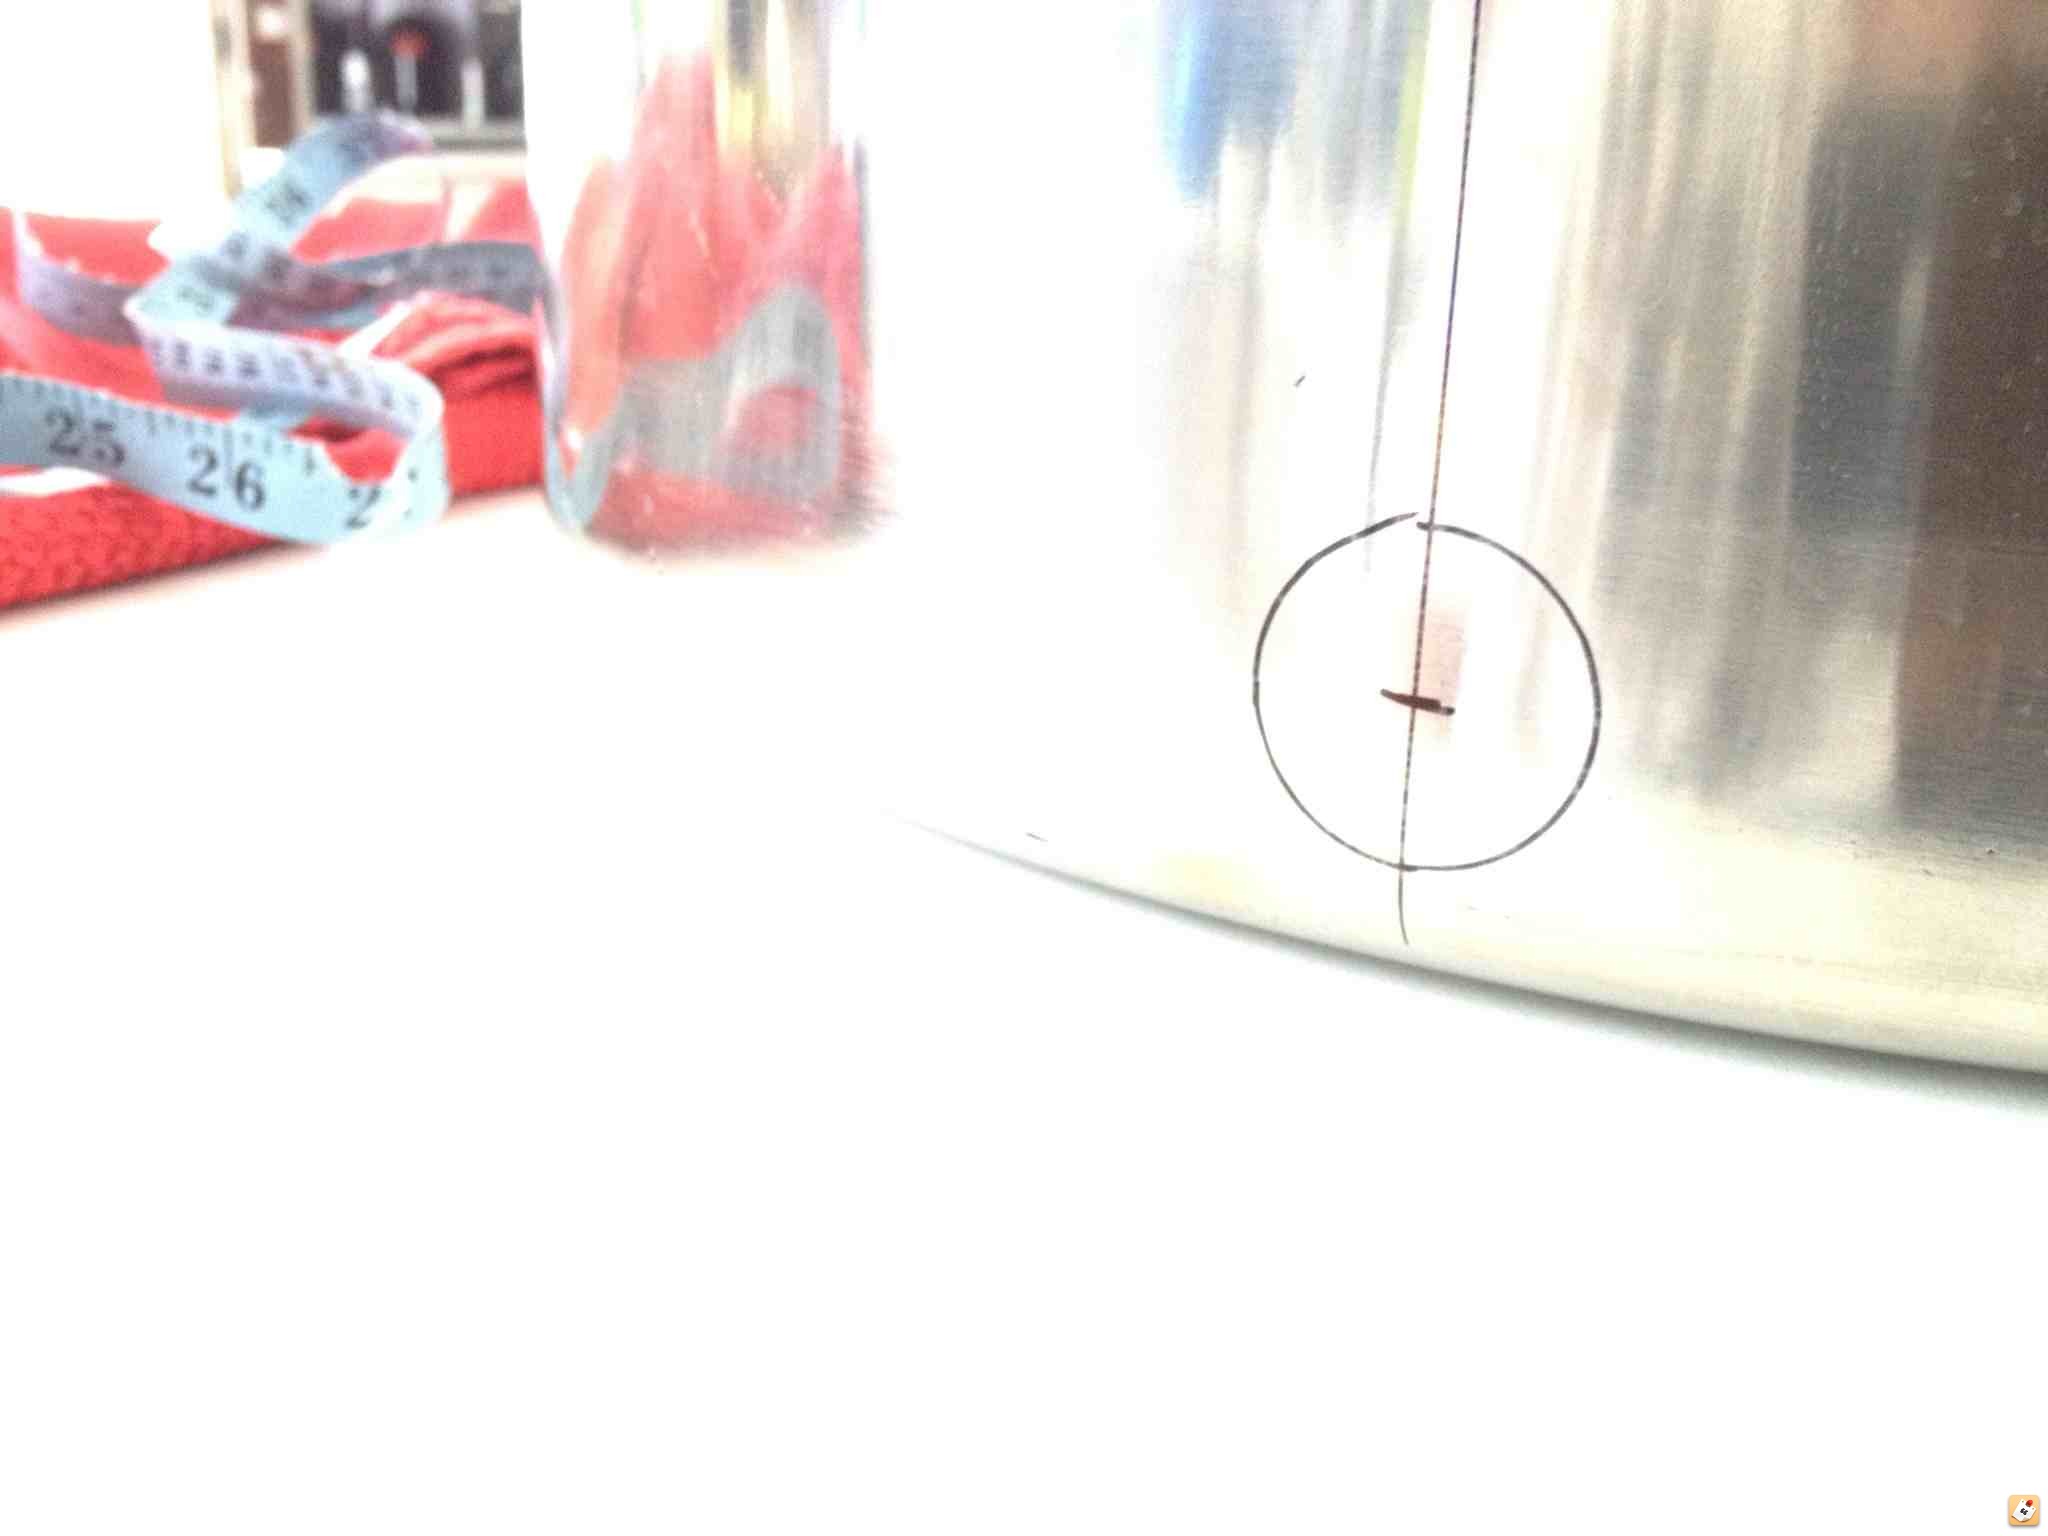
Then mark the centre of the the inside of the tap on the centre line of the pot.
I made sure that the flange nut on the inside of the pot would be above the bottom to side curve of the pot, so therefore on a flat surface for a good seal.
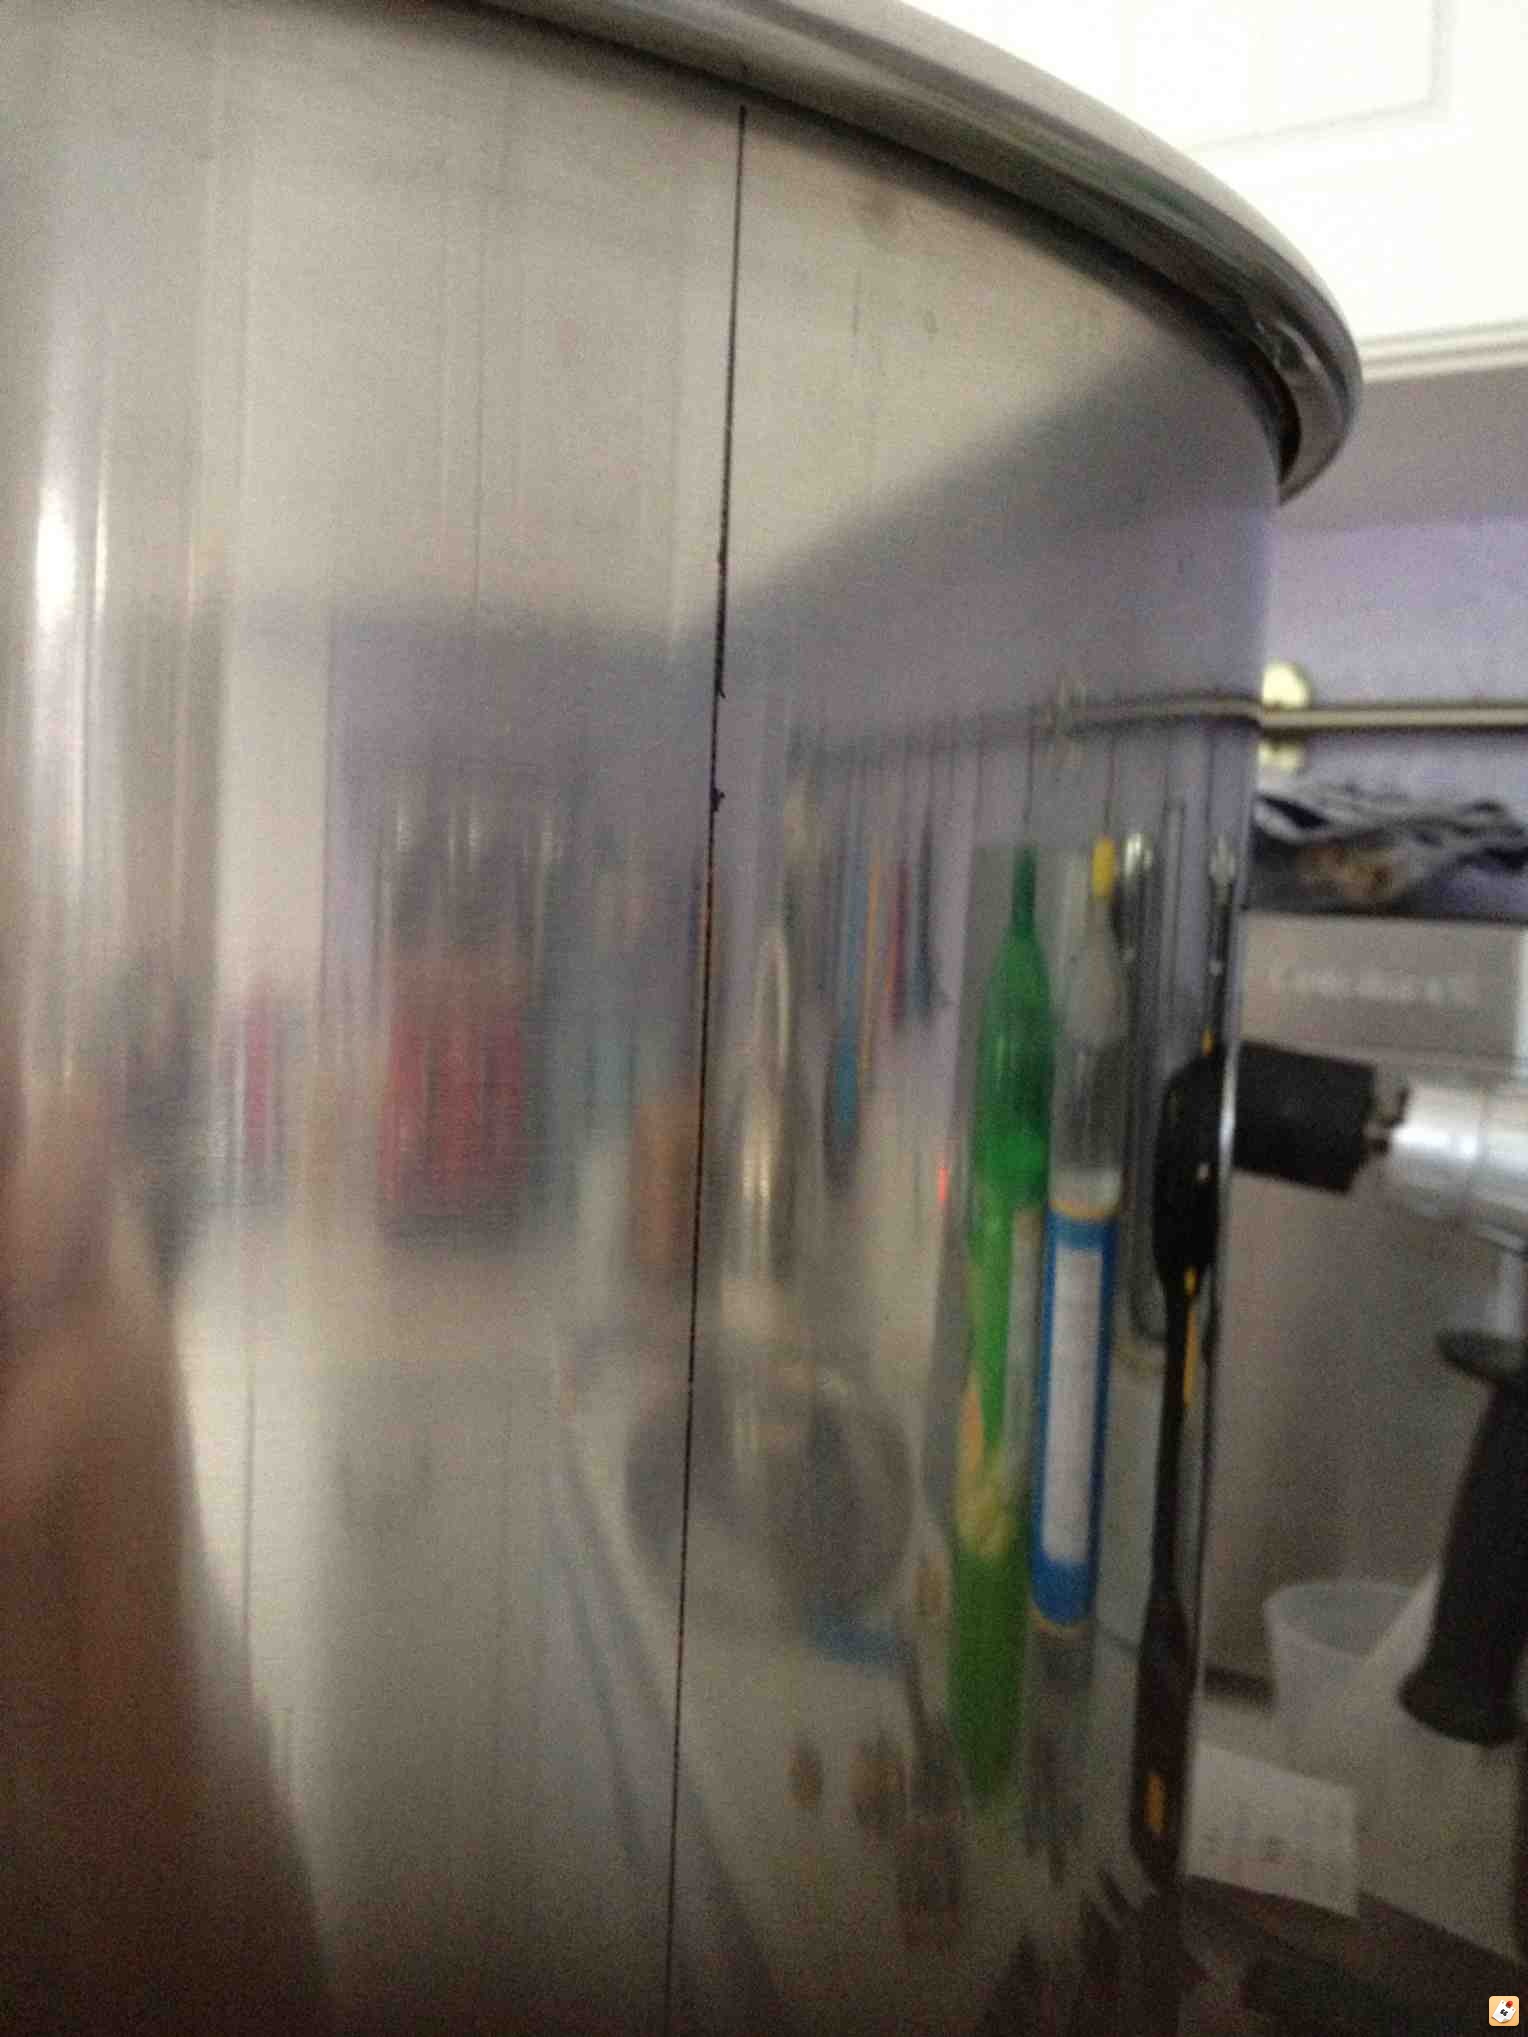
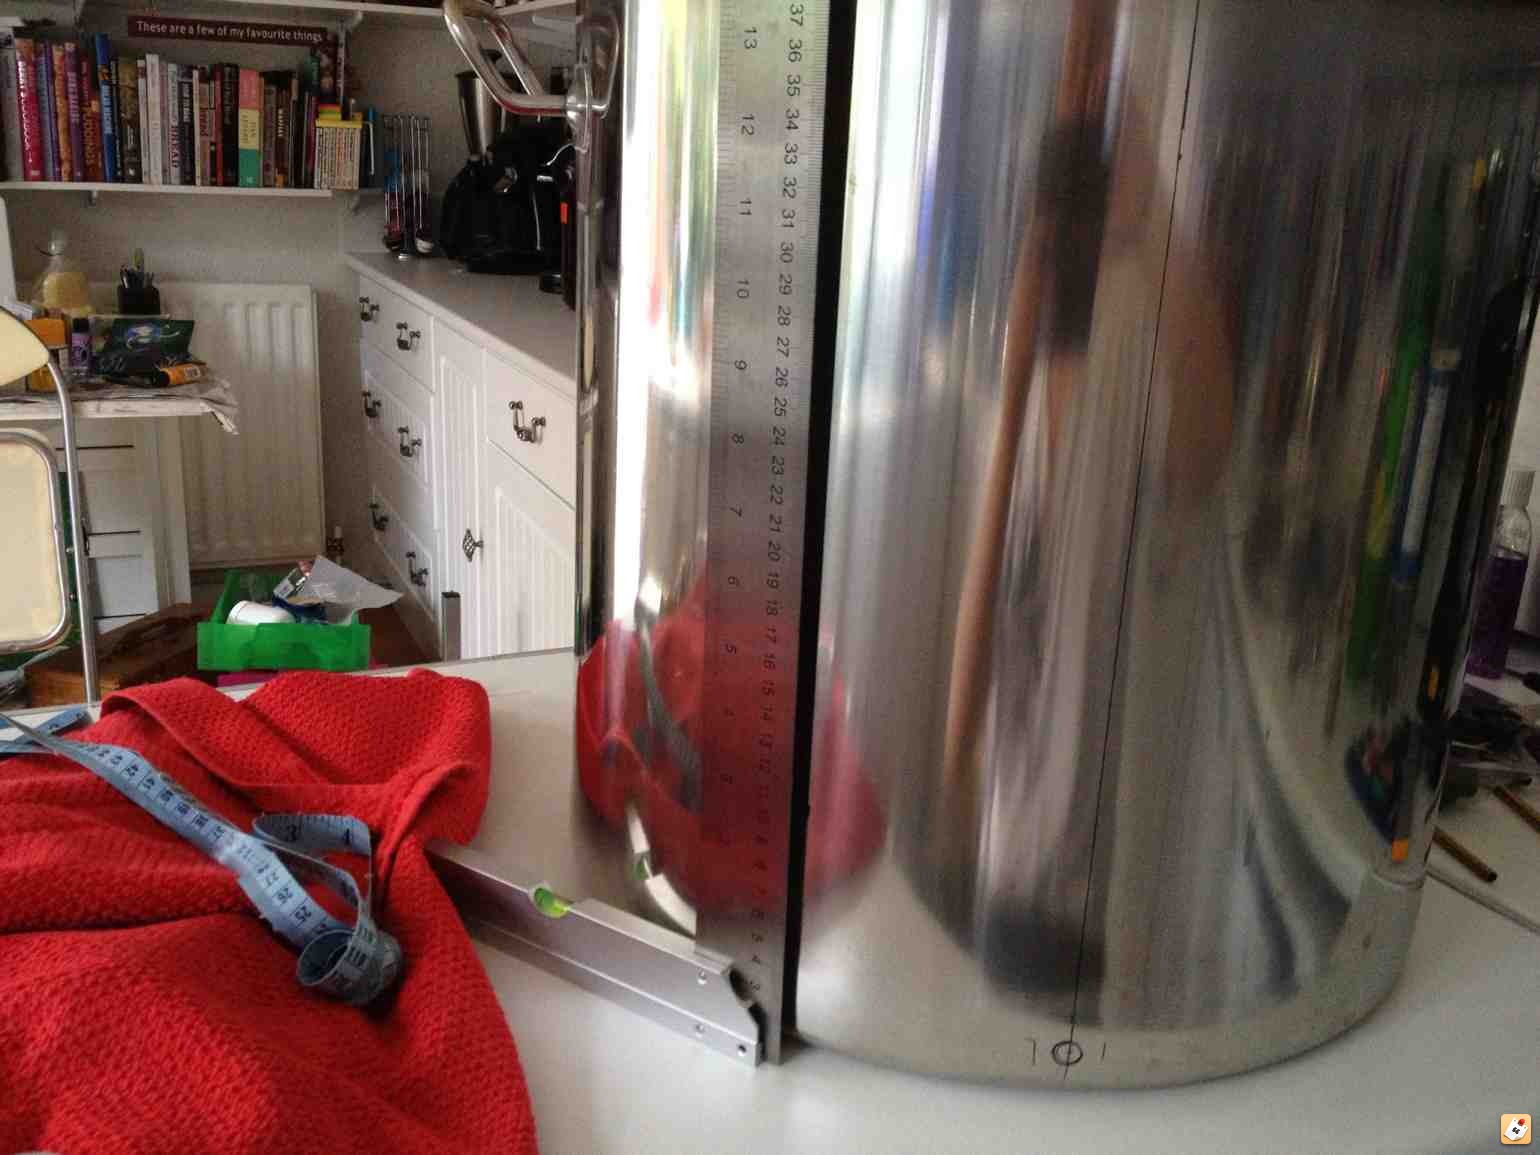
4. By eye I marked where the handle lever on the tap ends, and then marked the middle between this mark and the left pot handle. Again, I drew the line up the pot with a set square. This line is the sight glass line and must be straight!
This gives enough clearance from both the pot handle and the tap handle so the sight glass doesn't get knocked or interfered with.
I placed it on the left as I thought its less likely to get knocked with me being right handed.
5. IMPORTANT, you must allow room for the depth of the lid above the upper sight glass elbow, otherwise the lid will not seat correctly and you will kick yourself!
Place a mark on the top of the pot to indicate the lid depth, and remember that it's the top of the hole to be cut that should be no higher than this mark (not the centre of the hole).

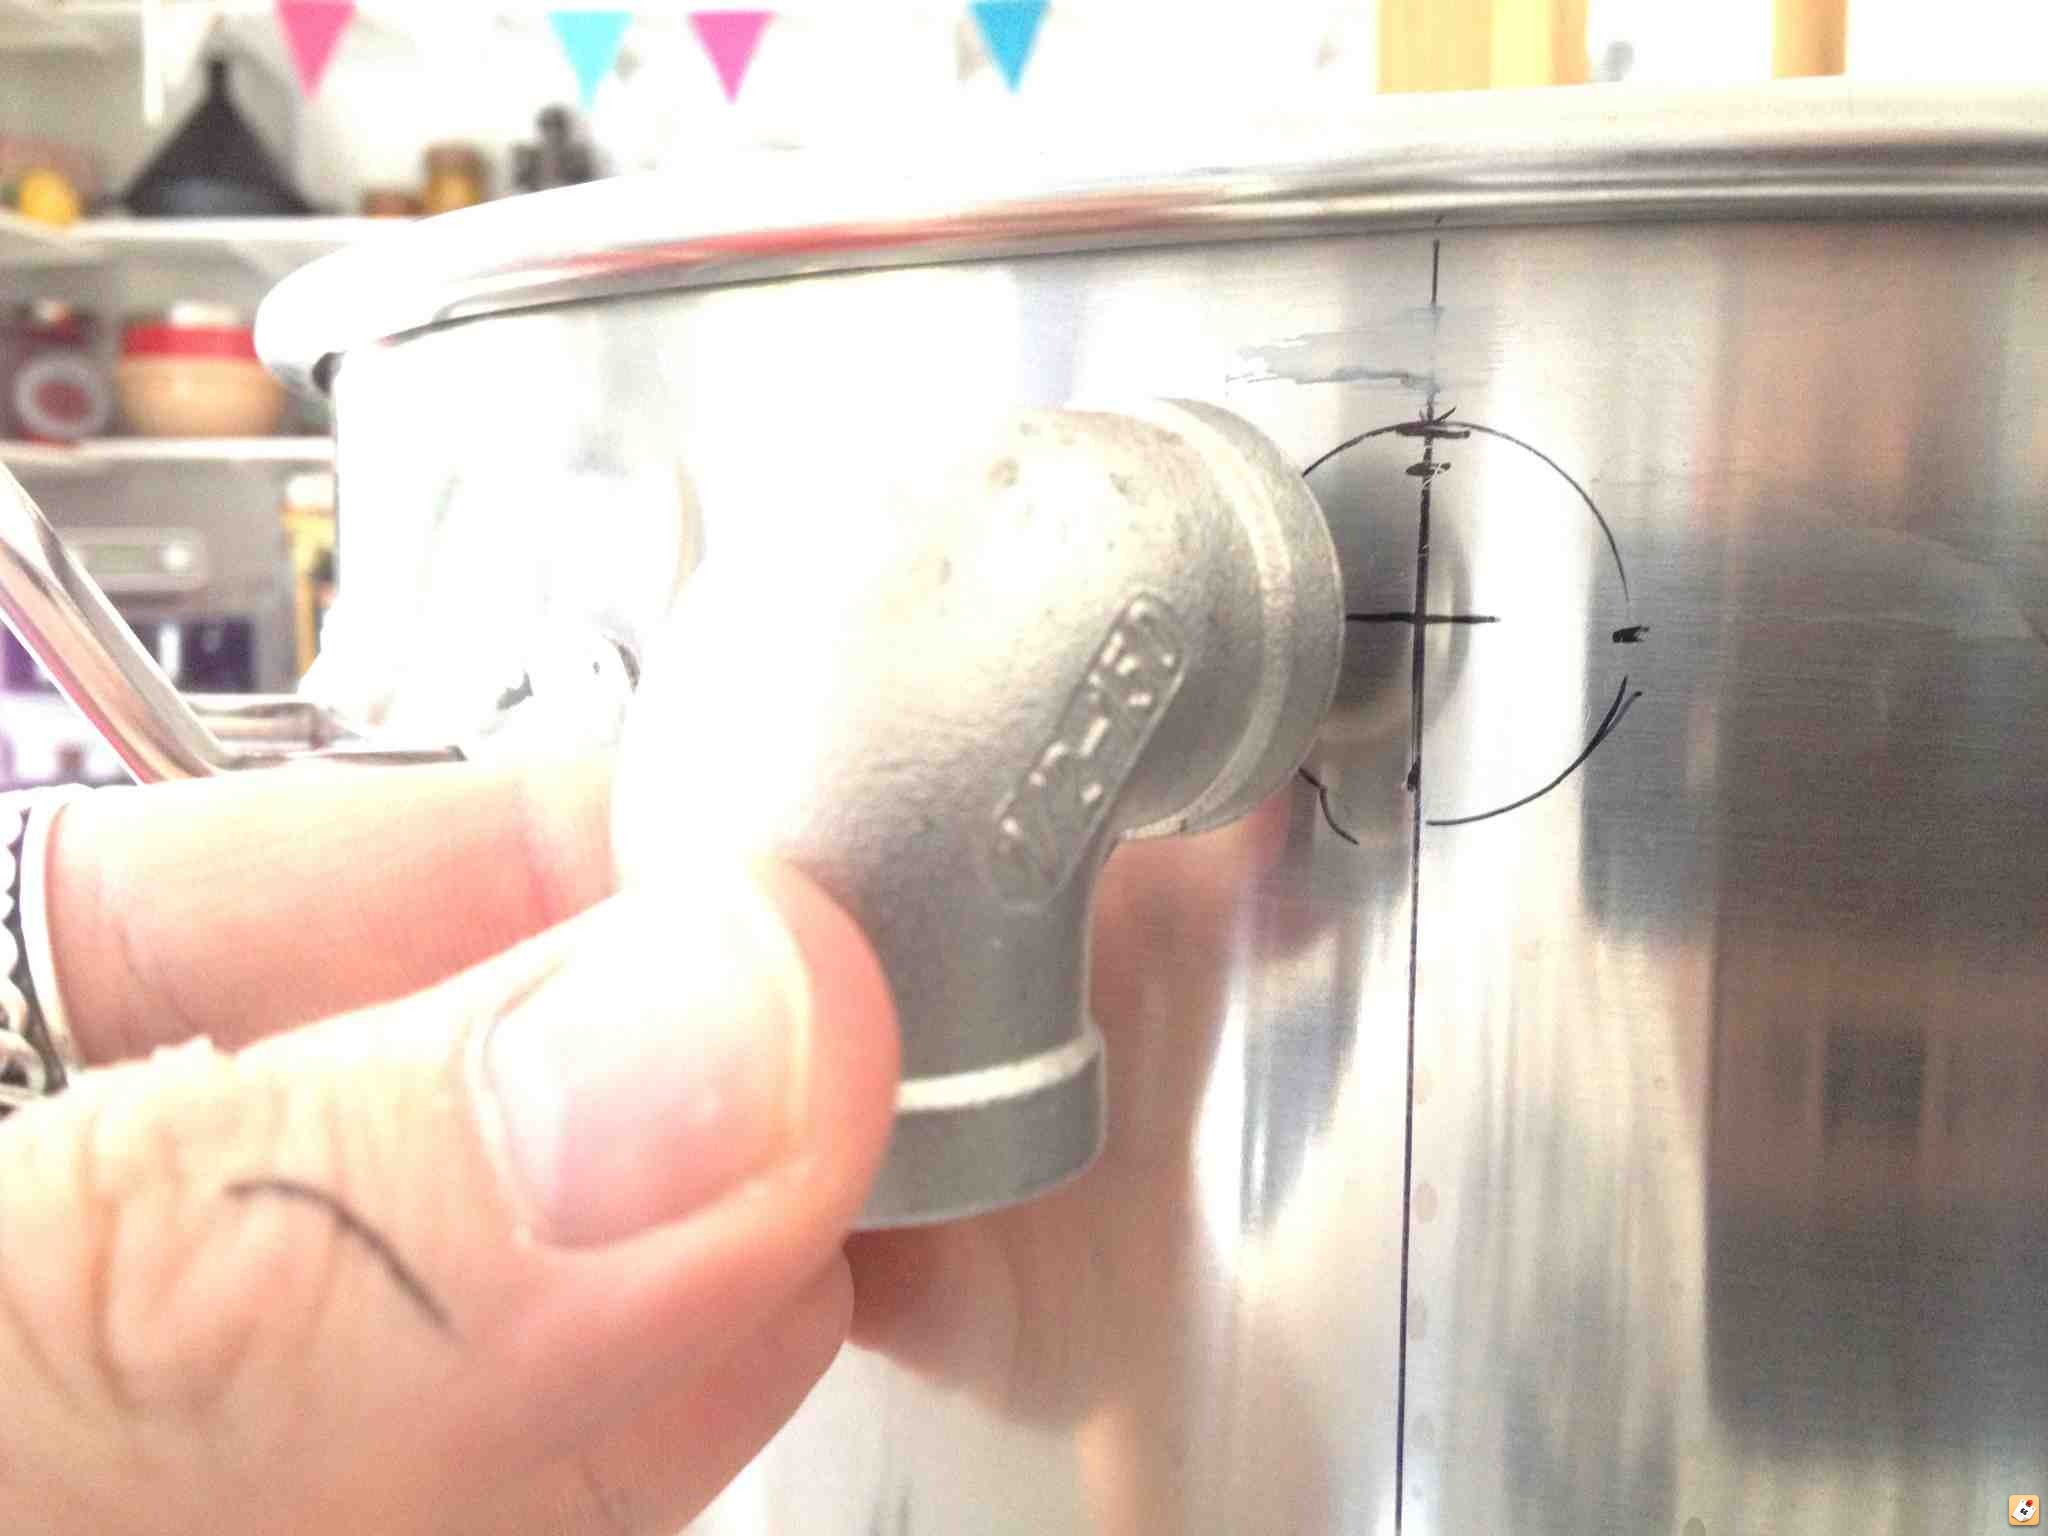
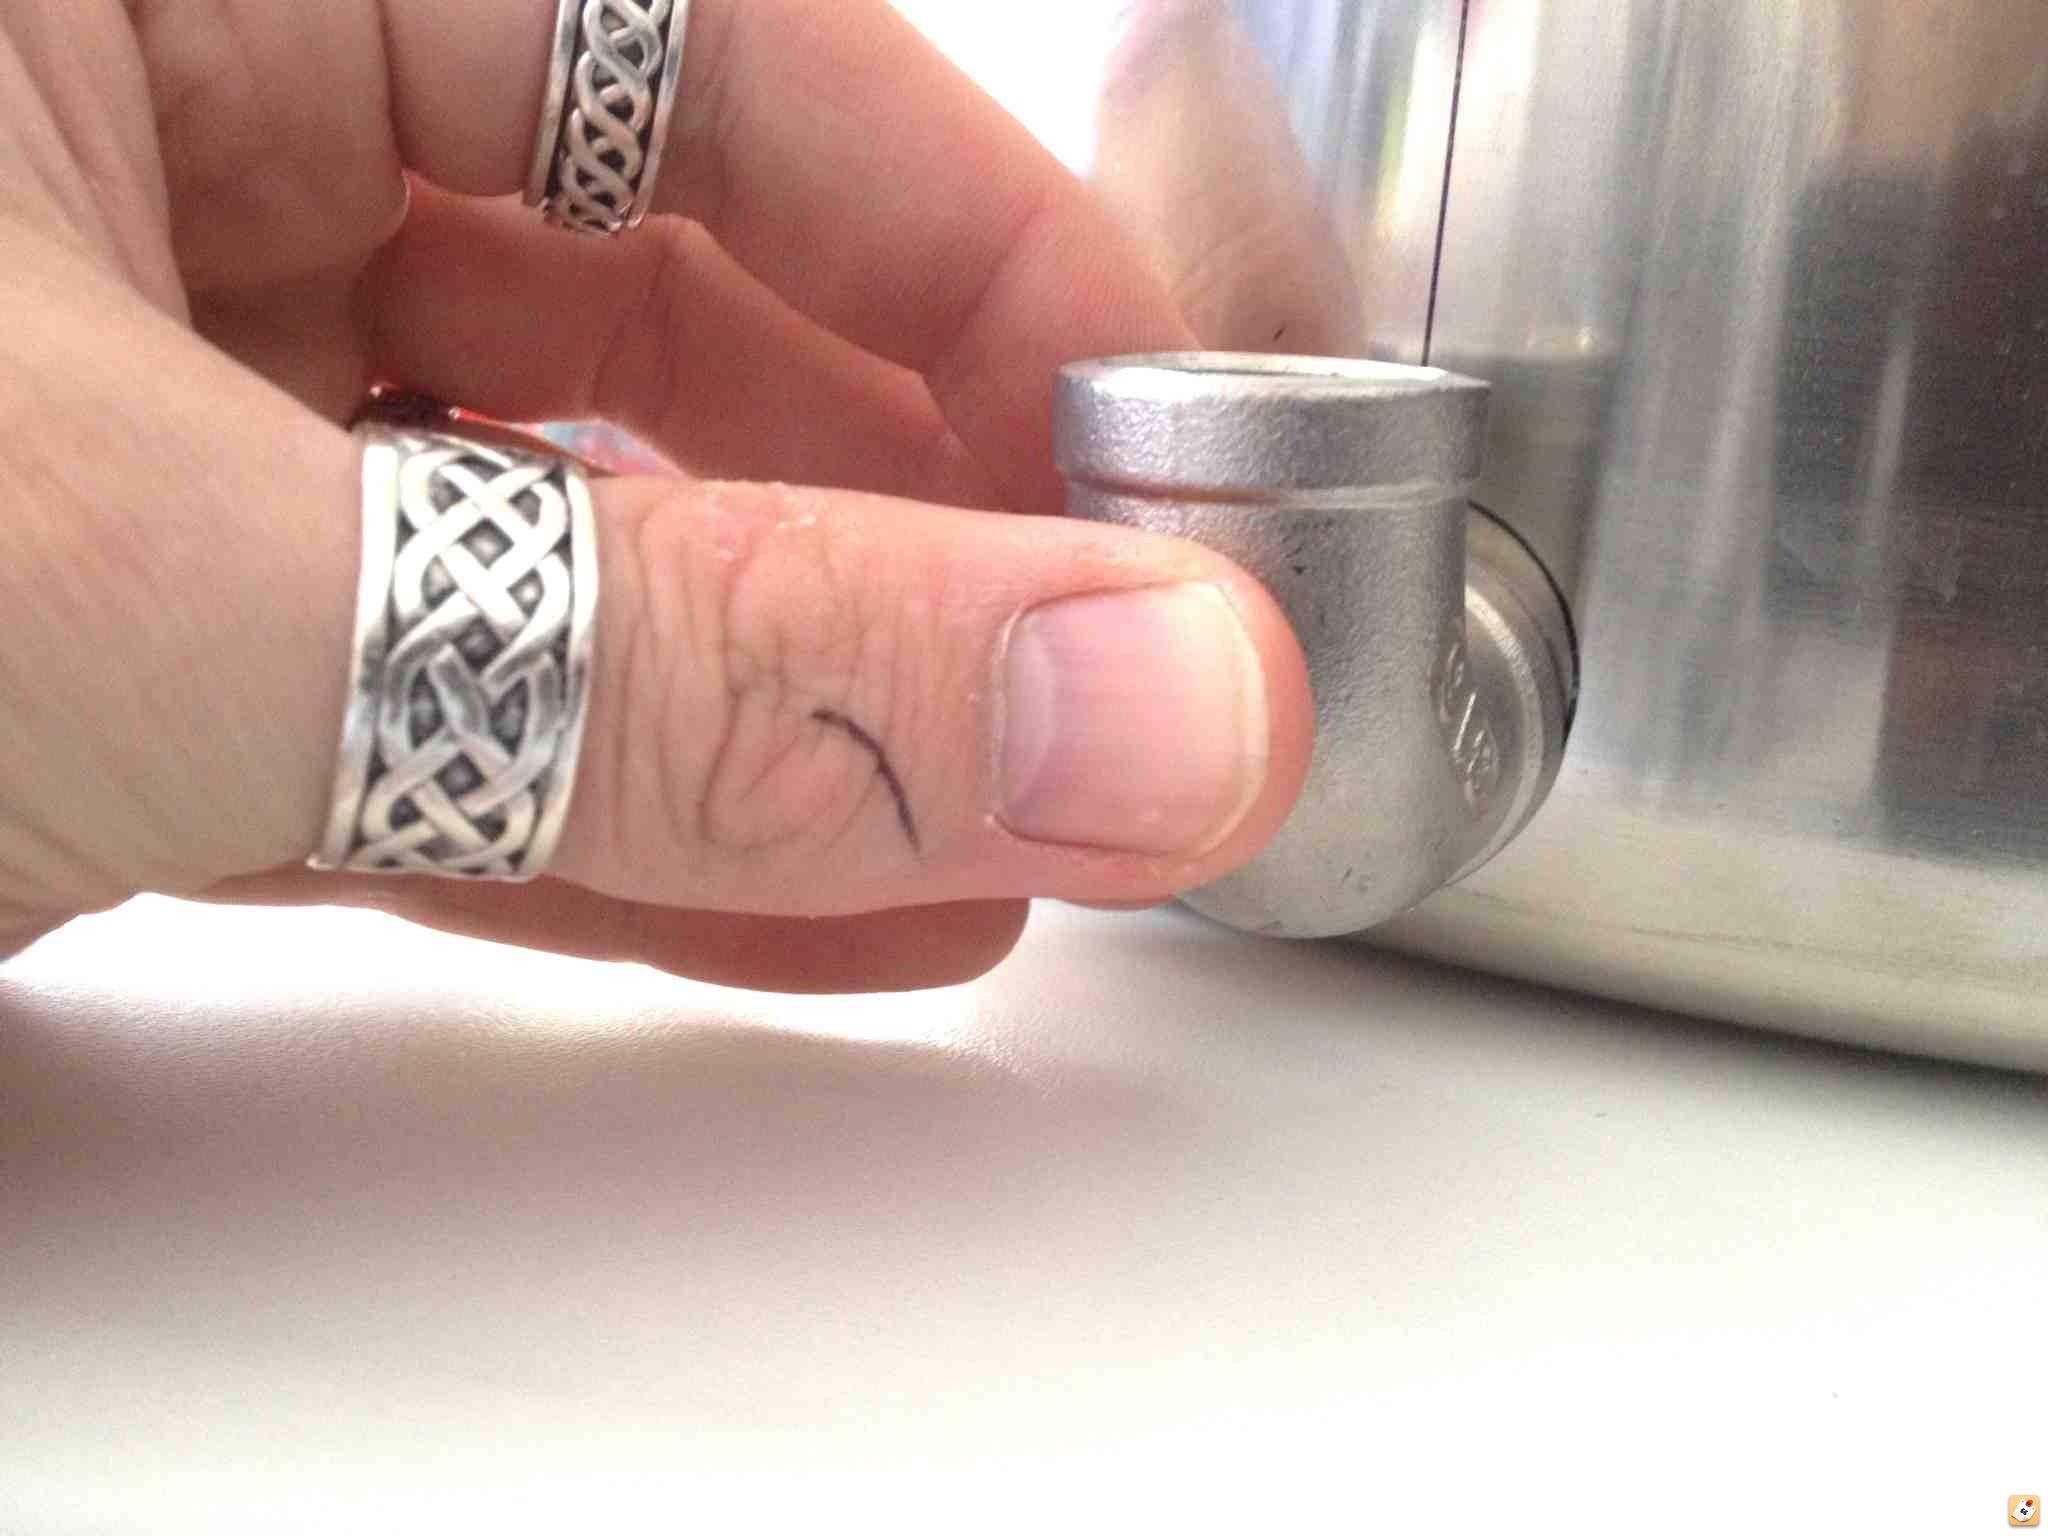
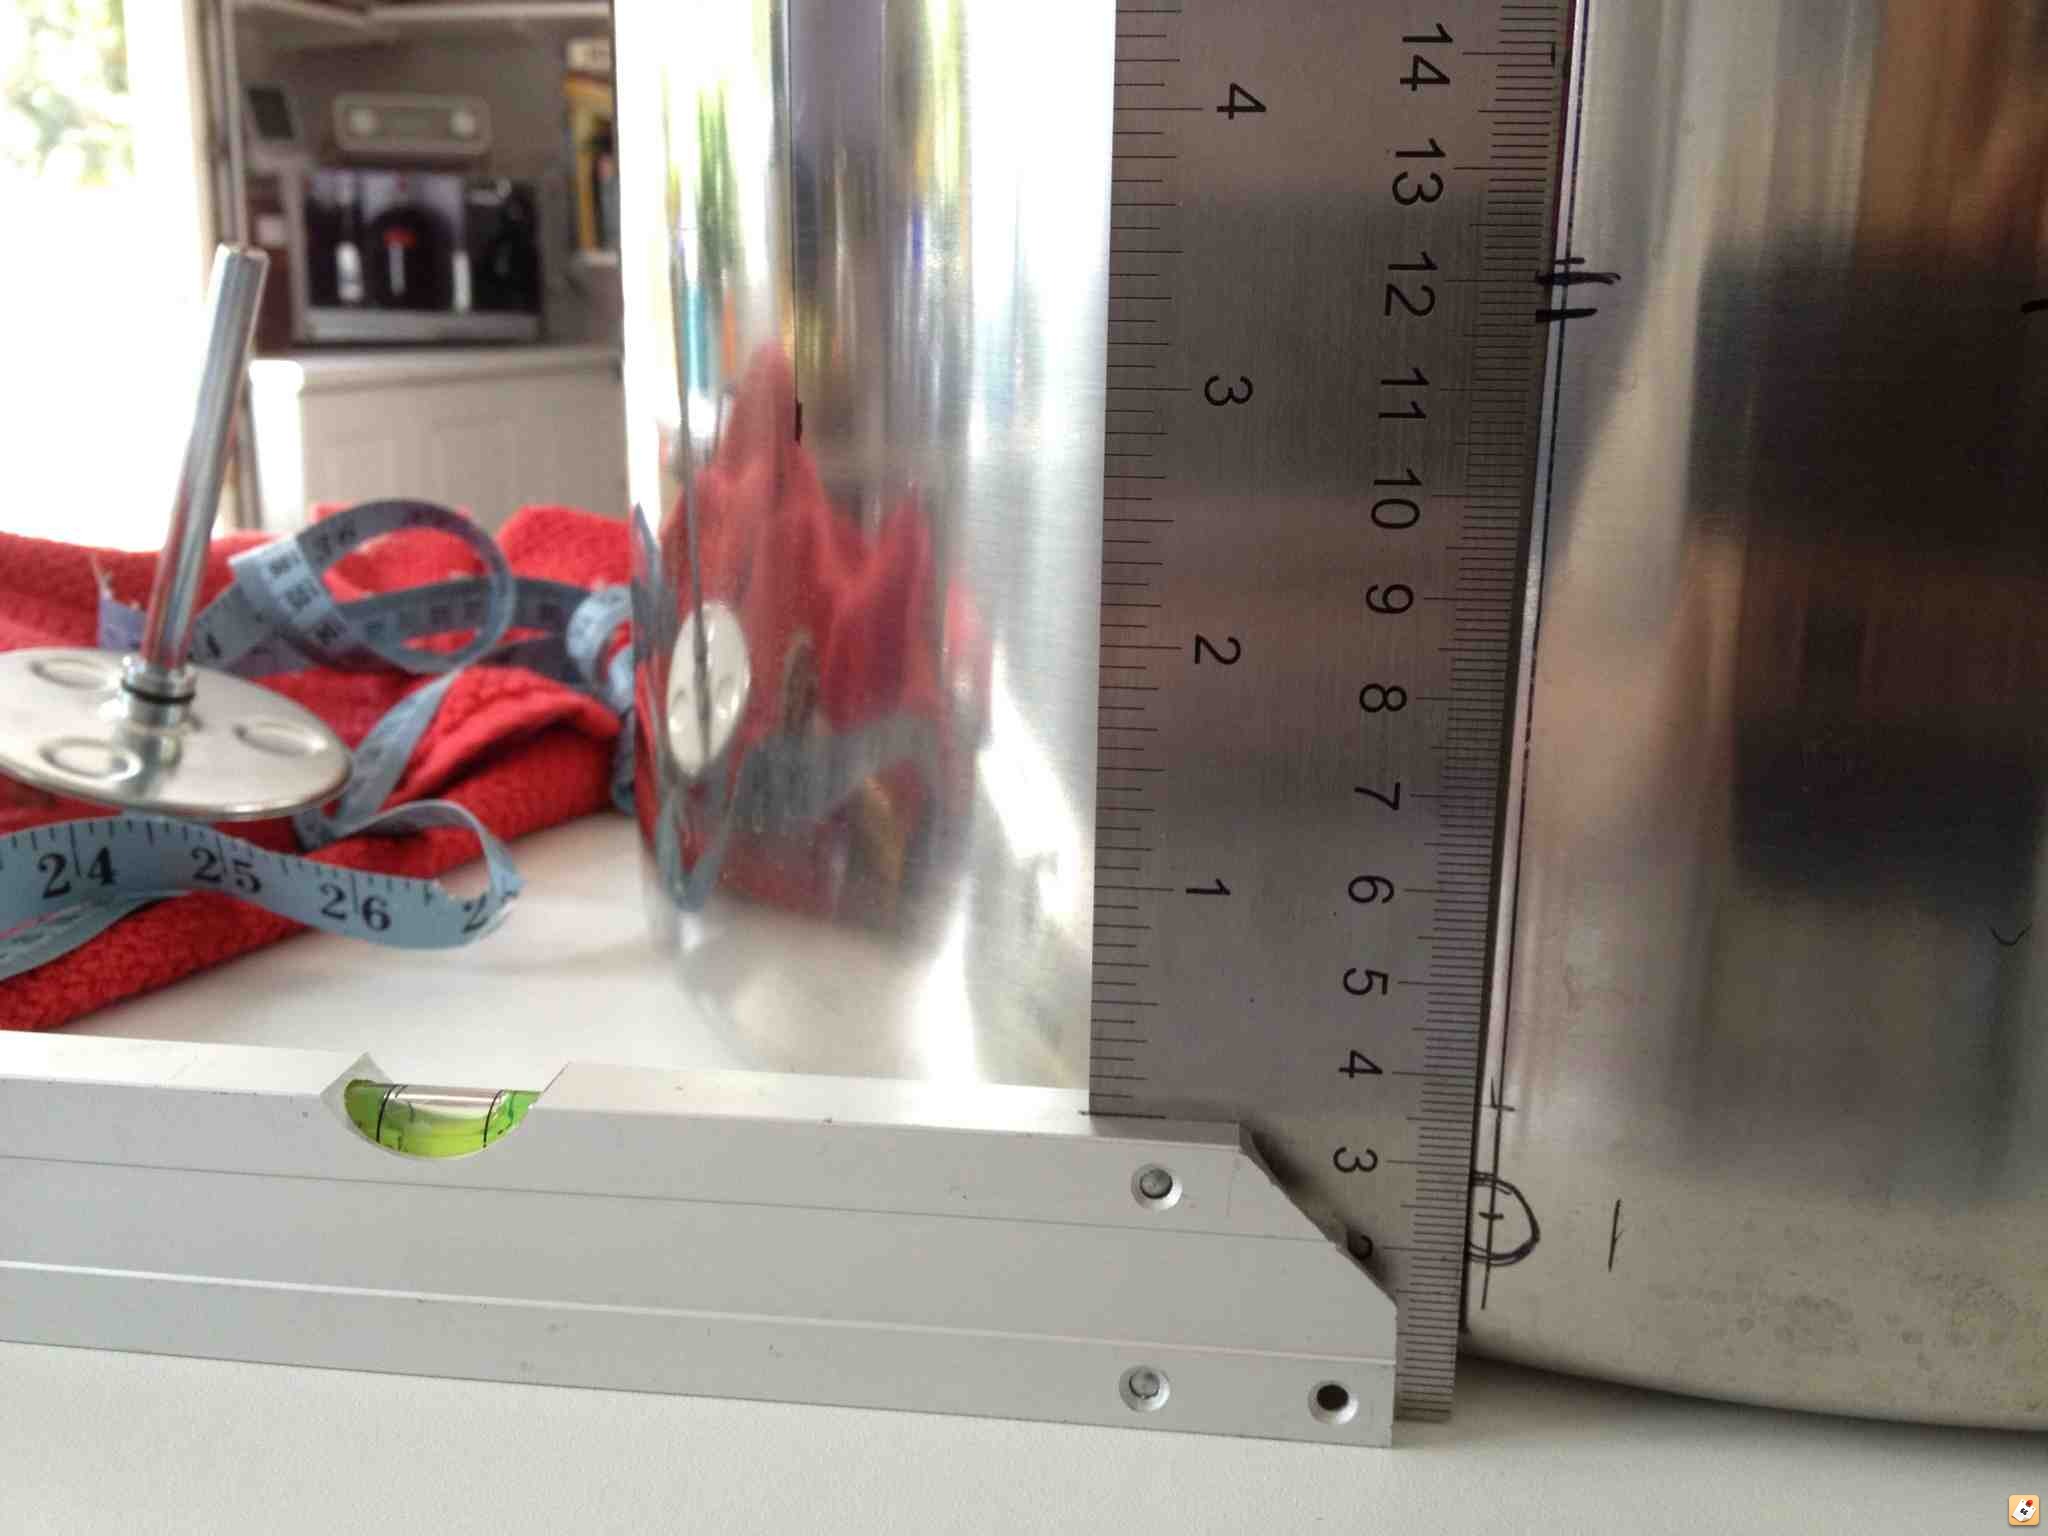
6. Mark the lower elbow centre mark by placing the elbow on the line just above the curve of the base (as low as possible).
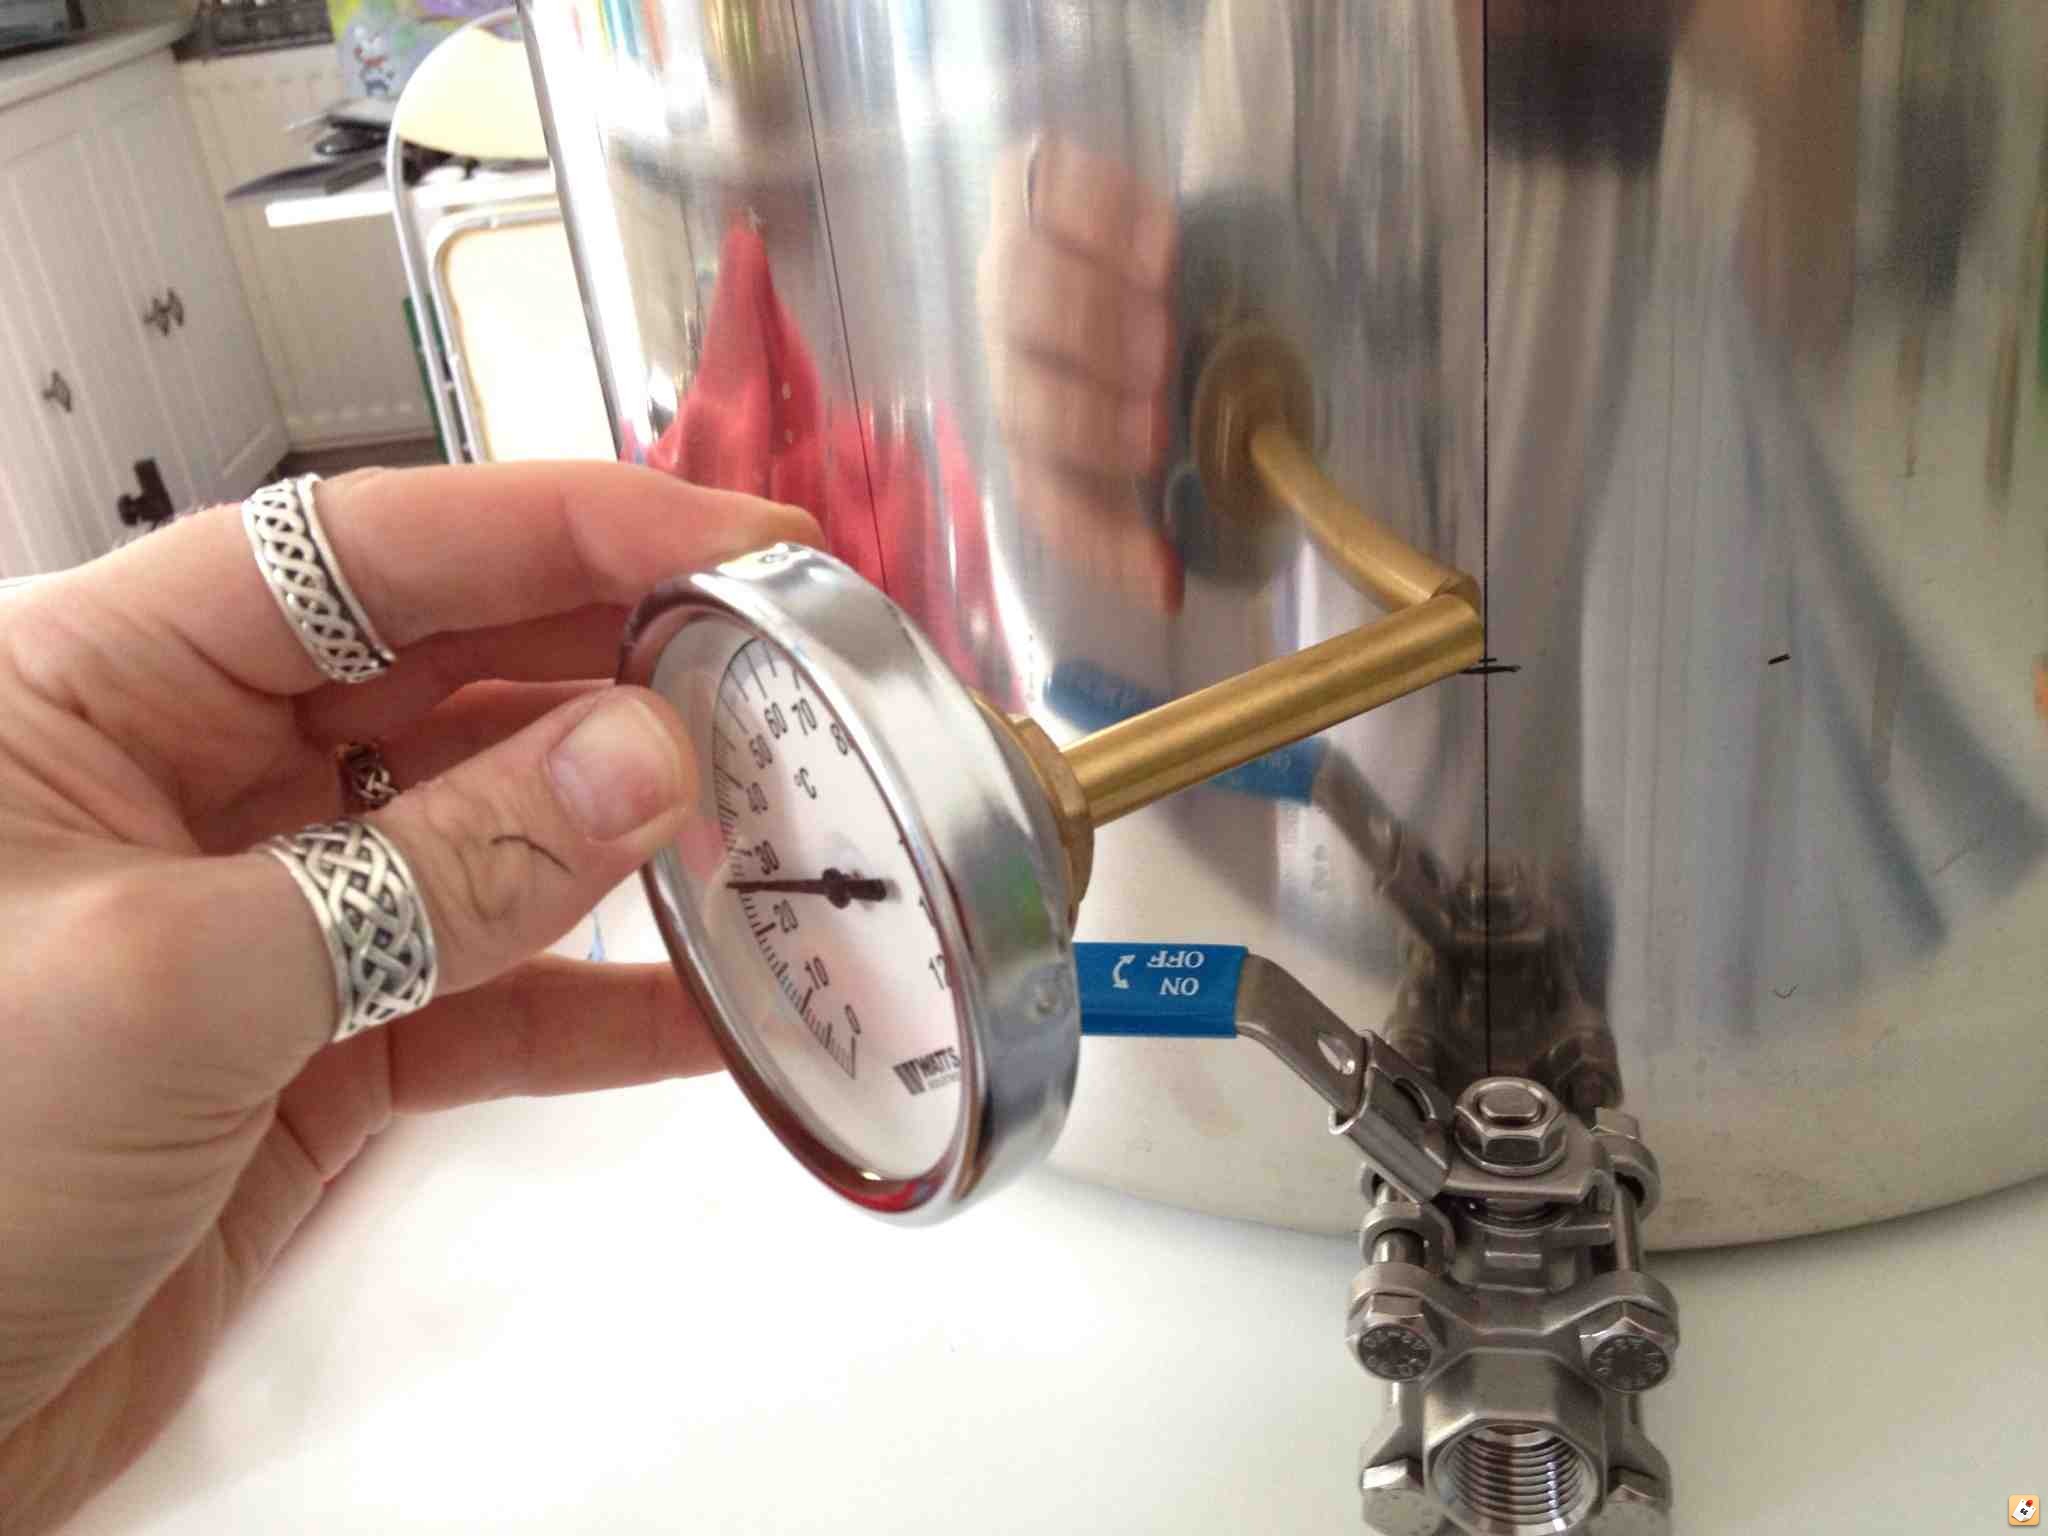
7. Mark on the centre line where to drill the thermo well hole, for me it was 12cm up. I just made sure that there was about 1cm clearance between the thermometer dial and the tap lever, so I could pull the thermometer out easily.
8. Drilling the pot seems so intimidating at first on your new expensive shiney pot, but when you get your first punch under your belt it becomes easy!
First line a pointed punch up on the mark and give it a sharp whack with a small hammer to stop the drill bit from slipping.
Then put a drop of oil in the dent, I used 3 in 1 oil.
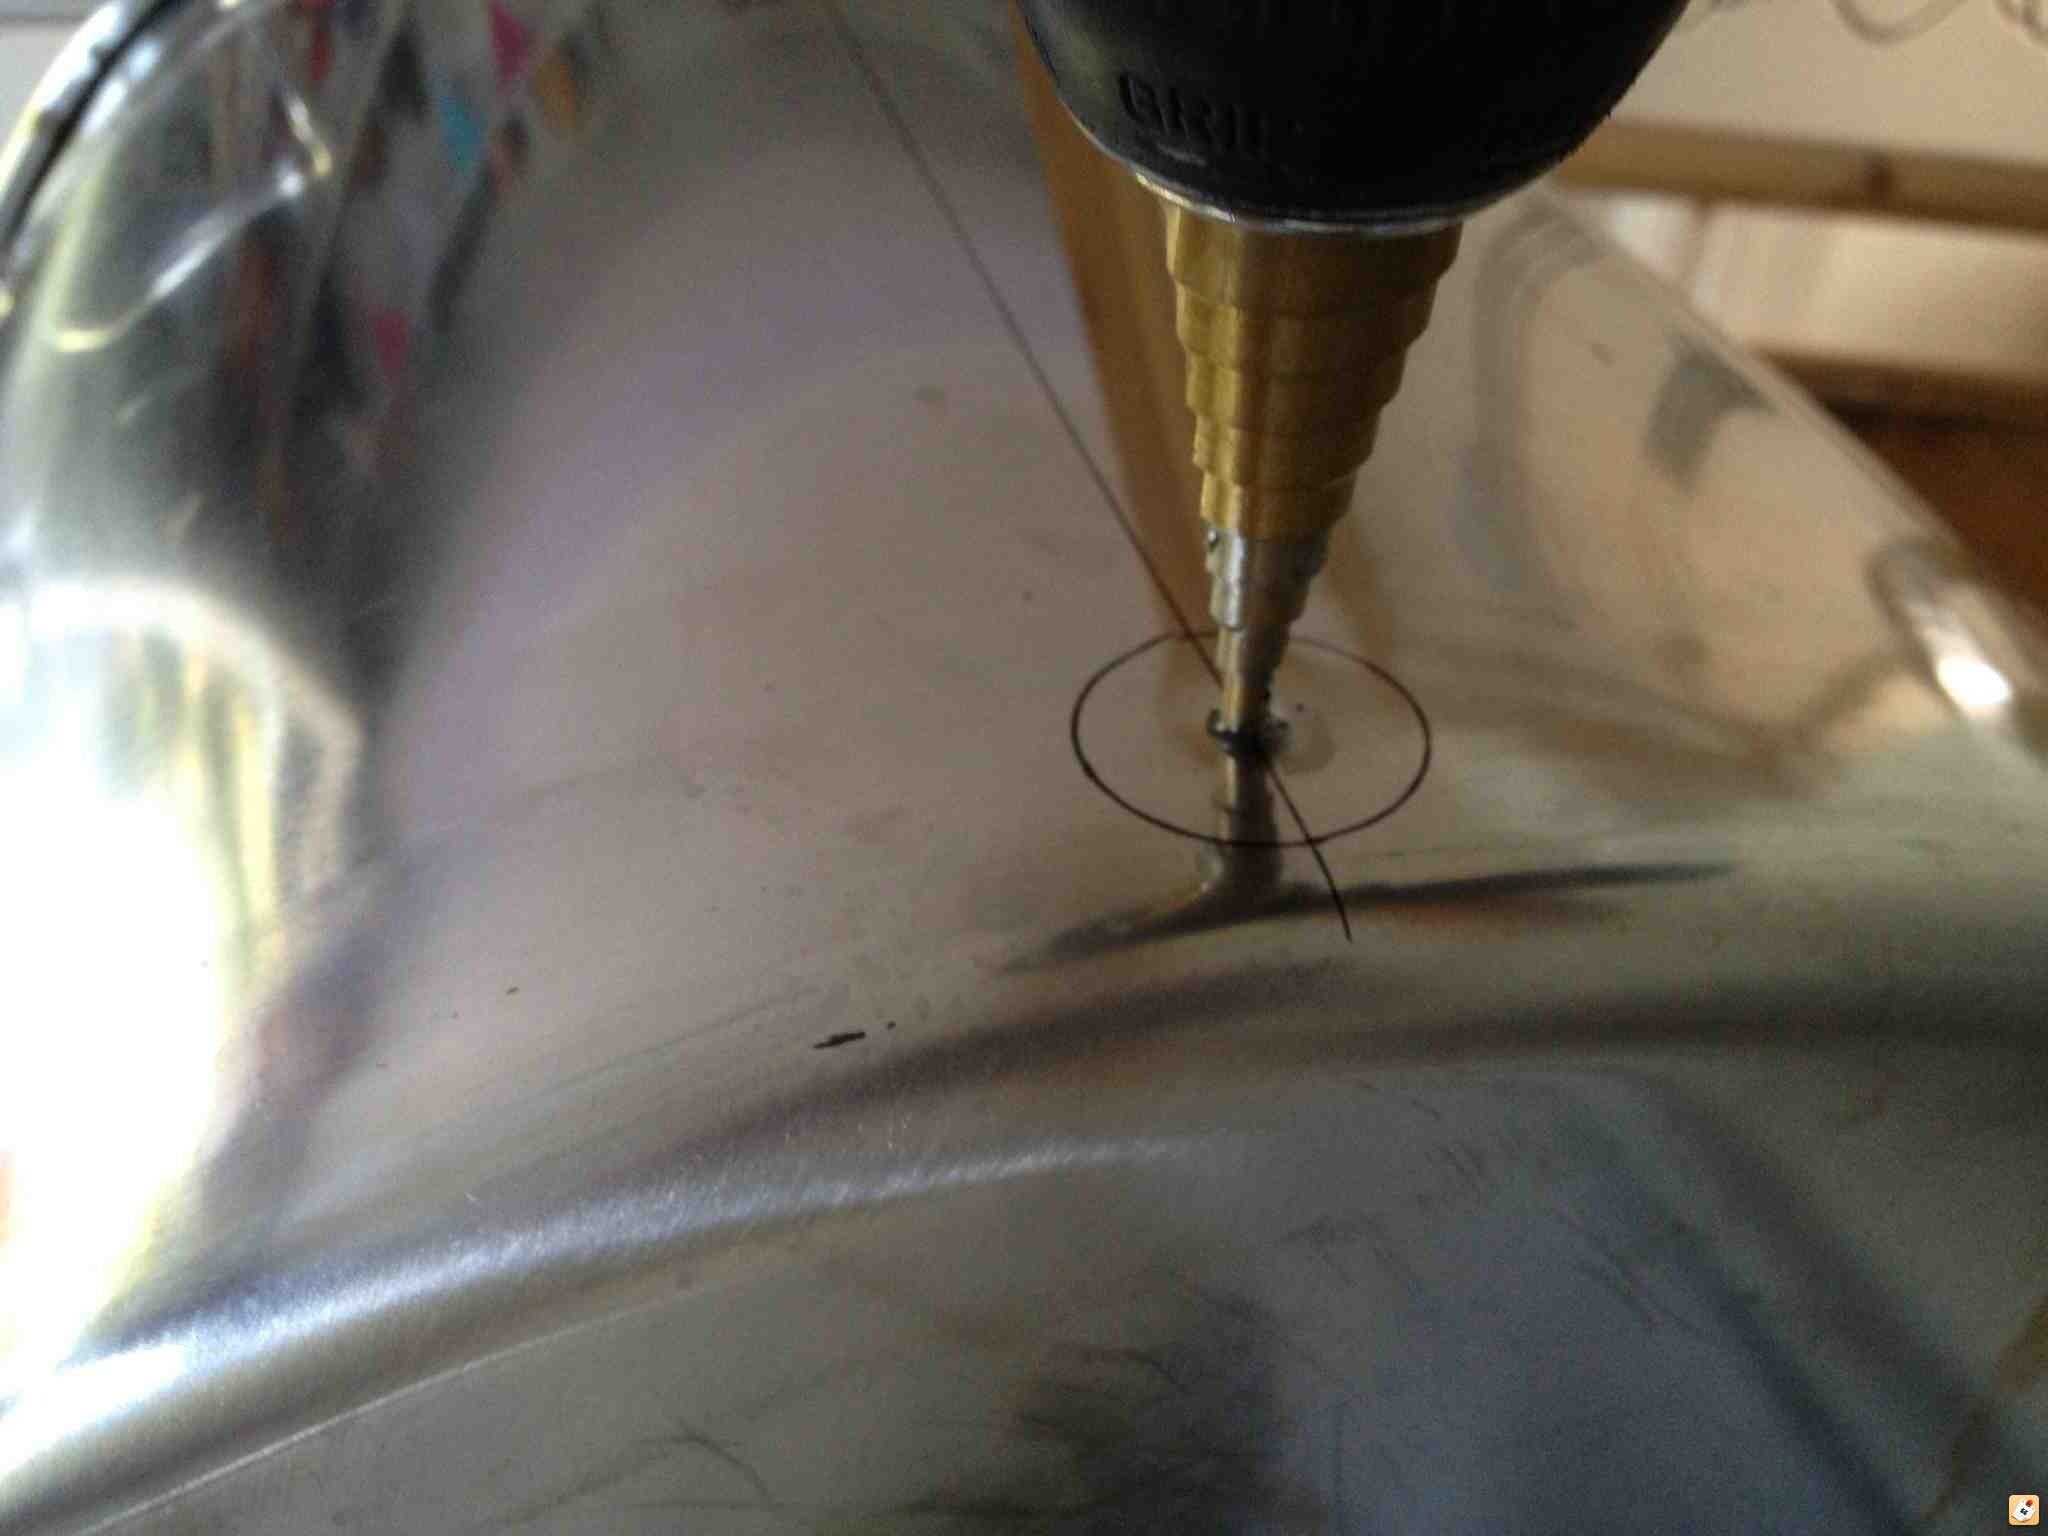
I found metal HSS drill bits hard to get started so I used a step drill bit with the drill on a slow speed but high torque setting, you can wiggle the bit around so it gets a bite, i found it has a shocking bang as it first goes through the pot!
Then I enlarged the hole one step at a time until it was the correct size for the bolt part of the Q.max punch.

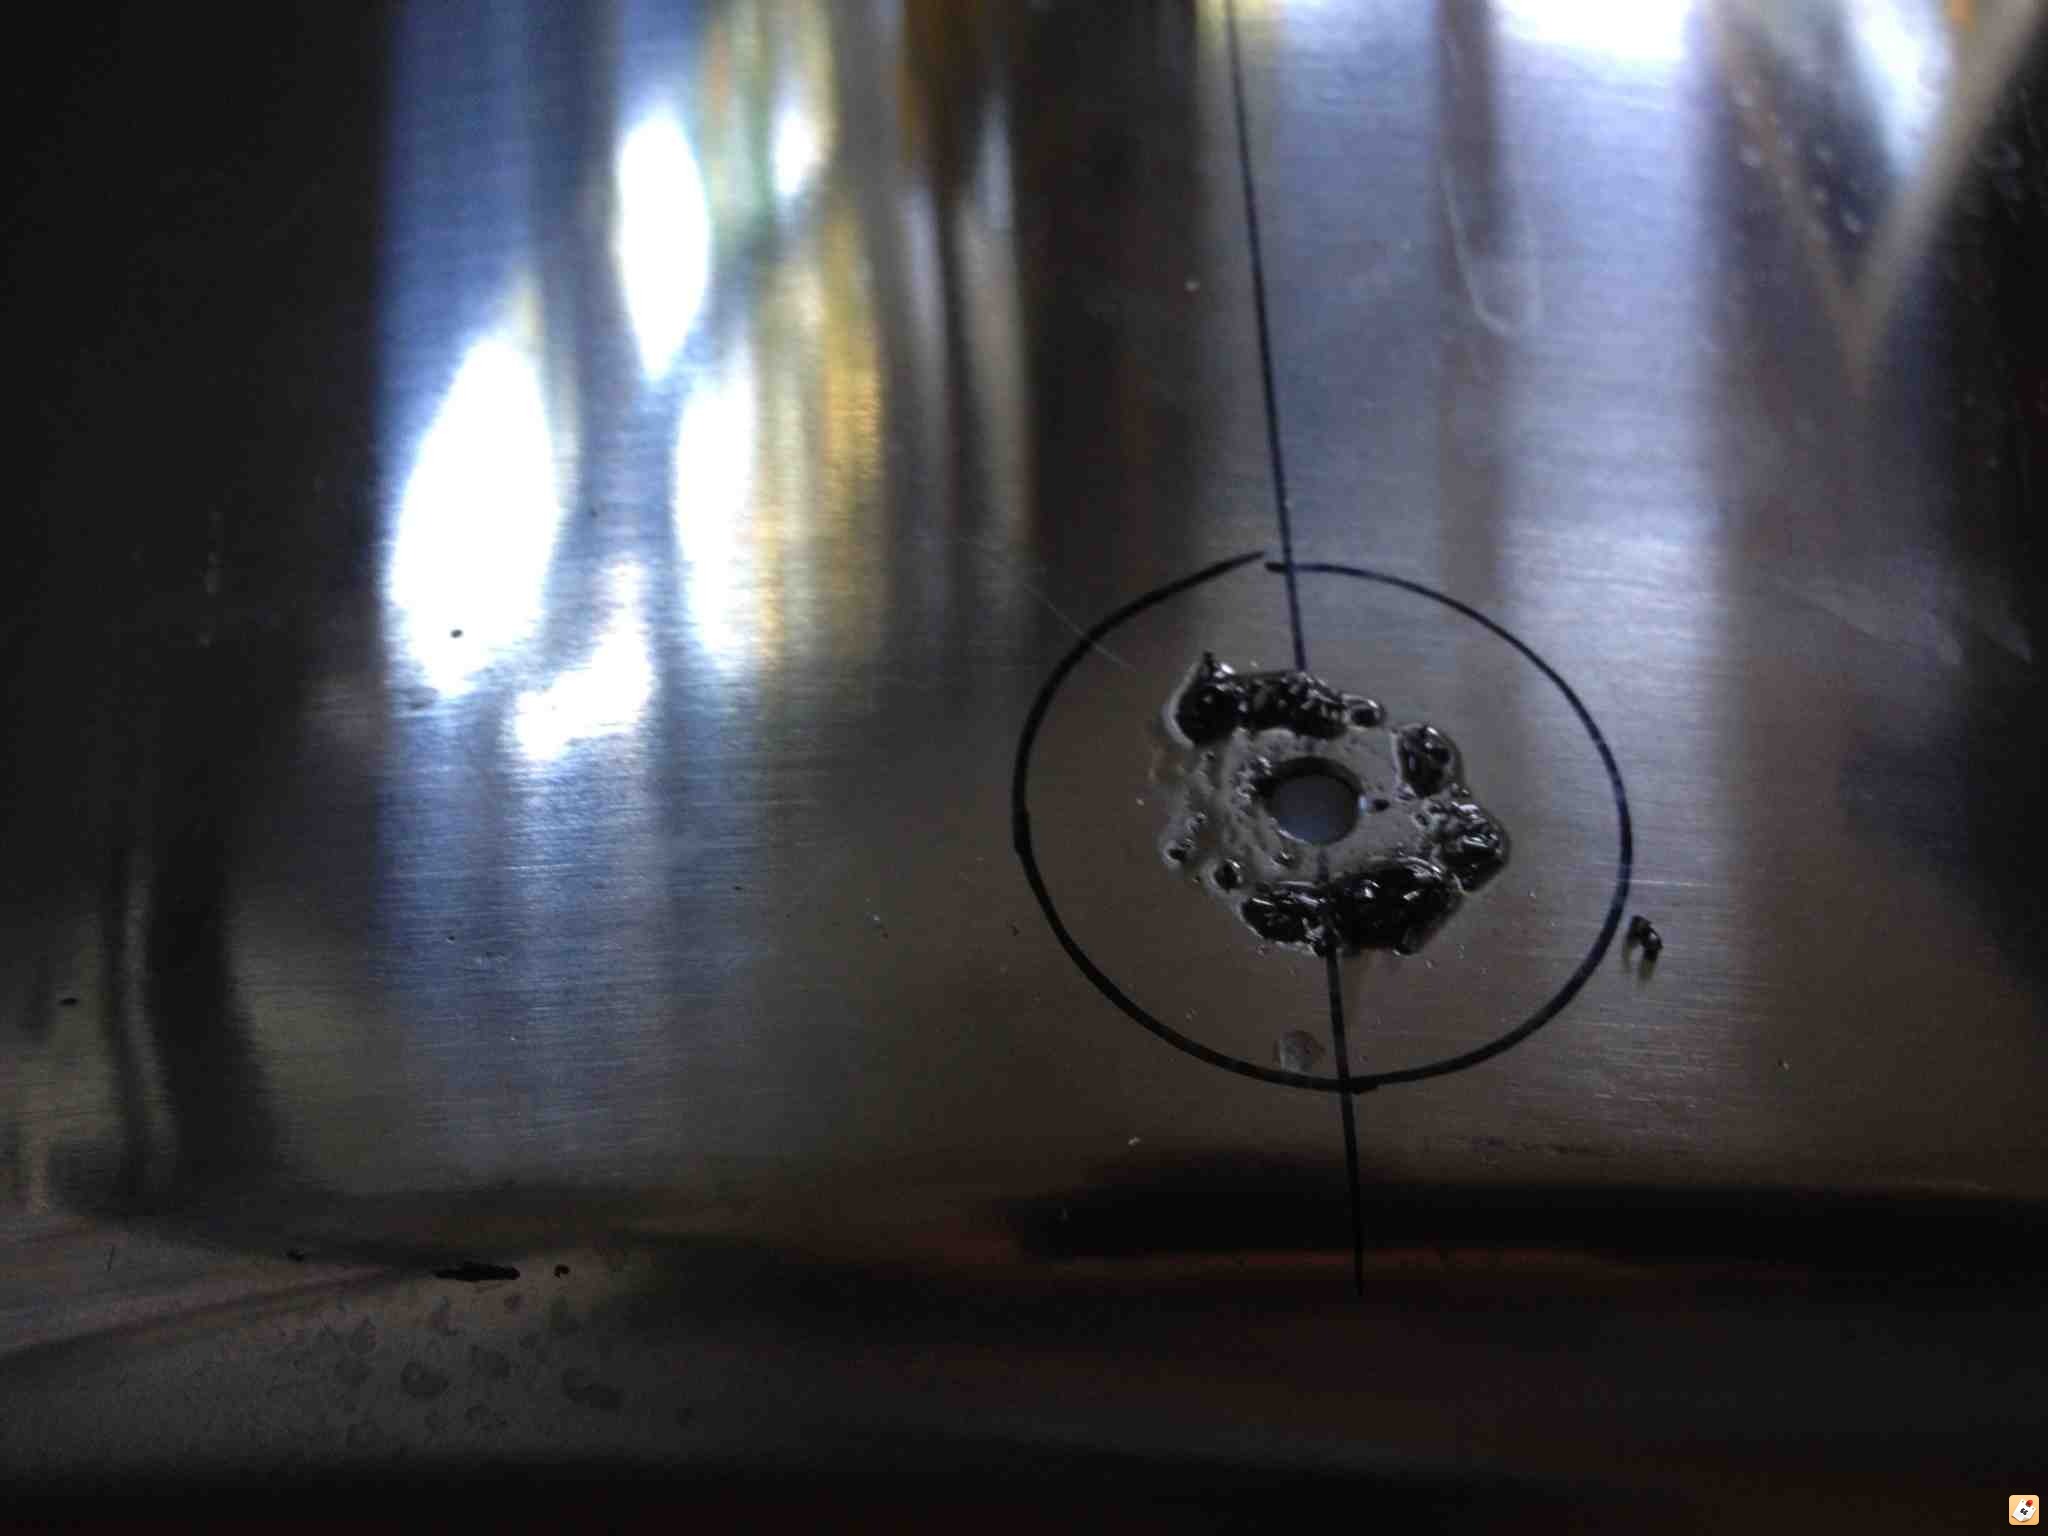
9. Place the punch through the hole, I used it with the hex key on the outside and cutter on the inside so it would be smooth on the inside and good for the seals.
Then just turn the hex key (you get three clicks and then it goes all the way through).
Punch all the holes and then step back and admire your pot!!!
Before filing off any sharp or sticky out bits.
Don't forget to remove the bit that's been punched out from the punch before moving onto the next hole! (These can be hammered flat and used as stainless steel washers).
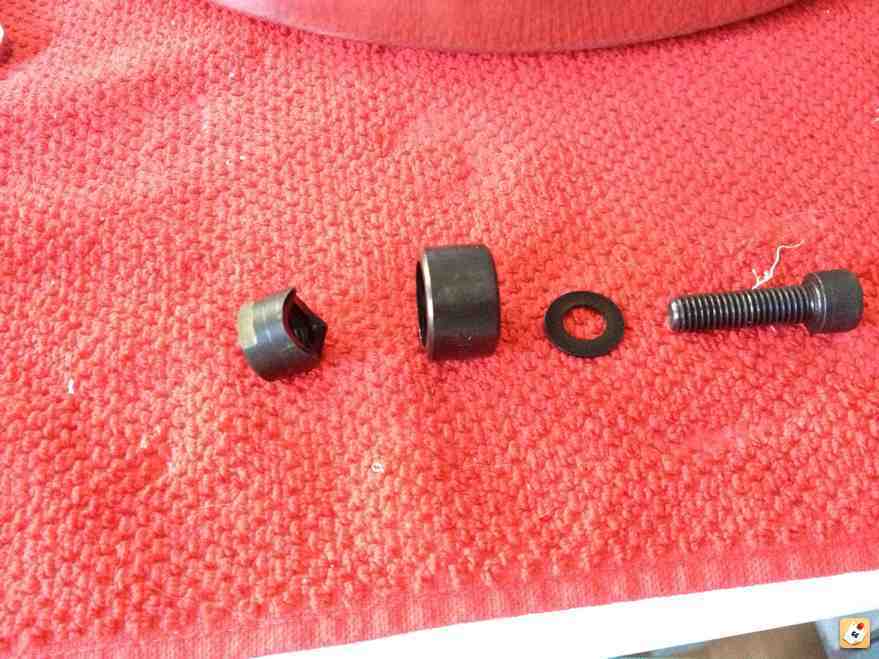
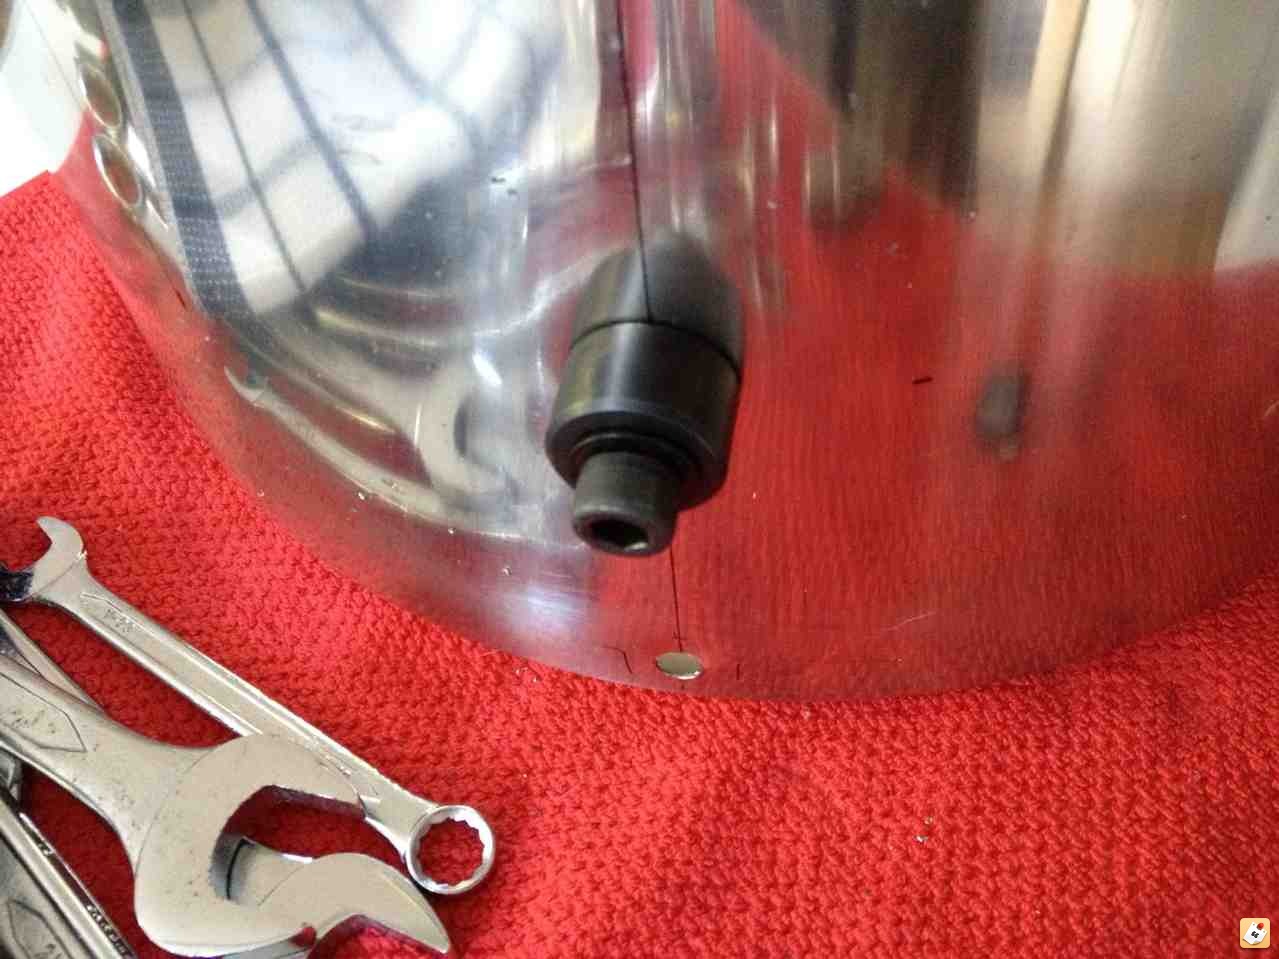


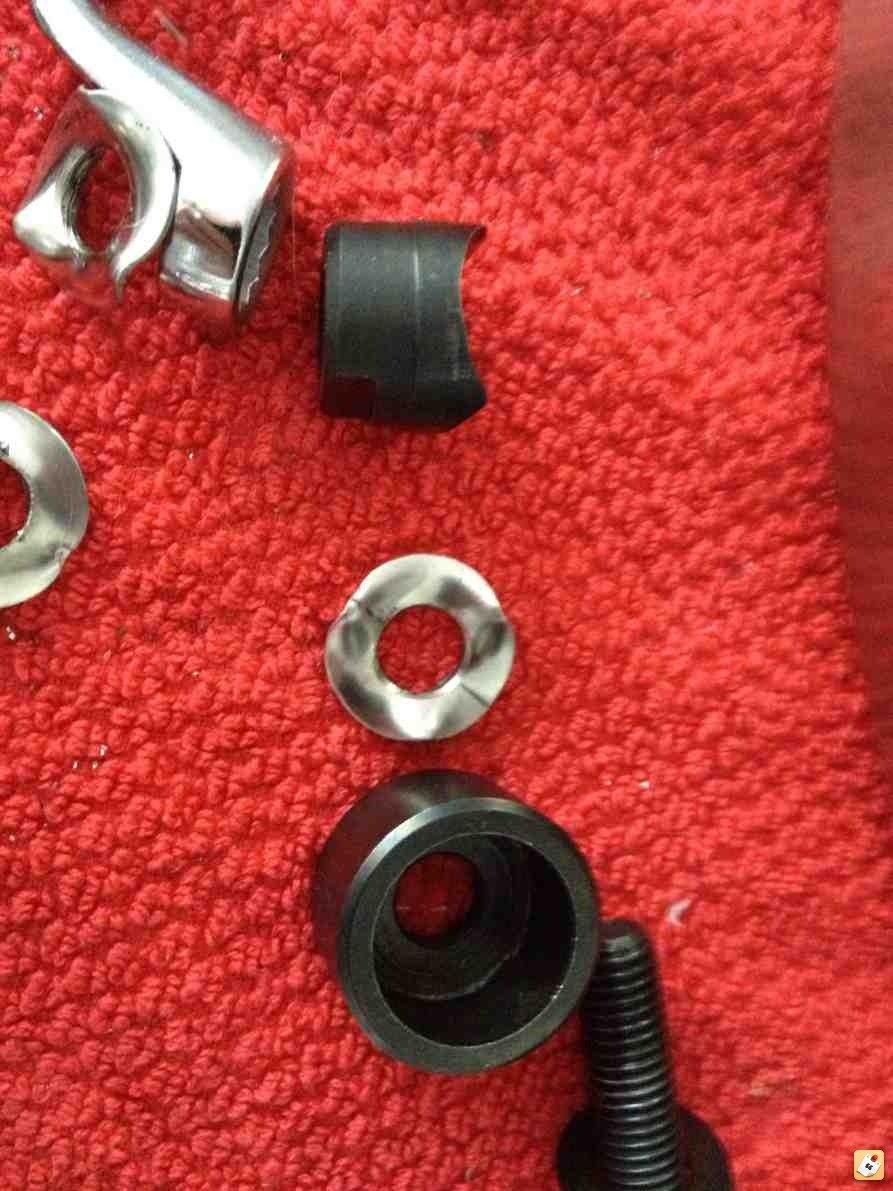
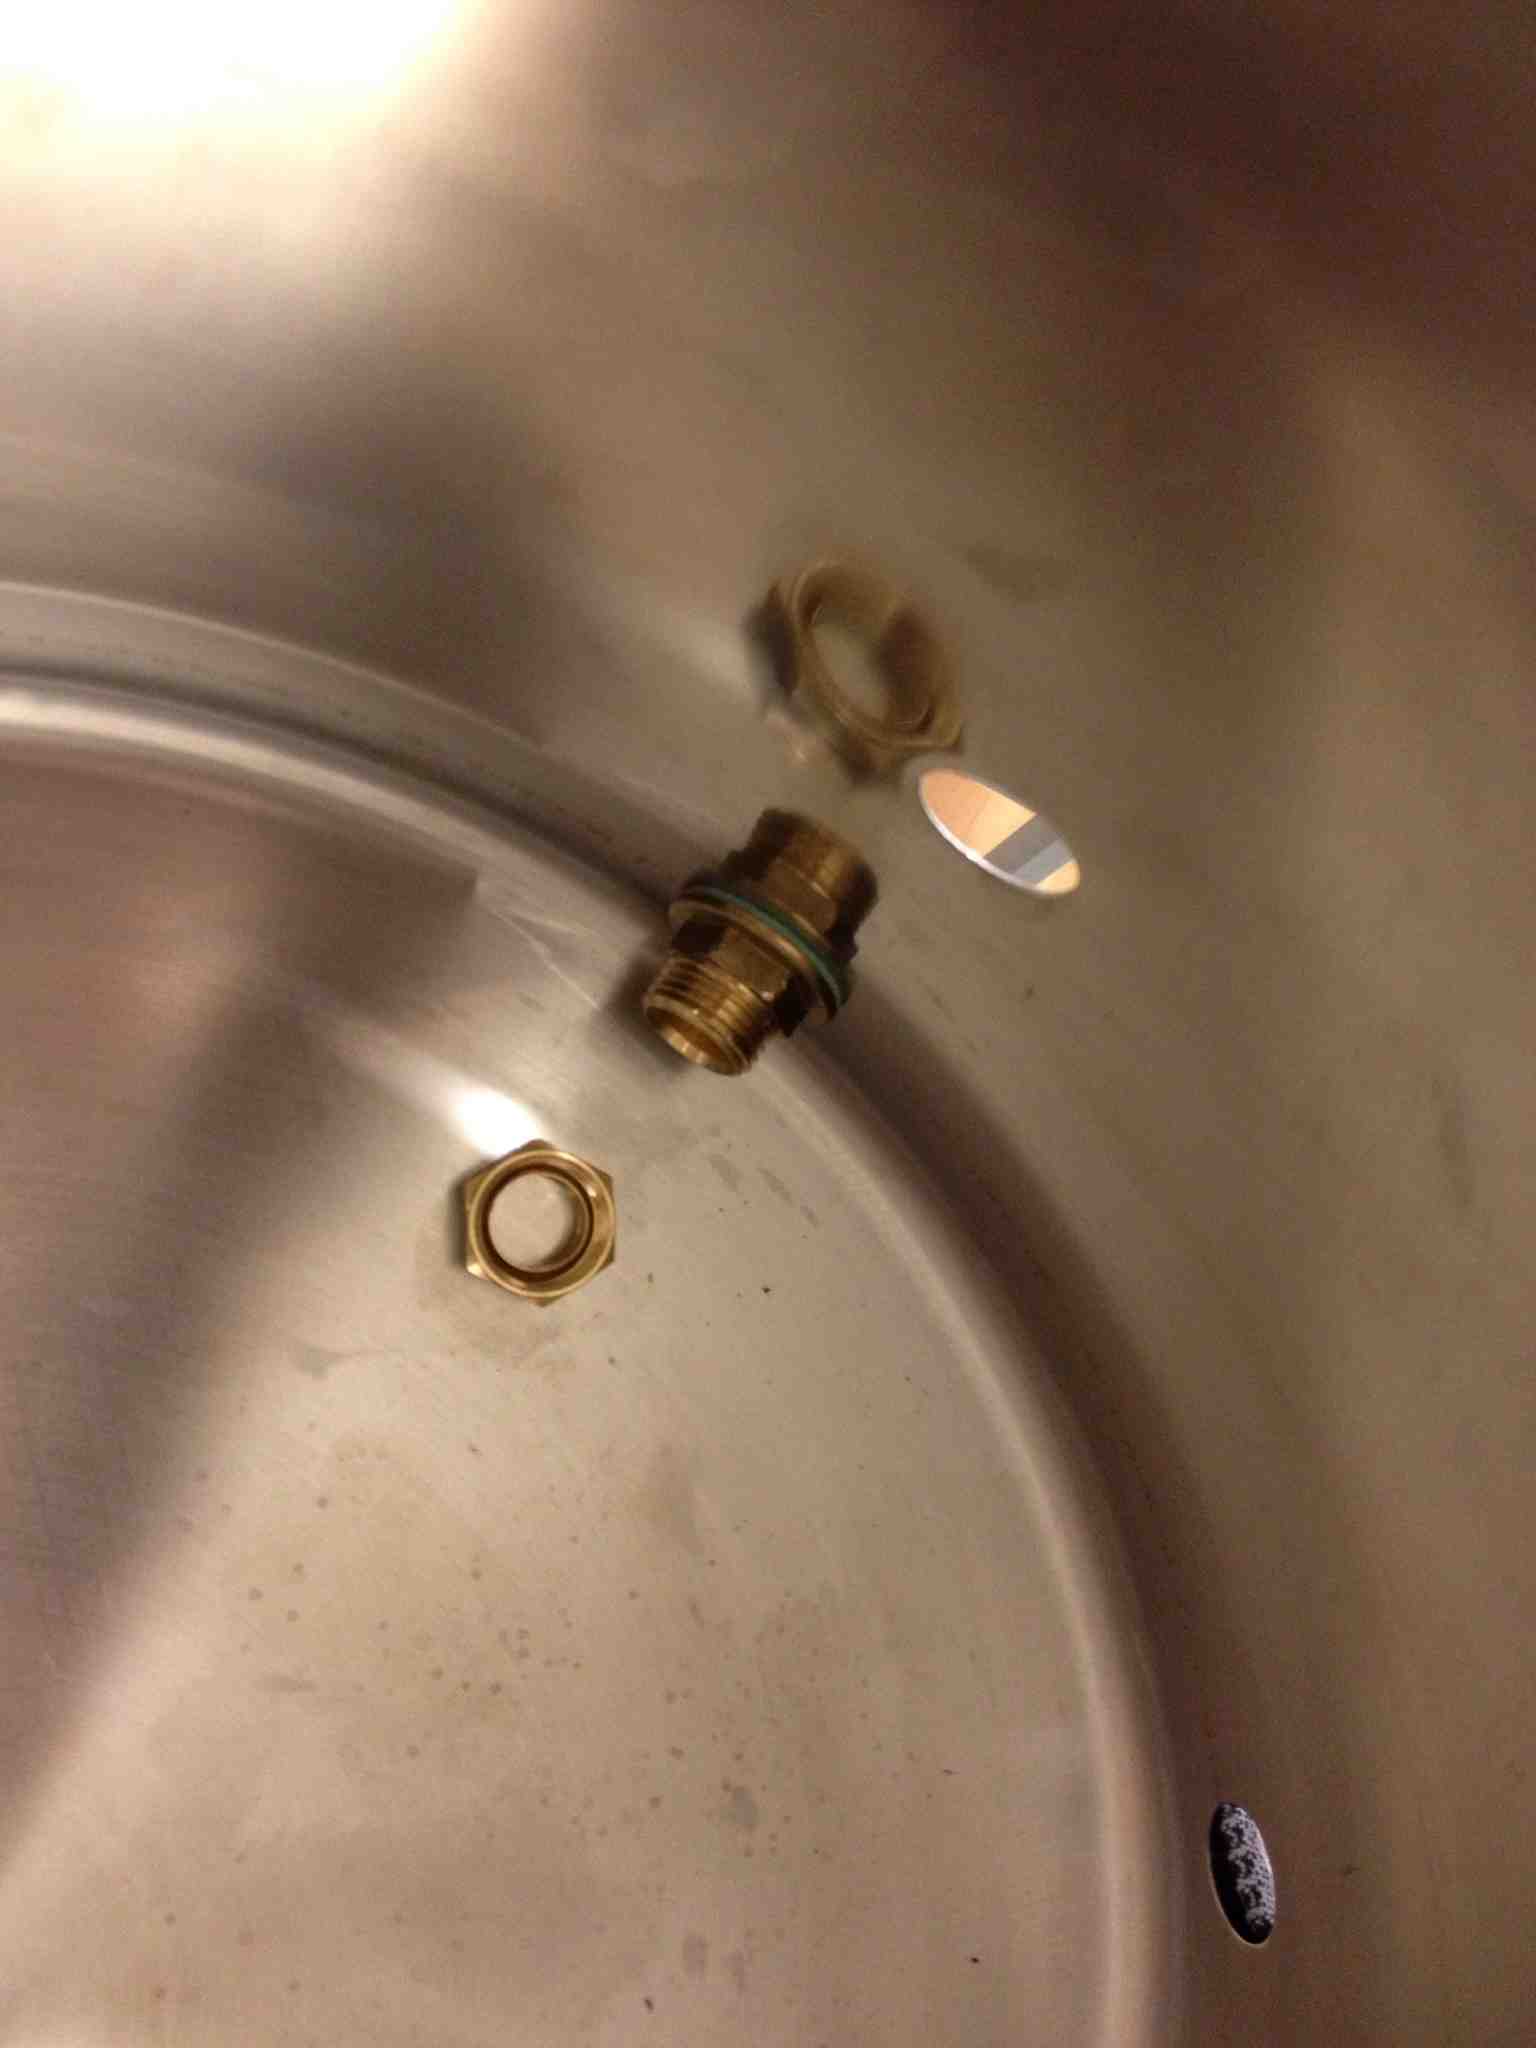
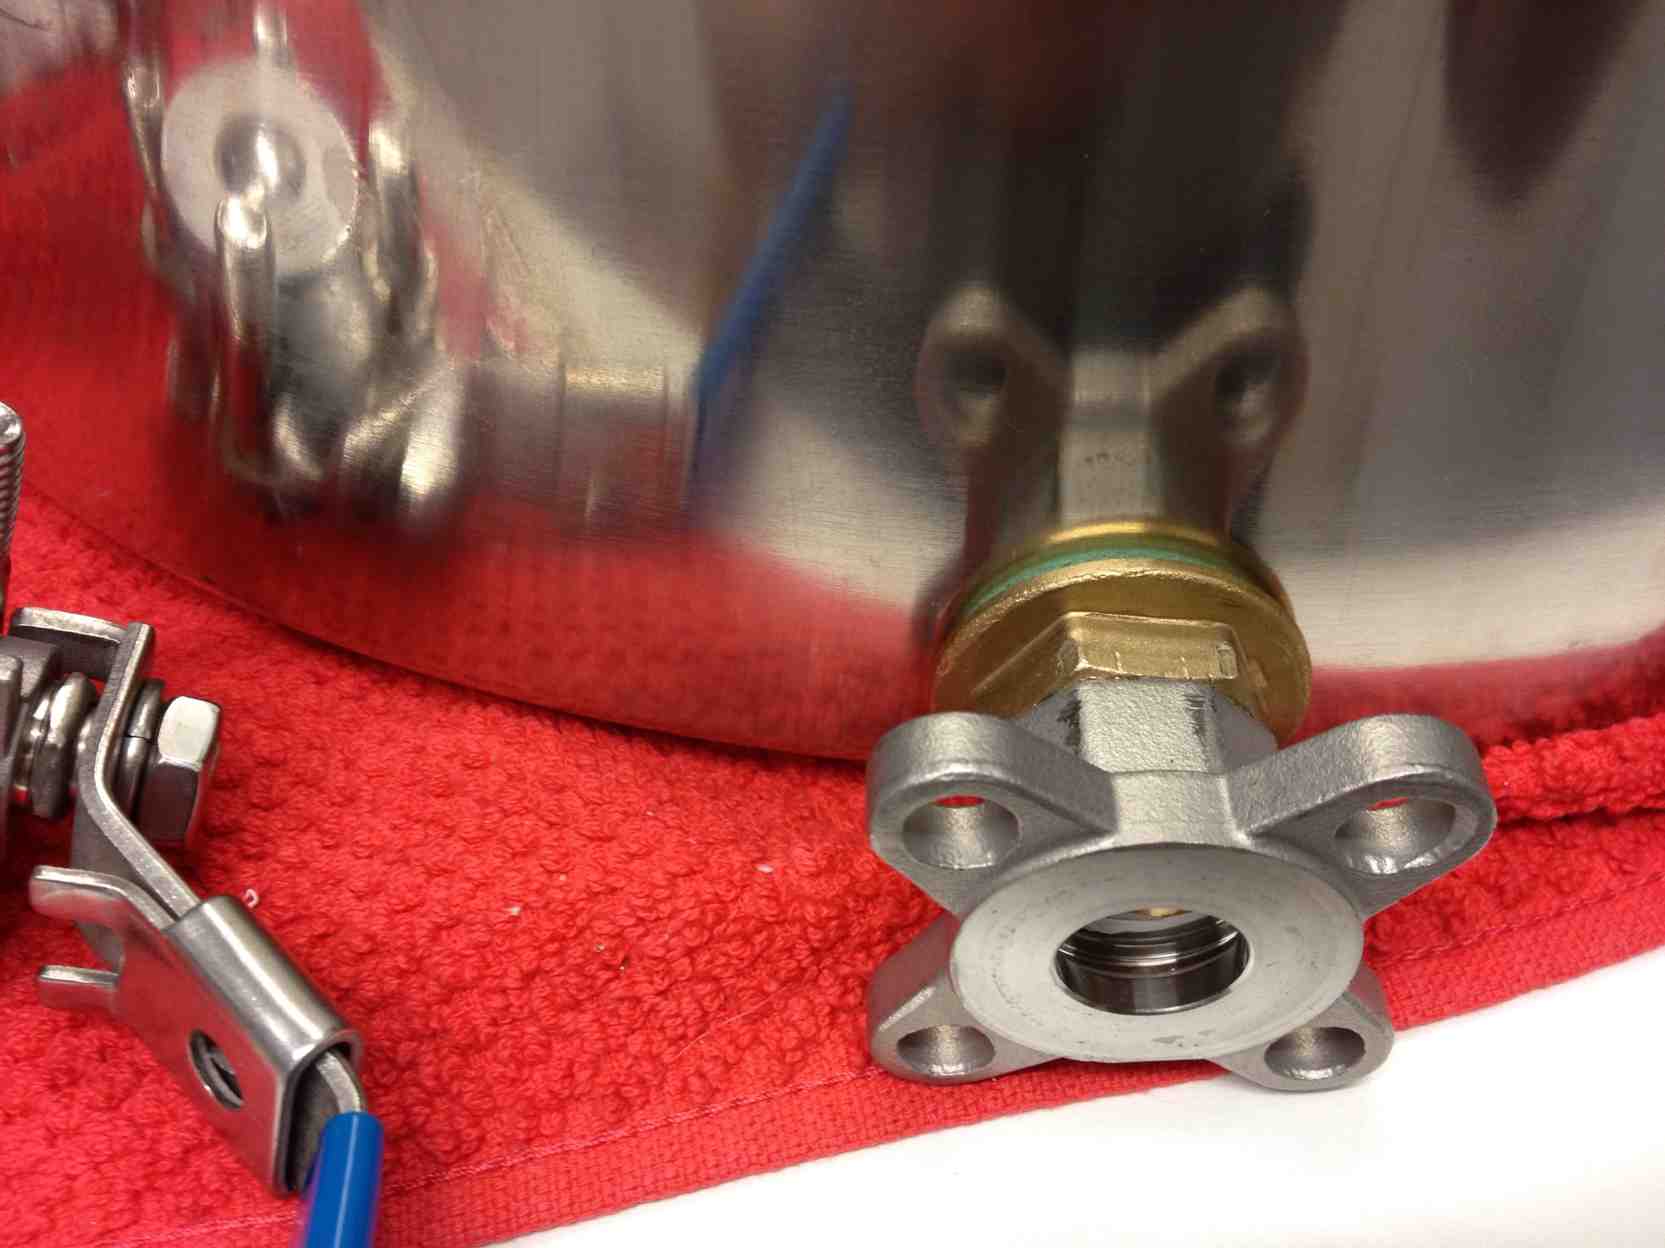
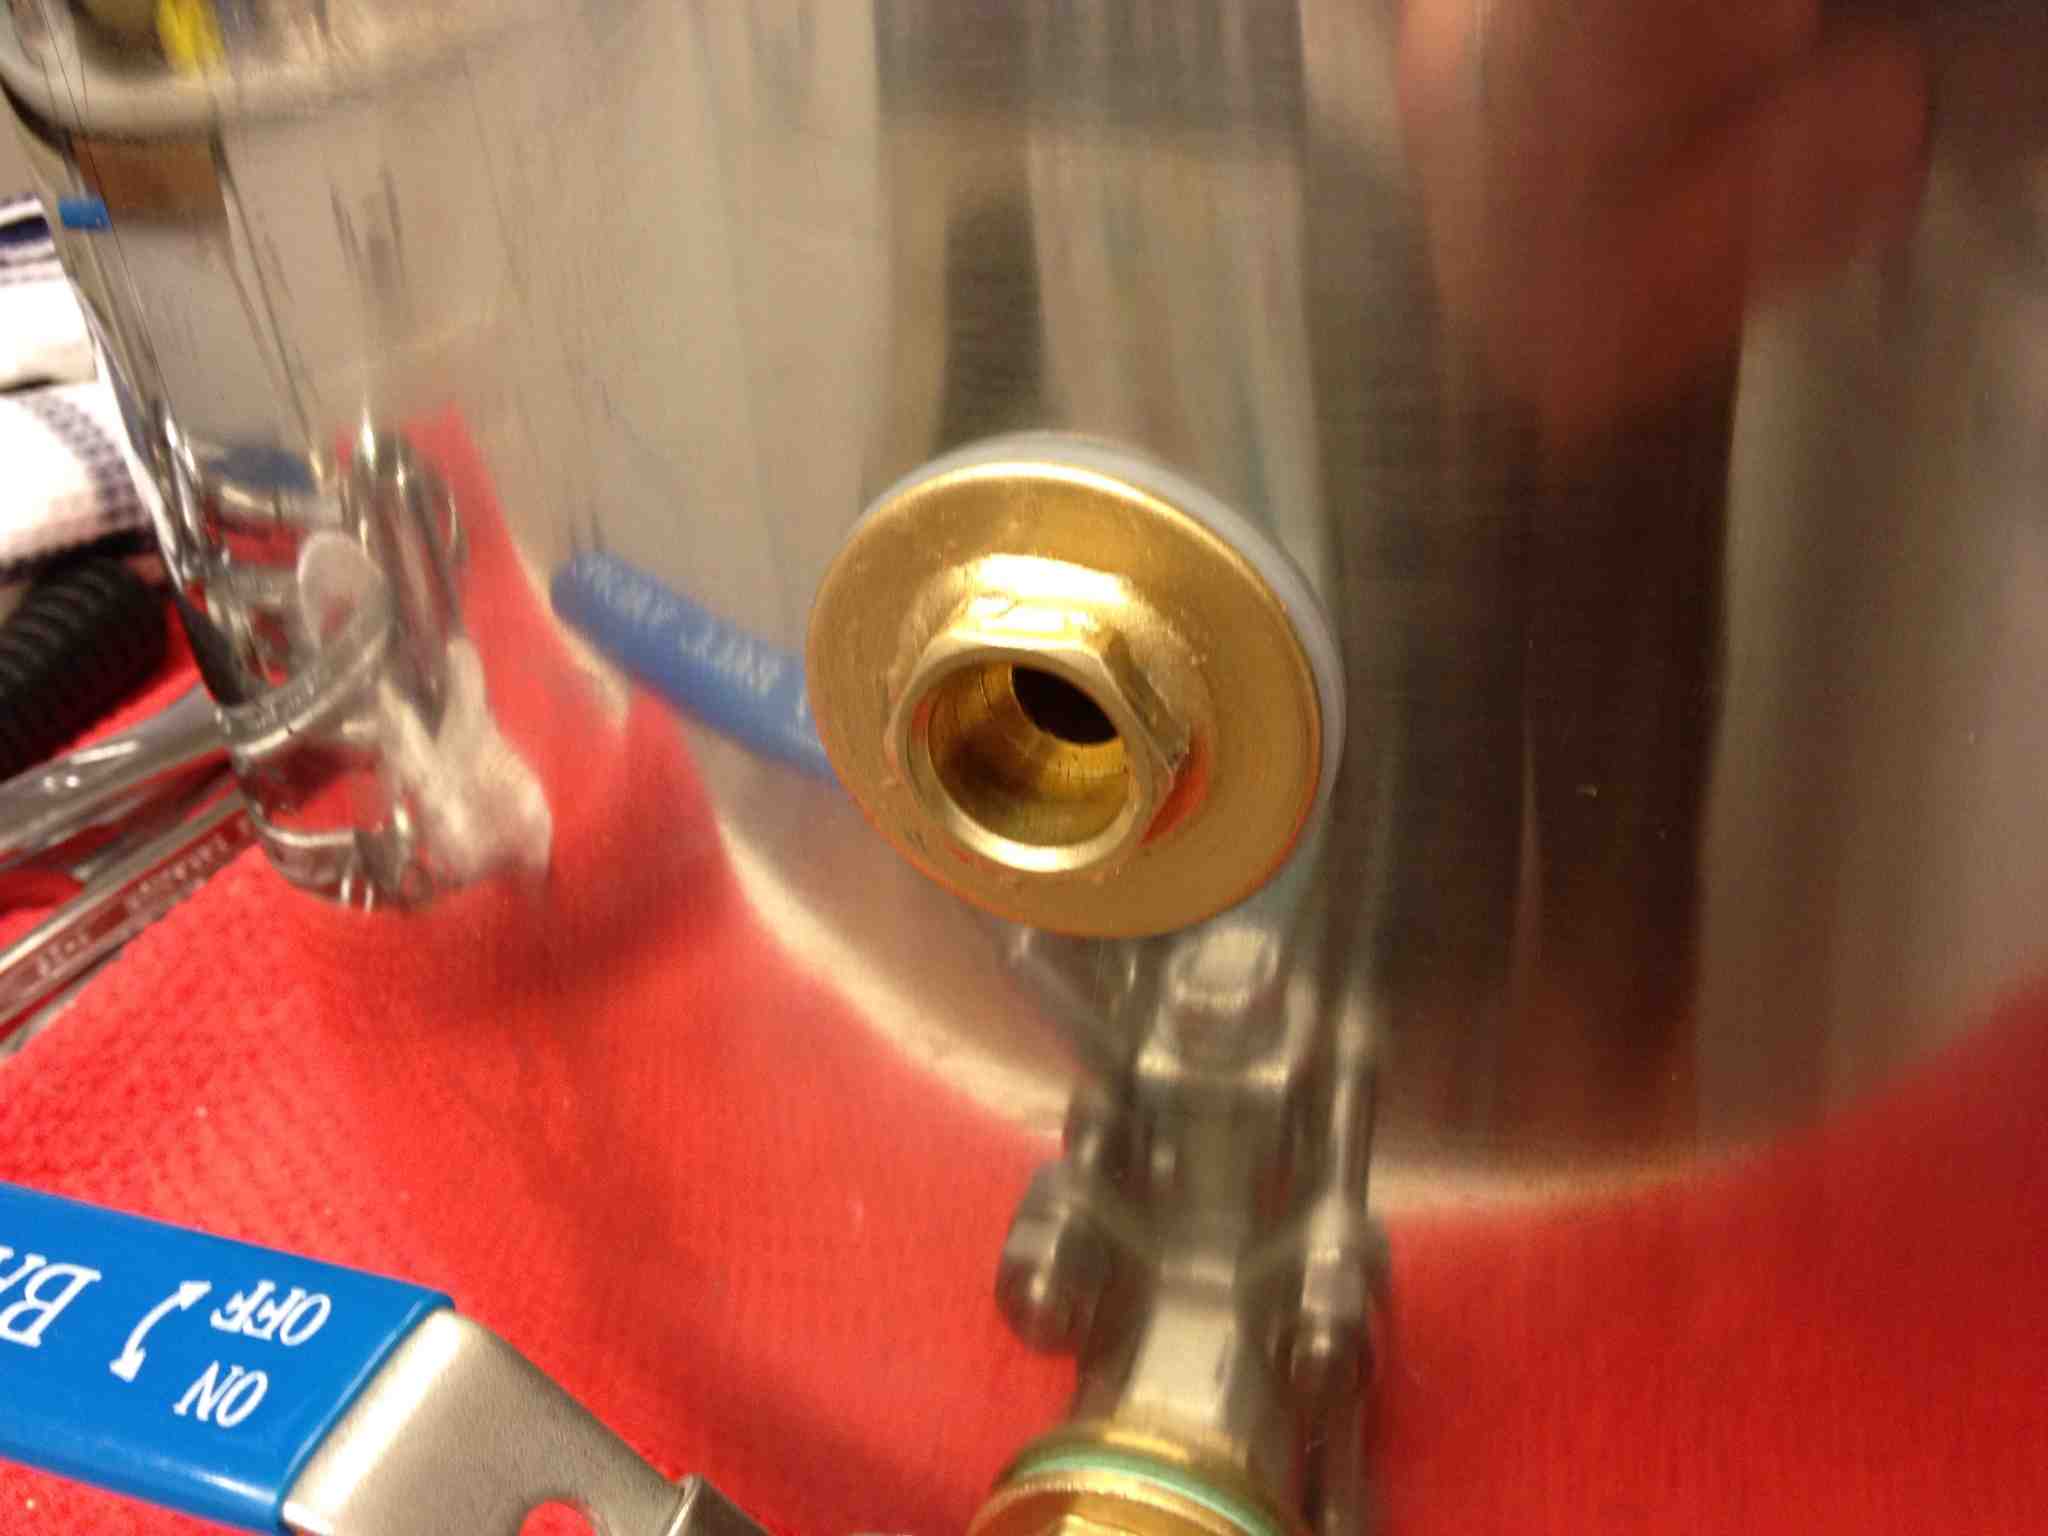
10. Next I fitted the bulkhead that came with the tap, this just had two fibre washers each side of the pot.
This leaves a compression joint on the inside for attaching various filters and stuff.
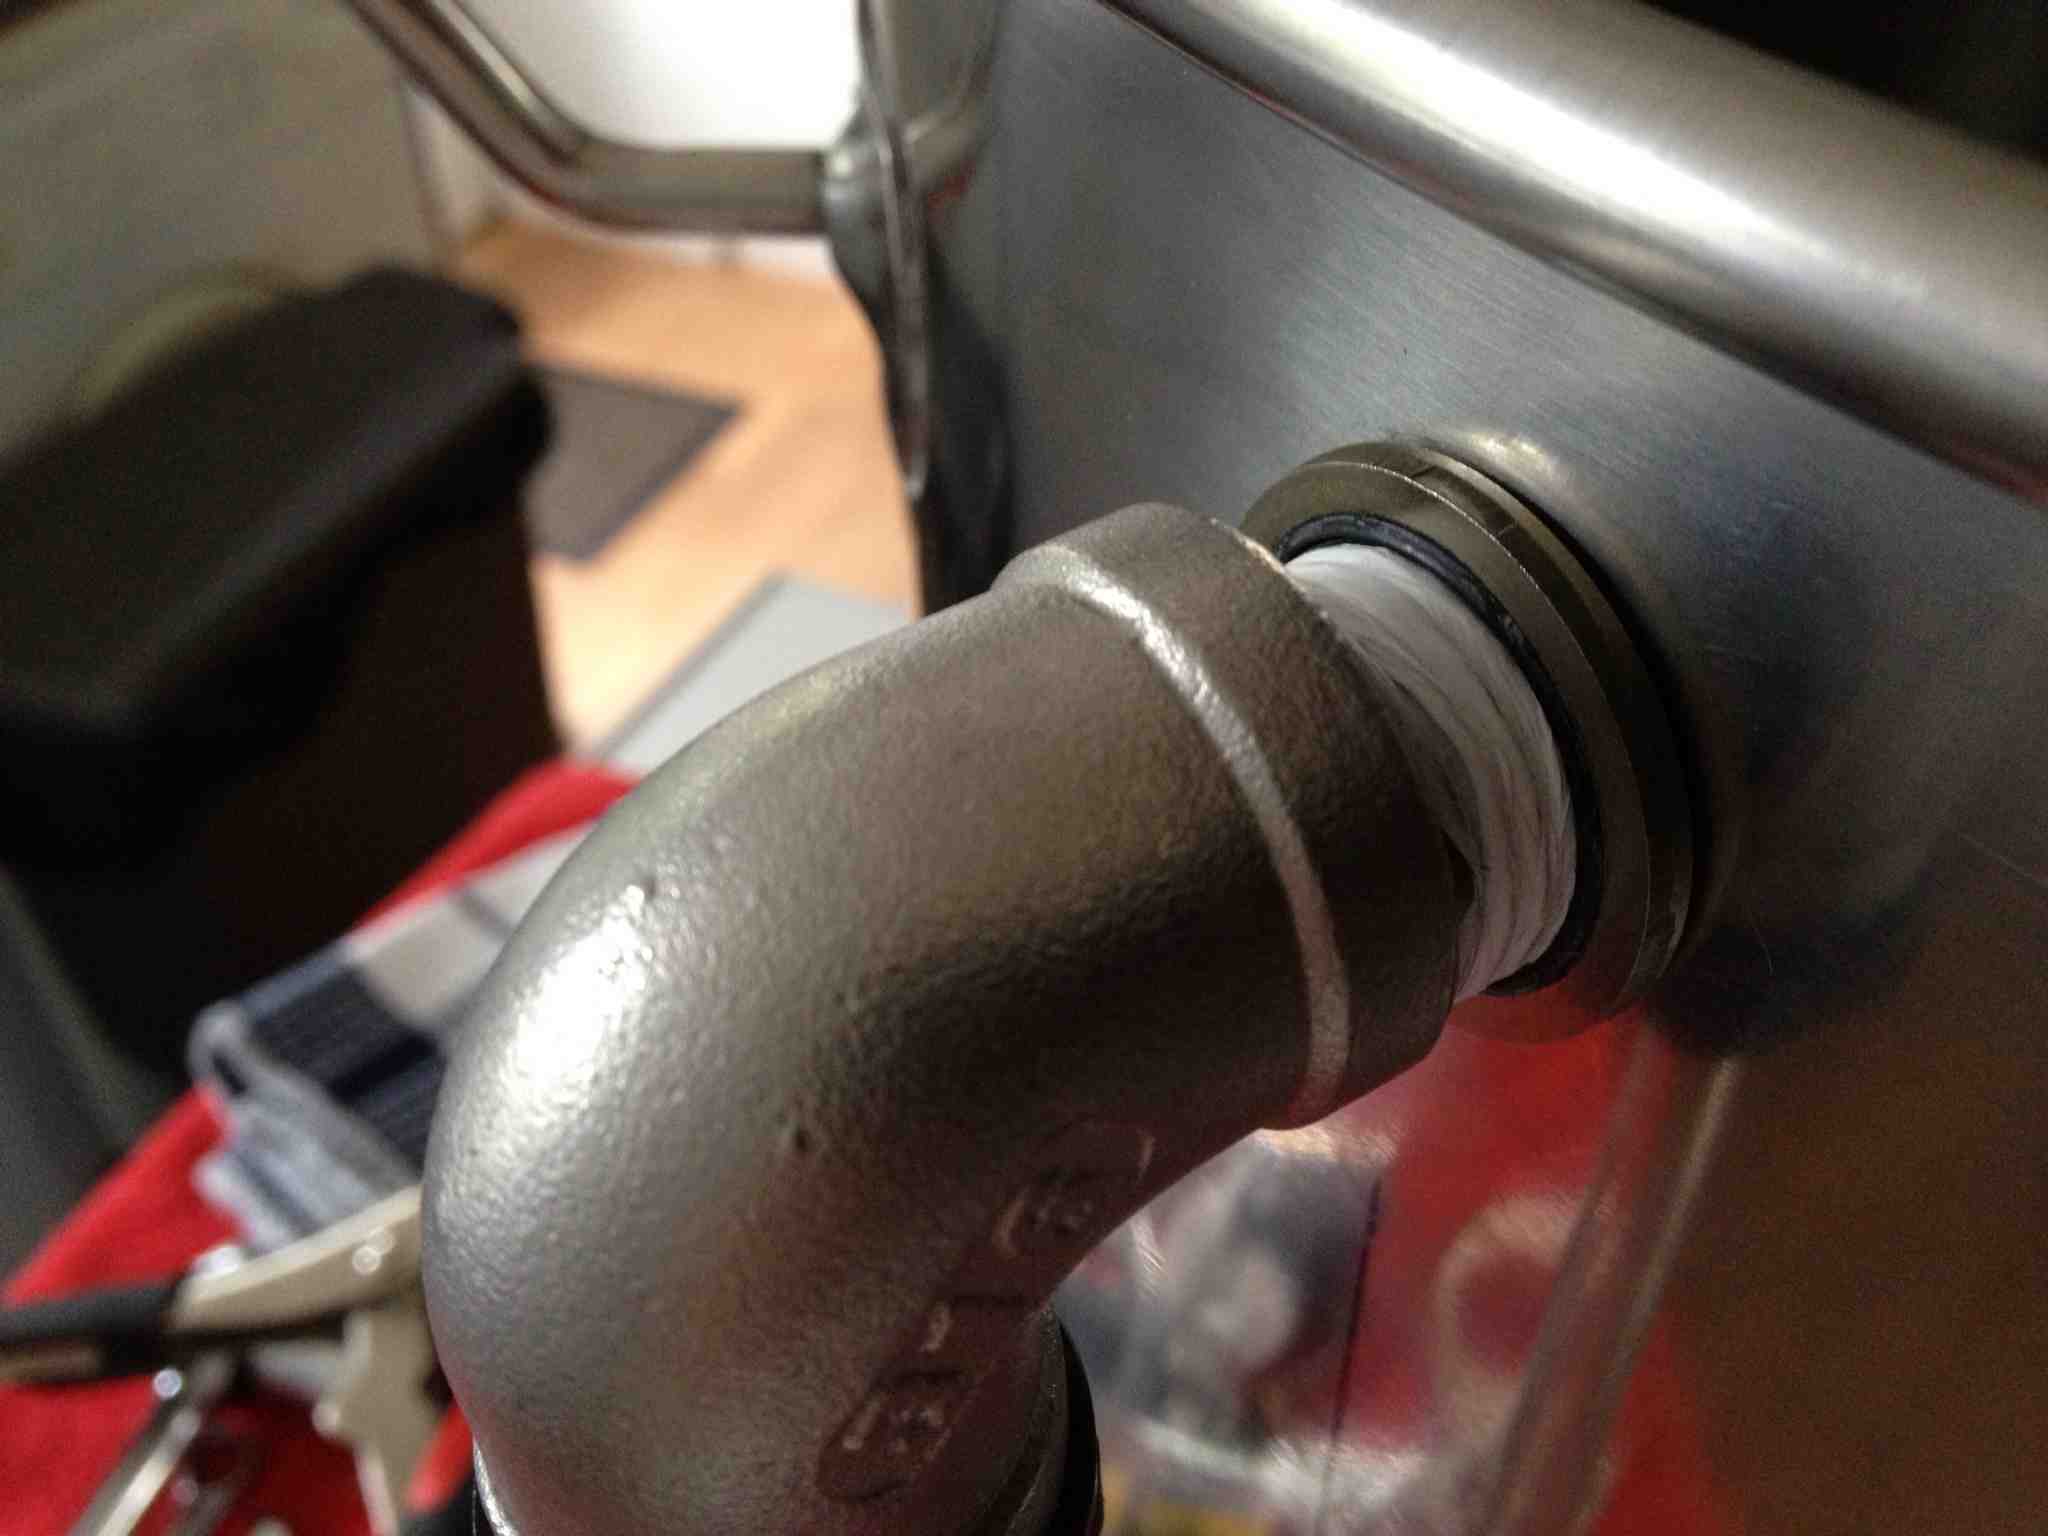
Make sure not to forget the PTFE tape around the thread before fitting the lever tap.
I wound between 10 and 15 wraps around the thread.
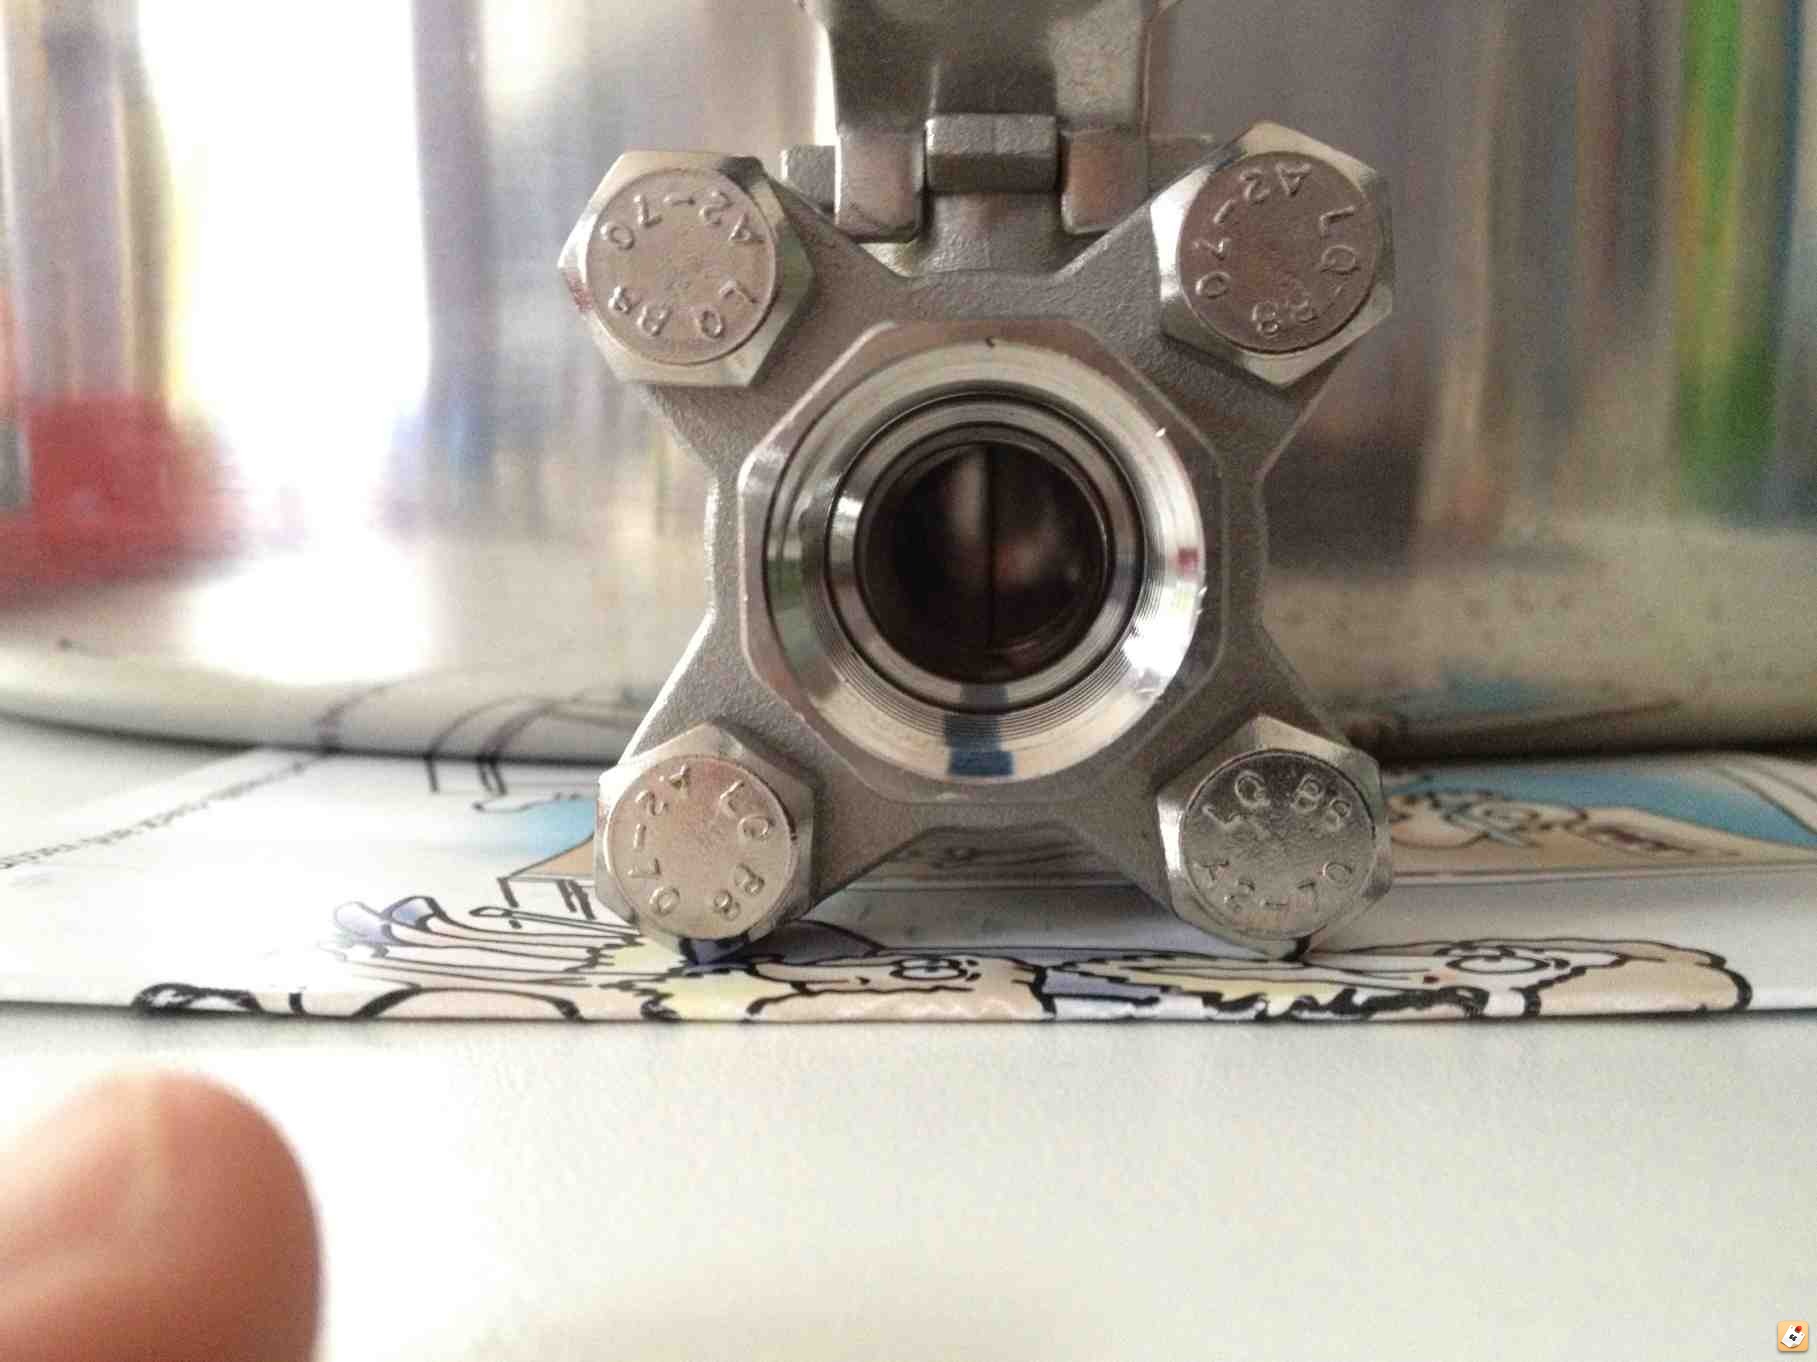
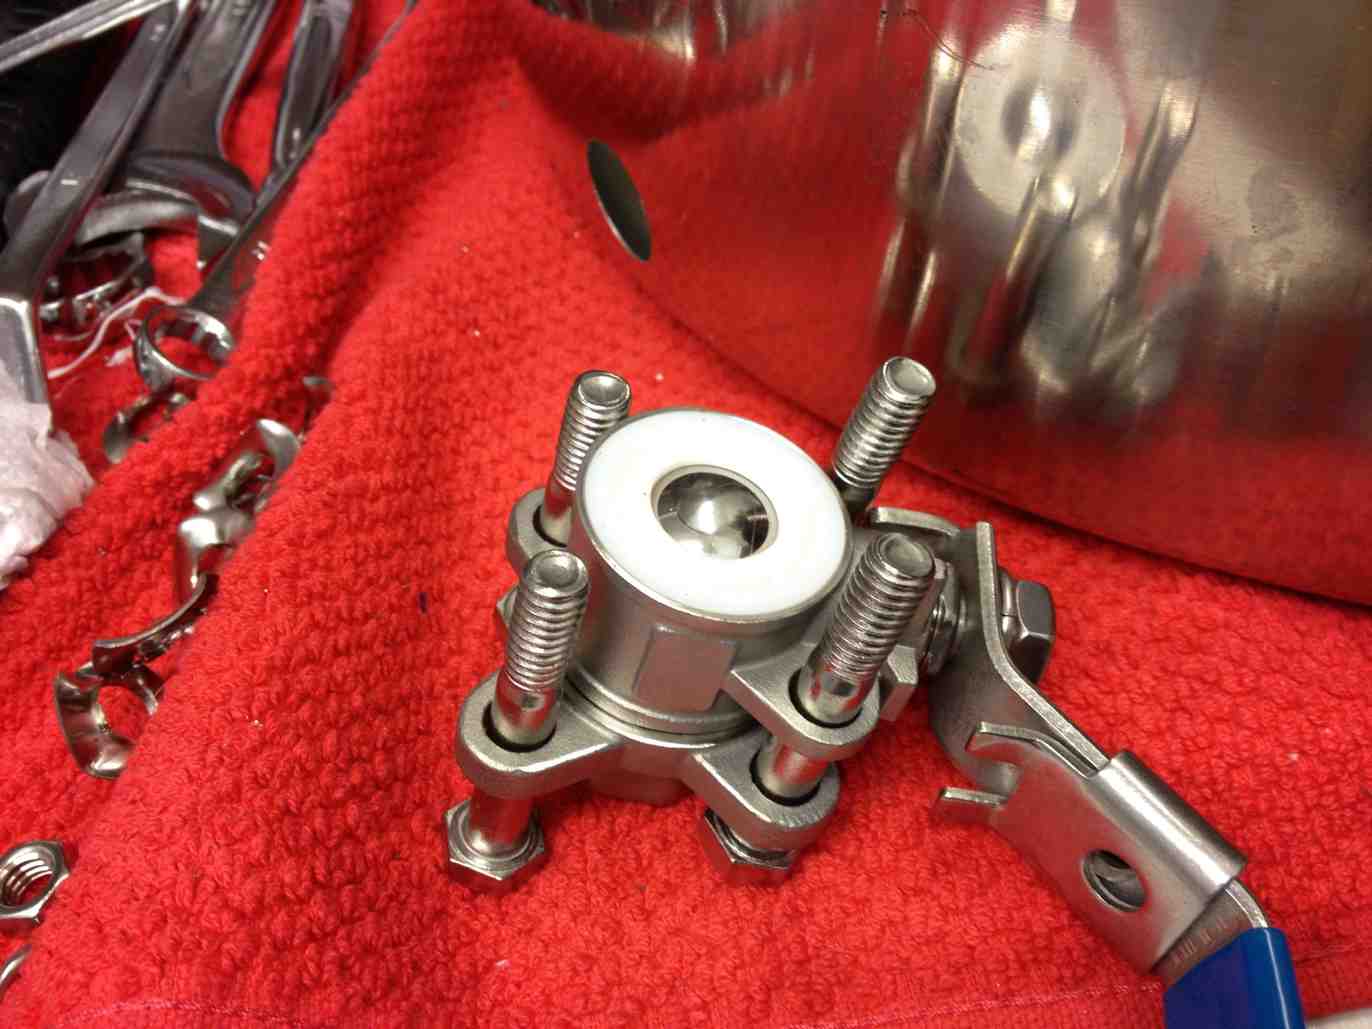
I found it easier to take the lever tap apart and fit the first piece of the tap onto the pot, (making sure to put the PTFE tape on), this allowed me to get it straight and also allowed me to be able to get a spanner onto the tap piece to hold it without the rest of the tap interfering.
It's simple to undo the four holding bolts, and this would have to be done anyway if the tap ever needed cleaning.
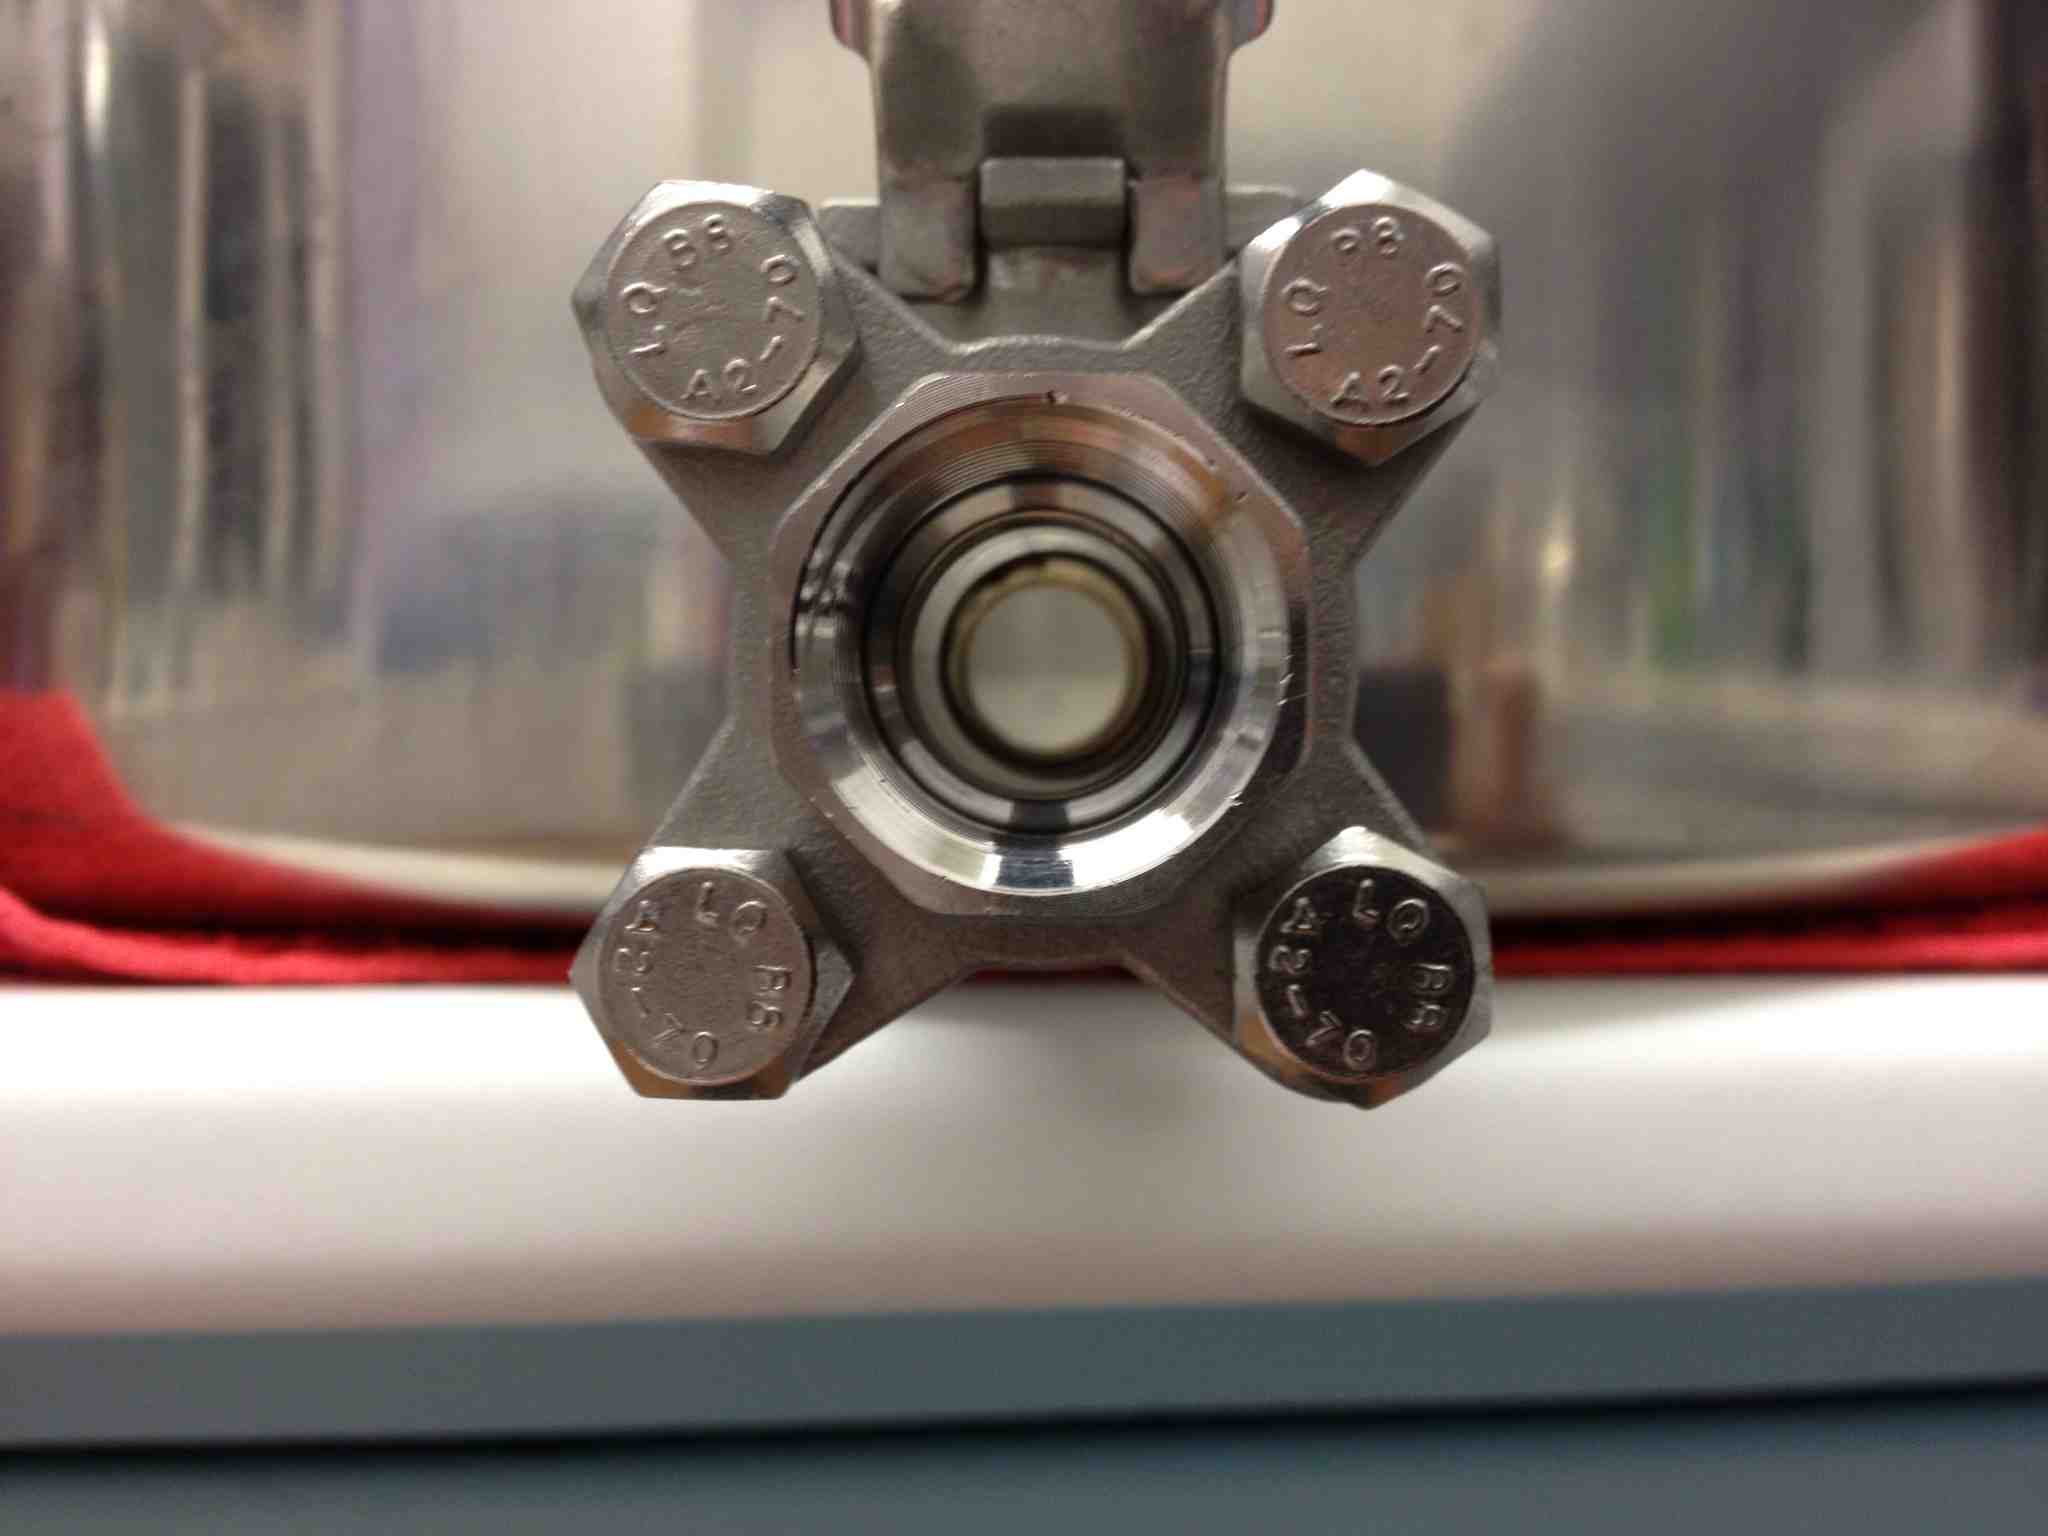
Once the piece is on straight, the tap can be fitted back together, loosely at first to allow you to align the pieces, then go around giving a little tighten to each bolt before getting an exact alignment and tightening the bolts (going around each bolt tightening a little at a time until fully tight).
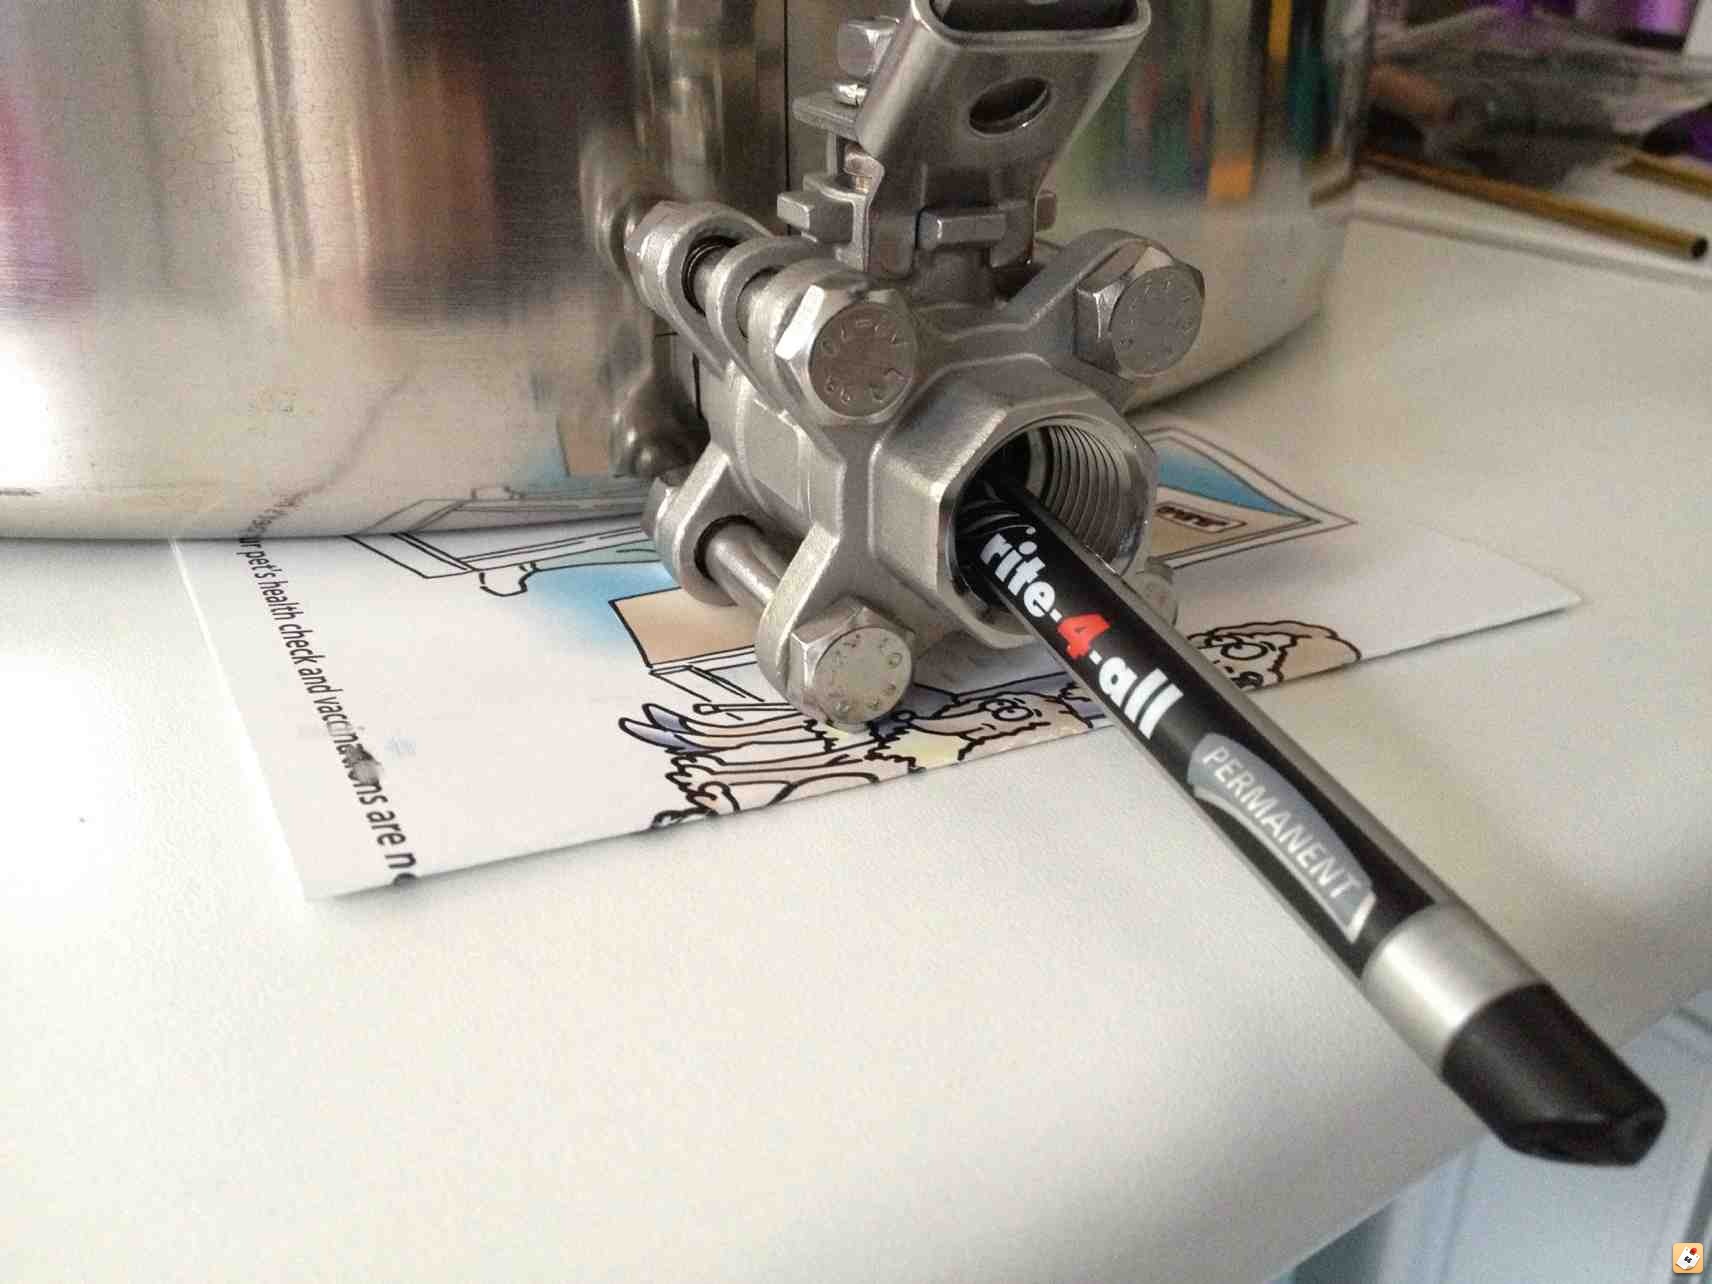
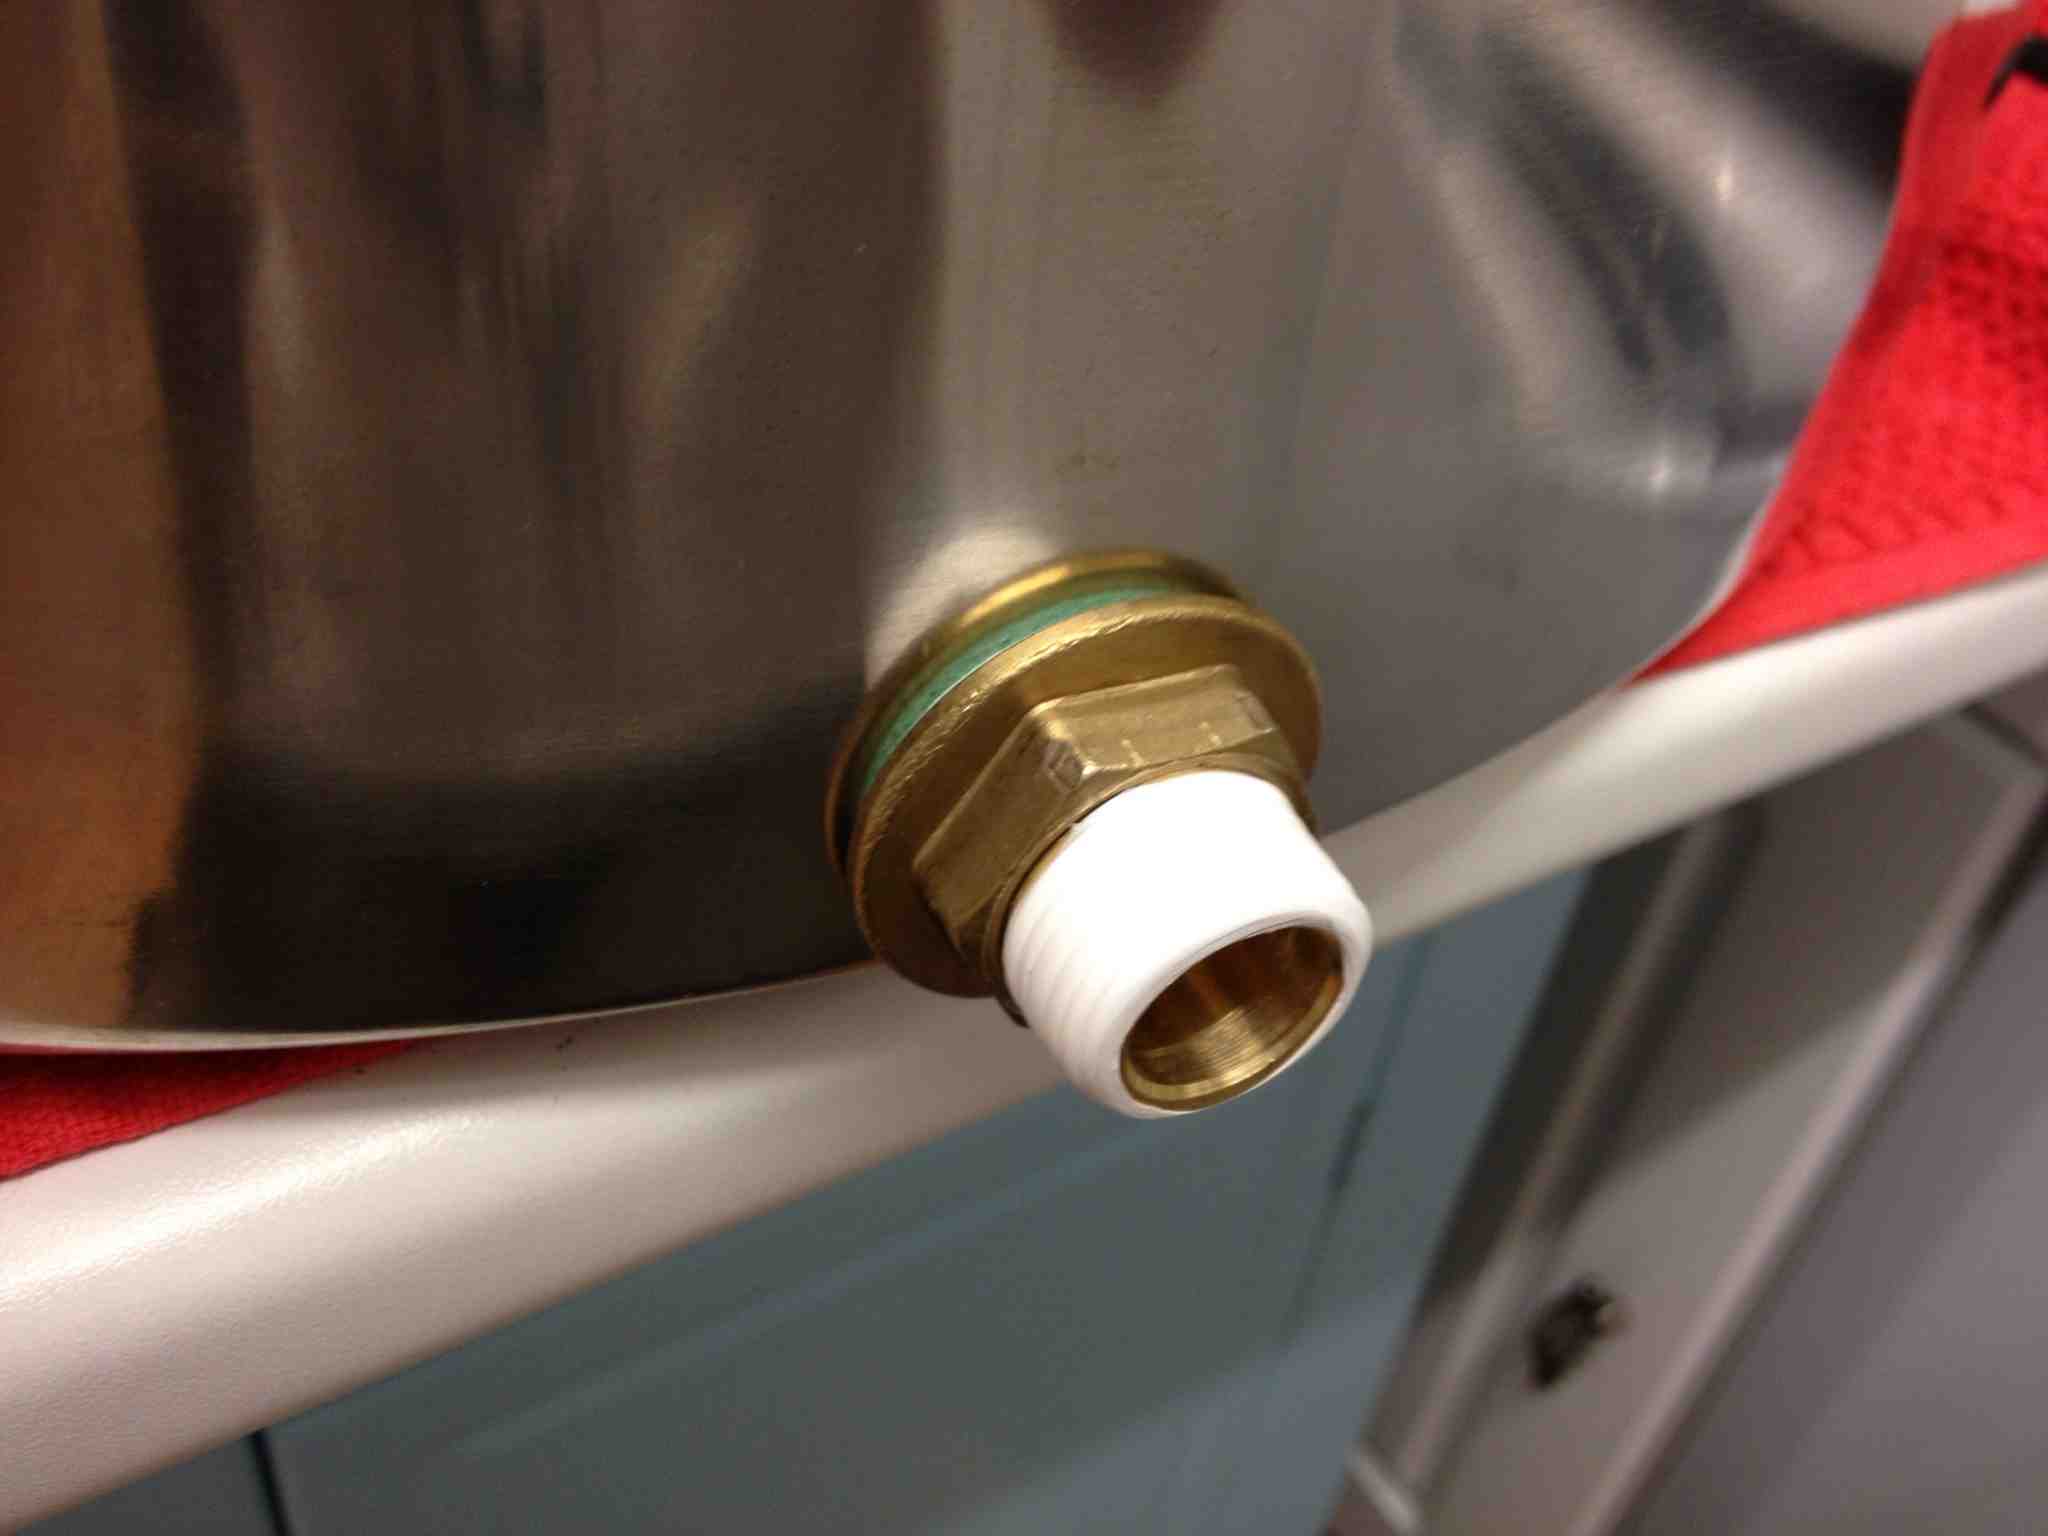
Next add some PTFE tape to the hose barb and screw this into the tap!
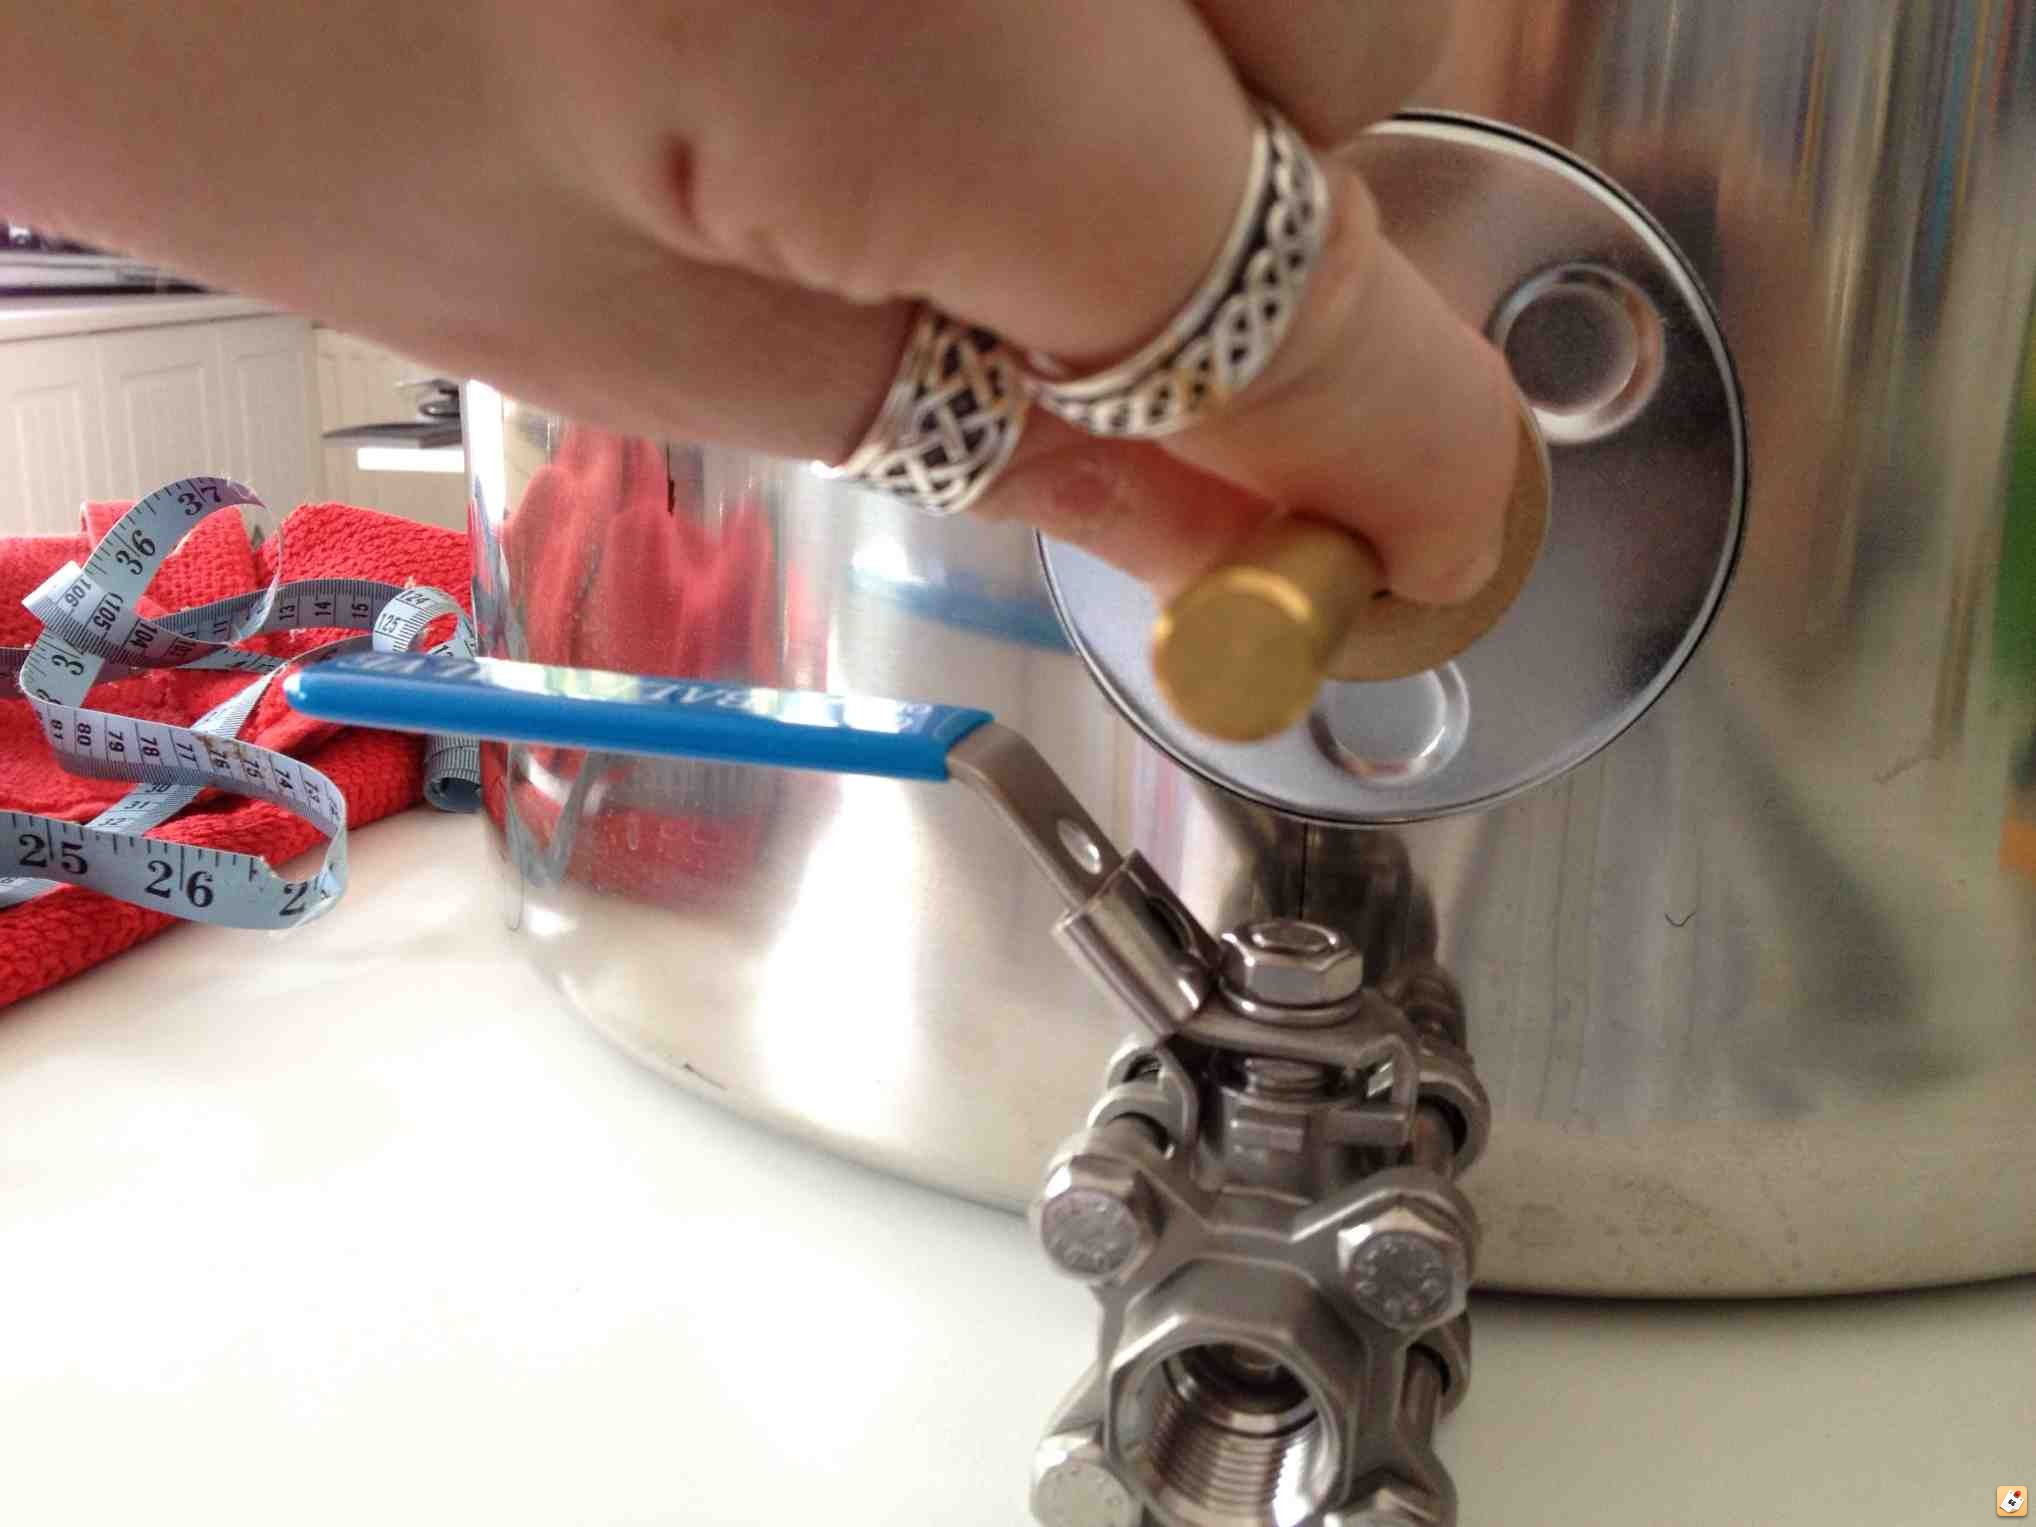
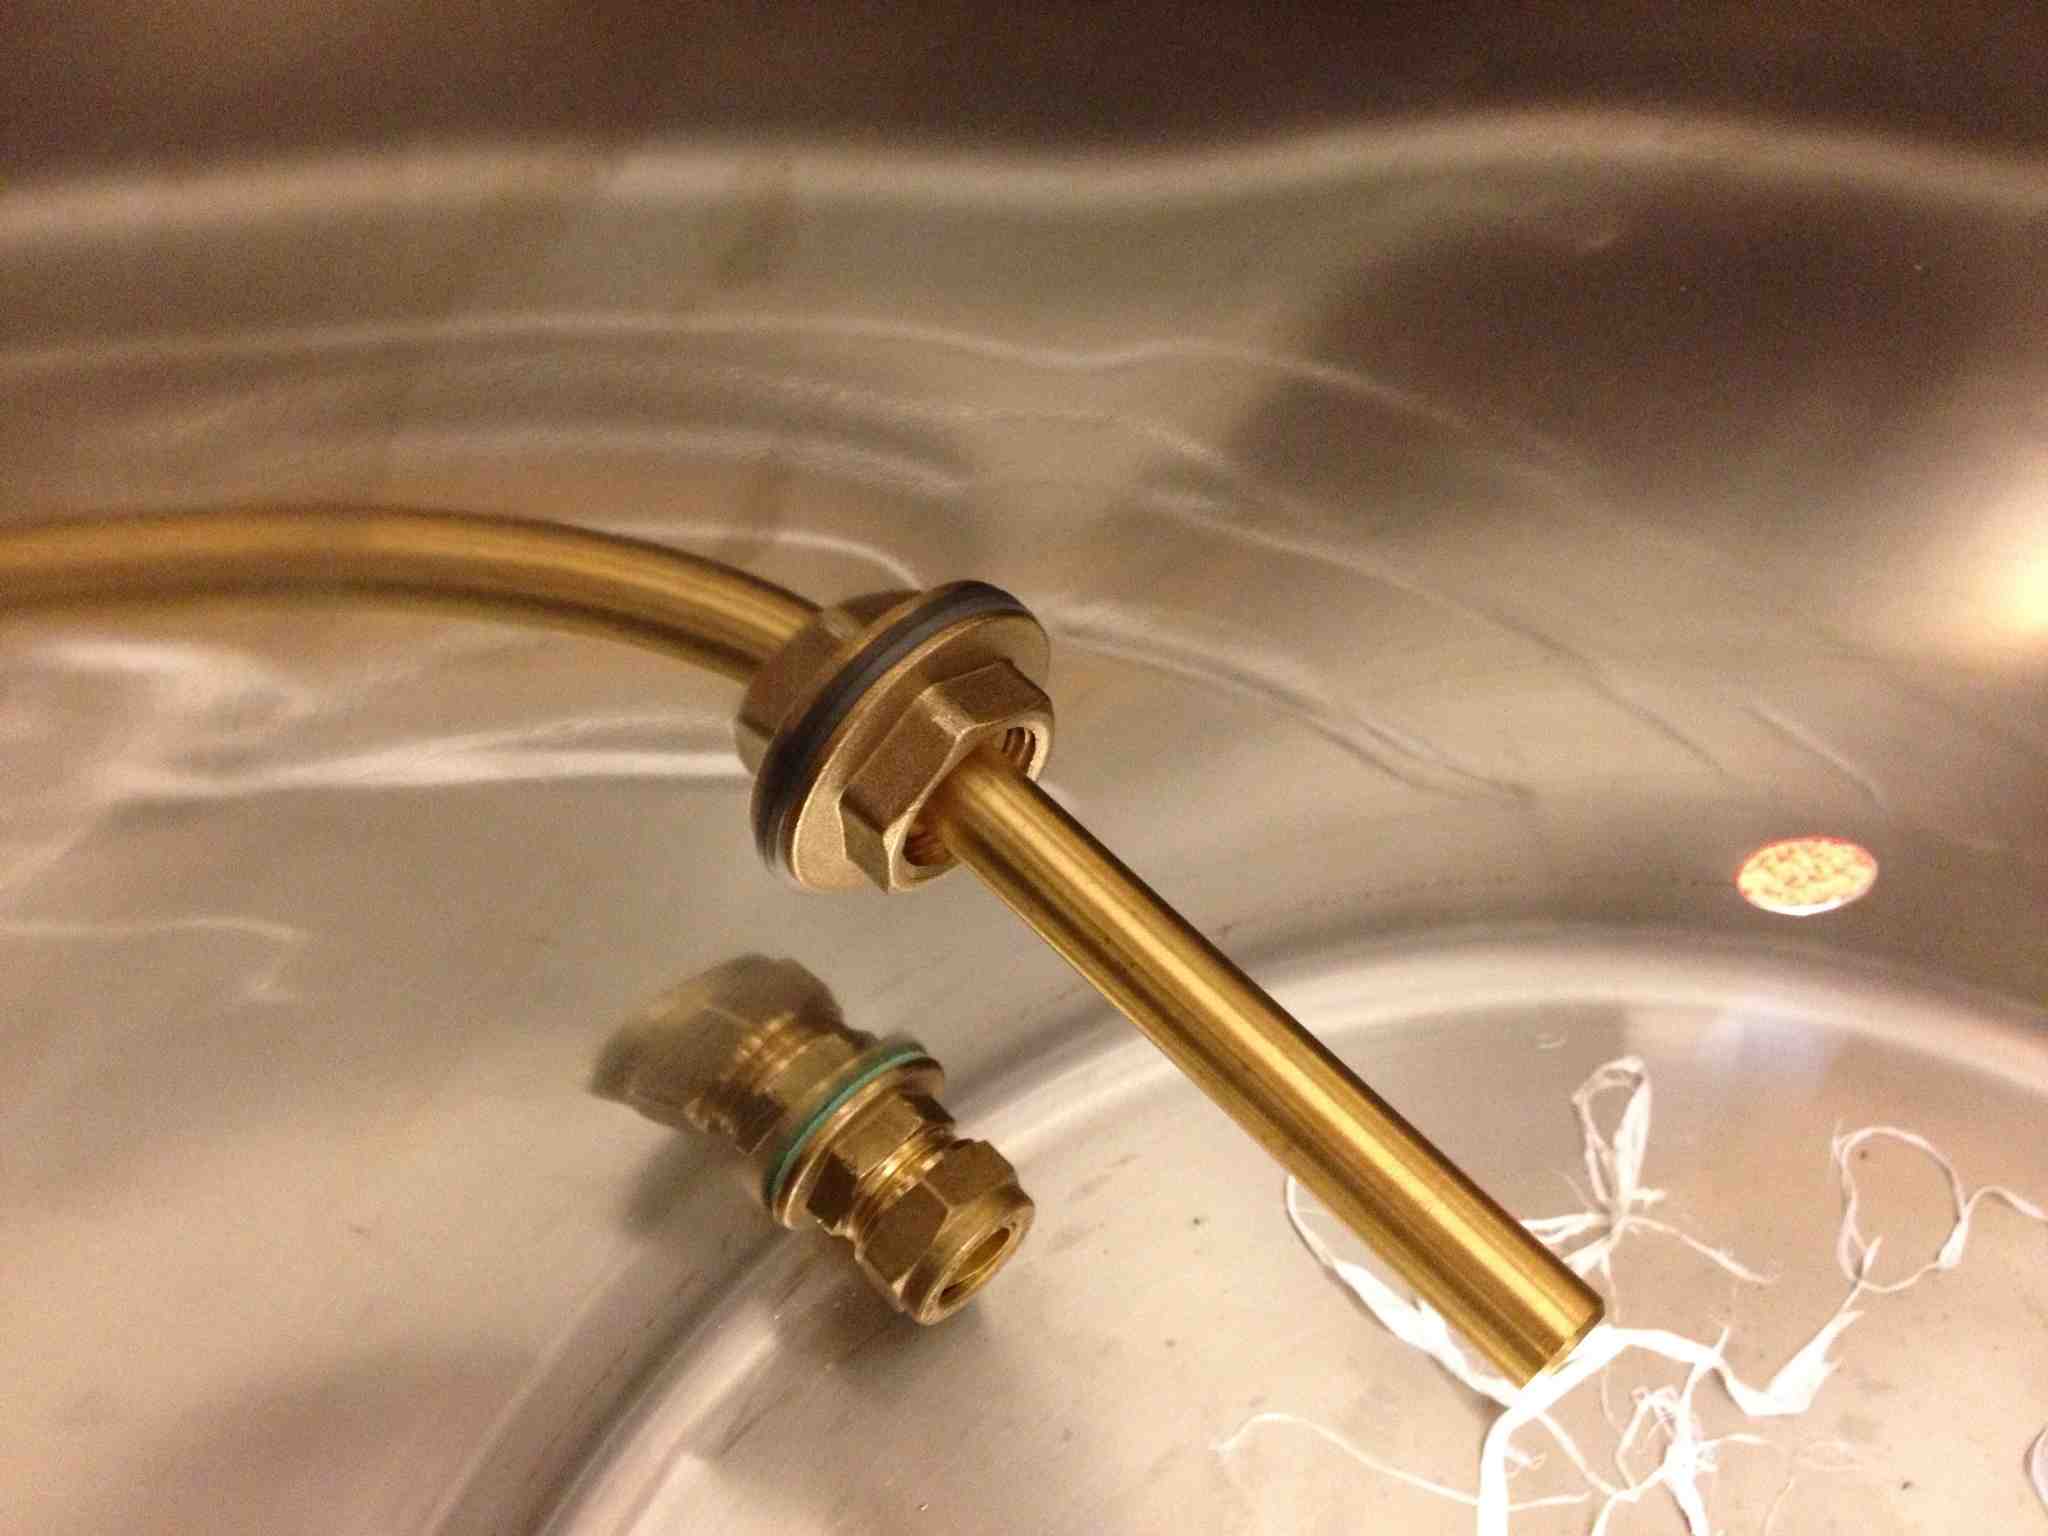
11. Fitting The Thermowell is just a matter of putting it through the hole and and tightening, with a poly washer each side of the pot.
12. Fitting the sight glass,
I'll explain it the best I can.
This is a little trickier, but I got there in the end.
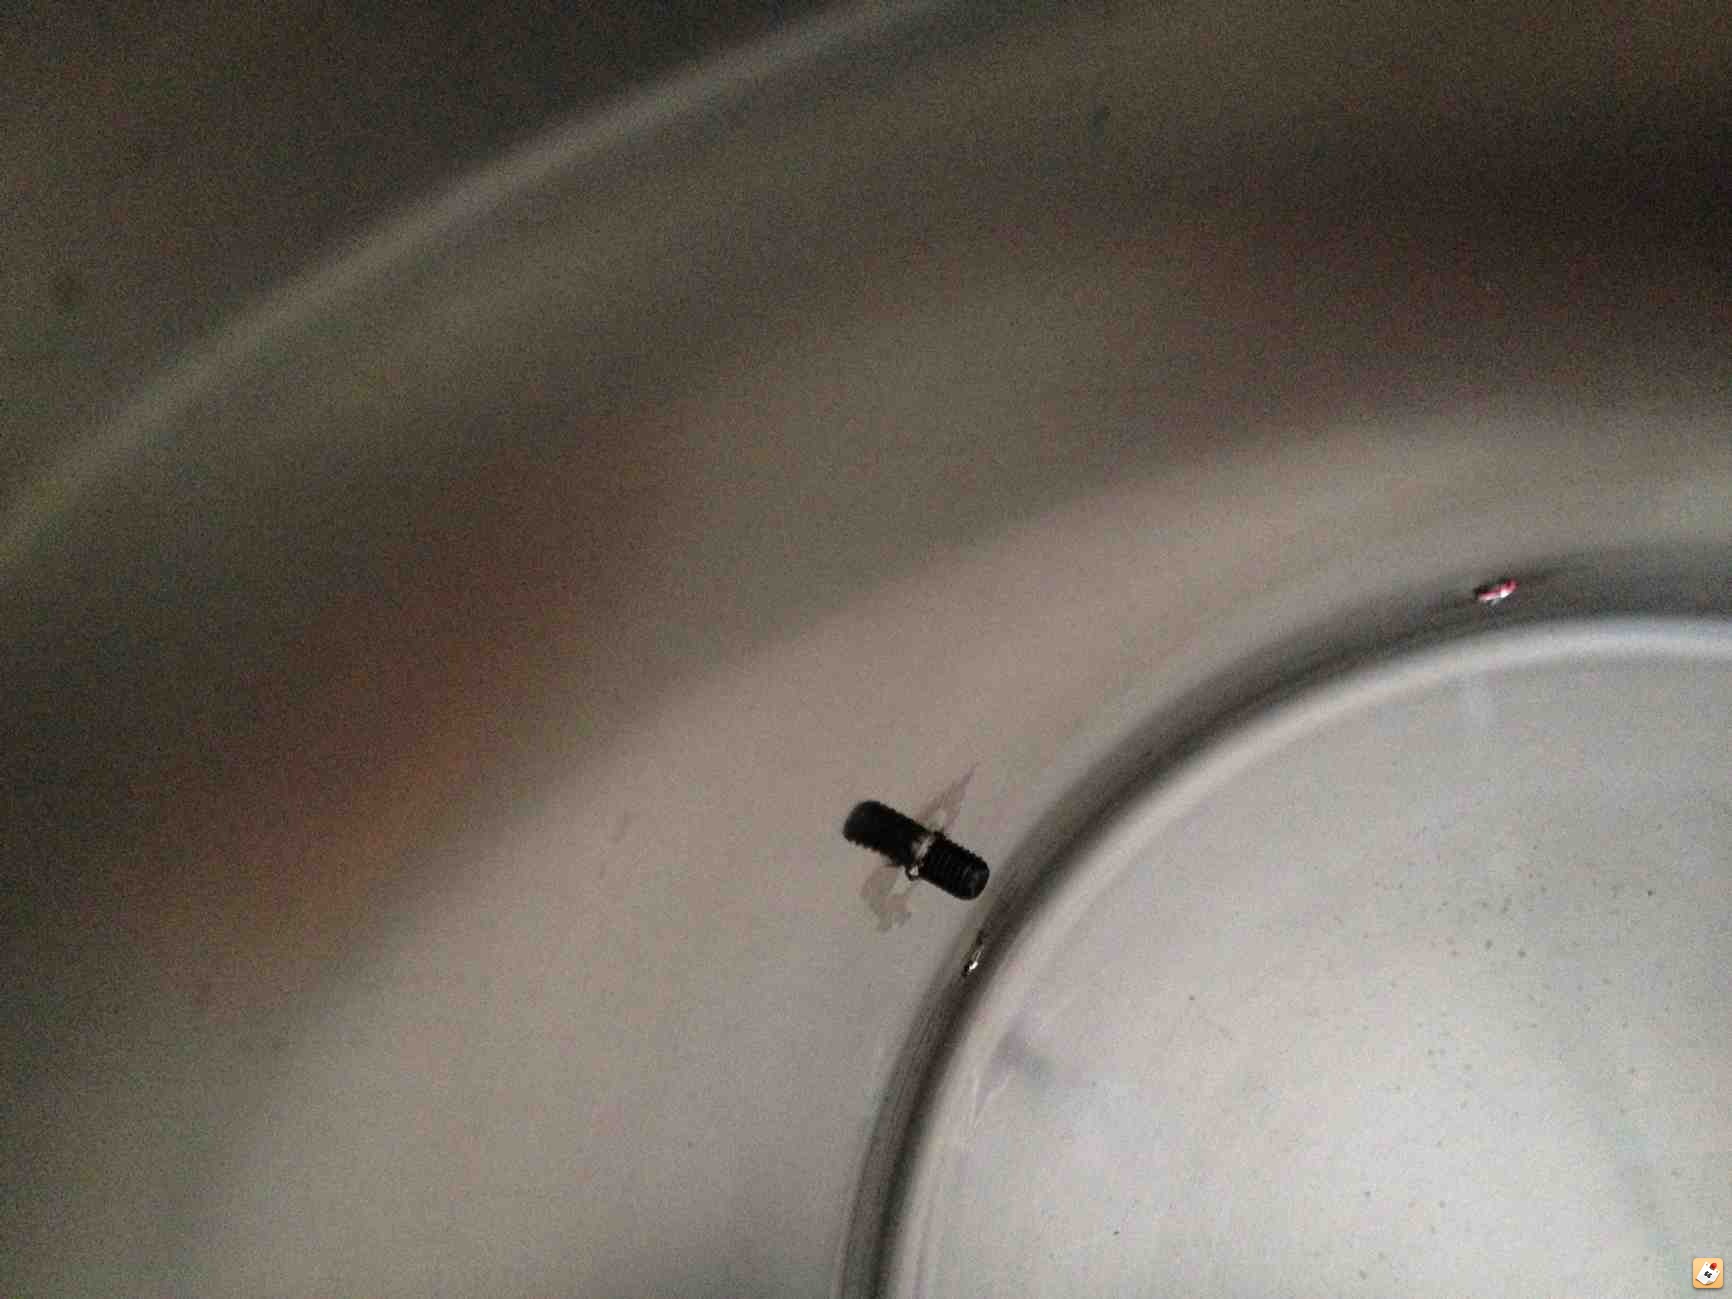
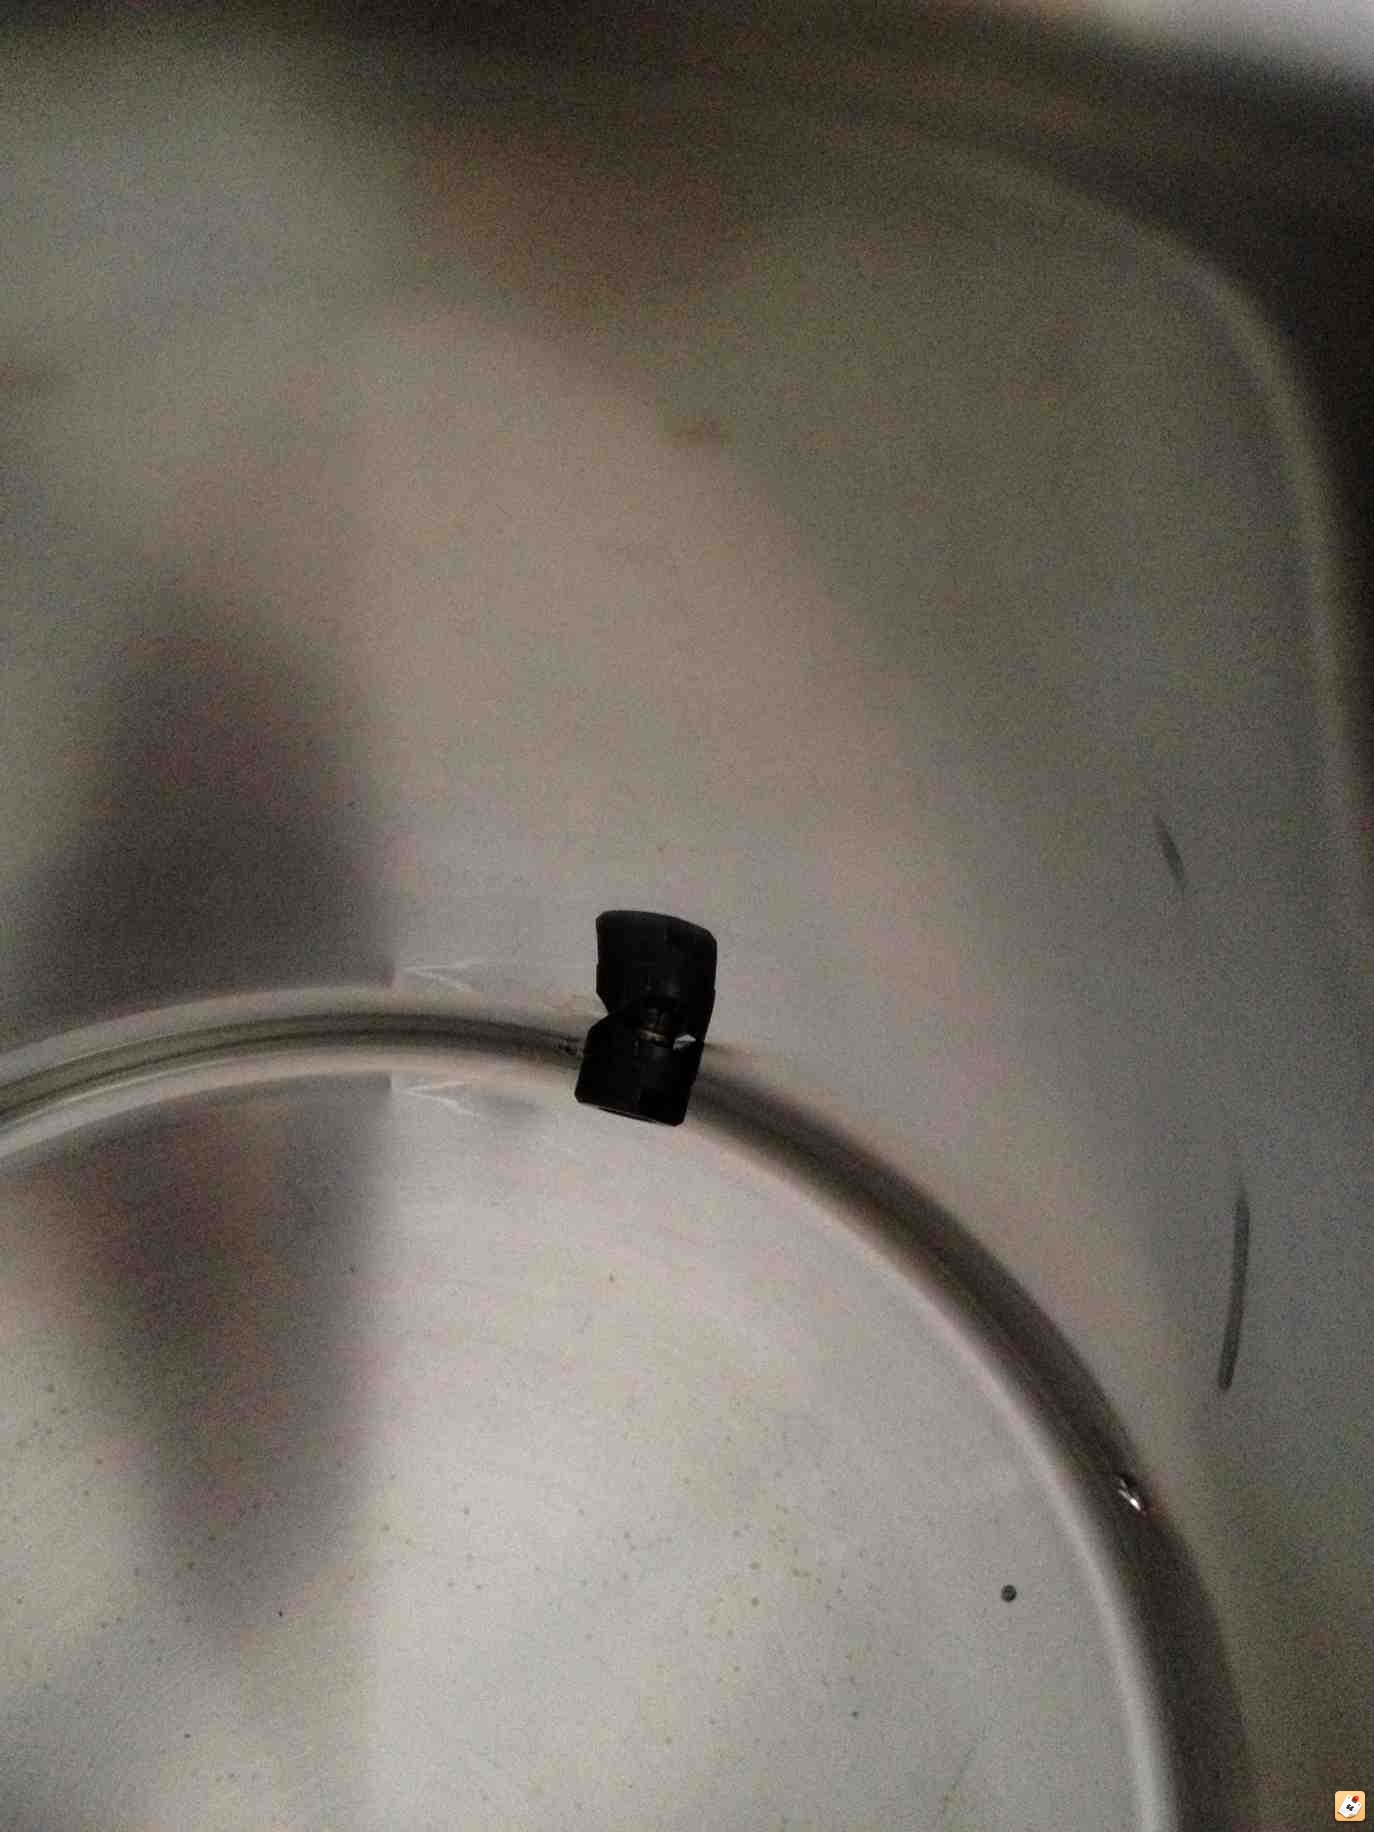
Wrap some PTFE tape around the nipple and slowly manoeuvre a dowty seal over this tape, then push it through the bottom hole of the pot, then slowly manoeuvre a second dowty seal washer over to hold it in place on the pot.
Next screw the elbow onto the nipple and hold it vertical while tightening the nipple from the inside of the pot.
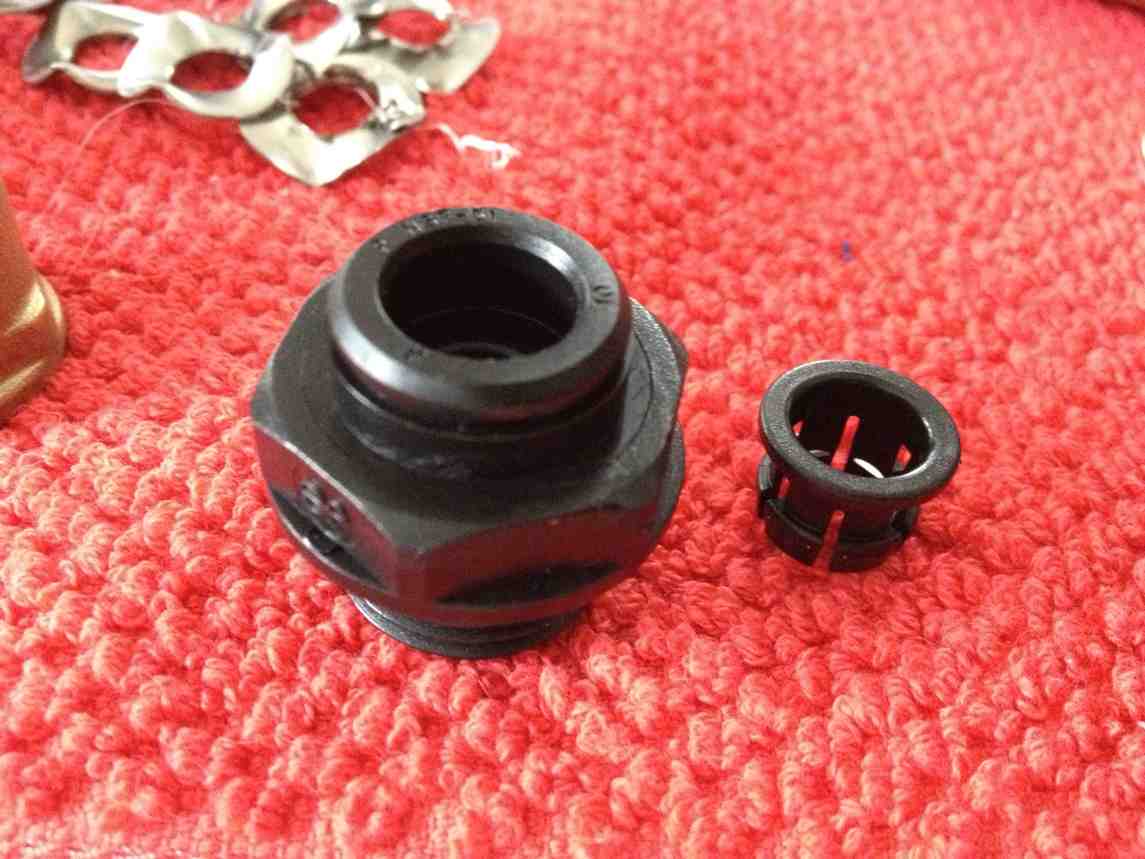
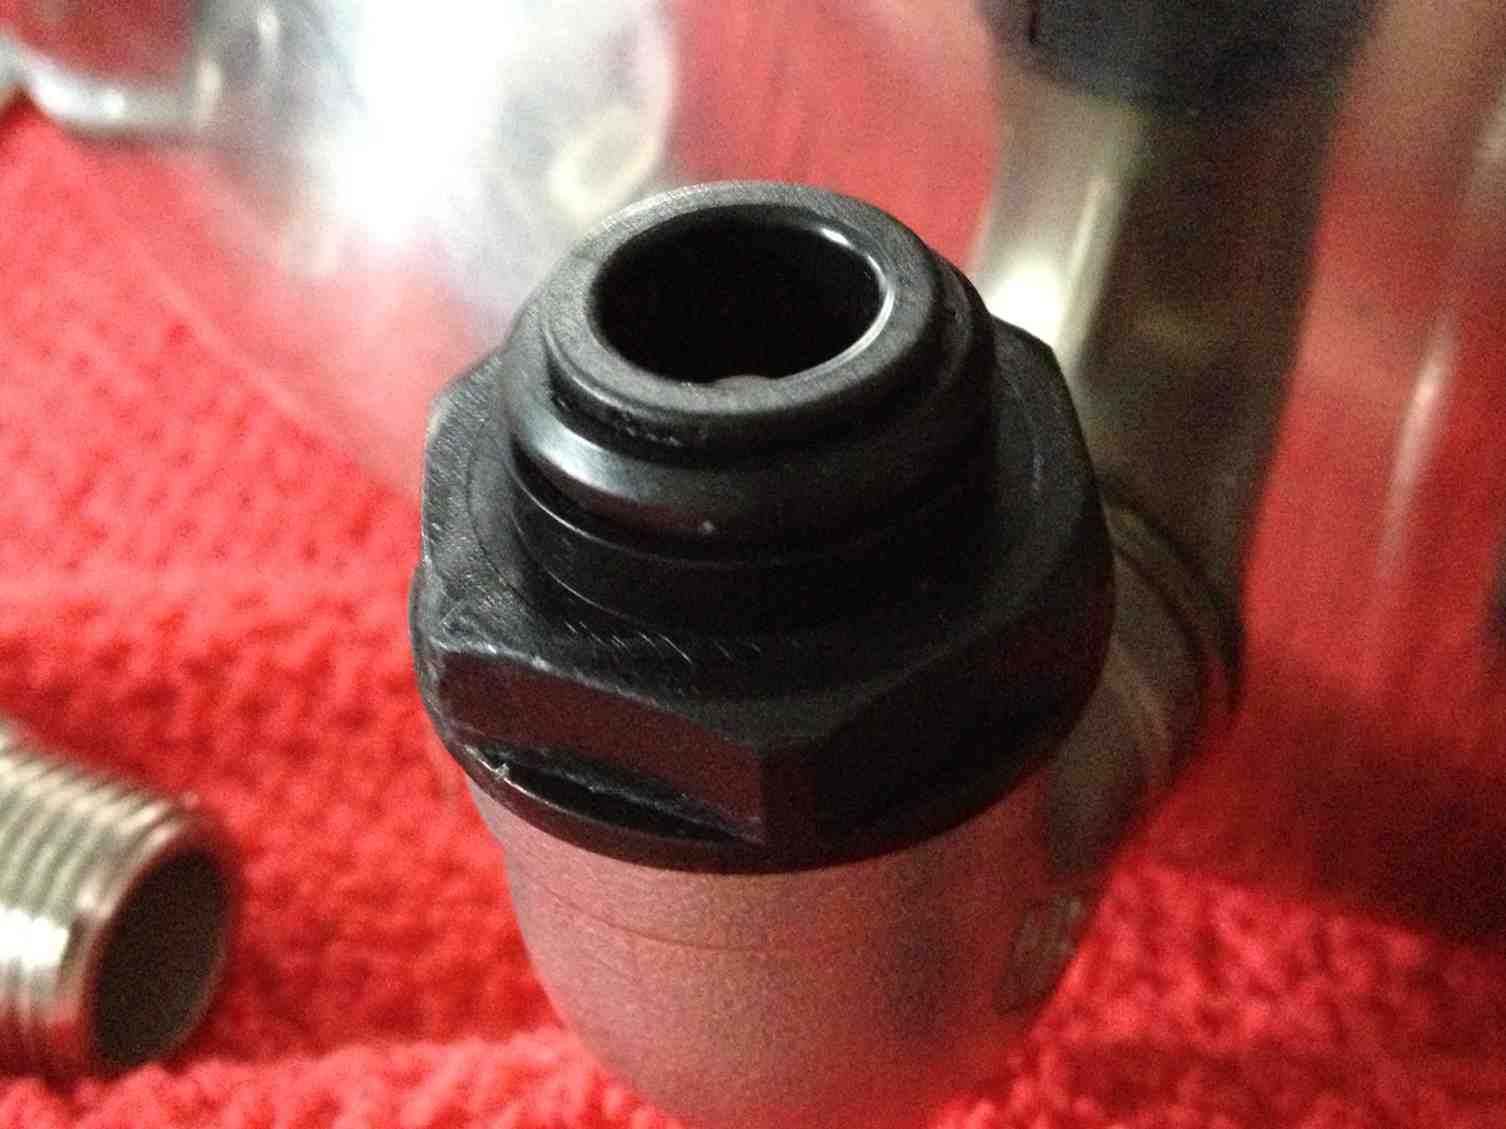
Then I found adding some PTFE tape to the John guest sight tube holder wouldn't hurt, and tightened this into the lower elbow.
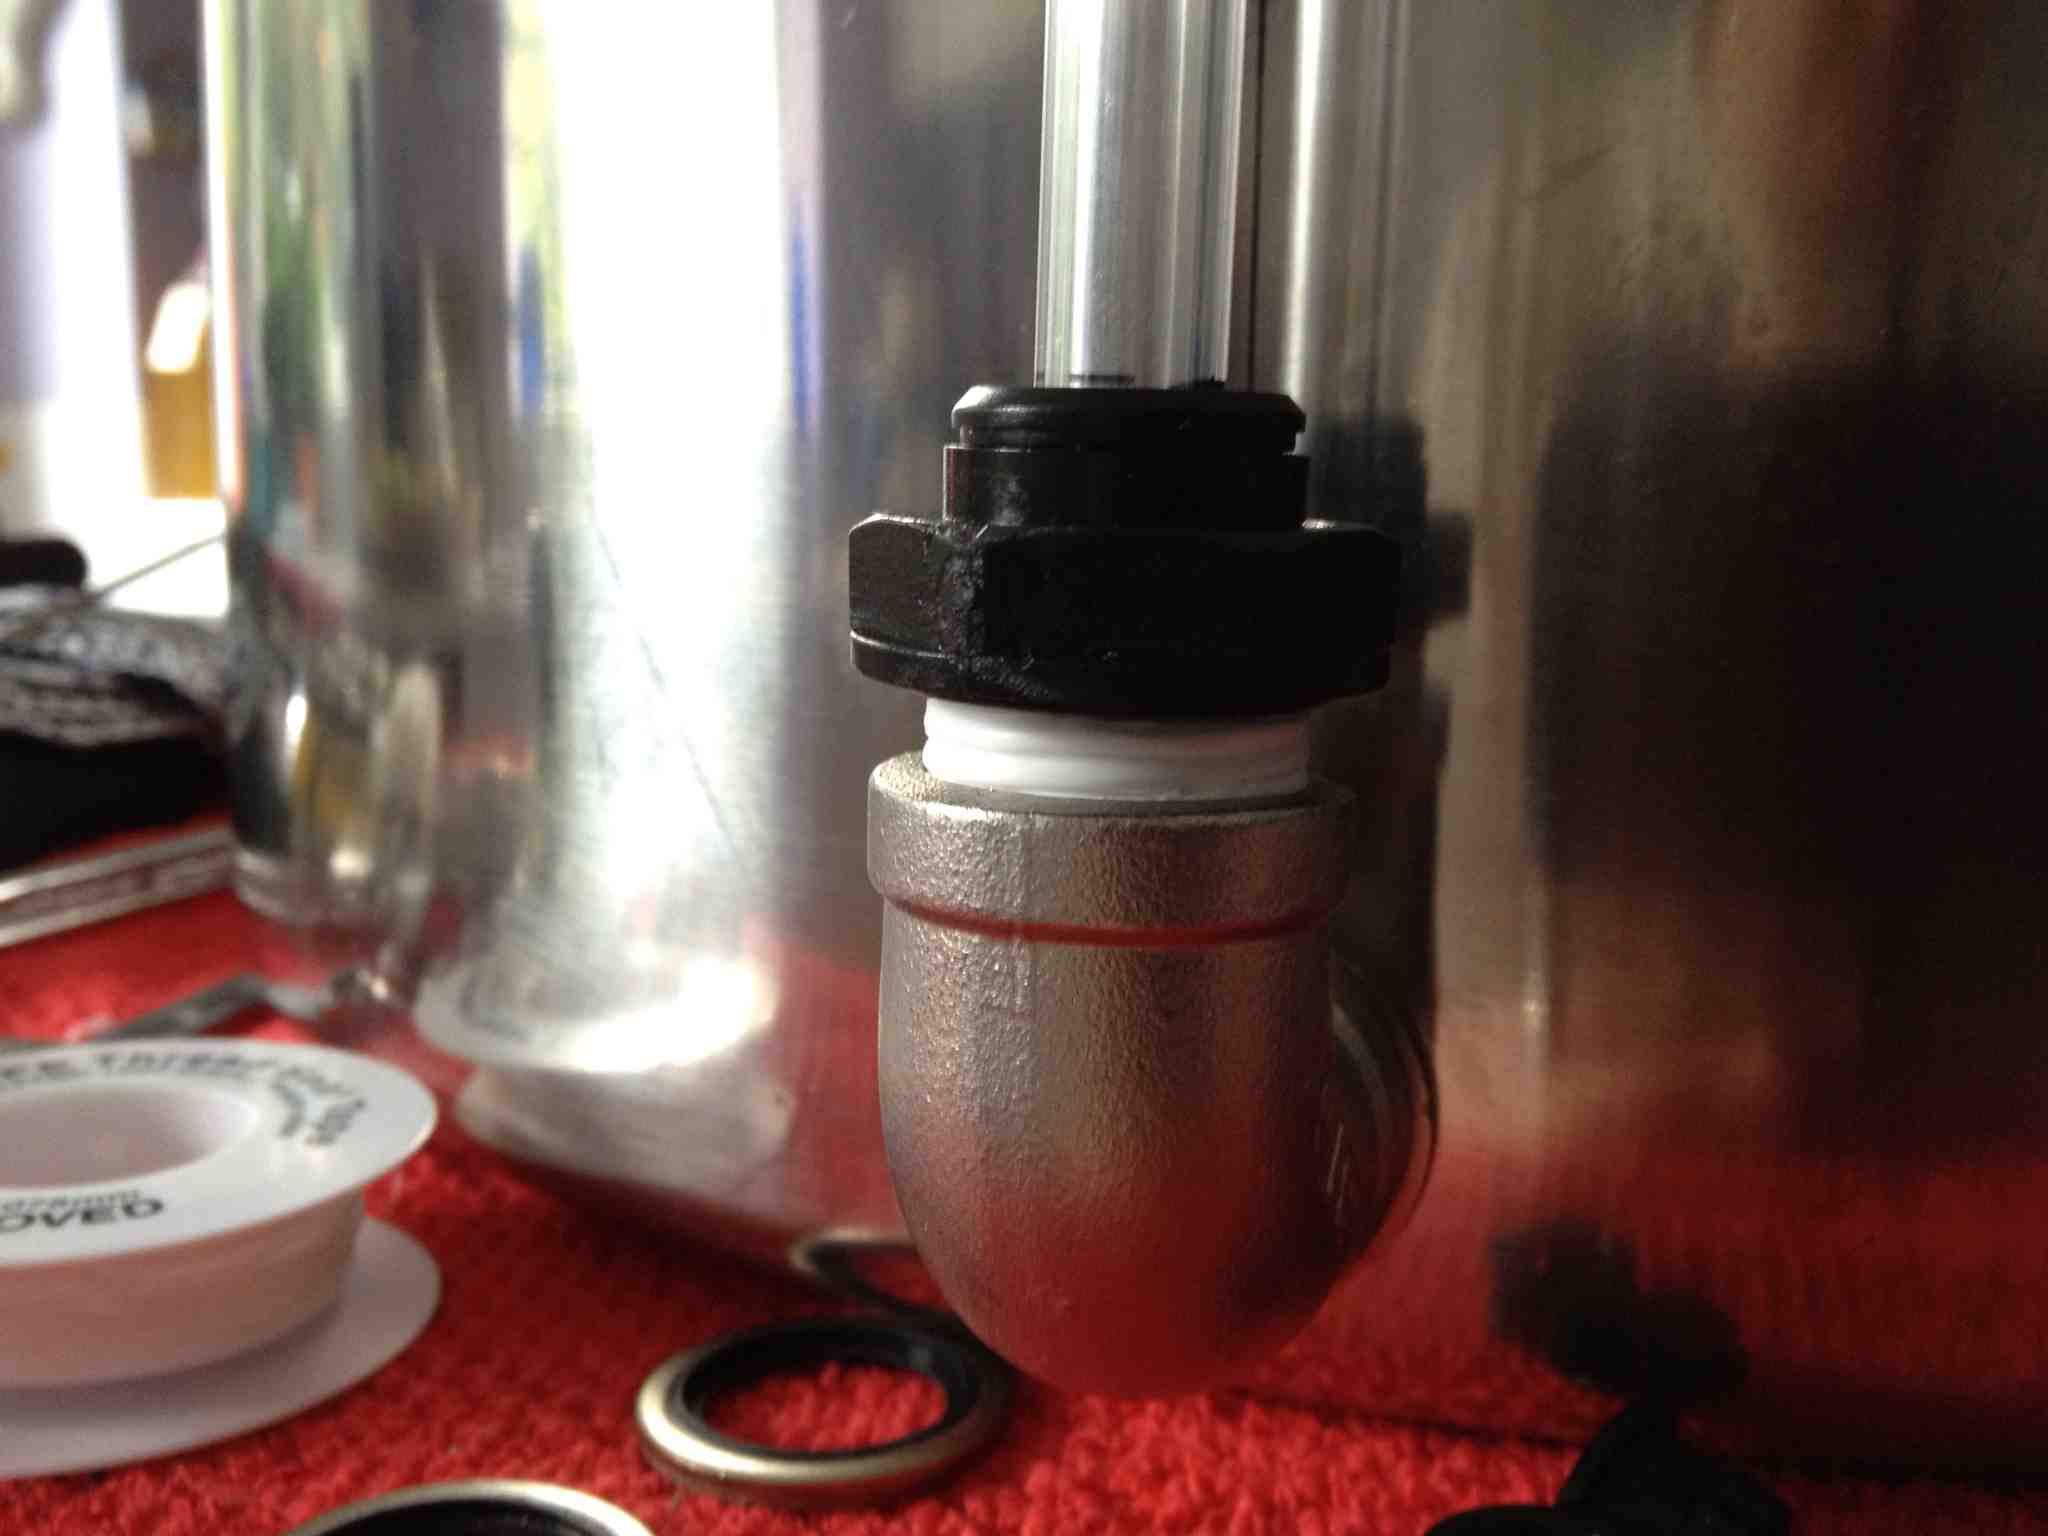
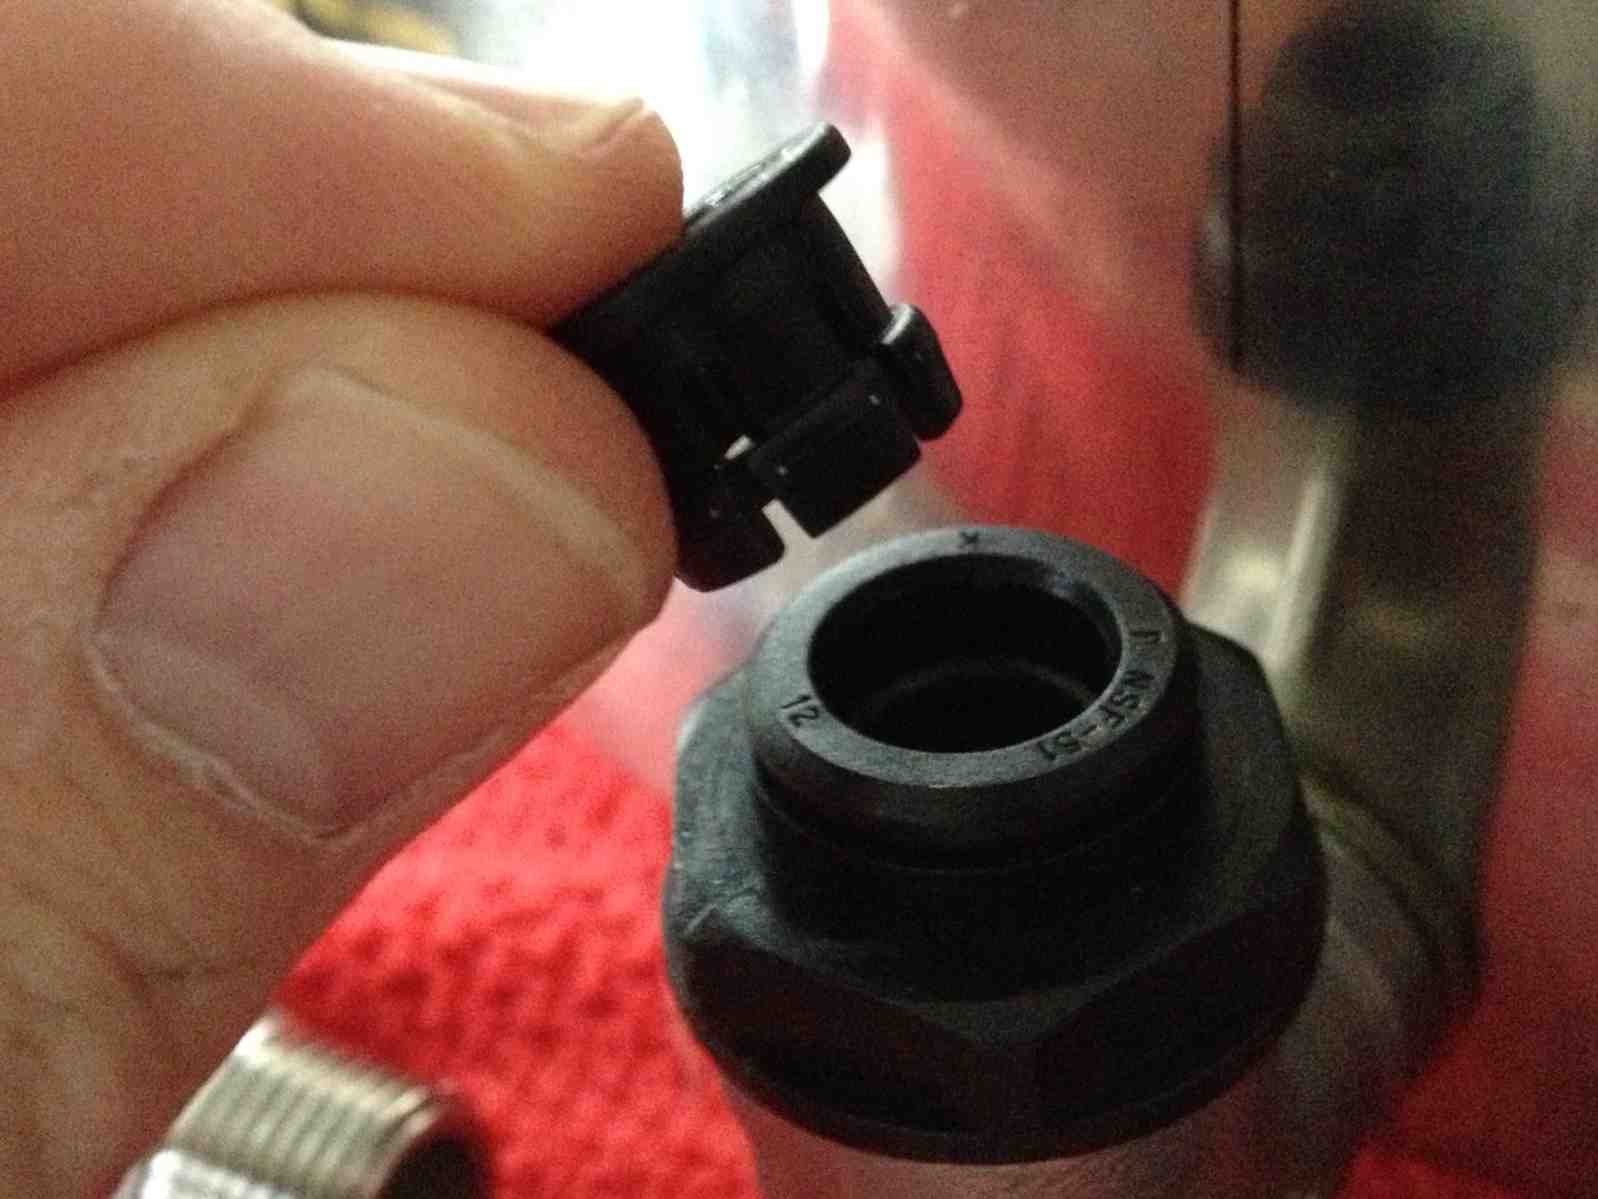
Remove the little black collar from the JG fitting (this will be added later) to allow the tube to be pushed in and removed easily for test assembling..... (something I found out to my cost, without the collar removed the tube is REALLY difficult to remove again). (Pic 3).
Loosely assemble the top elbow in the same way as this will be removed again.
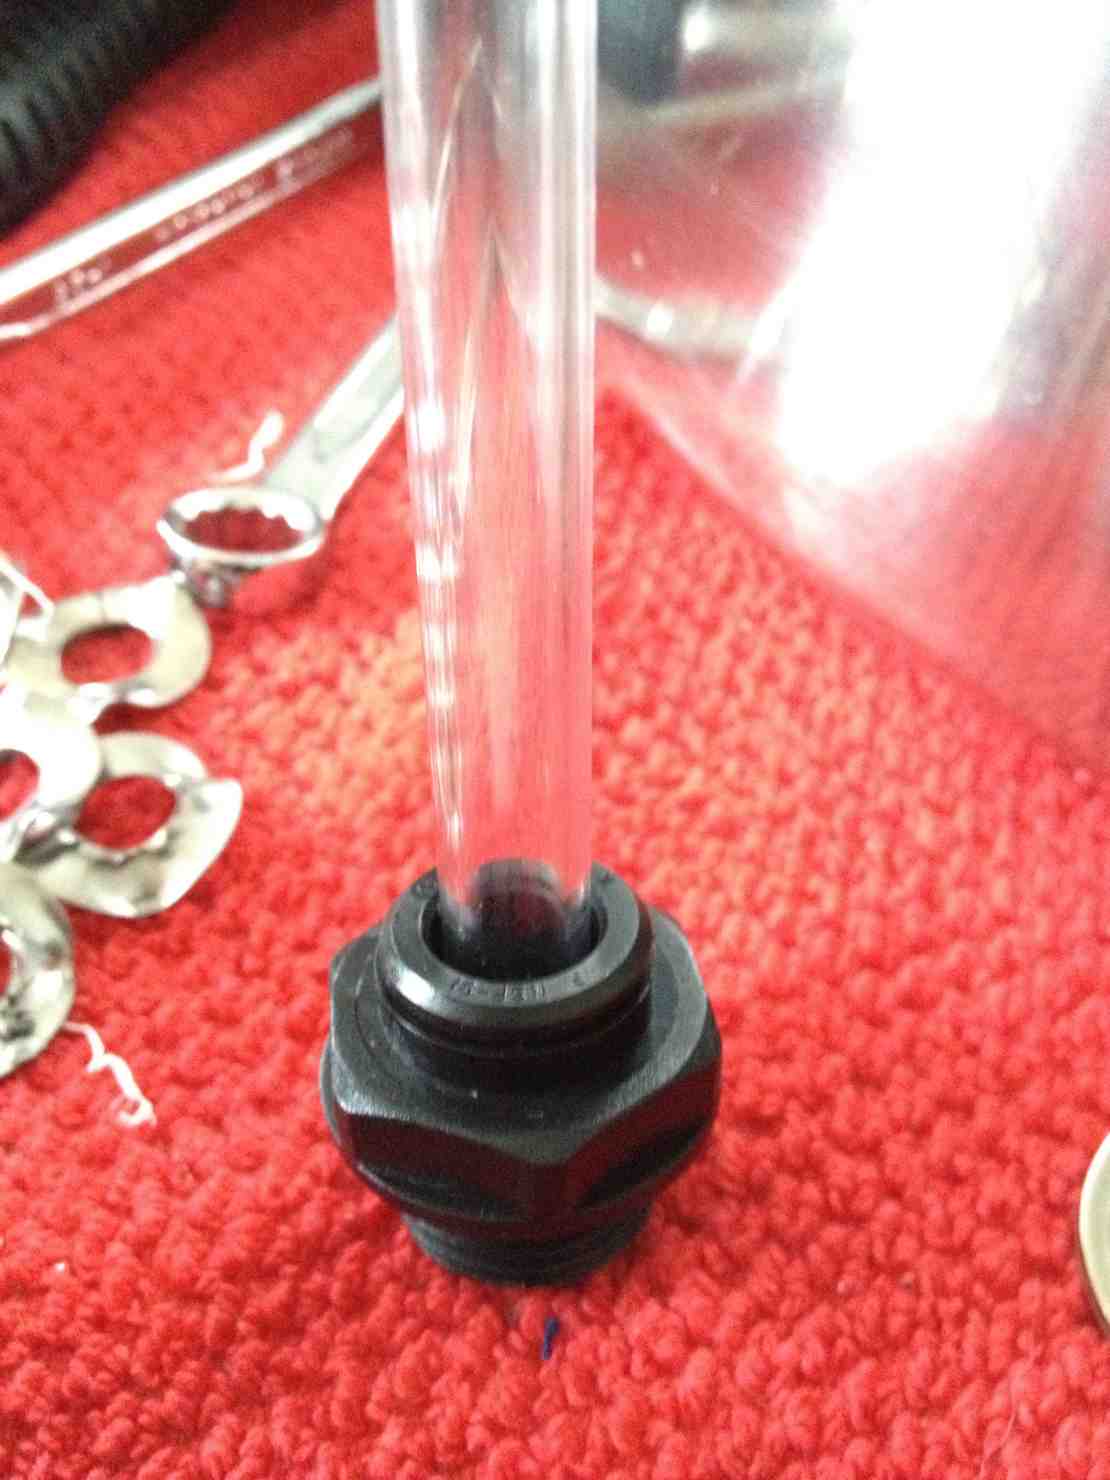
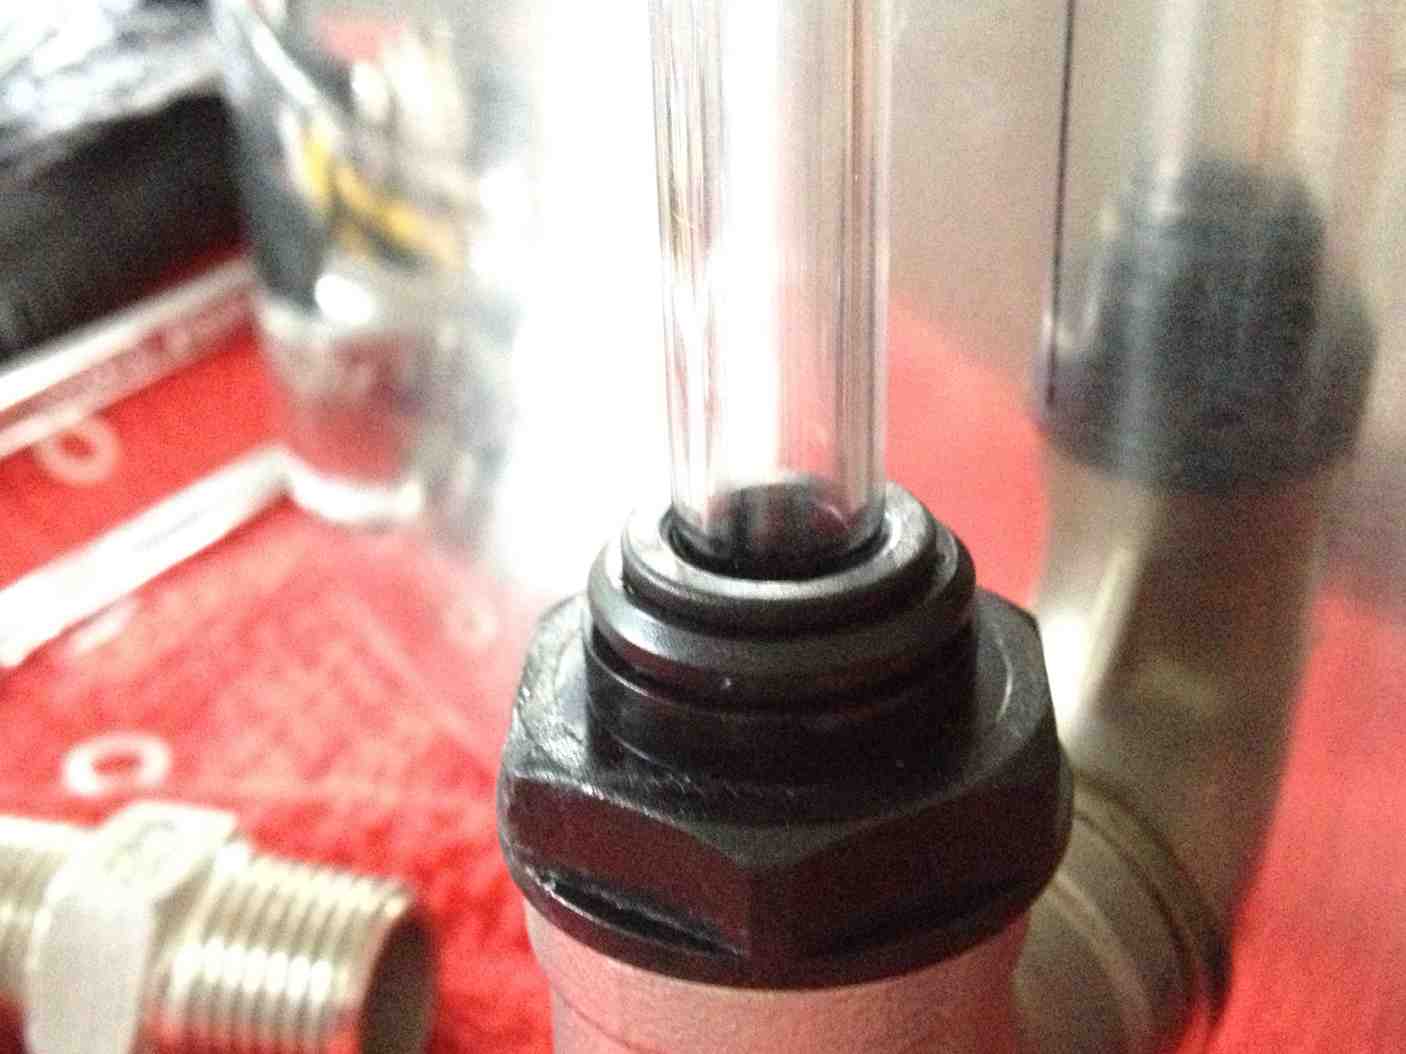
Push the polycarbonate tubing into the bottom elbow joint as far as it will go, this will be easier without the collar.
Now you can mark the tube at the top where it is to be cut.
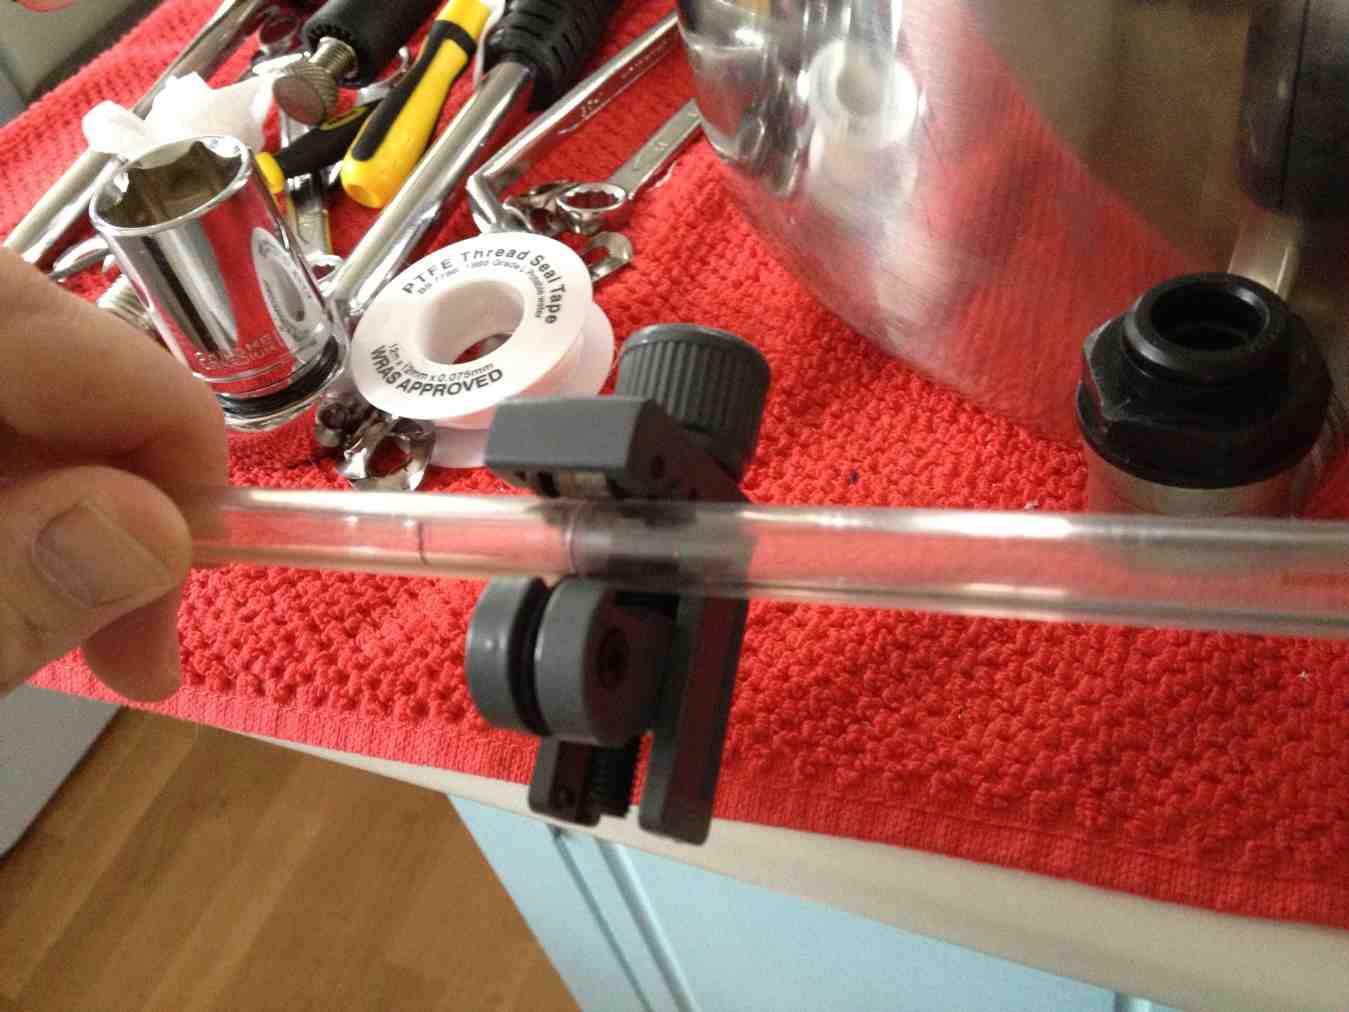
Take the tube out and cut it using a pipe cutter. (Better to be a bit long than a bit short as you can always remove some but you can't add some).
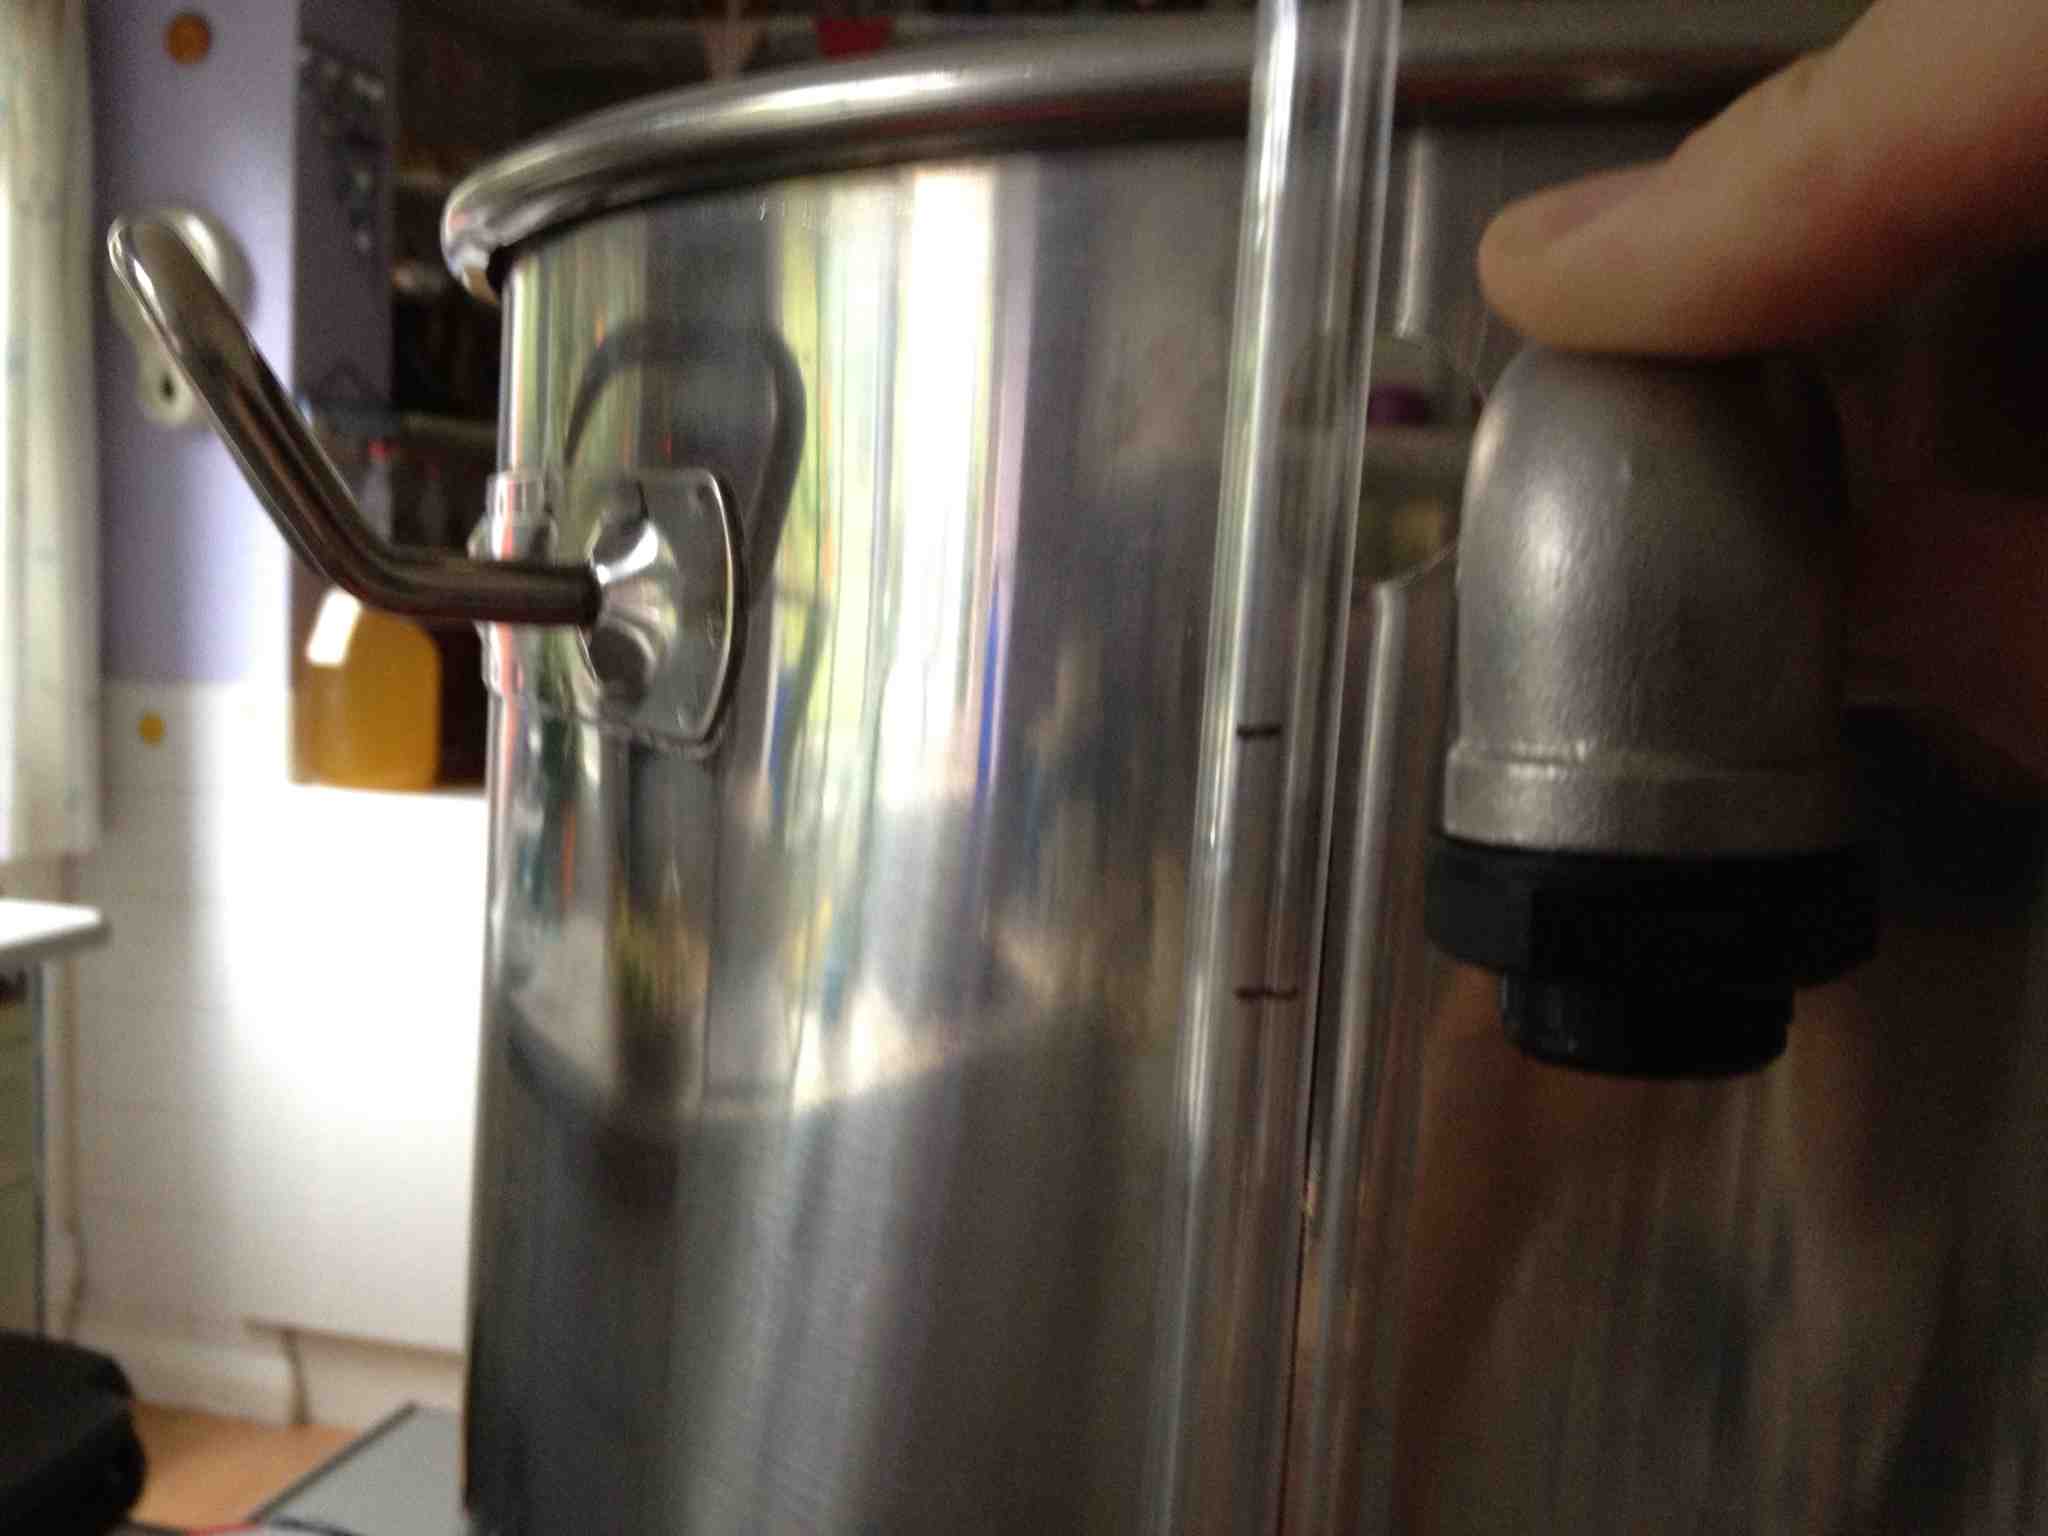
Once cut, remove the top elbow and push it onto the top of the tube, and see by eye if it lines up with the top hole in the pot centrally.
When you are happy with the fit, assemble the top joint to the JG fitting and then remove the tube and replace the black collars into the JG fittings.
Push the tube as far as it will go into the bottom elbow, then push the top elbow onto the tube as far as it will go, BEFORE lining it up with the top hole in the pot and assembling with the dowty seals etc.
I used some mole grips to hold the top elbow steady while tightening the nipple inside the pot, then tweaked it until the tube was straight with the line on the pot.
I also had a leak from the upper JG fitting on my first attempt because I didn't push the tube far enough into the fitting, luckily I had enough spare tube for a second go! That's how I know how hard it is to remove the tube with the collars fitted, and can't stress enough the importance of test fitting first without the collars.


13. Leak testing.
When you are happy with the pot, take the plunge and FILL IT UP!!!
I placed kitchen paper under it all to see if there were any drips or leaks..

14. Decals
About to do these!
15. Completion

Many thanks to Vossy for his how to on converting a thermo pot to a bottom draining mash tun, which inspired me to do my own similar but slightly modified version.
Parts list.
Note that Tappatalk users may have to use web view to view these links, annoying or what!
1 x Brass Bulkhead fitting.
1 x Stainless Steel 3 piece lever tap (valve).
Bought as a kit or seperate from here:
http://www.themaltmiller.co.uk/index.ph ... ductId=194
1 x Sight Glass Kit:
http://www.the-home-brew-shop.co.uk/aca ... s-Kit.html
1 x Thermometer with Thermowell:
http://cgi.ebay.co.uk/ws/eBayISAPI.dll? ... 1197864329
1 x Stainless Steel hose connector:
http://www.themaltmiller.co.uk/index.ph ... ductId=341
1x Q.max 21mm Punch Cutter:
http://www.ebay.co.uk/itm/400364350325? ... 1439.l2649
1 x 8mm Hex Key (Allen Key) for Q.max
1x Step Drill Bit.
Various Spanners to fit.
Centre Punch.
Hammer.
PTFE tape.
Various Files.
Pipe Cutter.
Oil (drill bit lubricant).
I repeated this same process on my 35 litre HLT.
First off is my boiler:
This is a 50 litre Boiler pot.
The first thing is to mark all of the holes to be drilled or cut.
1. I measured between the handles and marked the exact middle.
2. I then transferred this mark down to the bottom with a set square.
3. With the pot level on a flat surface I placed the tap onto a piece of card to raise it up a couple of millimetres from the bottom, so the weight of the full pot doesn't press on it.
Then mark the centre of the the inside of the tap on the centre line of the pot.
I made sure that the flange nut on the inside of the pot would be above the bottom to side curve of the pot, so therefore on a flat surface for a good seal.
4. By eye I marked where the handle lever on the tap ends, and then marked the middle between this mark and the left pot handle. Again, I drew the line up the pot with a set square. This line is the sight glass line and must be straight!
This gives enough clearance from both the pot handle and the tap handle so the sight glass doesn't get knocked or interfered with.
I placed it on the left as I thought its less likely to get knocked with me being right handed.
5. IMPORTANT, you must allow room for the depth of the lid above the upper sight glass elbow, otherwise the lid will not seat correctly and you will kick yourself!
Place a mark on the top of the pot to indicate the lid depth, and remember that it's the top of the hole to be cut that should be no higher than this mark (not the centre of the hole).
6. Mark the lower elbow centre mark by placing the elbow on the line just above the curve of the base (as low as possible).
7. Mark on the centre line where to drill the thermo well hole, for me it was 12cm up. I just made sure that there was about 1cm clearance between the thermometer dial and the tap lever, so I could pull the thermometer out easily.
8. Drilling the pot seems so intimidating at first on your new expensive shiney pot, but when you get your first punch under your belt it becomes easy!
First line a pointed punch up on the mark and give it a sharp whack with a small hammer to stop the drill bit from slipping.
Then put a drop of oil in the dent, I used 3 in 1 oil.
I found metal HSS drill bits hard to get started so I used a step drill bit with the drill on a slow speed but high torque setting, you can wiggle the bit around so it gets a bite, i found it has a shocking bang as it first goes through the pot!
Then I enlarged the hole one step at a time until it was the correct size for the bolt part of the Q.max punch.
9. Place the punch through the hole, I used it with the hex key on the outside and cutter on the inside so it would be smooth on the inside and good for the seals.
Then just turn the hex key (you get three clicks and then it goes all the way through).
Punch all the holes and then step back and admire your pot!!!
Before filing off any sharp or sticky out bits.
Don't forget to remove the bit that's been punched out from the punch before moving onto the next hole! (These can be hammered flat and used as stainless steel washers).
10. Next I fitted the bulkhead that came with the tap, this just had two fibre washers each side of the pot.
This leaves a compression joint on the inside for attaching various filters and stuff.
Make sure not to forget the PTFE tape around the thread before fitting the lever tap.
I wound between 10 and 15 wraps around the thread.
I found it easier to take the lever tap apart and fit the first piece of the tap onto the pot, (making sure to put the PTFE tape on), this allowed me to get it straight and also allowed me to be able to get a spanner onto the tap piece to hold it without the rest of the tap interfering.
It's simple to undo the four holding bolts, and this would have to be done anyway if the tap ever needed cleaning.
Once the piece is on straight, the tap can be fitted back together, loosely at first to allow you to align the pieces, then go around giving a little tighten to each bolt before getting an exact alignment and tightening the bolts (going around each bolt tightening a little at a time until fully tight).
Next add some PTFE tape to the hose barb and screw this into the tap!
11. Fitting The Thermowell is just a matter of putting it through the hole and and tightening, with a poly washer each side of the pot.
12. Fitting the sight glass,
I'll explain it the best I can.
This is a little trickier, but I got there in the end.
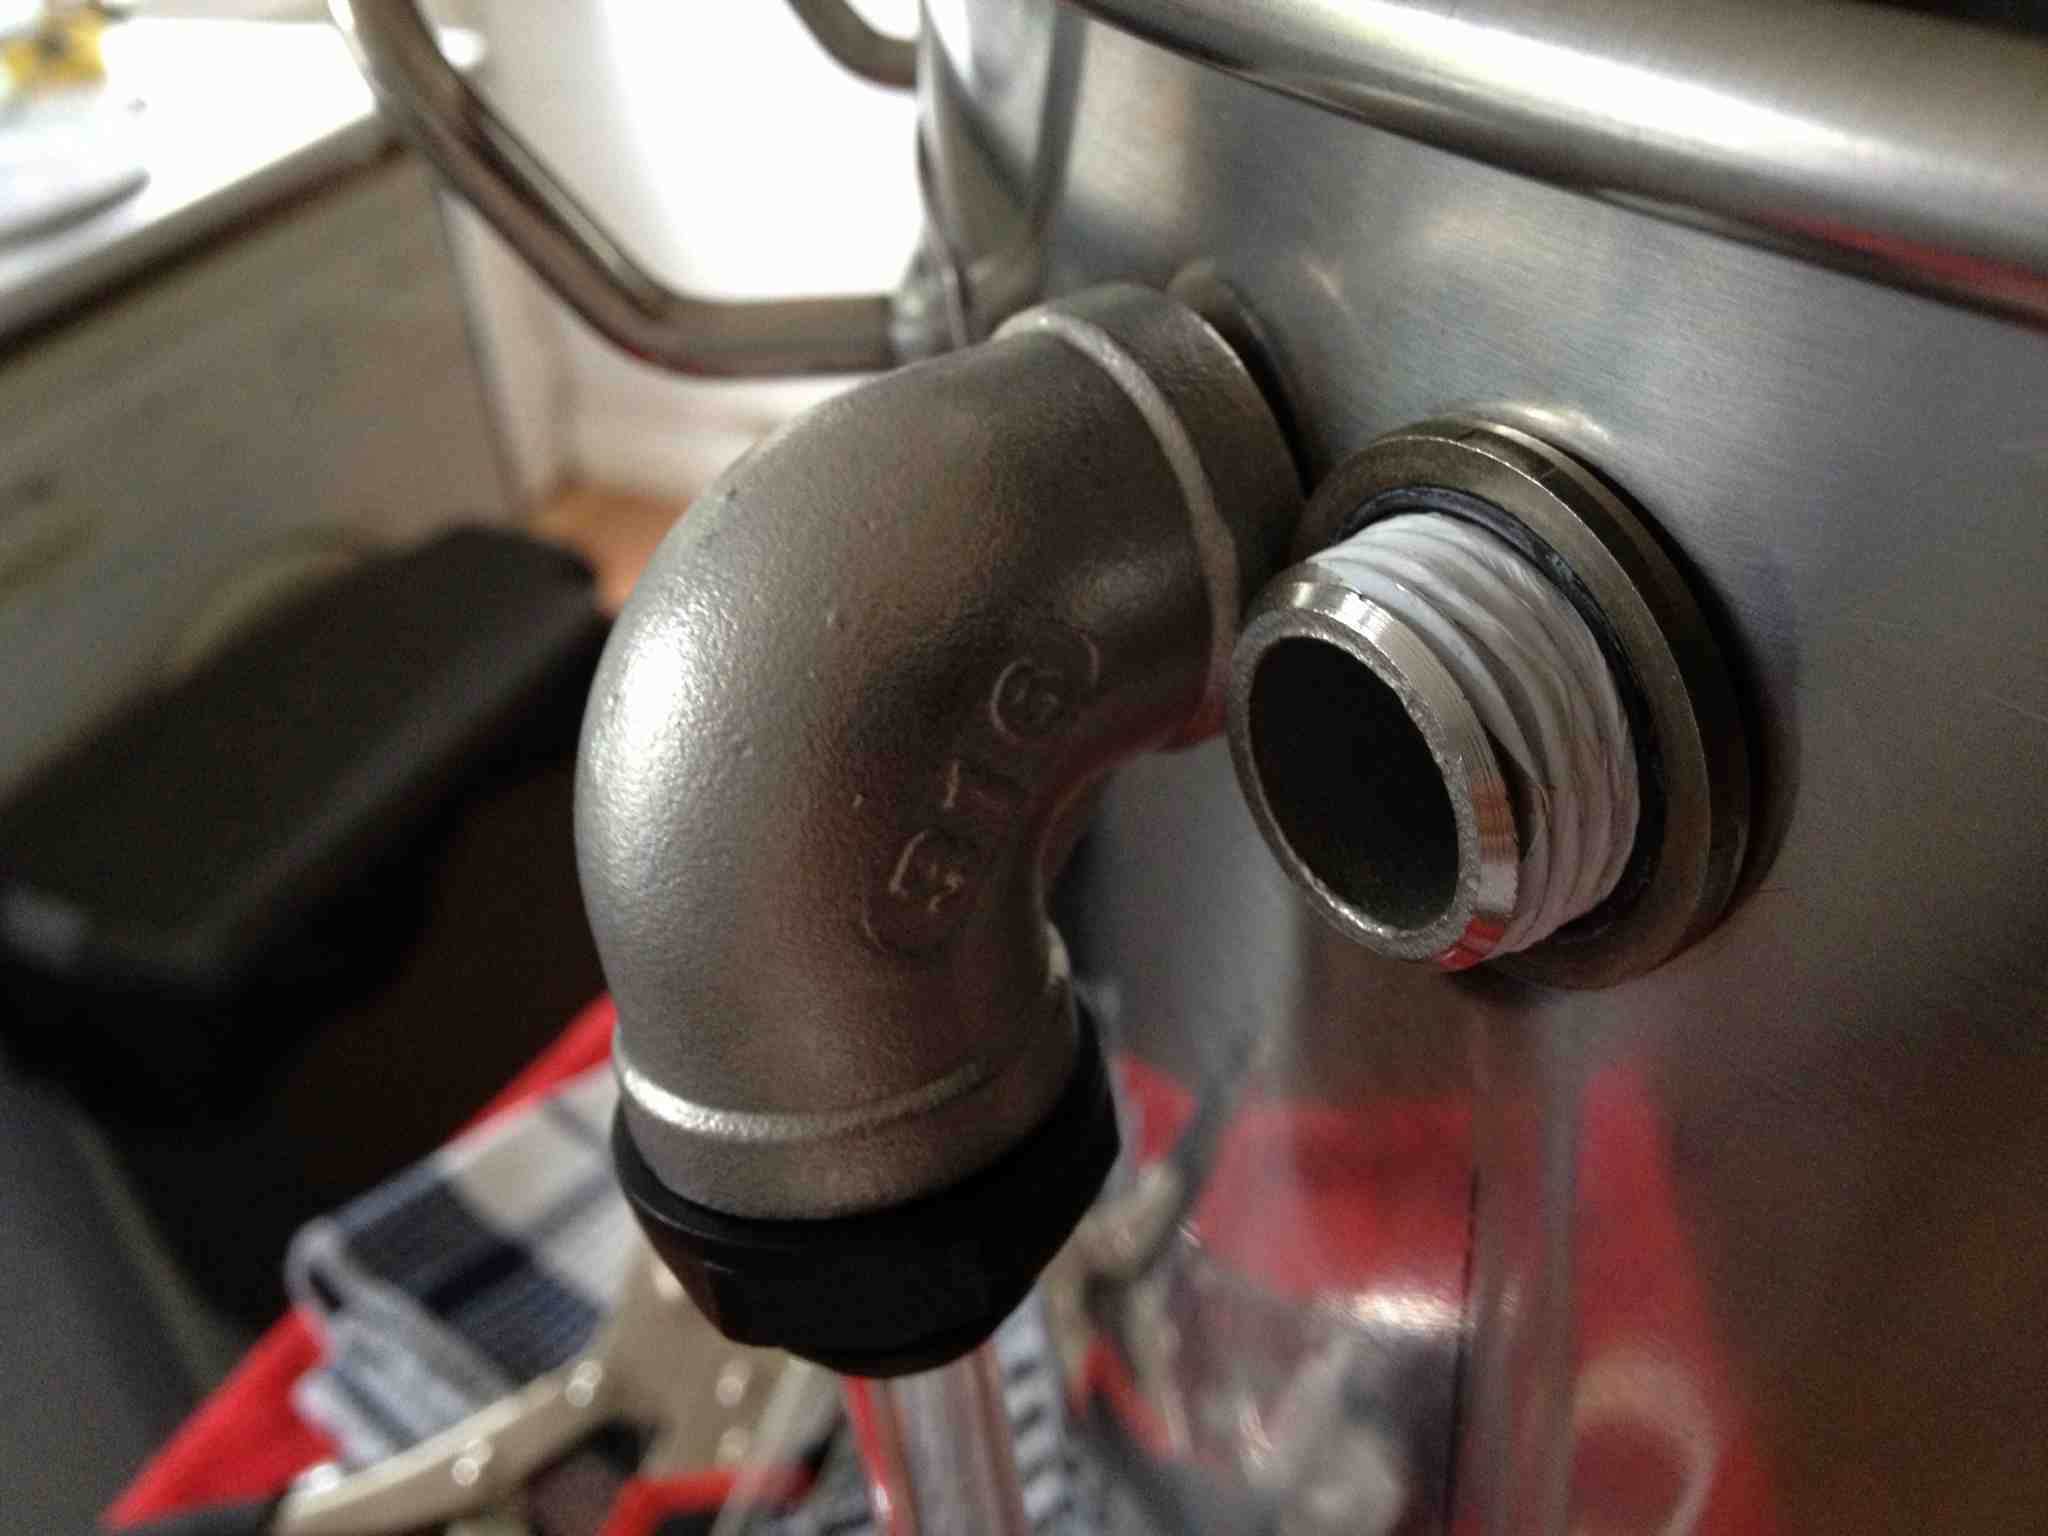
Wrap some PTFE tape around the nipple and slowly manoeuvre a dowty seal over this tape, then push it through the bottom hole of the pot, then slowly manoeuvre a second dowty seal washer over to hold it in place on the pot.
Next screw the elbow onto the nipple and hold it vertical while tightening the nipple from the inside of the pot.
Then I found adding some PTFE tape to the John guest sight tube holder wouldn't hurt, and tightened this into the lower elbow.
Remove the little black collar from the JG fitting (this will be added later) to allow the tube to be pushed in and removed easily for test assembling..... (something I found out to my cost, without the collar removed the tube is REALLY difficult to remove again). (Pic 3).
Loosely assemble the top elbow in the same way as this will be removed again.
Push the polycarbonate tubing into the bottom elbow joint as far as it will go, this will be easier without the collar.
Now you can mark the tube at the top where it is to be cut.
Take the tube out and cut it using a pipe cutter. (Better to be a bit long than a bit short as you can always remove some but you can't add some).
Once cut, remove the top elbow and push it onto the top of the tube, and see by eye if it lines up with the top hole in the pot centrally.
When you are happy with the fit, assemble the top joint to the JG fitting and then remove the tube and replace the black collars into the JG fittings.
Push the tube as far as it will go into the bottom elbow, then push the top elbow onto the tube as far as it will go, BEFORE lining it up with the top hole in the pot and assembling with the dowty seals etc.
I used some mole grips to hold the top elbow steady while tightening the nipple inside the pot, then tweaked it until the tube was straight with the line on the pot.
I also had a leak from the upper JG fitting on my first attempt because I didn't push the tube far enough into the fitting, luckily I had enough spare tube for a second go! That's how I know how hard it is to remove the tube with the collars fitted, and can't stress enough the importance of test fitting first without the collars.
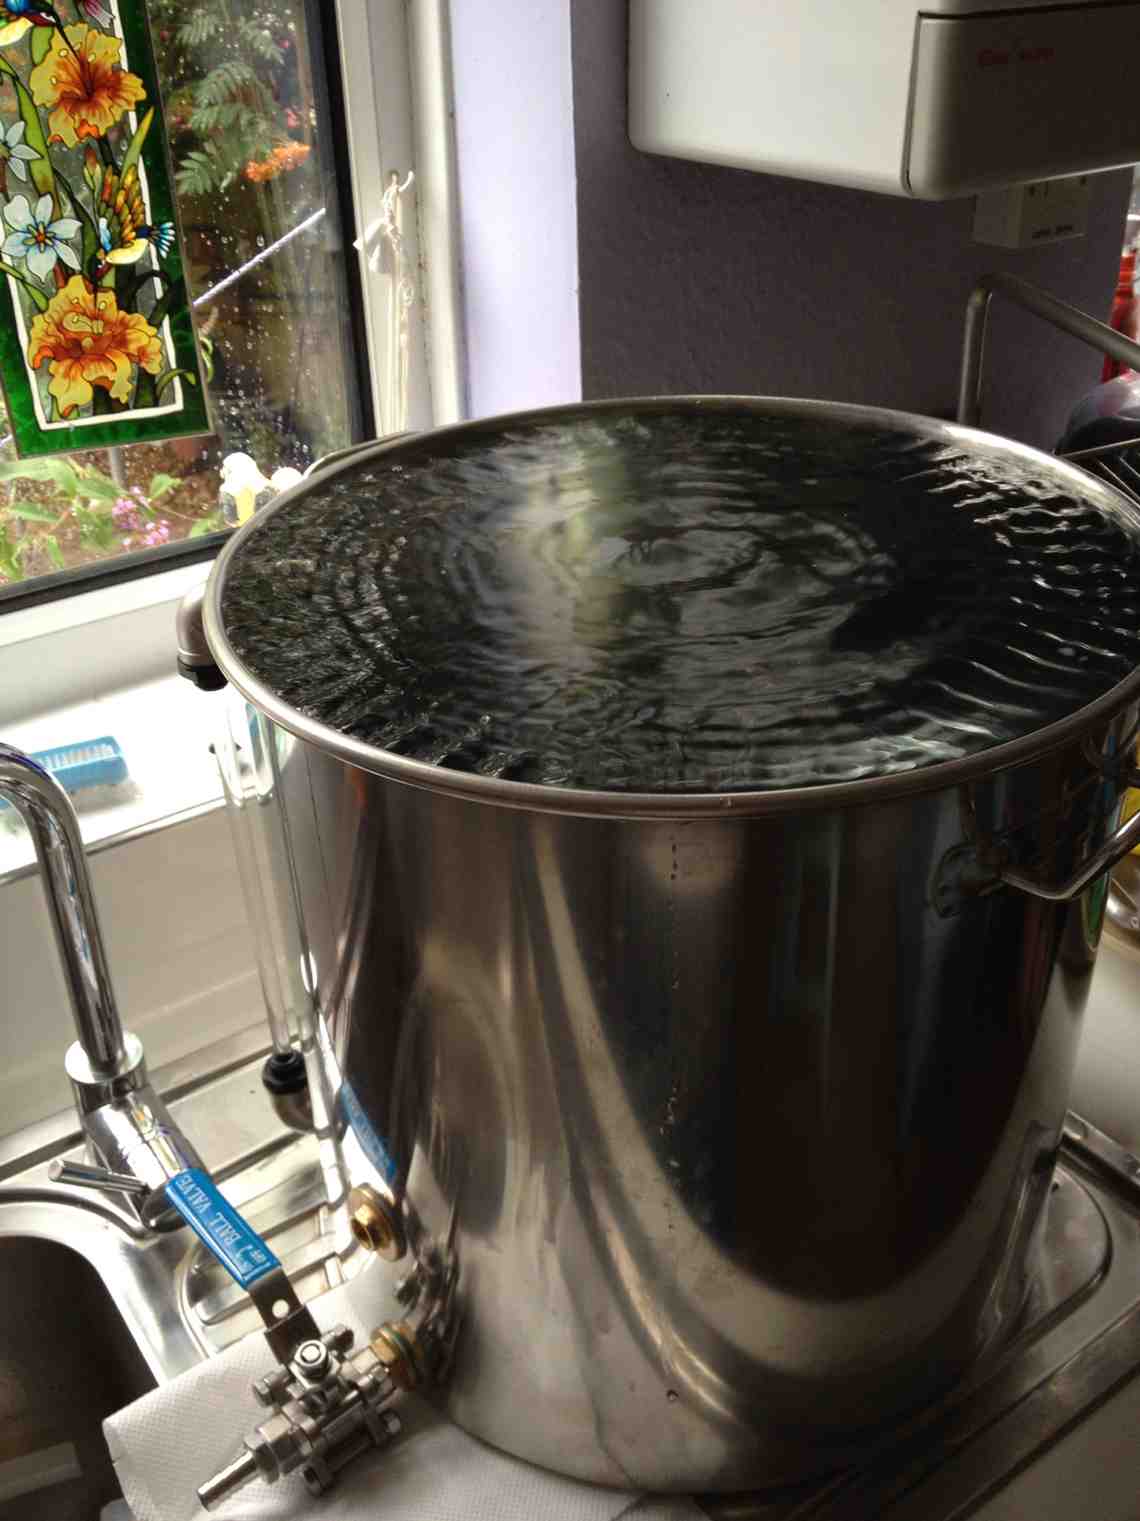
13. Leak testing.
When you are happy with the pot, take the plunge and FILL IT UP!!!
I placed kitchen paper under it all to see if there were any drips or leaks..
14. Decals
About to do these!
15. Completion
 I'll have to have another play with it later :thumb: