


Now that the brew pots and HERMS pot have been made, I will of course need a brew stand to put the pots on and pumps to make it all work. I previously described on the Forum how I have adapted mrlardâs 24v pumps and these will be used with no further changes (viewtopic.php?f=23&t=46600). However, to connect the pumps to the NEMA L6-15 output on the control panel I will need to make up two short extension leads. I could have fitted NEMA male plugs onto the pump power supply leads, but thought that I might want to use the pumps independently of my electric brewery at some point (given the wet weather recently perhaps to bail out a flooded house?). On the more general subject of power, I have a 32A Commando type weatherproof socket mounted on the rear wall of my house, which is wired to a separate consumer unit with RCB, so power is not an issue. A NEMA L6-30 female plug goes into the control panel at one end of the power feed, and a 32A Commando type male plug goes into the wall mounted supply at the other end.
As for the brew stand, this needs to take into account my chronic storage facilities. I have no large shed or garage to use as a store or brew house and do all my brewing on the garden patio. This means my set up has to be broken down and be put away when I am finished. All my equipment is stored in my loft. I recently floored all the loft and fitted power and lighting, so I have somewhere to work if I need to. I also enlarged my loft hatch and fitted a pulley system, akin to a dumb-waiter, so that I can easily get things up and down to and from storage. However, a brewing bench is another matter and one strong enough and large enough to hold all my pots and equipment would simply be too big and heavy to get through a loft hatch.
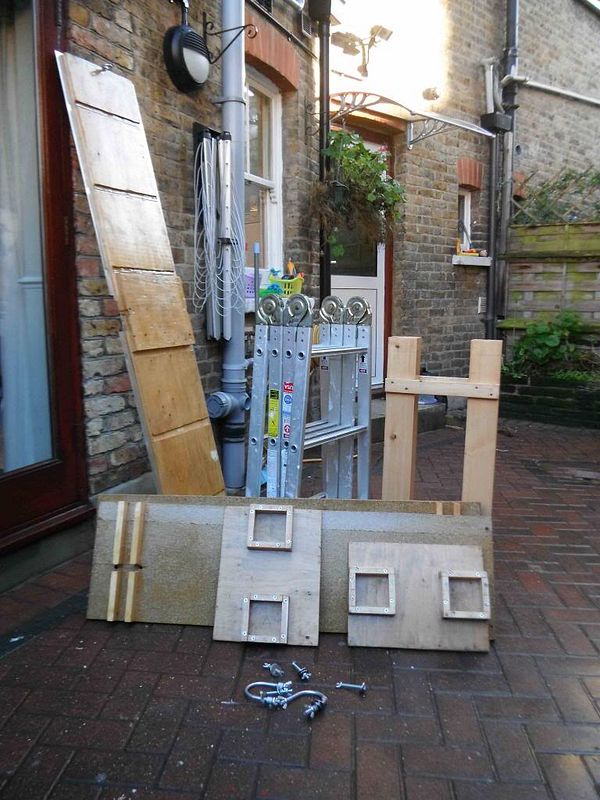
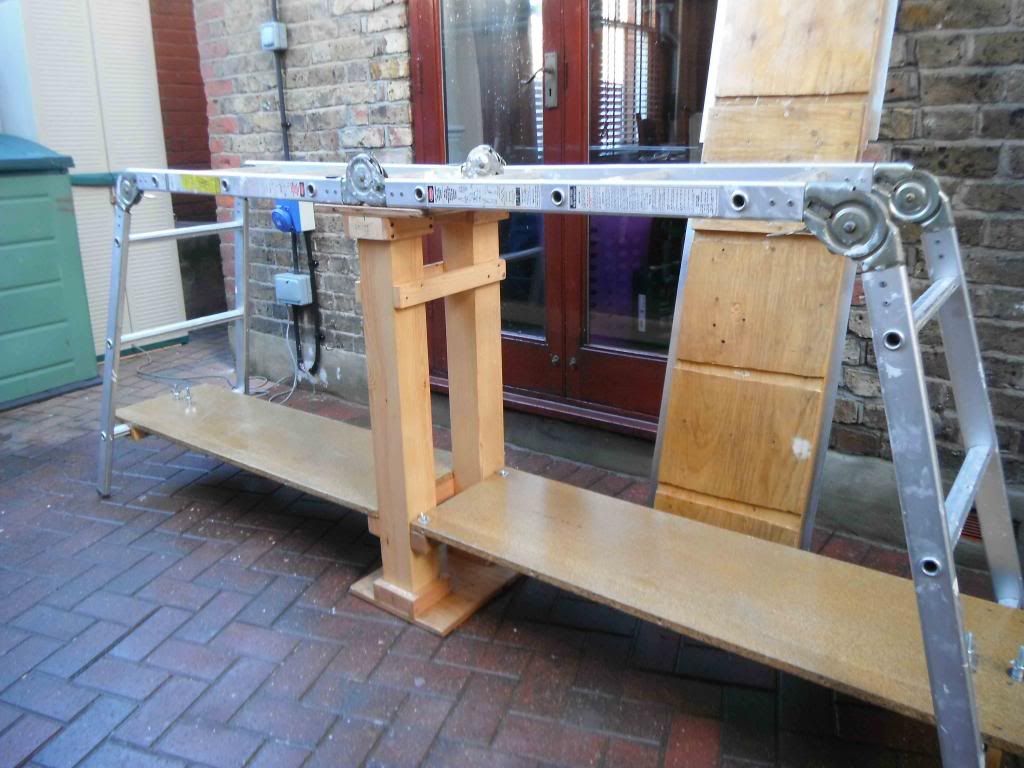
So the answer for me was to utilise a multi-functional combination ladder like this: http://www.buydirect4u.co.uk/multi-func ... tAodqVcAgg. I canât remember where or when I bought my version of this type of ladder, but it was over 15 years ago when they first started to appear in this country. My ladder was imported from the USA and it looks and feels much stronger than the ones I have seen on sale at DIY stores recently. When used as a brew stand the ladder is erected in the platform position. In this mode the general dimensions are 96â length between the bottom legs and 76â length between the top legs. It is 16â wide at the top and 22â wide at the bottom. The height to the top from the ground is 38â. To bridge the rungs along the top I have made a platform from 3/4â inch construction plywood, rebated at each rung position to fit closely and help hold it in place. A 2mm sheet of aluminium cut to the same dimensions as the platform is screwed on it to give a smooth waterproof surface to stand the pots on. According to the ladder manual, the ladder arranged as a platform is supposed to âtake the weight of two men and a tool boxâ, but the last thing I wanted was for it to collapse with 100L of wort on it, so I have strengthened it by adding a middle support. The support is made from two pieces of 4â x 4â timber braced apart with 2â x 2â battens. A shelf runs from each side of the middle support to the respective side of the legs, where it is fitted to the bottom rung with a âUâ bolt. Further bolts connect the shelves to the middle support. The shelf also stops the legs from splaying. The shelf is very handy for standing the pumps and wort chiller on. I bought all the wood and shelving as off-cuts and the whole lot cost me less than £20. Wood and shelves are varnished with yachting varnish for protection. It only takes a couple of minutes to put up or take apart the brew stand. The ladder is stored folded in my small garden shed and the other bits in the loft. Pictures below show the parts before and after assembly.
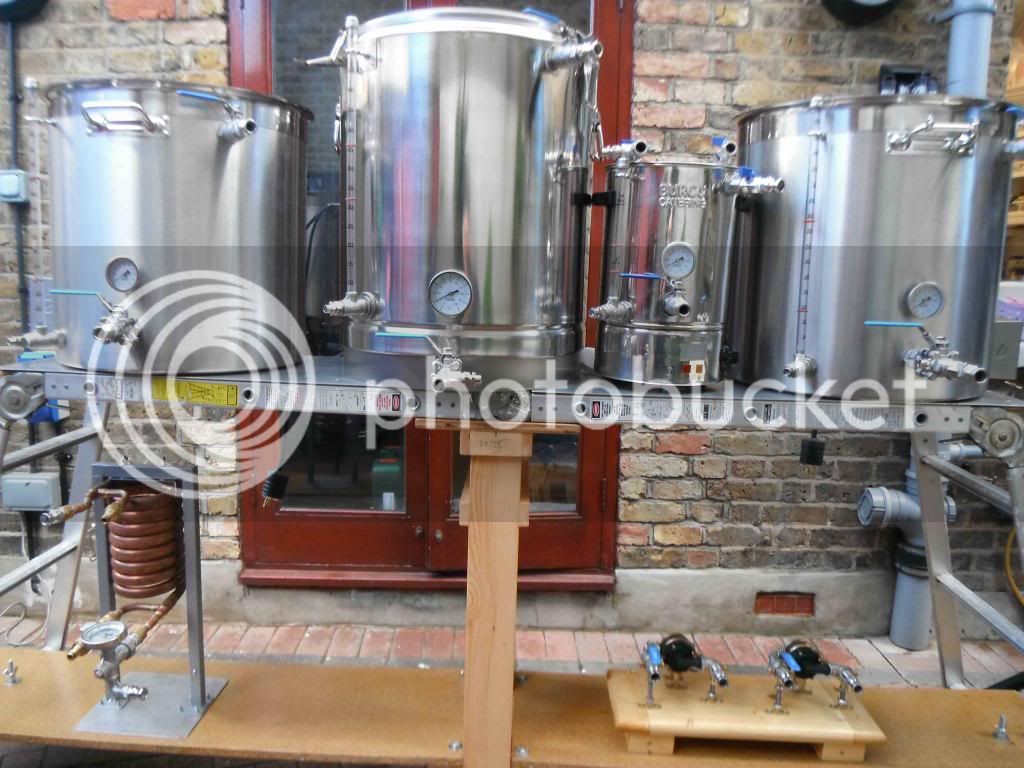
I did a dummy run today with all the pots, pumps and wort chiller in position along with the control panel. The large plastic pot to the right is the cold liquor tank. I first put the mains water into this via an active carbon filter for treatment. I add potassium metabisulphite to remove the chlorine and chloramines then add whatever brewing salts I need before pumping the water into the HLT for heating up. This graduated plastic tank holds 120L and was given to me as surplus unused equipment by a photo developing factory that was closing down â it was originally made for holding developing fluid, but it was never taken out of its cardboard delivery box. I fitted it with a ball valve and dip tube. Here are some pictures of the dummy run.
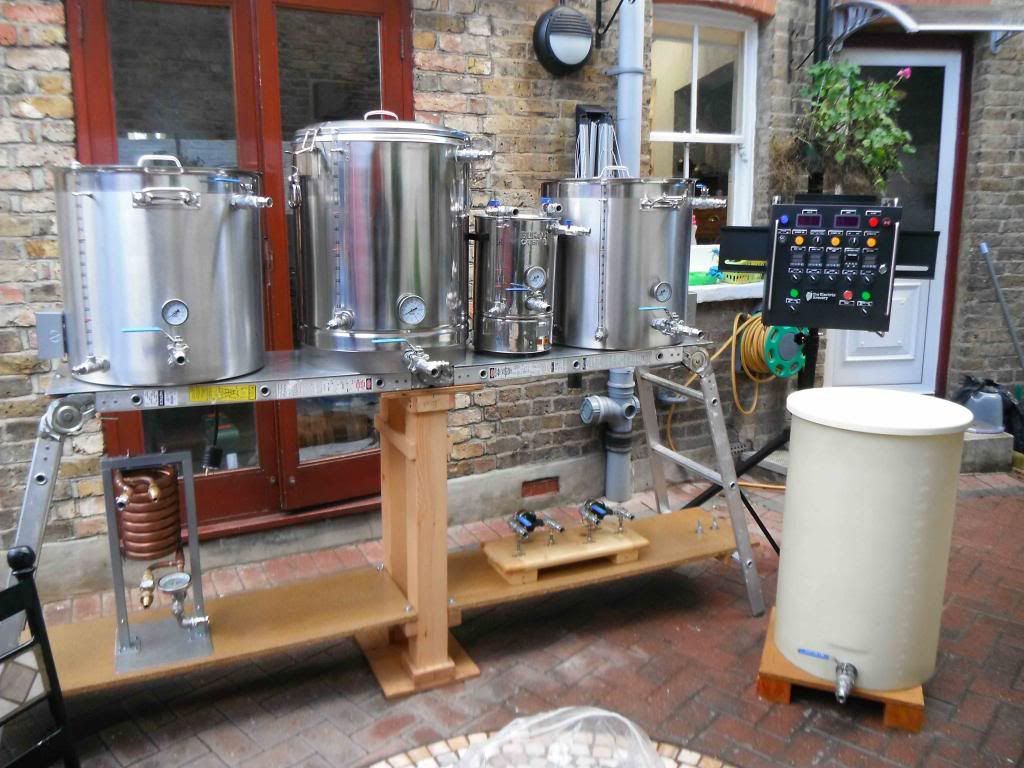
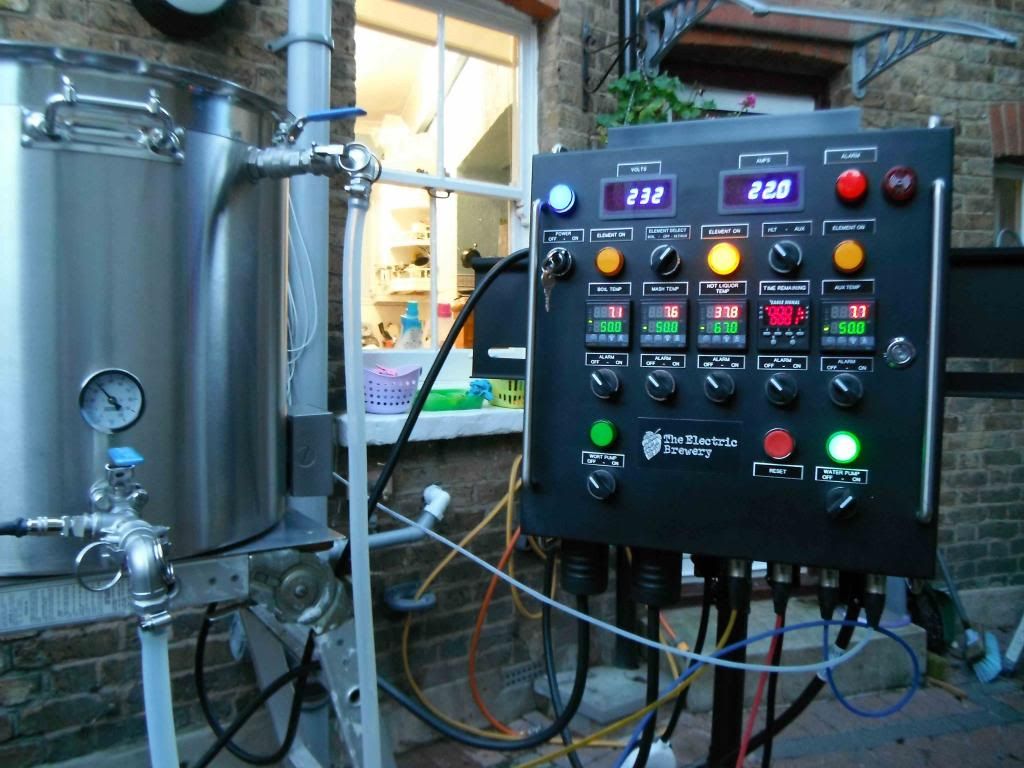
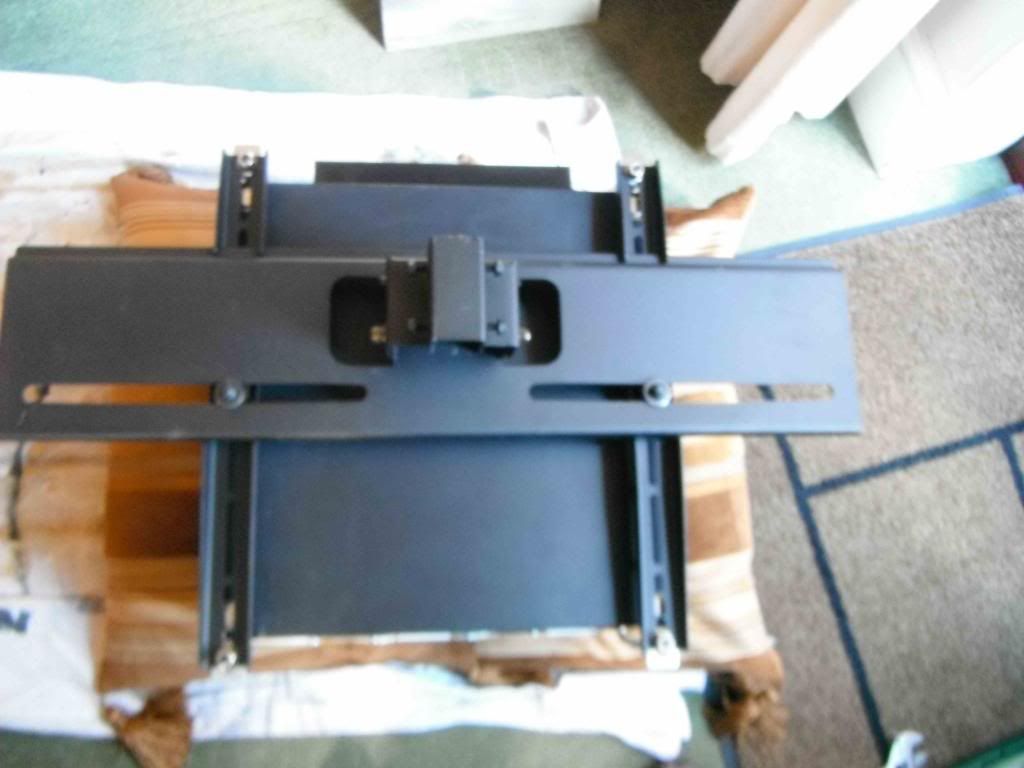
The mount for the control panel is a Plasma TV stand (http://www.amazon.co.uk/gp/product/B00D ... UTF8&psc=1). It can hold 35g, so easily supports the 17.5kg weight of the control panel.
All these pots, pumps and valves make quite a complicated set up. So what I will do is write up a manual with pictures for my own benefit to be used when I do my first brew. Itâs based on a CAMRA homebrew recipe of âLiberty IPAâ. It will be written along the same lines as the brew day step-by-step manual on the Electric Brewery website (http://www.theelectricbrewery.com/brew-day-step-by-step). I'm more than happy to send anyone a PDF copy of this if they want it when I have written it â please pm me.
As for the brew stand, this needs to take into account my chronic storage facilities. I have no large shed or garage to use as a store or brew house and do all my brewing on the garden patio. This means my set up has to be broken down and be put away when I am finished. All my equipment is stored in my loft. I recently floored all the loft and fitted power and lighting, so I have somewhere to work if I need to. I also enlarged my loft hatch and fitted a pulley system, akin to a dumb-waiter, so that I can easily get things up and down to and from storage. However, a brewing bench is another matter and one strong enough and large enough to hold all my pots and equipment would simply be too big and heavy to get through a loft hatch.
So the answer for me was to utilise a multi-functional combination ladder like this: http://www.buydirect4u.co.uk/multi-func ... tAodqVcAgg. I canât remember where or when I bought my version of this type of ladder, but it was over 15 years ago when they first started to appear in this country. My ladder was imported from the USA and it looks and feels much stronger than the ones I have seen on sale at DIY stores recently. When used as a brew stand the ladder is erected in the platform position. In this mode the general dimensions are 96â length between the bottom legs and 76â length between the top legs. It is 16â wide at the top and 22â wide at the bottom. The height to the top from the ground is 38â. To bridge the rungs along the top I have made a platform from 3/4â inch construction plywood, rebated at each rung position to fit closely and help hold it in place. A 2mm sheet of aluminium cut to the same dimensions as the platform is screwed on it to give a smooth waterproof surface to stand the pots on. According to the ladder manual, the ladder arranged as a platform is supposed to âtake the weight of two men and a tool boxâ, but the last thing I wanted was for it to collapse with 100L of wort on it, so I have strengthened it by adding a middle support. The support is made from two pieces of 4â x 4â timber braced apart with 2â x 2â battens. A shelf runs from each side of the middle support to the respective side of the legs, where it is fitted to the bottom rung with a âUâ bolt. Further bolts connect the shelves to the middle support. The shelf also stops the legs from splaying. The shelf is very handy for standing the pumps and wort chiller on. I bought all the wood and shelving as off-cuts and the whole lot cost me less than £20. Wood and shelves are varnished with yachting varnish for protection. It only takes a couple of minutes to put up or take apart the brew stand. The ladder is stored folded in my small garden shed and the other bits in the loft. Pictures below show the parts before and after assembly.
I did a dummy run today with all the pots, pumps and wort chiller in position along with the control panel. The large plastic pot to the right is the cold liquor tank. I first put the mains water into this via an active carbon filter for treatment. I add potassium metabisulphite to remove the chlorine and chloramines then add whatever brewing salts I need before pumping the water into the HLT for heating up. This graduated plastic tank holds 120L and was given to me as surplus unused equipment by a photo developing factory that was closing down â it was originally made for holding developing fluid, but it was never taken out of its cardboard delivery box. I fitted it with a ball valve and dip tube. Here are some pictures of the dummy run.
The mount for the control panel is a Plasma TV stand (http://www.amazon.co.uk/gp/product/B00D ... UTF8&psc=1). It can hold 35g, so easily supports the 17.5kg weight of the control panel.
All these pots, pumps and valves make quite a complicated set up. So what I will do is write up a manual with pictures for my own benefit to be used when I do my first brew. Itâs based on a CAMRA homebrew recipe of âLiberty IPAâ. It will be written along the same lines as the brew day step-by-step manual on the Electric Brewery website (http://www.theelectricbrewery.com/brew-day-step-by-step). I'm more than happy to send anyone a PDF copy of this if they want it when I have written it â please pm me.
Last edited by a moderator: