Building a Shed?

The Homebrew Forum

Help Support The Homebrew Forum:

This site may earn a commission from merchant affiliate links, including eBay, Amazon, and others.
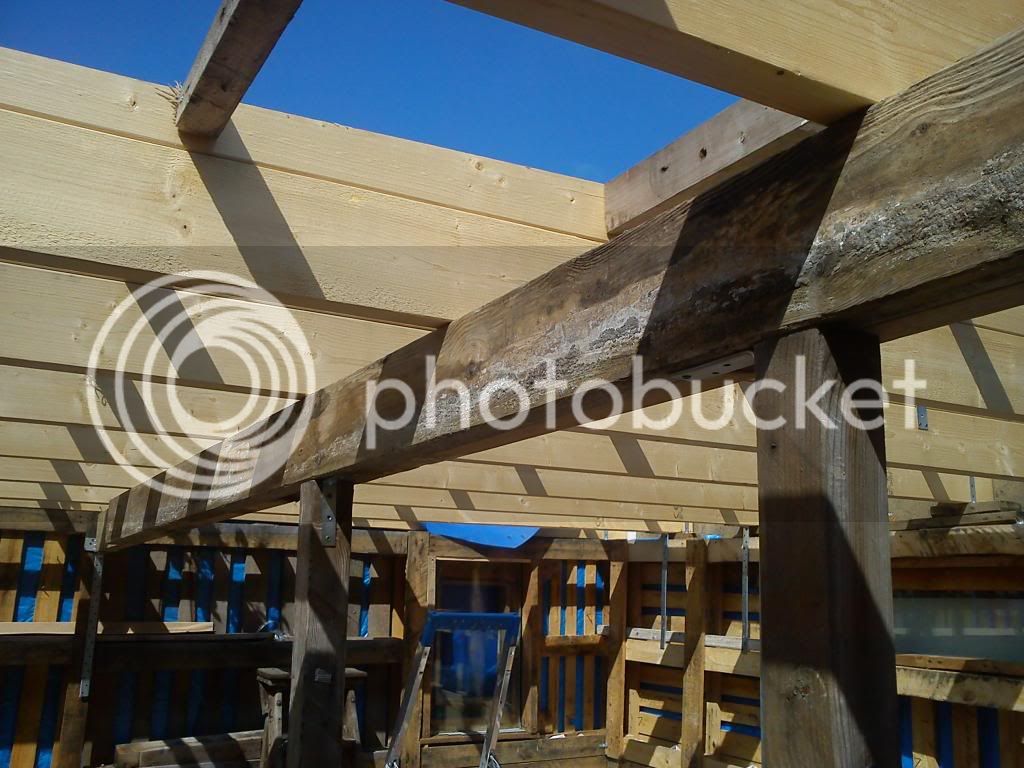
Ok, finally some new pictures for you all, fist one is one form inside tghe shed, this is the support beam that has been added, as well as 2 posts supporting it, all done by myself!

This was done with the use of lorry straps and a lot of patience!!


Second picture is one i took while nipping upstairs, obviously the boards appear unlevel as they hhad not been all screwed down at this point!


Thanks, any comments , please list below!!
 
Ok.....THE ROOF IS DONE!!!!!!

first picture is my brother in law helping with the roof


Second picture is of the finished roof, with the bitumen still wet!!


I can make a move now!!!
 
Back out till 1pm, then finished for the day!

Today i went round the sides and the back, tacking the felt to the roof sides, tidying it up, i have then been shoring all the holes in the front of the shed, the front is just waiting for the final skin to go on now!
Wednesday i will shore the holes up round the back of the shed, and then a few bits to tidy up, and after that, the whole outside will be done, just waiting for the final skin...hopefully end of the month for that!!!
 
Ok, brilliant day outside!
Today, i have been round with the silicone and sealed the windows and small cracks wherever they would be.
I have put the bottom boards on the window side, and also have put some insulation at the back of the roof too.

Started to break up the pallet boards to make a start on the cladding, which i should be able to start putting on in the morning!
 
Thats great bitcaster!!, can't beat the shed!, i don't know what makes men fascinated by sitting in sheds up the garden...but why not!!

Anyways....update for today!
Have started and done the wall with the window in, to do the bottom cladding, and have now turned to do the wall with the small window!
Takes a lot of time taking nails out etc, but getting there!!
Looks sweet inside!

 
Small update...

Going to be having air conditioning inside the shed, after i bought a stand alone unit, that needs a rear pipe fitting to it, for the princely sum of £10
Winner
 
Update:

Ok, the cladding is all but done, just one wall to the left to do, i have the timber, but no boards for that side just yet, a shelf will be put on top of the cladding once the top part of the wall is done.

I have also put a first corner of the second flooring down, it's in the bar corner, giving me chance to start working on the bar part as well!

For a while i have put in a spare amp and speaker, so i have some music to listen to while in there!

Ok, the picture below is me toying with the idea of a long pallet to form the basis of the frame for the bar, it's a good height too at 42", i may go along with the idea i have for that, the bar stool is there for seating height next to the bar!

Thanks

 
Quick update:
Yesterday i went to a kitchen place that deals in granite, they have given me 19 chipboard boarding, most of them being 8ft by 4ft for free!

These boards will be used on the top half of the wall once the electrics are wired in, and also as a lot are white, i think i may just use them for the ceiling too!

Got to go back this week some time, to have a chat about a black cut of piece of granite that's leaning outside!!
That would be pretty cool having a shiny black granite bar!!!
:)
 
Tempted to just wallpaper over it and paint it.

Wife has had a great idea about using the 5ft pallets we have left, cut them short and make wall seating with them, and put cushions and foam on them for seats!

Sorted!
 
Ok, i have finally done all the interior cladding all the way around, laid 98% of the second floor boards, i have also started work on the bar itself, going to be a nice big bar area too, the wife has decided that a bigger bar is better, so who am i to argue with that.

The first part of the bar is screwed down and secured, frame to be completed by next week.

Also, i have made some corner seating for one of the corners, and that is one of those L type arrangements, the wife's going to be sorting cushioning out for them!

I have also put in a sort of wall feature in the middle of the room, for the TV to be screwed to.

Cabling and electrics are going in place in the next few days!

Photo next time!
 
Think a day off today, but as your asking, here's some pictures for you!

First one is what the wife asked for, some seating made out of pallets, it needs one more pallet cutting up for the top, then painting and cushions putting on!!


The next picture is the feature i have put in to make use of the posts i put in, this 'wall' will eventually have a wall light on and a shelf!


Lastly, this picture is the other side, where one of the Tv's are going, this one will be the area where the xbox will be played with a sofa to sit on!all cables running behind and a socket mounted too!


Bar area is a lot bigger than first thought!!
 
Done for today, just a few hours in, completed all the floor now, and coach bolted the bar to the walls!

Have also tidied up the garden a bit, any rogue cut up pallets have been sawn up for the fire and put in the log bin!

Cheers!
 
As for the shed, a late start to the day, but i have put down a membrane on top of the floor, simply to avoid any liquids that will get spilt from seeping into the boards underneath, then a carpet or carpet tiles will be used.

I am covering the bar front with the same timber that i have used all around the walls to continue the look of the cladding!

Am looking at drilling little holes near to the top, that i can insert some blue LED's that i have into them, giving a nice effect!
Am also going to start making the frame for the fridges to go into behind the bar, am considering putting doors in front of the fridges, with some of the wood that i am getting from the kitchen place, and then making vent holes on the top at the back!

Ok, back to it!!
 
Last edited by a moderator:
ok, just the one picture, first side of the bar is now covered, and part of the frame behind the bar is complete.

The wood on top, that resembles the bar top is only a temporary measure, more for the look at the moment.


Back on for a full day at it in the morning!!

Beer time now!!
 
Hi, yes, got to get hold of some armored cable and a RCD breaker box, and have these installed properly, this will be done the month after the outer skin is done, which won't be too long i think.
Right, back out to it!! lol
 
Update again!

Ok, the frame for the bar is complete now, i just need to cut the shelving out and finally the bar top itself to sit on top.
I have made some room for about 6 shelves, and the small side of the bar, there is room for perhaps 3 cornies stood up!


Next picture is my attempt at a snug area, obviously all these require painting and cushioning fitted, and a table is to go in the middle, but its coming together!


This picture is the other side to the snug area, opposite the door, a long seating area, and ready for painting and cushioning.


Last picture is the other side to the bar, front cladding hasn't been put on yet, but this is just to get a feel for the bar area.


Thanks
 
Just a quick update while i have a break in the shed!

Today i have completed the electric sockets, in total i have put in 9 double sockets, i think that should be enough.

The wiring for the lighting is in place as well, but no lights ready just yet or switches.
I have also plumbed in all the internal cat5 cable i need too, and have also brought in a satellite cable as well from the dishes outside, the big black cable is a component cable for a system i have.
Decided to make sure the satellite cable is working, so testing on a 15" tv i have spare, and it is working a treat on picking upo Eurosport for free on astra 19e!

Ok, for the two pictures, this is the cabling area, obviously not final:


Next picture is the corner snug i have with the electrics i put in working!

 
Quick update, i have put on what timber i had spare for the main front of the bar, more timber to come within a week, this is how the bar looks like at the moment:


Second picture, this is the left had wall all done, just a bit of tidying up filling in the few small holes that exist, other than that, it's ready for wallpapering and a rail in the middle going round it all when done!!


Thanks
 

Latest posts

Back
Top