


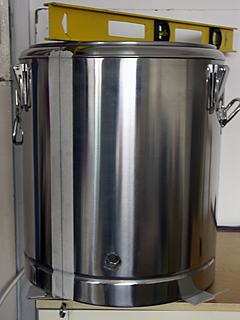
Ok this is how I converted my 34.5L Thermobox into an electric copper for the small 20L femtoplant. Some steps are still missing, but it will be added to as I find the piccies :lol:
DISCLAIMER: MAINS ELECTRICITY AND WATER ARE A DANGEROUS COMBINATION, IF YOU ARE NOT CONFIDENT WORKING WITH SUCH, GET A COMPETENT PERSON TO DO IT FOR YOU.
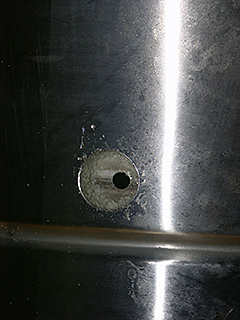
I decided I wanted a sight glass, so after levelling the thermobox I dangled a weight on a piece of cord to determine a true vertical. That was marked on the masking tape Note the existing hole where the original tap was positioned. Using a 6mm Cobalt Drill and plenty of water as a coolant a hole was drilled right through at the top and bottom. Then switched to a 25mm Cobalt Holesaw and (again with lots of water as coolant/lubricant) I drilled through the inner skin. This was repeated at the top. A 15mm Q Max punch completed the holes on the inner skin (Not shown), and a 3/8" custom nipple fitted (details in another post somewhere . . . don't think its on here yet) Top and bottom.
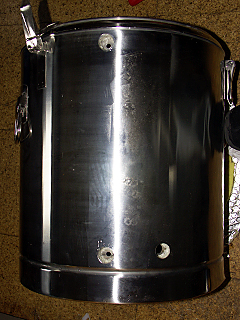
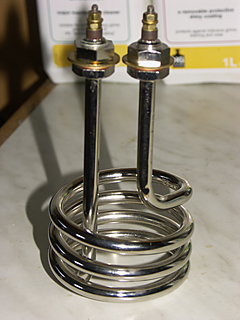
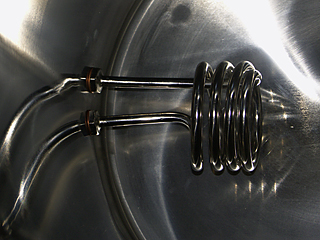
Now to fit the element, this is a water boiler element from The heating element company (Backers), and was chosen because it is a) 3KW and b) it only requires two 13mm holes to fix it securely in place . . . and I have a 12.5mm QMax Punch. There is an issue however, the end of the element actually protrudes through the outer side wall, and mixing electricity and wort is something you always need to be aware of. What I decided to do was to get an IP56 project box from Maplin, cut the bottom off, radiused to fit the curve of the inner skin, which would give that extra headroom.
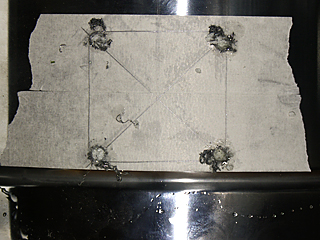
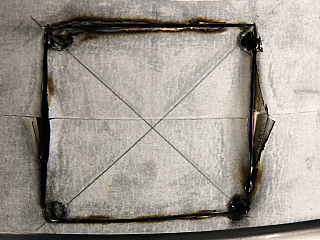
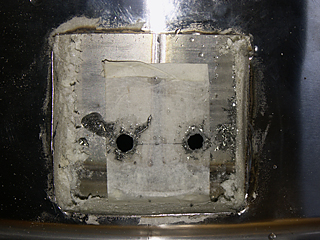
First job, is to mark out the appropriate sized hole near the base of the outer skin, and a hole drilled with a 6mm Cobalt drill bit (and plenty of coolant) in each corner. Then using my trusty angle grinder with a stainless steel slitting disc. I carefully cut through the inner skin
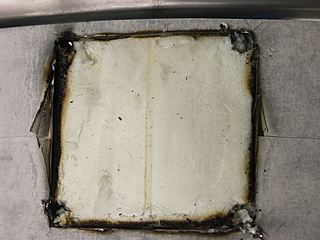
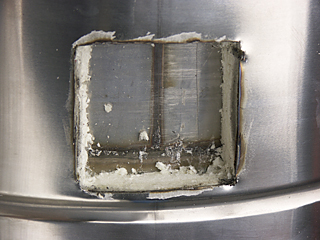
Before prising off the stainless steel covering to reveal the foam underneath. Some work with a sharp craft knife, saw the insulation encouraged to leave, and it was removed in short order.
My Favourite 6mm cobalt drill bit was then used to drill a pair of holes at the appropriate distance apart, before punching out with the 12.5mm QMax punch, and a 'little tickle' with a grinder on the Dremel meant that the element was fitted in short order.
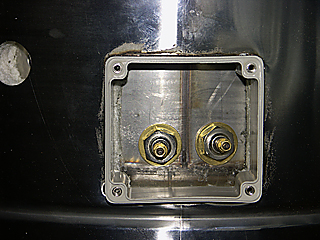
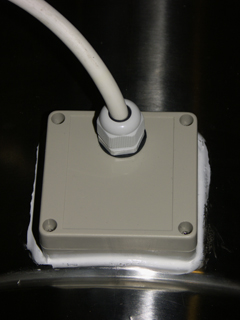
With the element in place it is time to fit the project box (the hole to the left is for the PT100 Probe which I use to maintain the temp while running off before switching power on to bring it to the boil). The outer hole needed a little bit of work with the grinder on the Dremel and a needle file to make it fit tightly. Once this was done the foam was coated with Food Grade silicone sealant and the Project box put in place and again liberally coated with sealant.
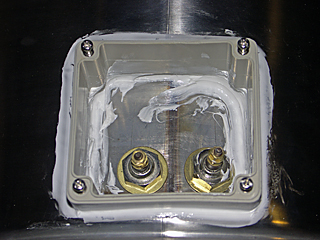
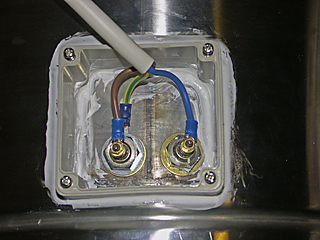
Wiring this element is simplicity itself. Firstly, one of the nuts is undone, and a M13 automotive crimp connector connected to the earth wire is put in place, followed by a brass washer and the fixing nut . . . this is screwed down firmly . . . and then earth continuity checks carried out. Crimp connectors are attached to the live and neutral wires which are then bolted down on the stud terminals at the end of the elements. The other end of the Lead is passed through an IP66 Rated cable gland and out to a 16A commando connector to connect to the mains.. . . . At this point it is probably wise to check Earth continuity and leakage . . . Luckily my boiler passed both :party:
Hope this helps . . . I'll try and get the missing bits added . . . like hop stopper/ Tap and sight gauge and the PT100 Probe. somethime soon
DISCLAIMER: MAINS ELECTRICITY AND WATER ARE A DANGEROUS COMBINATION, IF YOU ARE NOT CONFIDENT WORKING WITH SUCH, GET A COMPETENT PERSON TO DO IT FOR YOU.
I decided I wanted a sight glass, so after levelling the thermobox I dangled a weight on a piece of cord to determine a true vertical. That was marked on the masking tape Note the existing hole where the original tap was positioned. Using a 6mm Cobalt Drill and plenty of water as a coolant a hole was drilled right through at the top and bottom. Then switched to a 25mm Cobalt Holesaw and (again with lots of water as coolant/lubricant) I drilled through the inner skin. This was repeated at the top. A 15mm Q Max punch completed the holes on the inner skin (Not shown), and a 3/8" custom nipple fitted (details in another post somewhere . . . don't think its on here yet) Top and bottom.
Now to fit the element, this is a water boiler element from The heating element company (Backers), and was chosen because it is a) 3KW and b) it only requires two 13mm holes to fix it securely in place . . . and I have a 12.5mm QMax Punch. There is an issue however, the end of the element actually protrudes through the outer side wall, and mixing electricity and wort is something you always need to be aware of. What I decided to do was to get an IP56 project box from Maplin, cut the bottom off, radiused to fit the curve of the inner skin, which would give that extra headroom.
First job, is to mark out the appropriate sized hole near the base of the outer skin, and a hole drilled with a 6mm Cobalt drill bit (and plenty of coolant) in each corner. Then using my trusty angle grinder with a stainless steel slitting disc. I carefully cut through the inner skin
Before prising off the stainless steel covering to reveal the foam underneath. Some work with a sharp craft knife, saw the insulation encouraged to leave, and it was removed in short order.
My Favourite 6mm cobalt drill bit was then used to drill a pair of holes at the appropriate distance apart, before punching out with the 12.5mm QMax punch, and a 'little tickle' with a grinder on the Dremel meant that the element was fitted in short order.
With the element in place it is time to fit the project box (the hole to the left is for the PT100 Probe which I use to maintain the temp while running off before switching power on to bring it to the boil). The outer hole needed a little bit of work with the grinder on the Dremel and a needle file to make it fit tightly. Once this was done the foam was coated with Food Grade silicone sealant and the Project box put in place and again liberally coated with sealant.
Wiring this element is simplicity itself. Firstly, one of the nuts is undone, and a M13 automotive crimp connector connected to the earth wire is put in place, followed by a brass washer and the fixing nut . . . this is screwed down firmly . . . and then earth continuity checks carried out. Crimp connectors are attached to the live and neutral wires which are then bolted down on the stud terminals at the end of the elements. The other end of the Lead is passed through an IP66 Rated cable gland and out to a 16A commando connector to connect to the mains.. . . . At this point it is probably wise to check Earth continuity and leakage . . . Luckily my boiler passed both :party:
Hope this helps . . . I'll try and get the missing bits added . . . like hop stopper/ Tap and sight gauge and the PT100 Probe. somethime soon


