Oggys Bar
Well-Known Member
- Joined
- Oct 2, 2008
- Messages
- 106
- Reaction score
- 0
Vossy et al...as promised a tour of the above brewery....Lots of pictures..Any constructive criticism accepted....Non constructive criticism also accepted...as long as it's funny ")
OK Vossyâ¦Hereâs the tour, but be warned commissioning of the HERMS has not been 100% successful and I am looking to you and Aleman (and anybody else) for advice.
------------------------------------------------------------------------------
1. The brewery is built on a 1.1m X 0.55m wheeled frame. It was built this size to fit an alcove which I was allowed to use on the provisor I didnât expand to take over the entire basement Given the size I then attempted to get the most practical brew length onto it. I use cornies, so I was looking at multiples of approx 20L. Actually for personal use and a few friends 20l is usually OK. 40L is also useful and I have regularly done both sized brews. I could just about manage a 60L length if the grain bill wasnât too big (batch sparging) and more easily fly sparging. The underback is under the trolley frame and wort is drained to the underback using a valentine v'v connected to the MT ball v/v. Wort is pumped from the underback using Flojet 1 into the copper. The limiting capacity factor factor is the boiler (70L.)
2. All the vessels are Nordic best stainless :) and consist of the following:
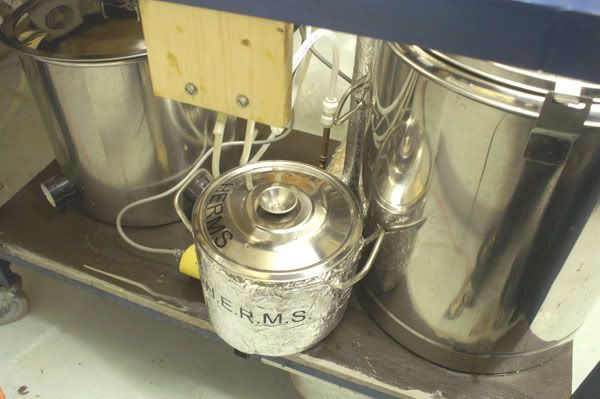
On the top level:-70L HLT. On the bottom level :-38.5L Mash tun, a choice of either a 35L or 70L boiler (35L currently in place) and recently a 6L Heat exchanger for a HERMS system.
3. Water is fed to the HLT via a flexible hose through a (charcoal) water filter.
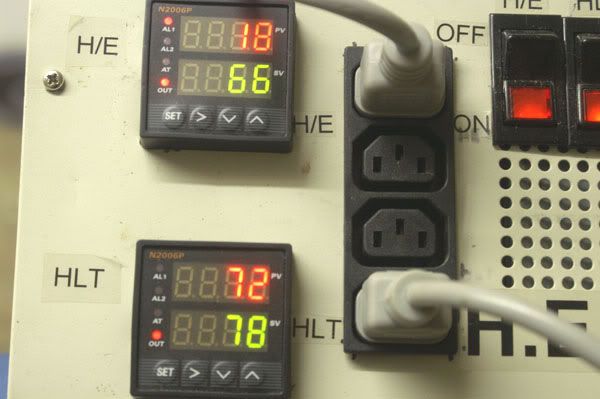
The HLT is heated via 2 kettle elements (from cheap kettles). 1 or both elements can be PID controlled. I raise to temp with both elements, 1 only pid controlled, then I unplug the non controlled element.
4. Hot liquor is transferred by gravity to the mash tun via underletting through the grain bed. This can be controlled by 2 ball v/vs, one at the HLT outlet and 1 at the MT inlet.
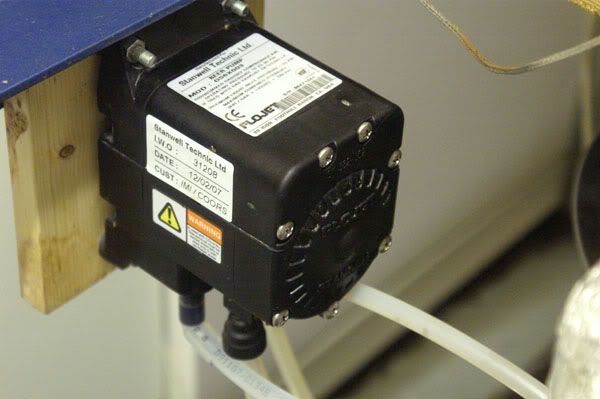
5. Once the mash is underway, the outlet tube from a Flojet pump (No1) is connected to a spray bar which is positioned just above or below the mash. The flojet sucks from the H/E outlet and the H/E inlet is permanently connected to the outlet from the mash tun (controlled by a ball v/v). The flojet flow is controlled by a pressure regulator and flow can be varied from 0.2L min to about 8L min. The flojet is operated by an air compressor.
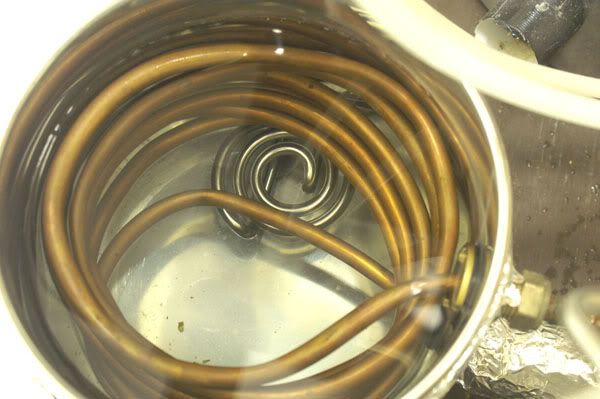
6. The 6L H/E is heated by a single kettle element and has a copper heat exchanger inside the stainless cooking pot. The H/E is PID controlled, but the temp sensor is placed in the MT presently as I am not sure what type (& size) of sensor I will eventually choose when I finally decide, I will fit the sensor in the H/E outlet.
7. At the end of the mash period the spray bar is removed from the Flojet and replaced with a 10mm copper wand. The flojet is switched on and the wort is transferred directly to the boiler via the wand.
8. The boiler is switched on as soon as the elements are covered and the batch sparge process is continued by closing the MT outlet and reconnecting the flojet outlet to the spraybar. If the mash should stick, then it is possible to open the MT outlet v/v and water will flow into the grain bed (underletting) to open up the bed (but never had to do it) The sparge is continued through the wand until all the wort is transferred to the boiler. It is possible at this stage to transfer water directly from the HLT to the boiler if required by simply closing the MT v/v and opening the HLT v/v.
9. At this stage the airline connection to flojet (No1) is disconnected via a quick connect coupling and Flojet (No2) is connected. This pump is connected to the outlet of a CFC. The CFC inlet is connected to the boiler outlet ball v/v. The copper wand is connected to the outlet from the cfc and directed straight into the F/V from a great height for max aereation. It is possible at this stage to recirculate the wort through the CFC and back into the boiler if required.
And Thatâs my brewing kit. See Photos (during a brew) for more detail.
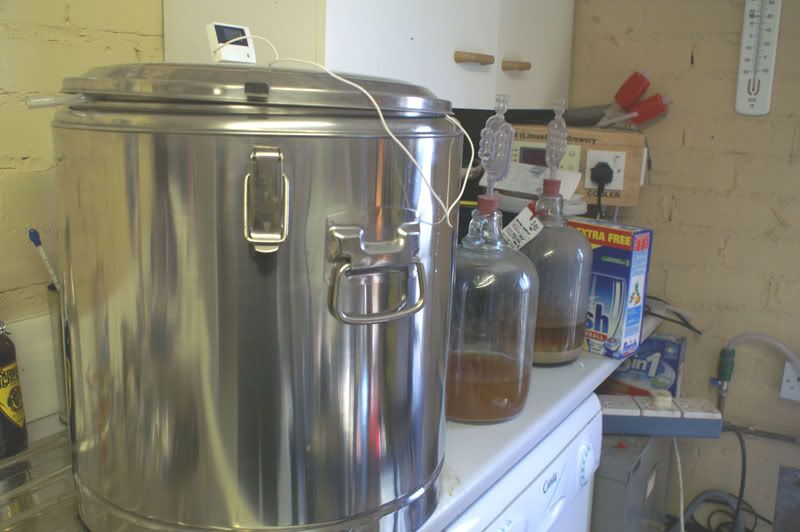
2 brews actually...A Boddingtons clone and a Hen Harrier clone.
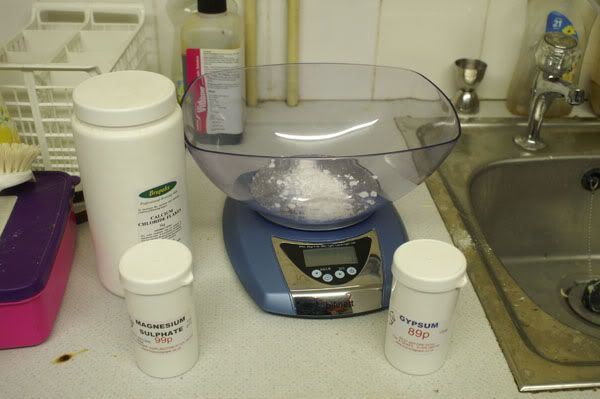
Still trying the water treatment..appears to be imroving my beer.
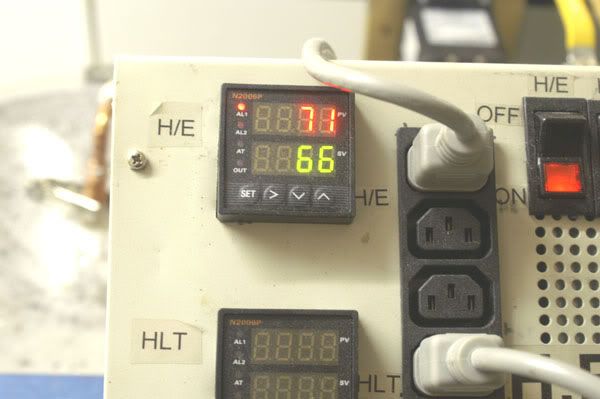
First use of the HERMS. Temperature set and heating up the HLT.

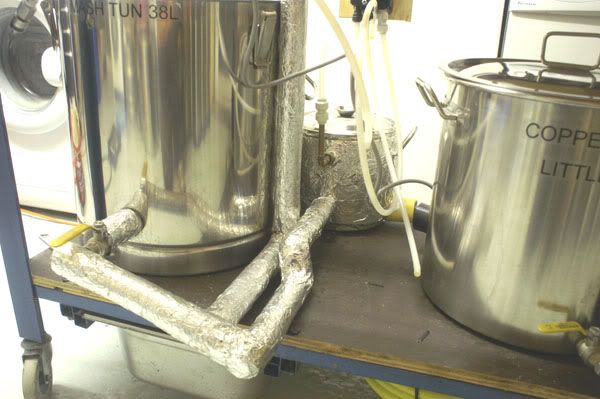
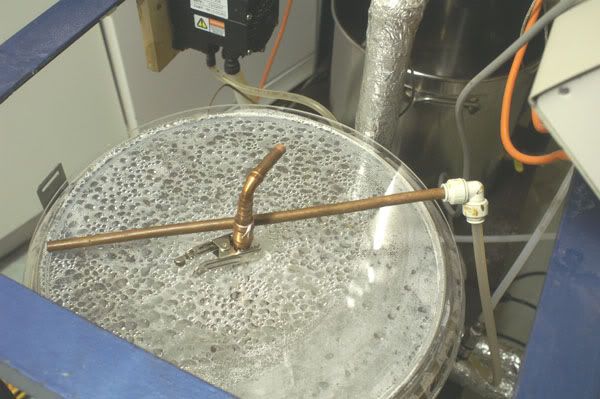
The water/wort manifold. Water from HLT to MT and wort from MT to HERMS heat exchanger.
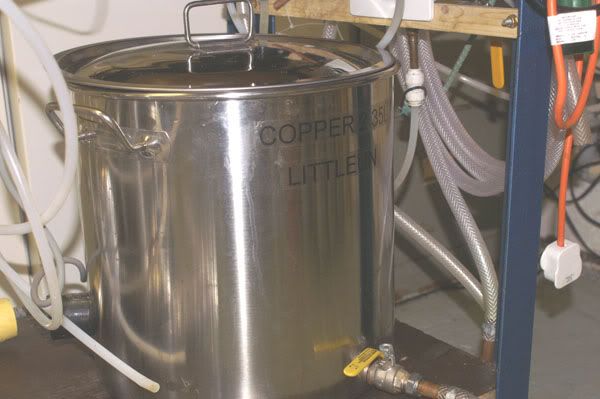
The boiler.
The HLT.

Flojet 1 connected to HE and recircing wort through HE and MT.
The air regulator used for regulating the wort flow through the Flojet.

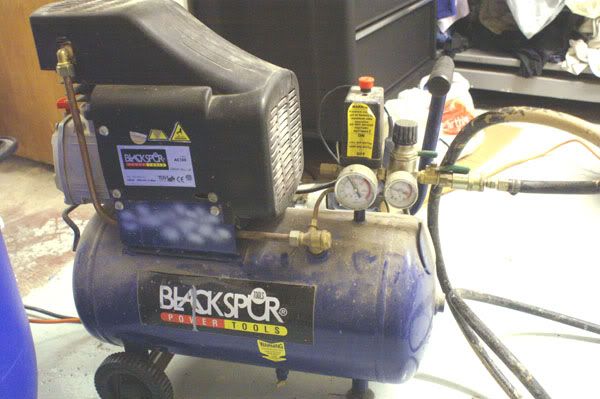
The trusty compressor used for powering the Flojets.
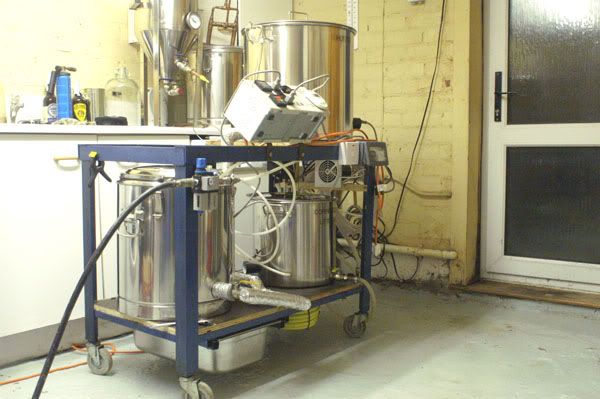
The whole kit on its trolley.
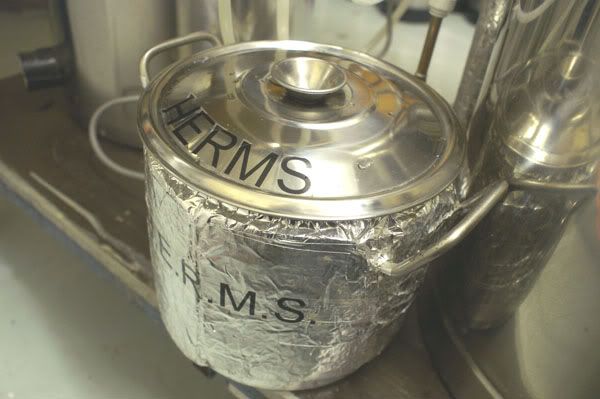
The HERMS heat exchanger at the back of the trolley (6L Nordic stock-pot insulated)
The copper coil and T**co kettle element inside the HE.
A rear-end view :shock:
The HLT nearly up to temperature.
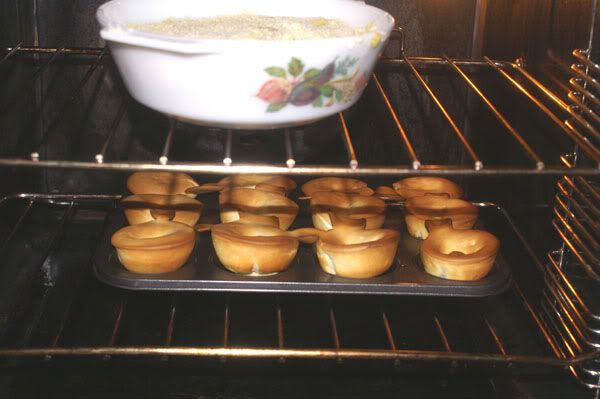
The thing about PID control is that you can leave the brewery to its own devices while you nip upstairs to get some brownie points by knocking up a rhubarb crumble and some Yorkshire puds, safe in the knowledge the HLT water wont be boiling when you get back.. :grin:
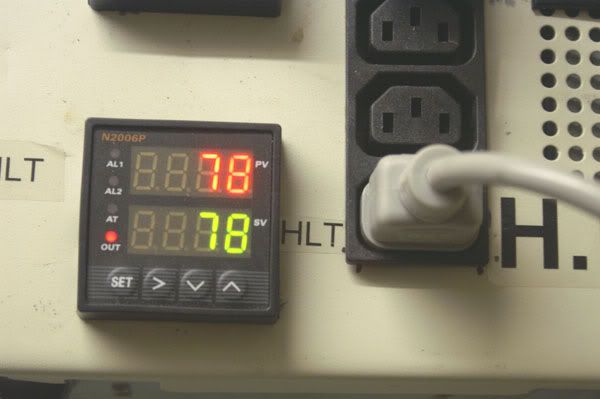
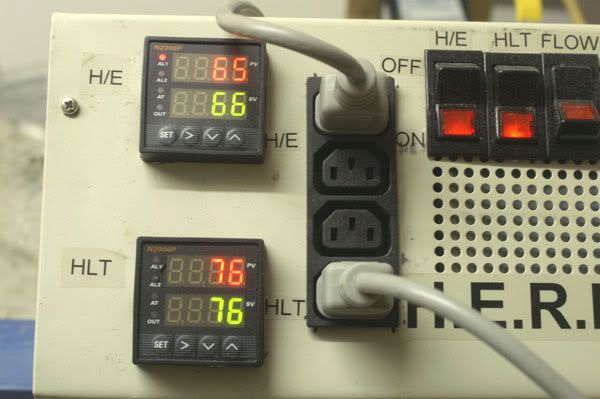
HLT temp has got there.
And Mash temp has got there.
Recirc pipe in the MT connected to the Flojet(1) via the HE.
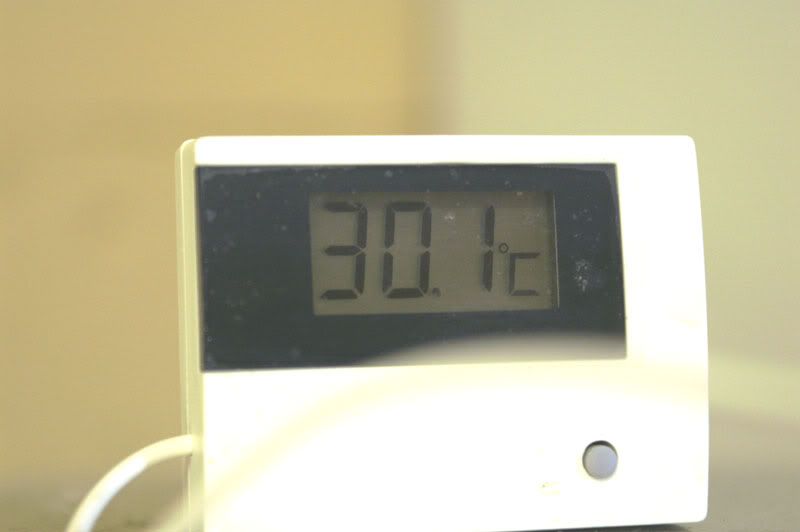
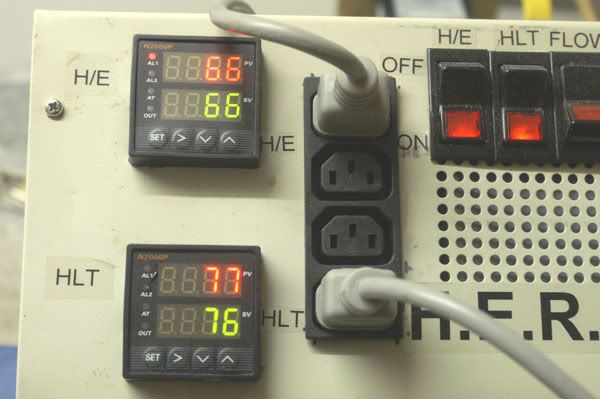
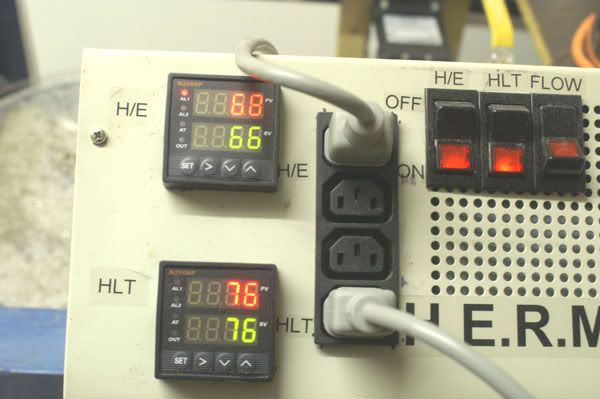
Slight undershoot in MT temp.
Now an overshoot.
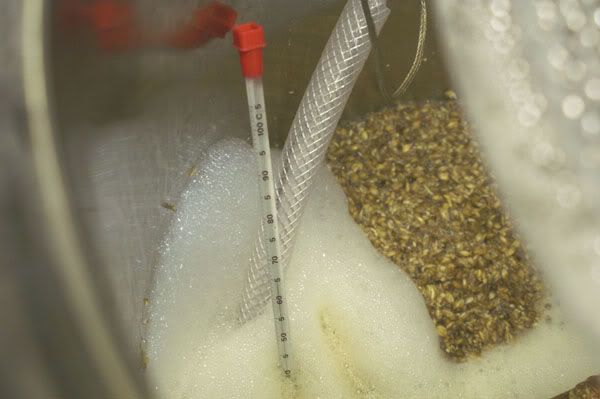
Actual temp as measured with an accurate lab thermometer is actually 2c under PID display (Pid had been calibrated in ice.
Spraybar removed and wort transfer wand in place....Magic
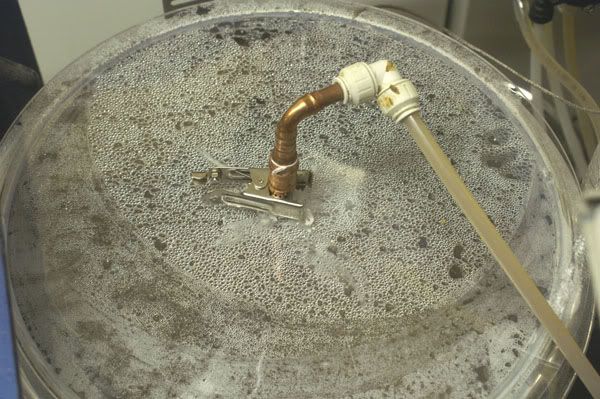
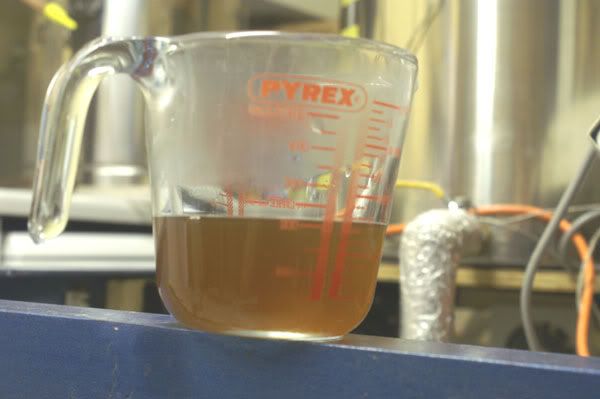
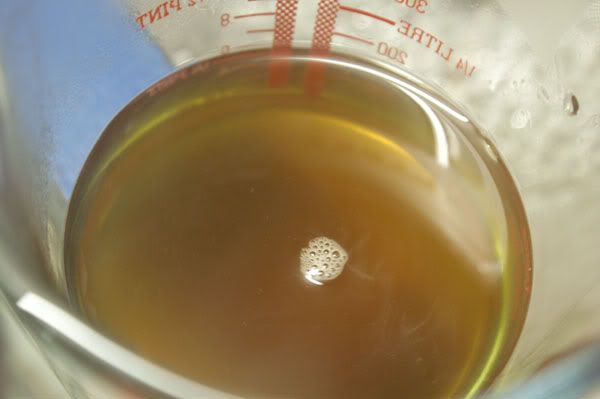
The wort as it came out of the wand..very clear, pictures don't do it justice.
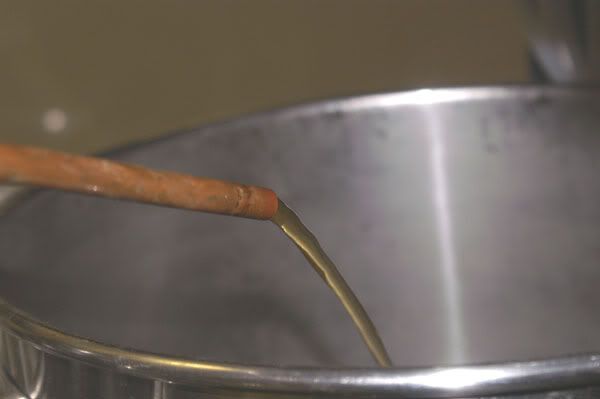
Wort being pumped into copper.
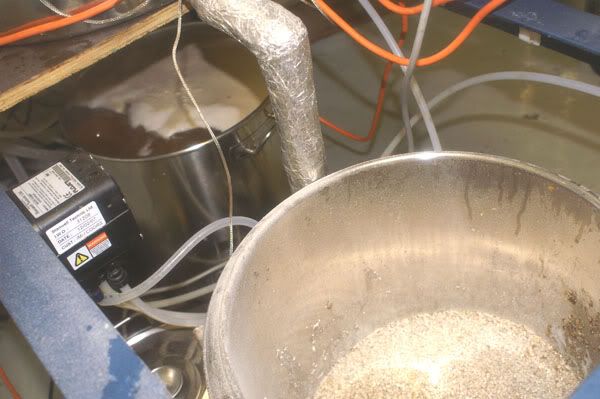
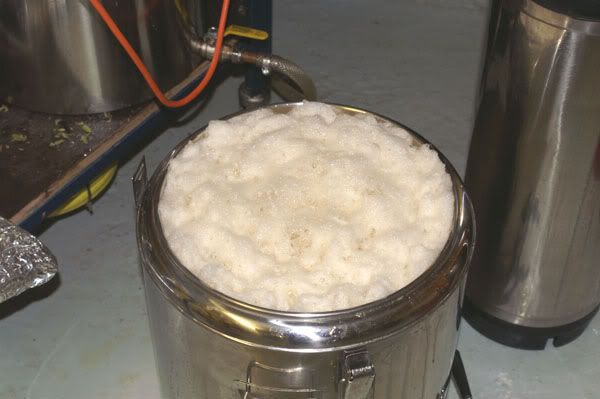
Grain for 2nd mash (Hen Harrier) in MT.
This time incredible temperature overshoot.
Boddingtons clone in the FV.
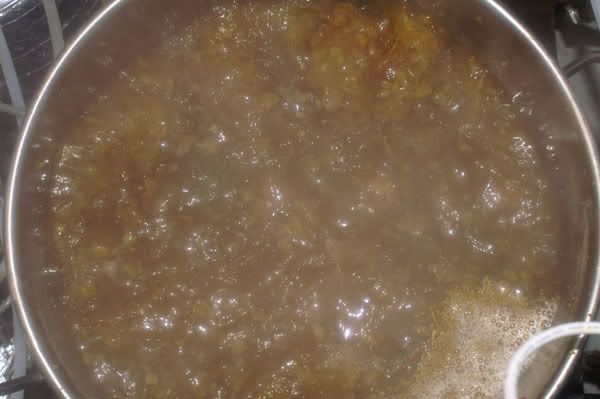
Hen Harrier under boil.
OK Vossyâ¦Hereâs the tour, but be warned commissioning of the HERMS has not been 100% successful and I am looking to you and Aleman (and anybody else) for advice.
------------------------------------------------------------------------------
1. The brewery is built on a 1.1m X 0.55m wheeled frame. It was built this size to fit an alcove which I was allowed to use on the provisor I didnât expand to take over the entire basement
Given the size I then attempted to get the most practical brew length onto it. I use cornies, so I was looking at multiples of approx 20L. Actually for personal use and a few friends 20l is usually OK. 40L is also useful and I have regularly done both sized brews. I could just about manage a 60L length if the grain bill wasnât too big (batch sparging) and more easily fly sparging. The underback is under the trolley frame and wort is drained to the underback using a valentine v'v connected to the MT ball v/v. Wort is pumped from the underback using Flojet 1 into the copper. The limiting capacity factor factor is the boiler (70L.)2. All the vessels are Nordic best stainless :) and consist of the following:
On the top level:-70L HLT. On the bottom level :-38.5L Mash tun, a choice of either a 35L or 70L boiler (35L currently in place) and recently a 6L Heat exchanger for a HERMS system.
3. Water is fed to the HLT via a flexible hose through a (charcoal) water filter.
The HLT is heated via 2 kettle elements (from cheap kettles). 1 or both elements can be PID controlled. I raise to temp with both elements, 1 only pid controlled, then I unplug the non controlled element.
4. Hot liquor is transferred by gravity to the mash tun via underletting through the grain bed. This can be controlled by 2 ball v/vs, one at the HLT outlet and 1 at the MT inlet.
5. Once the mash is underway, the outlet tube from a Flojet pump (No1) is connected to a spray bar which is positioned just above or below the mash. The flojet sucks from the H/E outlet and the H/E inlet is permanently connected to the outlet from the mash tun (controlled by a ball v/v). The flojet flow is controlled by a pressure regulator and flow can be varied from 0.2L min to about 8L min. The flojet is operated by an air compressor.
6. The 6L H/E is heated by a single kettle element and has a copper heat exchanger inside the stainless cooking pot. The H/E is PID controlled, but the temp sensor is placed in the MT presently as I am not sure what type (& size) of sensor I will eventually choose when I finally decide, I will fit the sensor in the H/E outlet.
7. At the end of the mash period the spray bar is removed from the Flojet and replaced with a 10mm copper wand. The flojet is switched on and the wort is transferred directly to the boiler via the wand.
8. The boiler is switched on as soon as the elements are covered and the batch sparge process is continued by closing the MT outlet and reconnecting the flojet outlet to the spraybar. If the mash should stick, then it is possible to open the MT outlet v/v and water will flow into the grain bed (underletting) to open up the bed (but never had to do it) The sparge is continued through the wand until all the wort is transferred to the boiler. It is possible at this stage to transfer water directly from the HLT to the boiler if required by simply closing the MT v/v and opening the HLT v/v.
9. At this stage the airline connection to flojet (No1) is disconnected via a quick connect coupling and Flojet (No2) is connected. This pump is connected to the outlet of a CFC. The CFC inlet is connected to the boiler outlet ball v/v. The copper wand is connected to the outlet from the cfc and directed straight into the F/V from a great height for max aereation. It is possible at this stage to recirculate the wort through the CFC and back into the boiler if required.
And Thatâs my brewing kit. See Photos (during a brew) for more detail.
2 brews actually...A Boddingtons clone and a Hen Harrier clone.
Still trying the water treatment..appears to be imroving my beer.
First use of the HERMS. Temperature set and heating up the HLT.
The water/wort manifold. Water from HLT to MT and wort from MT to HERMS heat exchanger.
The boiler.
The HLT.
Flojet 1 connected to HE and recircing wort through HE and MT.
The air regulator used for regulating the wort flow through the Flojet.
The trusty compressor used for powering the Flojets.
The whole kit on its trolley.
The HERMS heat exchanger at the back of the trolley (6L Nordic stock-pot insulated)
The copper coil and T**co kettle element inside the HE.
A rear-end view :shock:
The HLT nearly up to temperature.
The thing about PID control is that you can leave the brewery to its own devices while you nip upstairs to get some brownie points by knocking up a rhubarb crumble and some Yorkshire puds, safe in the knowledge the HLT water wont be boiling when you get back.. :grin:
HLT temp has got there.
And Mash temp has got there.
Recirc pipe in the MT connected to the Flojet(1) via the HE.
Slight undershoot in MT temp.
Now an overshoot.
Actual temp as measured with an accurate lab thermometer is actually 2c under PID display (Pid had been calibrated in ice.
Spraybar removed and wort transfer wand in place....Magic
The wort as it came out of the wand..very clear, pictures don't do it justice.
Wort being pumped into copper.
Grain for 2nd mash (Hen Harrier) in MT.
This time incredible temperature overshoot.
Boddingtons clone in the FV.
Hen Harrier under boil.