NB's bunker brewery build

The Homebrew Forum

Help Support The Homebrew Forum:

This site may earn a commission from merchant affiliate links, including eBay, Amazon, and others.

Northern Brewer

Landlord.
Joined
Nov 21, 2011
Messages
600
Reaction score
60
Location
Todmorden
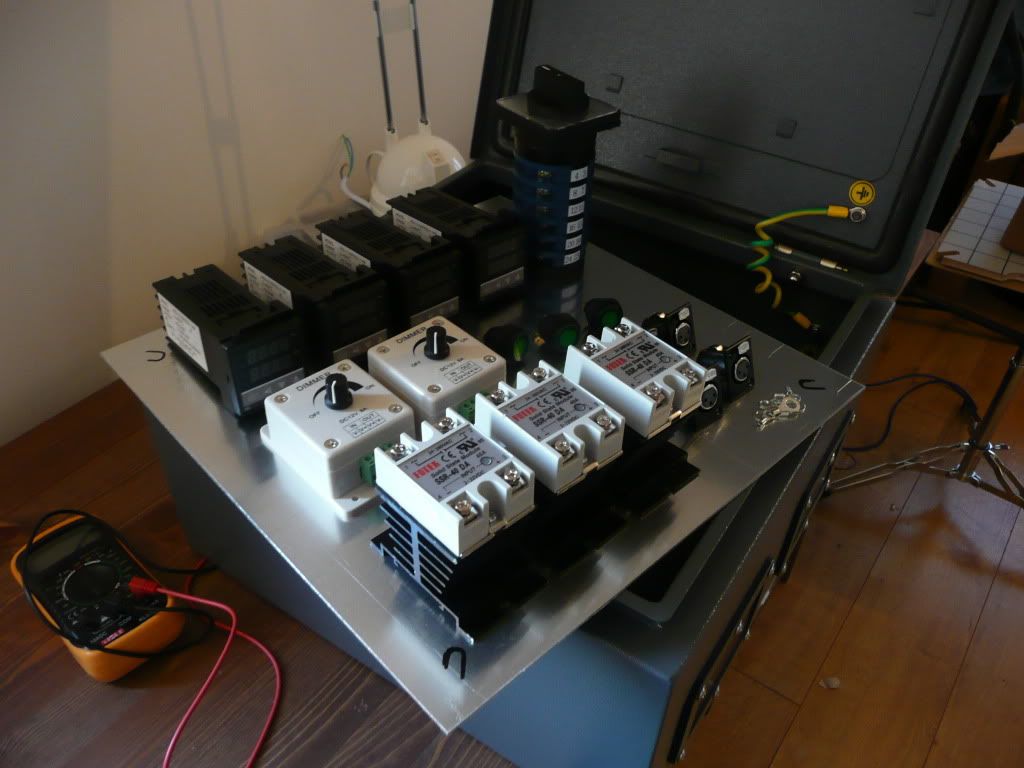
I haven't got a name for the brewery yet so I've taken Frisp's suggestion as a temporary name. I've now started construction proper, I've been tinkering with things however it was mainly to test how things work and to make sure I've got all the bits I need,

I thought I would start with the heat exchangers for HERMS. I originally bought an asparagus steamer however changed my mind and bought a 6L Thermos pot and may use the steamer for a hopback later, or just veg.

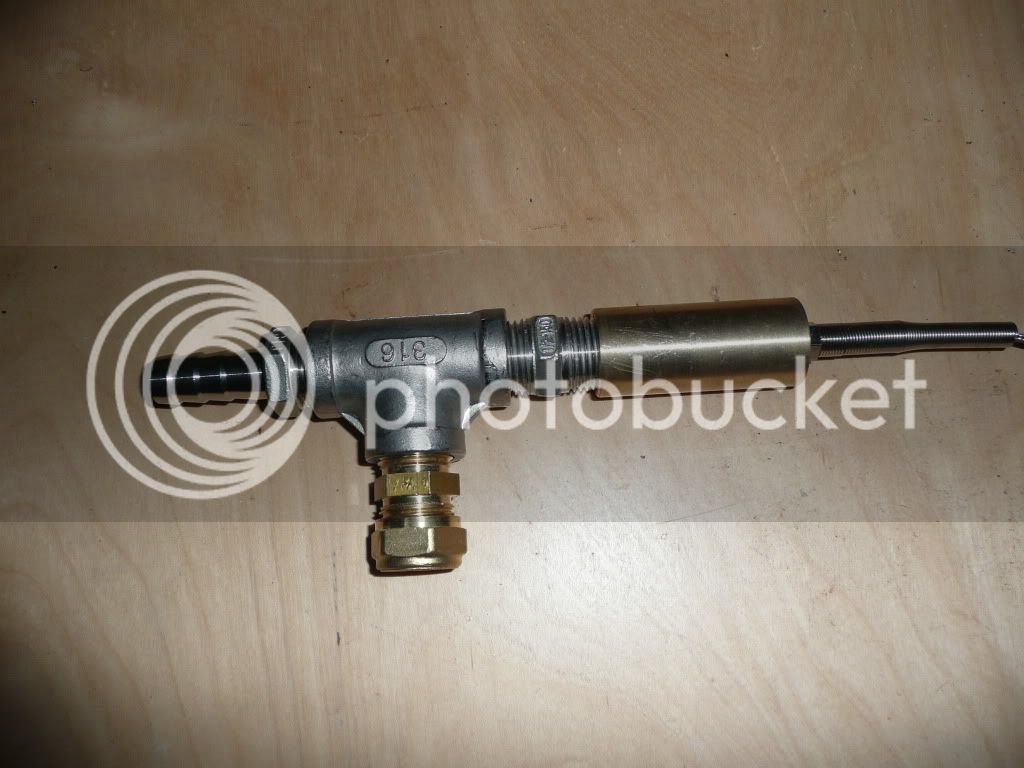
Here's most of the components.
P1020228.jpg

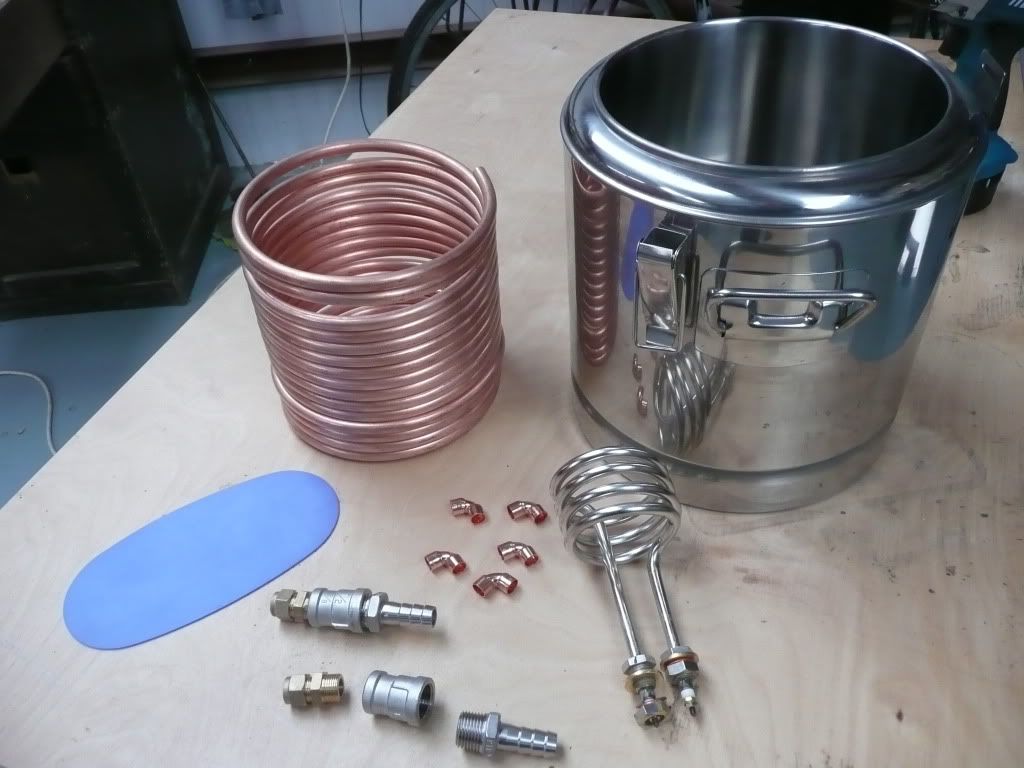
There's a few bits like 16mm silicon o-rings and PTFE tape missing and I have some bits to buy, some heat resistant flex and a cable gland but apart from that its complete. The plumbing bits are :-
9m of 10mm copper tube bent around a 160mm drainage pipe
4 x 10mm capillary elbows
2 x 10mm to 3/8" BSP brass compression adaptors
2 x 3/8" to 1/2" BSP socket adaptors - stainless
2 x 1/2" hosetails - may change these but useful for pressure testing
1 x 3KW immersion heater from Backer

tools - except usual stuff
1 1/8" hole saw
51mm hole saw
16mm qmax cutter - all these I already had

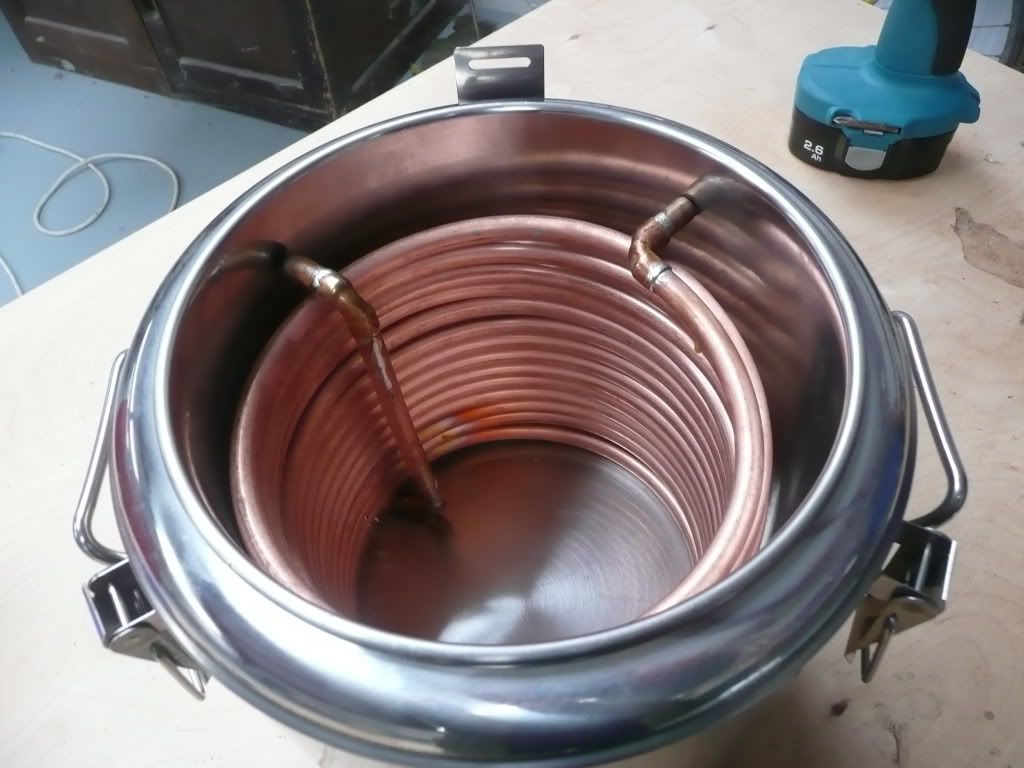
Coil after soldering capillary fittings, trying it for size and marking it up for the holes.
P1020229.jpg

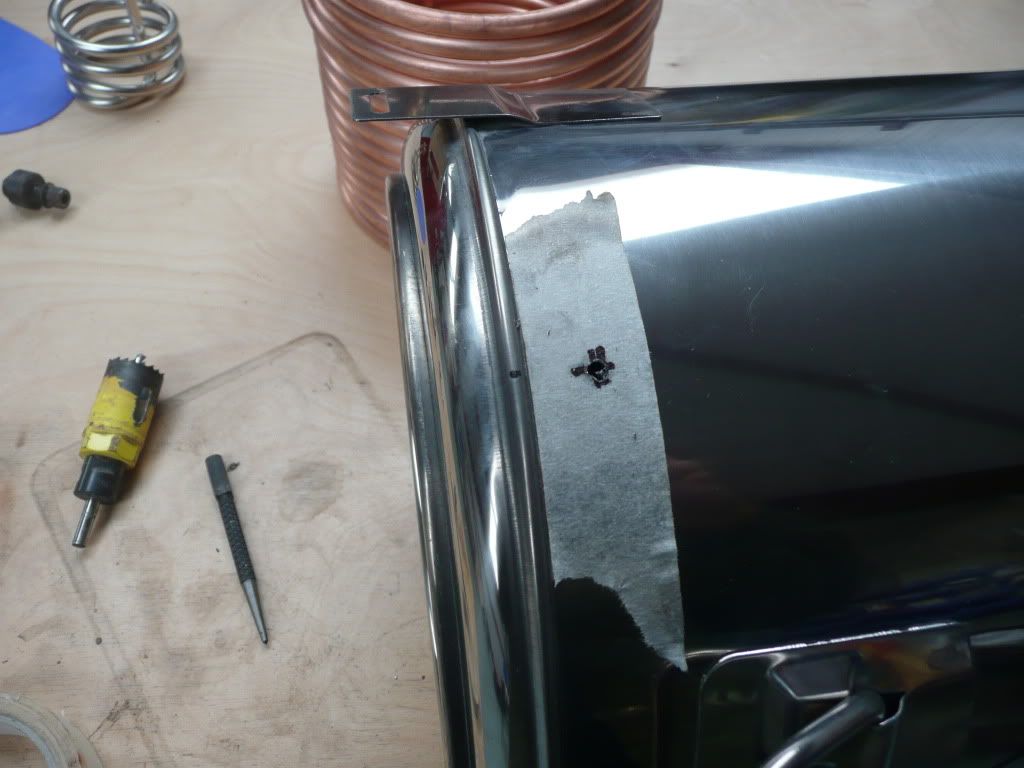
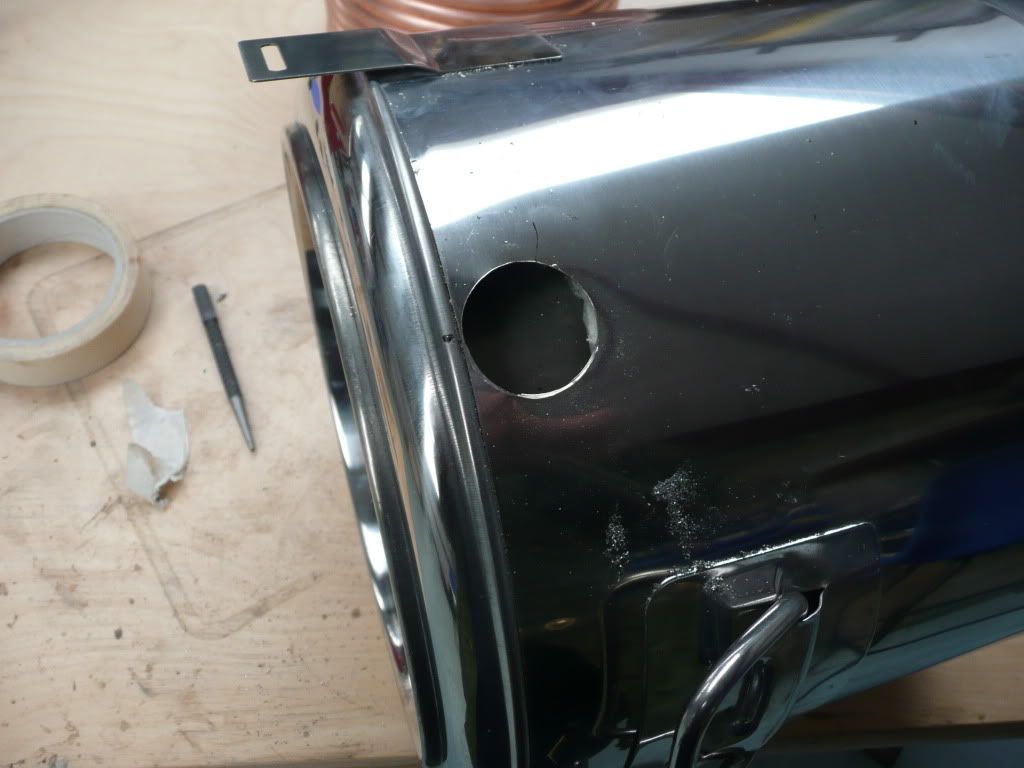
Marking up the hole ready for drilling with the 1 1/8" hole saw, want to get the hole right up against the top edge wiithout damaging it
P1020230.jpg

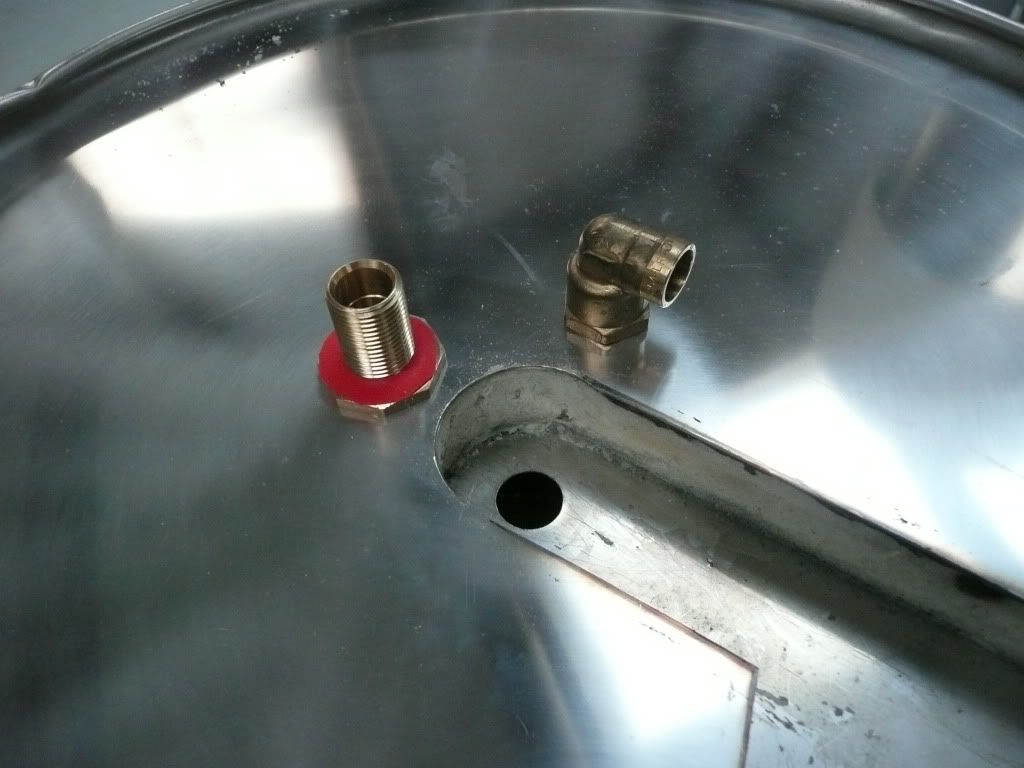
This is the hole ready for the smaller hole in the inner skin
P1020231.jpg

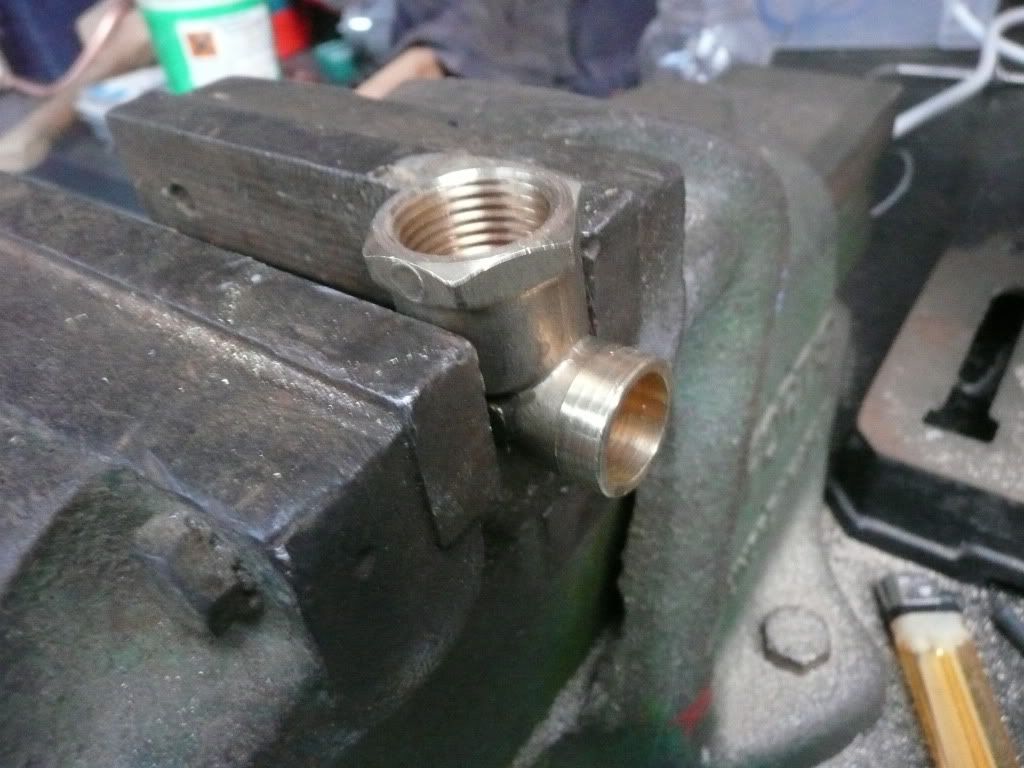
Making sure the 3/8" to 1/2" adaptor fits
P1020232.jpg

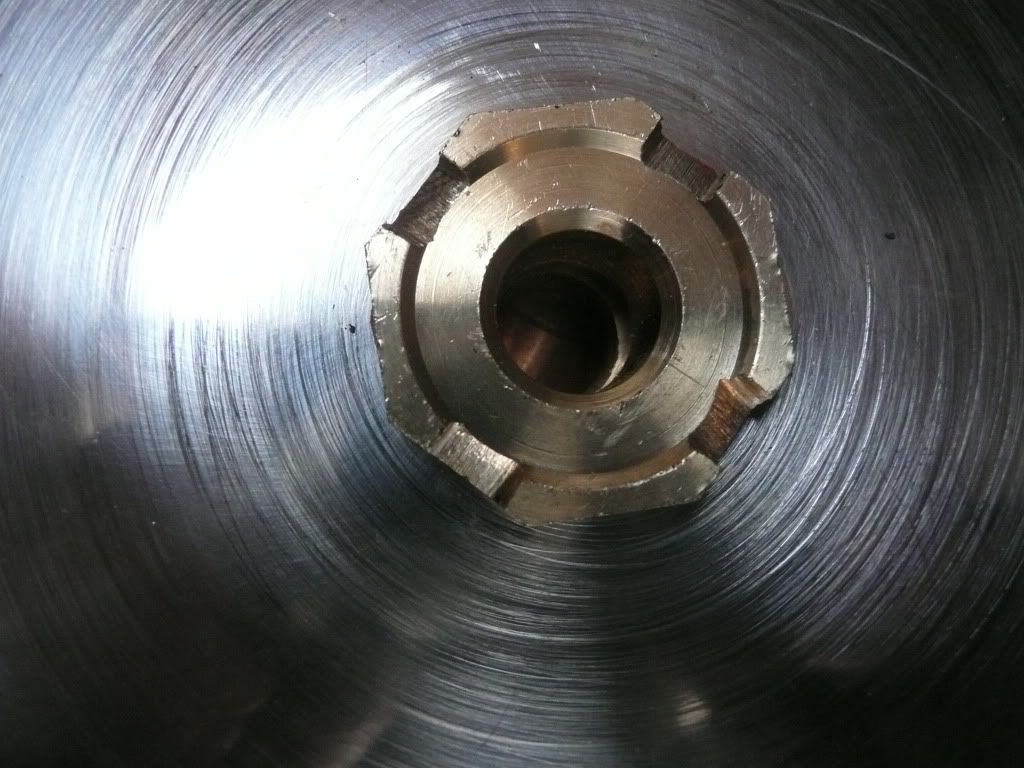
Making the inner 16mm hole with the Qmax
P1020233.jpg

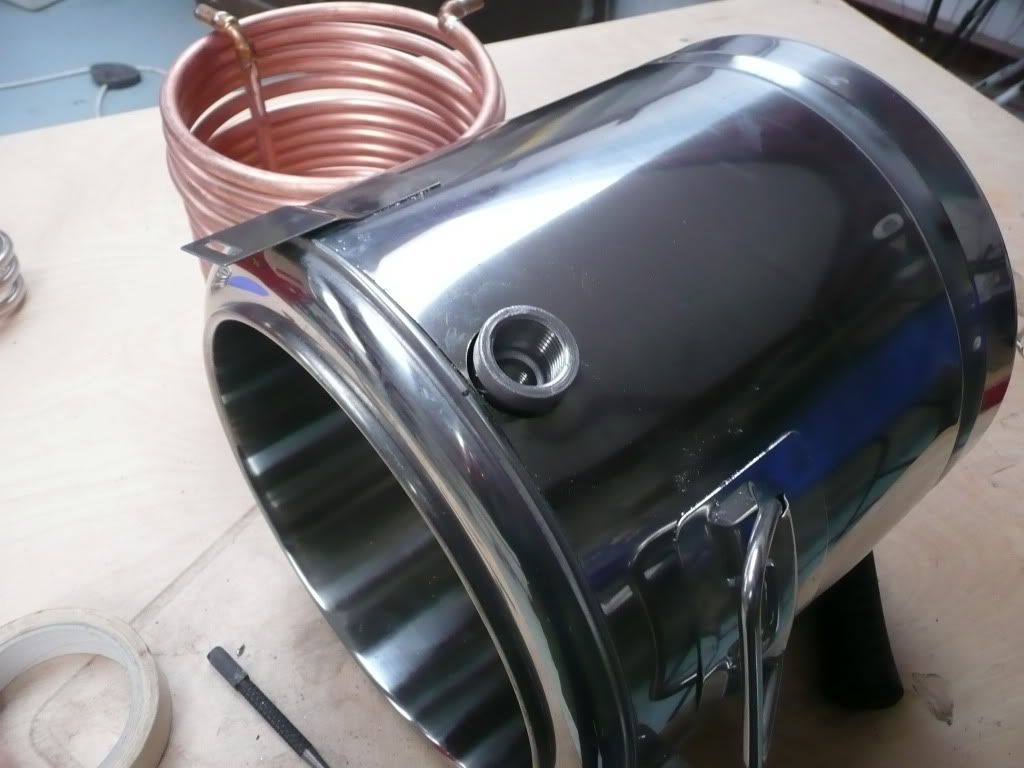
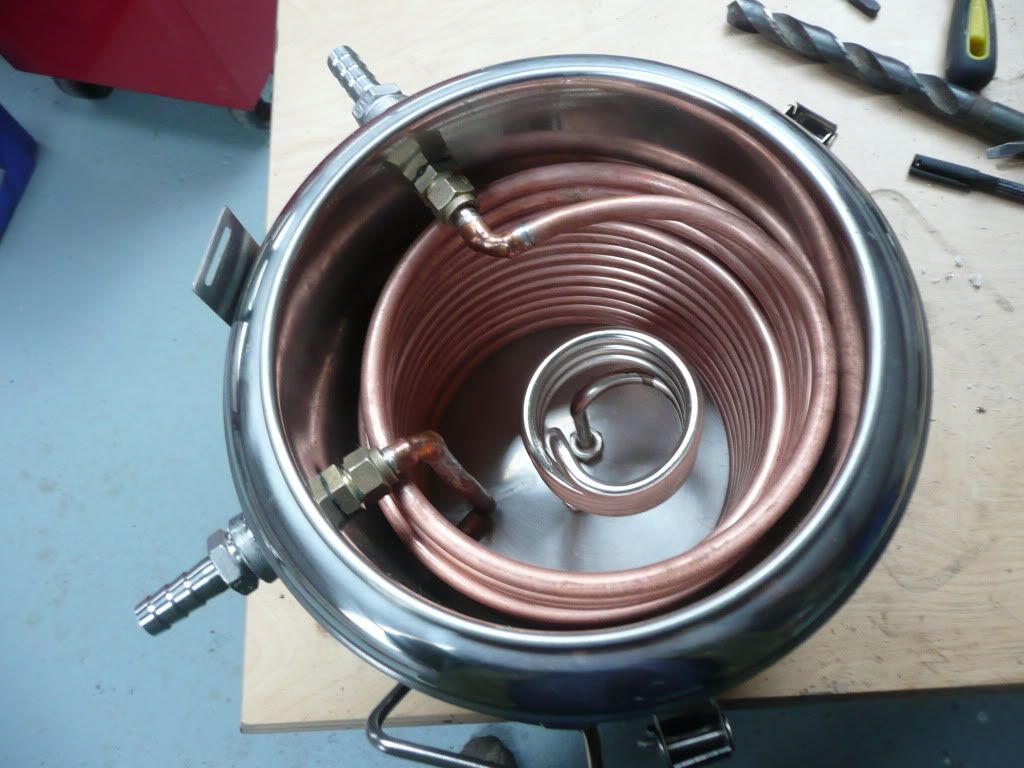
Coil and fitting inserted, took a bit of wiggling to get it in, I put a thin 16mm silicon o-ring both sides of the inner skin and puts lots of PTFE on the 3/8" thread that goes through the inner skin, a bit fiddley being recessed.
P1020234.jpg

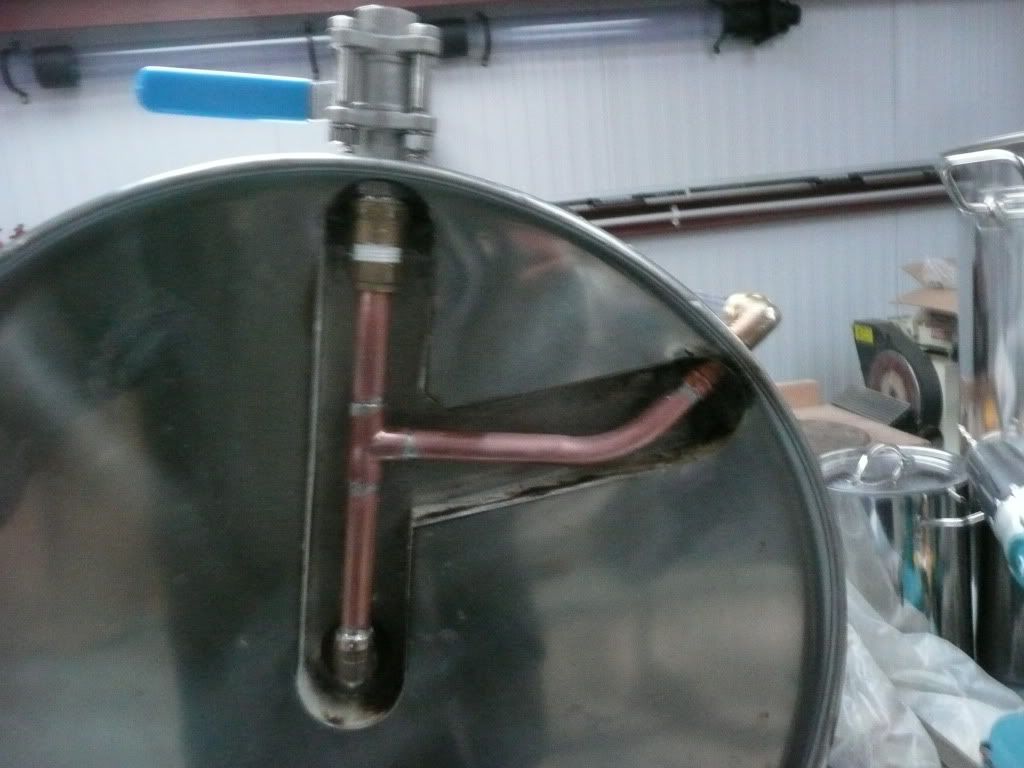
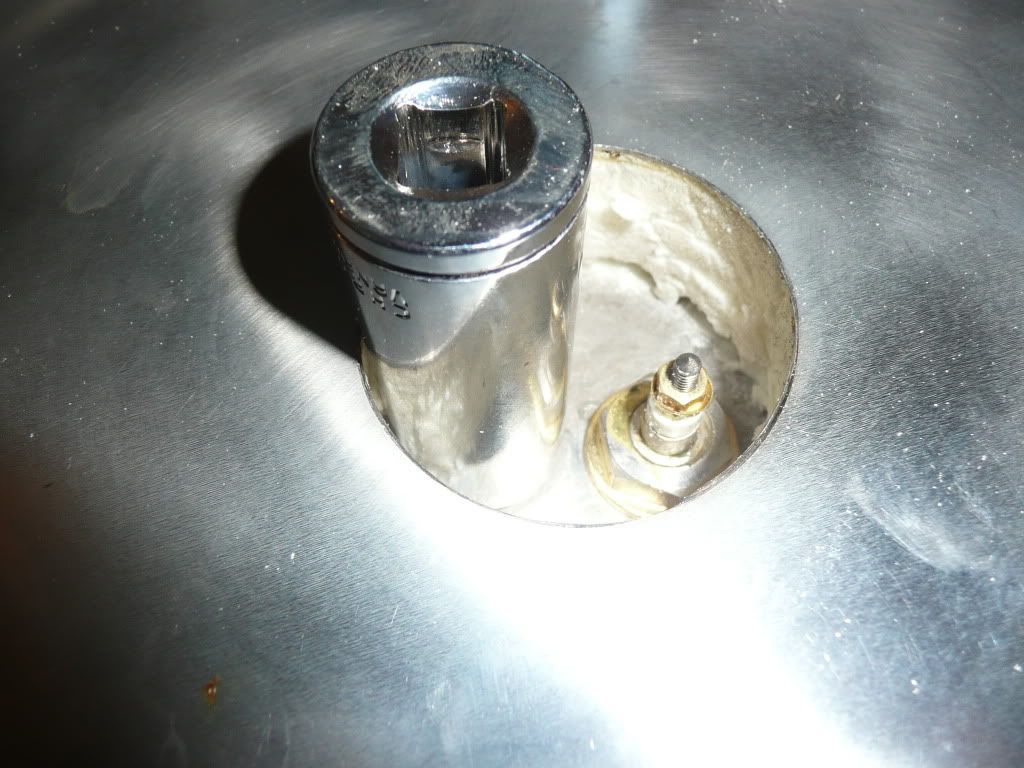
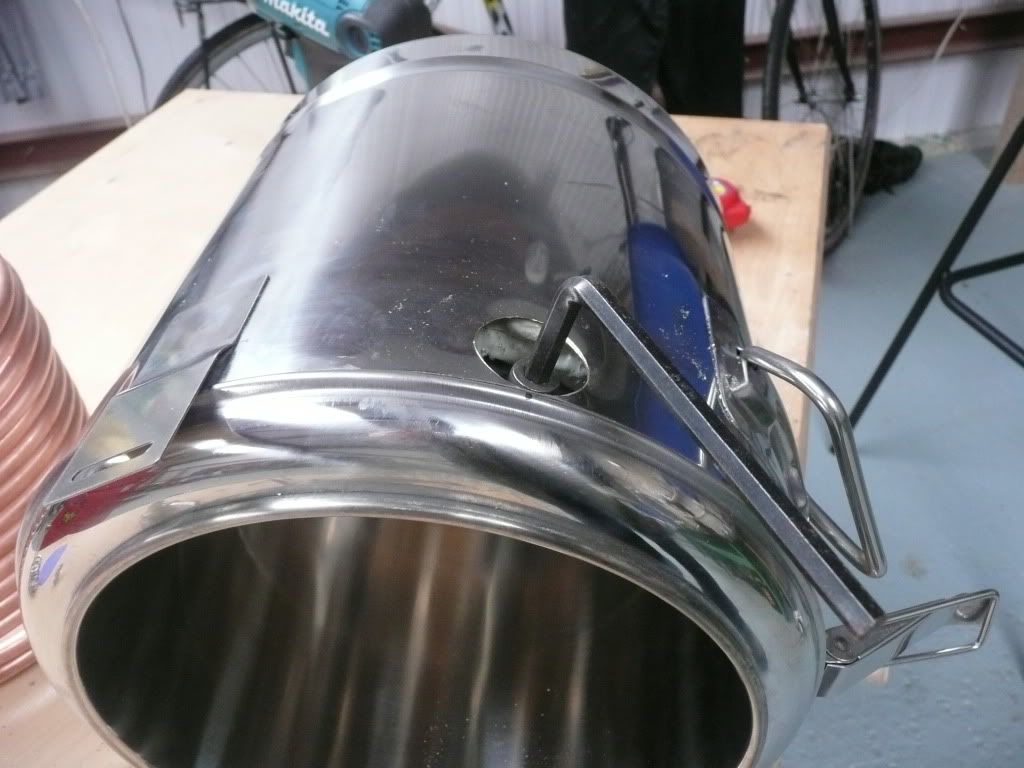
Underneath the pot, outer skin drilled to 51mm, could be smaller, the elements prongs are about 30mm apart.
P1020236.jpg

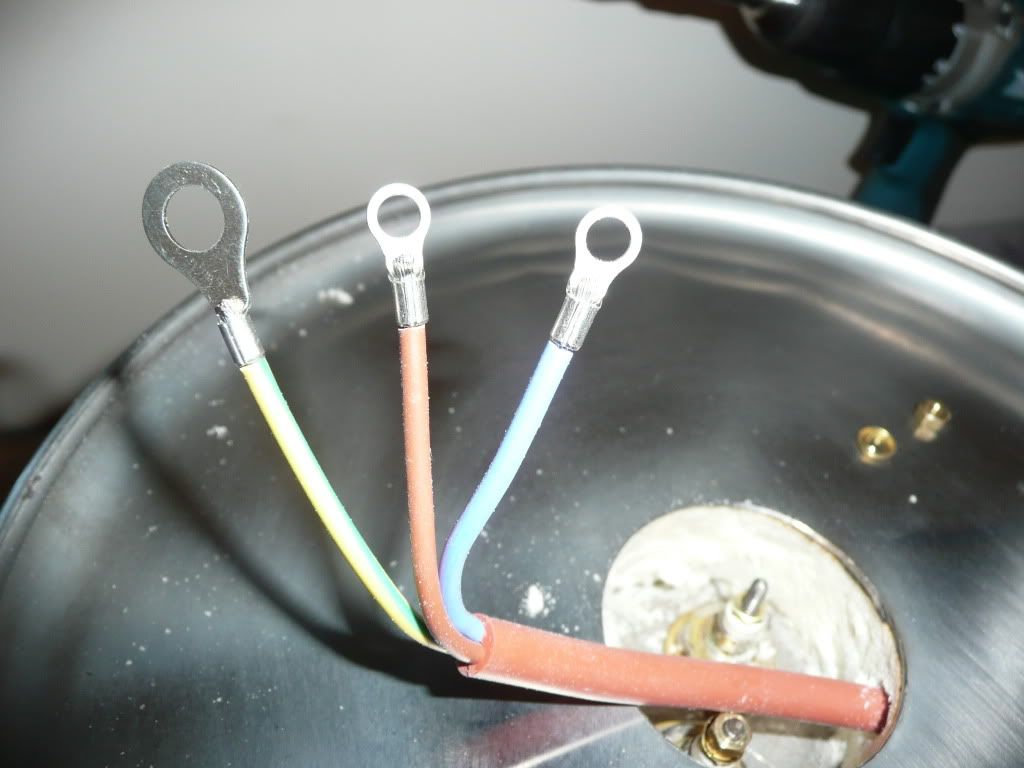
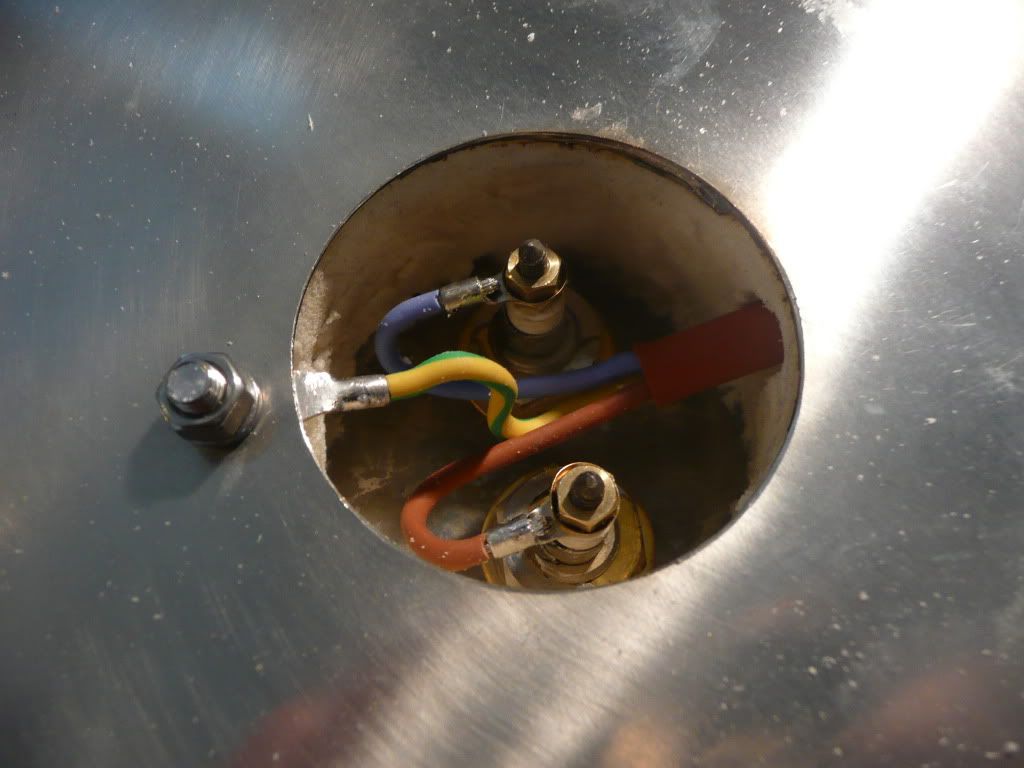
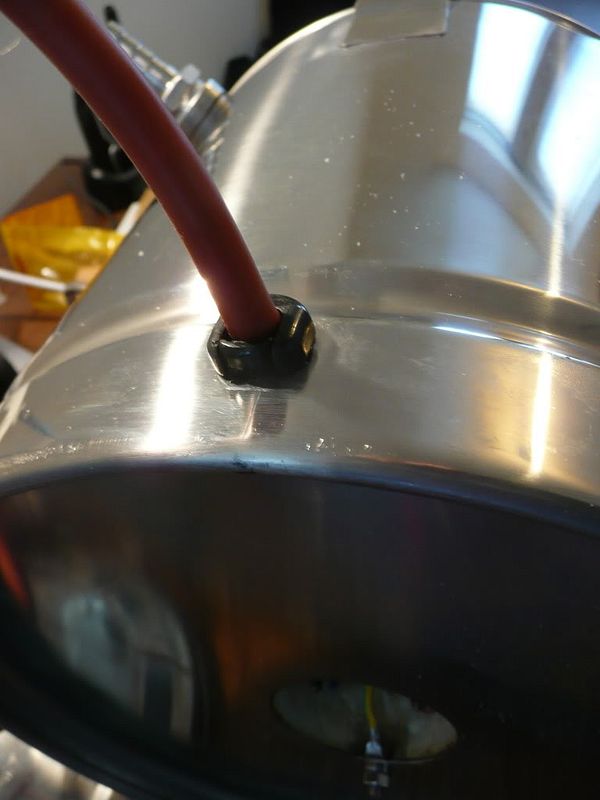
the inner skin drilled with a 1/2" drill and the element inserted. The lead is off of a Tesco kettle and is just for testing, the final version will have a chunkier lead with ring solder terminals on the end to go on the element and I'll drill a hole to bolt the earth too. Will also add a cover. The lead comes through the side of the pot at the bootom though the insulation and will terminate directly on a Commando plug.
P1020237.jpg

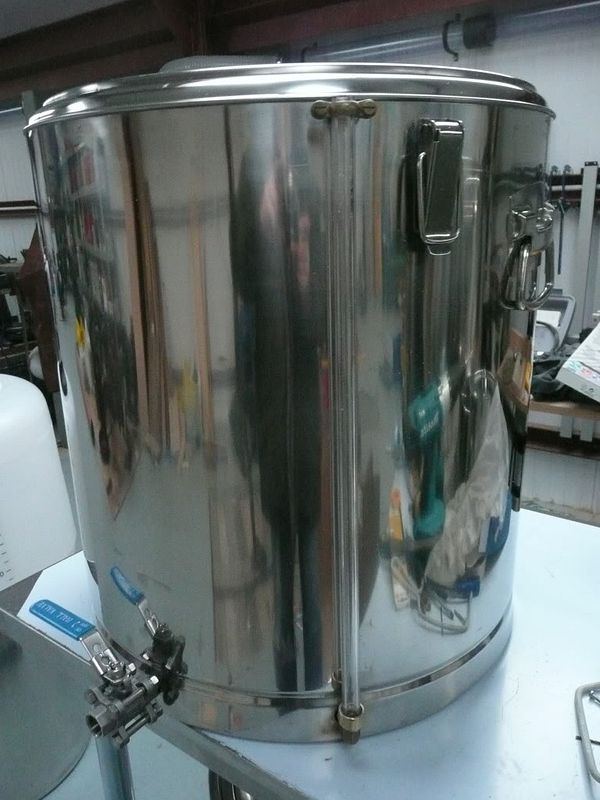
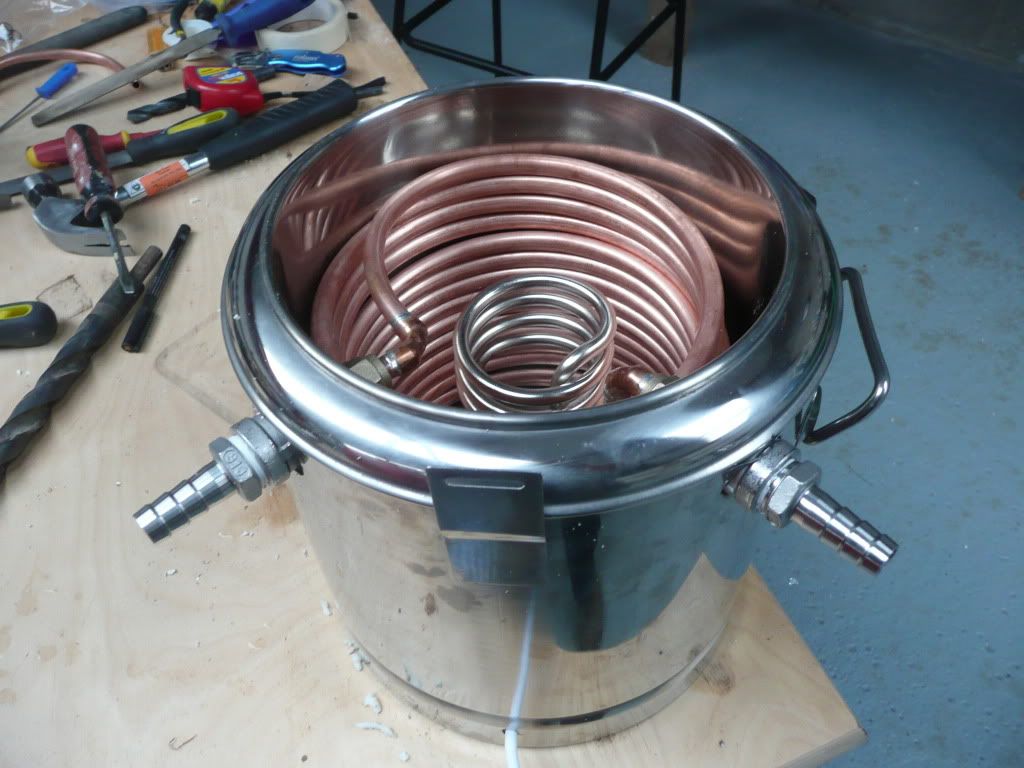
Mostly finished, the pipework has been pressure tested but I haven't filled the pot and tested the element yet.
P1020241.jpg

P1020240.jpg


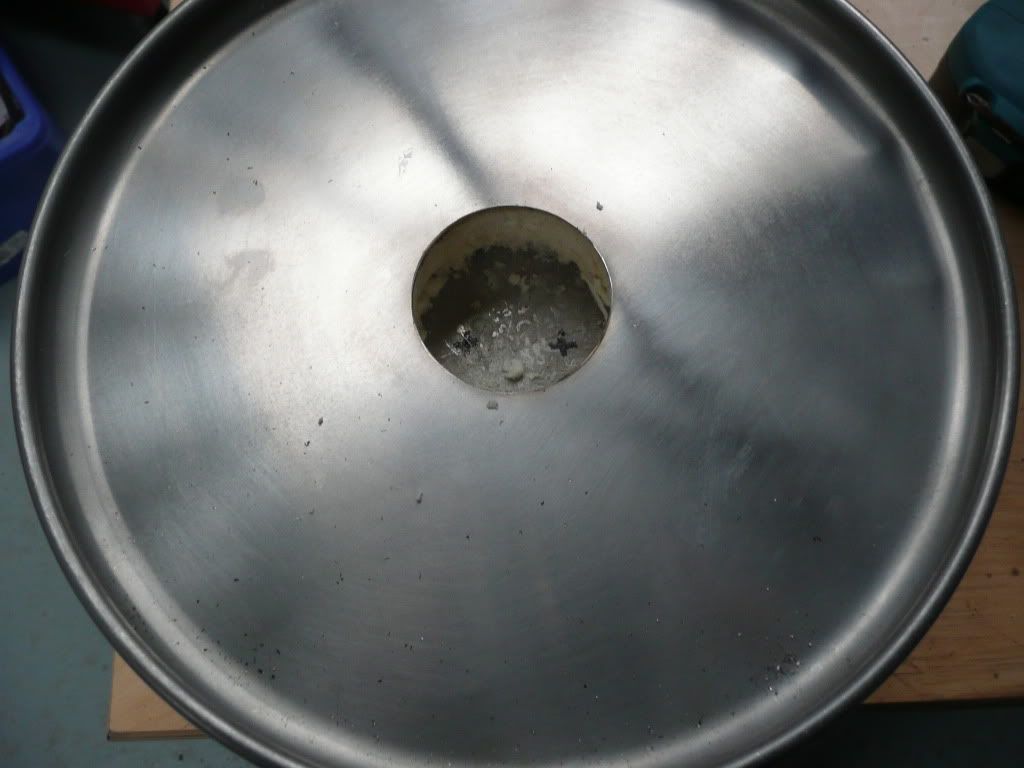
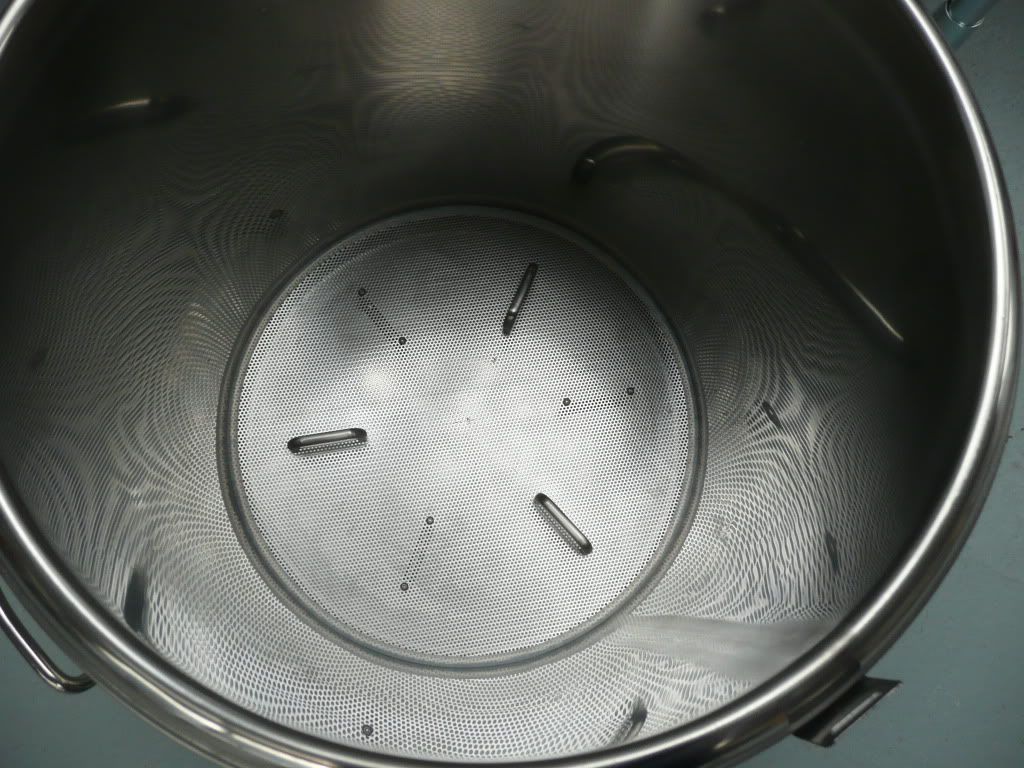
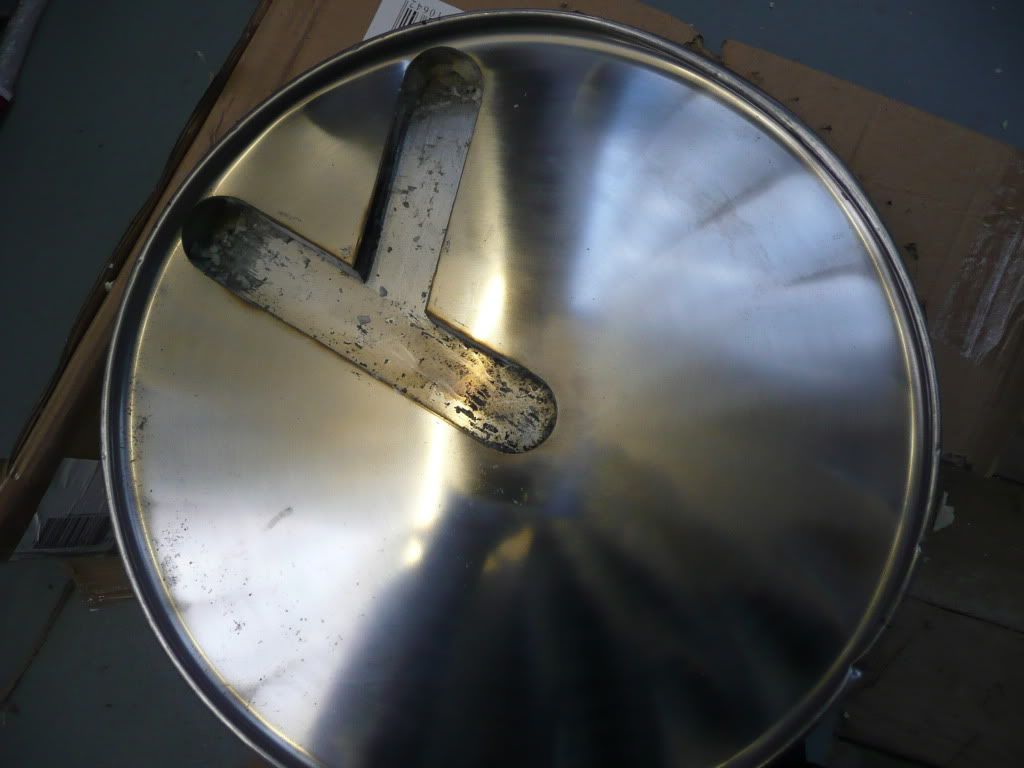
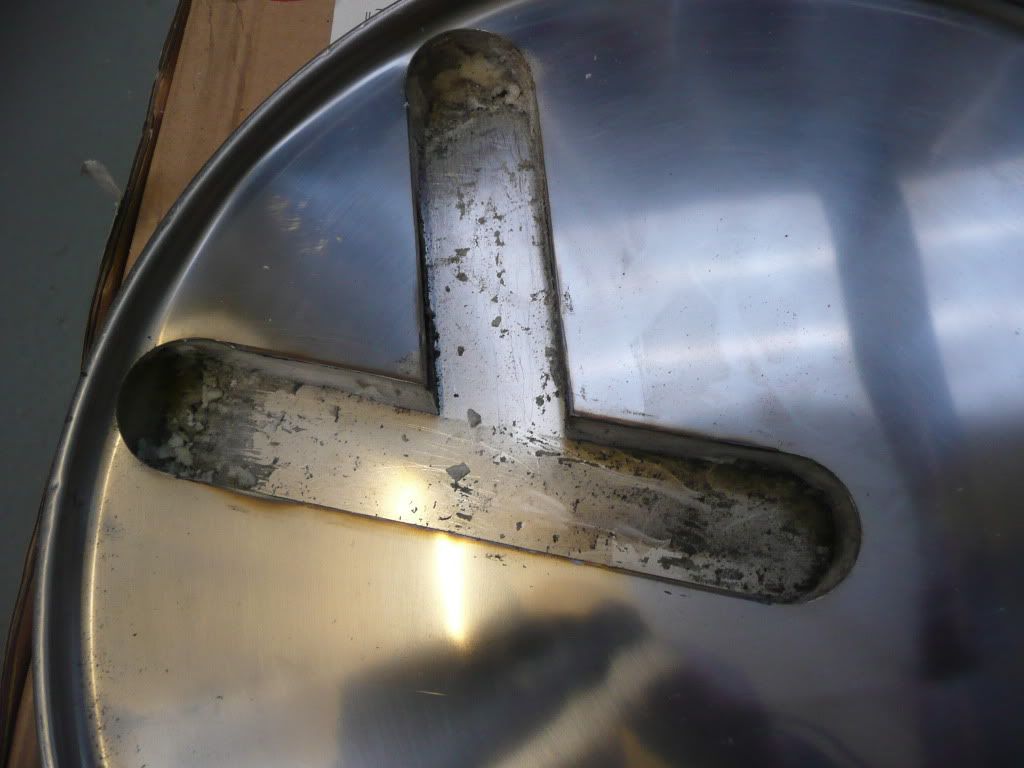
False bottom for mash tun
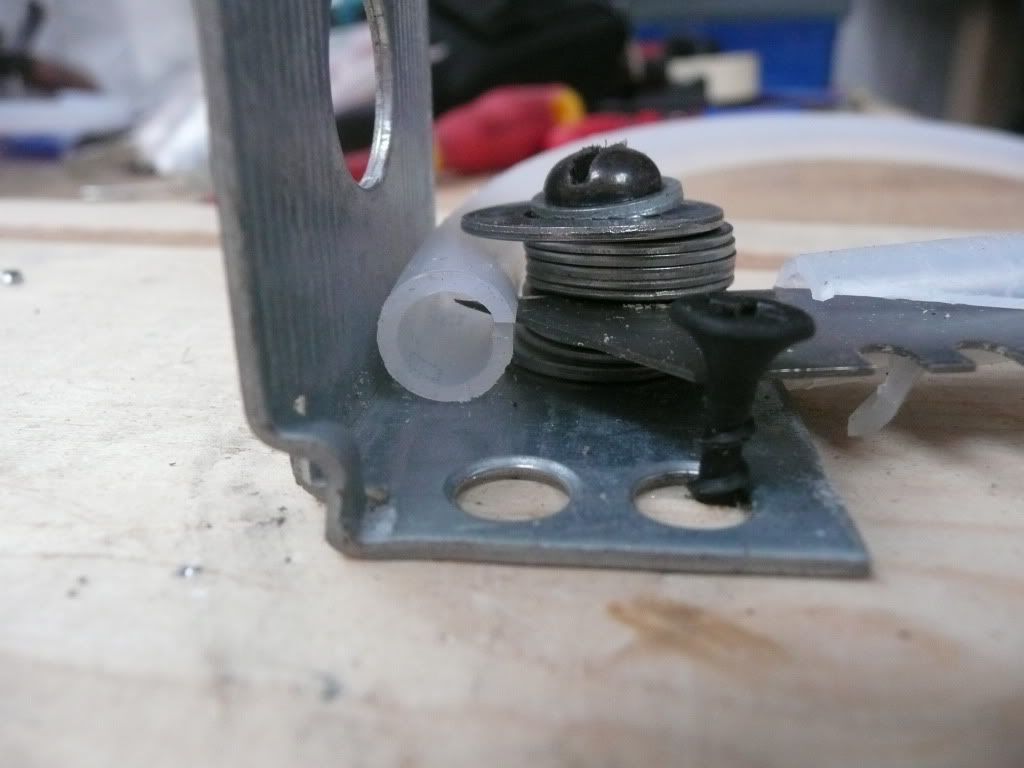
I roughed it out about 3mm oversize using a nibbler then stuck on a more accurate thin card template with Pritt glue then tidied it up with the angle grinder. I then put stainless kitchen door handles on both side, these lift the FB off the bottom of the pot and provide handles for lifting it out. I'll be putting the hose around it for the seal once i have built a little jig with a stanley blade in to cut the beer line longtitudinally, first attempt wasn't up to much.
P1020245.jpg

Cheers
NB
 
Thanks guys - it was about time I stopped designing it and got the tools out, quite enjoyed it, SWMBO kept the kids away all day so no need to hide the stanley knife and hot blowtorch every few minutes etc. :)

Vossy1 said:
Very nice conversion NB :clap: ..fancy making a 'How to convert a 6ltr TB' out of it, it would make a great one :cool: :hmm:

Could do, I've just ordered the silicon flex and ring terminals, I guess there's not much more to do to make it into a How to. I'll wait until I get the rest of the bits and test it thouroughly, I used the tank that holds my spring water to pressure test it which has about a 10ft head so not the same as testing it with mains pressure. However I don't envisage there being much pressure in the system using solar pumps with bypasses etc.

Cheers
NB
 
Yesterday I got the false bottom for the mash tun complete except for the beer line around the perimeter because my first attempt to split it longtitudinally was ****. So I made a jig as follows to split the beer line, took me all of 5 minutes, just a few washers, a scrap kitchen cabinet bracket, a couple of screws and a stanley knife.
P1020249.jpg

P1020248.jpg

The jig did a lovely job very quickly and the beer line went on the FB in seconds :thumb: Here's it completed and in the tun.
P1020251.jpg

Then started on the outlet in the base of the thermos pot. Reading on this forum that a vent between mash tun and pump helps to stop sucking the mash and causing a stuck mash, and because I have 2m of polycabonate tubing I decided to put in a sight glass as it will perform the job of a vent too. I started by drilling 3 x 51mm holes, just because I already have a hole saw that size, I put the pilot drill way back in the tool so only 5mm was sticking out past the teeth so it didn't go through the inner skin too.
P1020252.jpg

I then joined them up with the angle grinder and dug out the insulation.
P1020254.jpg

P1020253.jpg

that was it today, time for a thai and a beer :drink:
Cheers
NB
 
the 10mm to 3/8" adaptor is BES 9071 and the 1/2" hose tails are BES 14558 and the 3/8" to 1/2" BSP socket reducing adaptor is BES 14321.

Although I have attempted to seal the fittings against the bulkhead this is just precautionary, its not a true bulkhead/tank connector. The water level in the HX will be just below this level, the main thing is to ensure the threads on the 3/8" adaptor has lots of PTFE as its parallel and so is the socket thread so the wort is contained in the pipe and not leaking into the pot cavity.

The hosetails shoudl be compatible with Vossy's tubing, I hope so as that's what I intend to use, I'm standardising on 1/2" BSP everywhere so I can use the camlock adaptors where required, not sure if I'll put them on the HX yet - will get all the pots adapted then work out the plumbing.

Cheers
NB
 
thanks for that will we need all you have listed as were only going through single ss not a thermo? Also where do you plan to mount your probe ? im thinking of a hose tail for the inlet and 15mm copper to a 15mm compression T to mount the pt100 in on the outlet of the hex course id need a 10 to 15mm end feed to do that
 
mark1964 said:
thanks for that will we need all you have listed as were only going through single ss not a thermo? Also where do you plan to mount your probe ? im thinking of a hose tail for the inlet and 15mm copper to a 15mm compression T to mount the pt100 in on the outlet of the hex course id need a 10 to 15mm end feed to do that

There's loadsof ways of tking it through the pot wall, singel or double and what I did would work for single skin too. just less fiddly

I've had a 1/2" BSP fitting made by a friend for the probe, its due to be delivered today or tomorrow so I can show you then however I am putting the probe at the end of the HX return at the top of the mash tun. For other probes I bought a lenght of 15mm dia brass rod, cut it in 12mm slices and drilled and tapped it to M8 so I can solder them in to tank connectors as required.
Cheers
NB
 
we just got some of springers turned down nuts with an m8 thread to solder into end feed reducers, probe will screw straight in and then in to a ss compression T where the wort will flow past. Dont know if to put probe on the out of the hex or drill thermo mash tun and put it just before it
 
Vossy1 said:
The forums silicone hose will fit any 1/2" hose tail :thumb:

Errr... no, it won't.

I've got some that have a smaller diameter hose tail but, but still 1/2" BSP. Must have been a different batch at BES.

They fit my other 10mm silicone quite well though.
 
Errr... no, it won't.
I've got some that have a smaller diameter hose tail but, but still 1/2" BSP. Must have been a different batch at BES.
If it doesn't fit a 1/2" hosetail then it's not a 1/2" hose tail :lol: ...trust you to have a odd sized one :grin:
I'll have to change that then to,

the hose will fit most 1/2" hosetails, but if you have a odd one like James, please contact me to make sure first.
 
Northern Brewer said:
Yesterday I got the false bottom for the mash tun complete except for the beer line around the perimeter because my first attempt to split it longtitudinally was ****. So I made a jig as follows to split the beer line, took me all of 5 minutes, just a few washers, a scrap kitchen cabinet bracket, a couple of screws and a stanley knife.
P1020249.jpg

P1020248.jpg

The jig did a lovely job very quickly and the beer line went on the FB in seconds :thumb: Here's it completed and in the tun.
P1020251.jpg

Then started on the outlet in the base of the thermos pot. Reading on this forum that a vent between mash tun and pump helps to stop sucking the mash and causing a stuck mash, and because I have 2m of polycabonate tubing I decided to put in a sight glass as it will perform the job of a vent too. I started by drilling 3 x 51mm holes, just because I already have a hole saw that size, I put the pilot drill way back in the tool so only 5mm was sticking out past the teeth so it didn't go through the inner skin too.
P1020252.jpg

I then joined them up with the angle grinder and dug out the insulation.
P1020254.jpg

P1020253.jpg

that was it today, time for a thai and a beer :drink:
Cheers
NB


That is such a neat job and am v impressed with the hose splitting jig :thumb:
 
Lots of nice shiney stuff there NB :thumb:

Northern Brewer said:
I didn't show the bit where I accidentally screwed the jig to the bench though :oops:


:rofl: I'm glad at times I'm more than a bit cack handed :whistle: otherwise I'd want to go all shiney and it'd cost me a fortune :roll: 
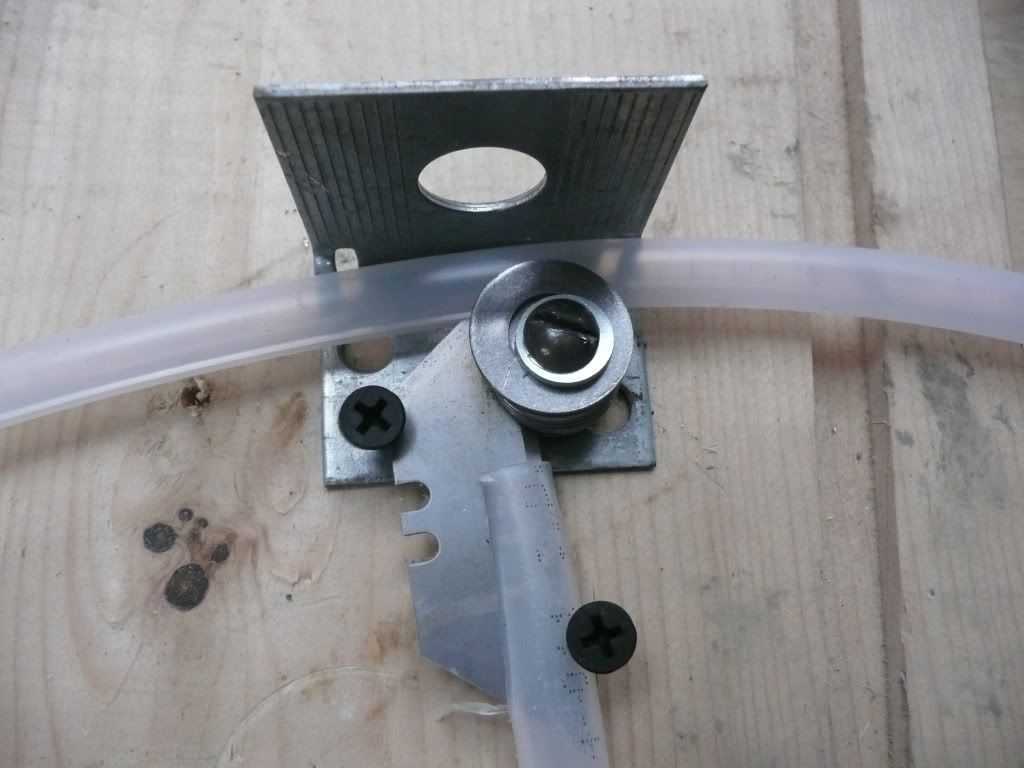
as it is I haven't got the skills so will stick to the gear I've got, I found the plastic barrel conversion to mash tun about my limit :oops: even than counted my fingers regularly :whistle:
 
Thats a very Impressive bit of brewery building. Good Work that man.

Northern Brewer said:
I didn't show the bit where I accidentally screwed the jig to the bench though :oops:

Isn't that what benches are for?

At least it wasn't the Dining Table :nono: :nono:
 
Cheers guys, thanks for the praise, makes up for expending the stream of expletives when it goes wrong, and it has, fortunately not irrevicably. Just had to cut out a compression fitting for a capillary one, and it was in a bitch of a location, in the recess under the thermo pot with sharp cut SS on both sides.

Luckily I used to be a gynaecologist, I only do it occasionally now, just to keep my hand in ;)

Anyway, here's some more progress. First the bunker, painted and most tiles down,
P1020257.jpg

and with drain and vent holes drilled.
P1020259.jpg

and a catering sink off of fleabay
P1020258.jpg


next here's the completion (almost) of the mash tun bottom. Here's the fittings for the drain in the centre.
P1020260.jpg

they are too tall for the space under the tun so I cut down the brass bend and the tank connector. This is the brass bend before
P1020261.jpg

and after showing how much thread I will cut off.
P1020262.jpg

here's the completed fitting with silicon (bottom) and fibre (top) washer. The silicon one will be inside the tun, its about 0.8mm thick
P1020263.jpg

just about to bend the pipe to feed the sight tube
P1020264.jpg

resulting bend ready to be trimmed to size.
P1020265.jpg

this is it assembled and soldered, I used the off cuts of SS from the bottom to mask off the foam insulation from the blow torch
P1020266.jpg

Here's the tank connector in the tun, I filed the sides in places to get as much wort out as I can. (good tip from elsewhere on the site :thumb: )
P1020267.jpg

Here's the tap fitted
P1020269.jpg

and the finshed article - just need to put the HX return through the lid now.
P1020268.jpg


when I pressure tested it, there was a slight weep from one of the olives on a compression fitting underneath so I'll deal with that at the weekend, tinkering time over.

Here's the fitting I have had made for the PT100 for the HX return, this shows wort in where the hosetail is, and wort out at the bottom where the brass compression is, this will go to the spreader/sparger. The PT100 is on the right, The housing is basically a lump of brass with a 1/2" BSP female thread at one end and an M8 hole at the other. I can trim it down a bit to get the probe in the flow.
P1020273.jpg

Cheers
NB
 
Here's a bit more progress on the build, won't get much done donw for a week or so as working away a bit.

Tightened up the element retaining nuts on the HX with a 19mm socket, the 51mm hole just gives enough room, wouldn't like to go much smaller. The copper washers go on the inside of the pot and the nut and plain washer underneath. it's water tight with hand hot water but need to test it with the element going so next step is wiring. Its a good idea to flush the copper pipe out with hot water as soon as you have finished soldering it to wash out the flux otherwise the flux keeps working and you get copper salts in the pipe that will taint your beer. I flushed this while testing whether the element leaks at the same time.
P1020274.jpg


I then put the 15A rated 1.5mm cored silicon heat resistant SIHF cable through a 15mm diameter hole in the side of the base of the pot and solder lugs onto them. The earth lug is bigger as I am going to bolt it to the base of the pot.
P1020275.jpg


Here's the element wired up and the earth bolted to the base of the pot. I then used a multimeter to make sure there was continuity between the earth and other part of the pot, there is some slicon sealer between the outer base and outer skin and I wanted to make sure this did not break earth continuity.
P1020280.jpg


I put a 6 - 9mm strain relief gland on the cable and squeezed it into the 15mm hole with a pair of pliers. that's it finished except for putting a commando plug on the end however I dont know how long the lead needs to be yet so I will do that when I put everything into the brewery as cable is dear stuff.
P1020282.jpg


Next job is to look at the electrics, here's most of the stuff assembled on an aluminium plate that will mount all the components except the ones going through the lid. Trust me to get a box with armour plating :( the inside of the lid has another plate attached and there are no obvious spot welds that I can drill out. Means I will have to cut through two layers to mount the PIDS :hmm:
P1020283.jpg
 
Back
Top