Jay's Electric Brewery Build - UK Version

The Homebrew Forum

Help Support The Homebrew Forum:

This site may earn a commission from merchant affiliate links, including eBay, Amazon, and others.
A later addition I love for my system is that I added a weigh-scale under the mash tun. A luxury I really like, saves a little time and mess as its so much easier to charge in say 10kg of malt direct with less mess elsewhere.

Since its there I tend now to dough in using the scale as well and check sparges etc, very handy, think cost was about 50 from flea-bay and accurate to 50g.
 
any piccys of your set up Alby? I think theres a lot of us interested in doing the same....
 
alby said:
I've got an 'electric-brewery'.

I hope you are okay with your FOTEK SSRs, however, just a word of warning, my ebay ones were complete **** and all failed. Oh, and the failure mode is to fail ON, short-circuit, so watch out. If you google this is known issue, rogue sellers, price too-good-to-be true.

The replacements I have are much more expensive, but have worked flawlessly for 15 batches.

Hello, thanks for the info. The foteks were either free of less then a 5er each, so if I have to replace them it's no big deal:)

Do you have a link to what you replaced them with?

Jay
 
at 5iver I suspect they will fail, good news is your not brewing just now!

as I said before they fail short-circuit on, so you'll go over temperature that way you'll notice, btw my heatsink is recovered from old drive and massively over engineered so heat was not the issue for me. I even opened the units up and the potted components are not rated for these currents.

A 'fairy-godmother' at work supplied some next-day expensive ones from RS Crydom type, they were expensive but I could hardly refuse :thumb:

I can't remember the alternative I would have chosen (on a budget) probably a korea one not supplied from china, but it probably between the fotek and RS price.
 
Pictures/blog/write-up geez that takes time effort and cables.... I'll get round to it, promise :thumb:

I have new dedicated brew single phase +63A supply, plus the old garage supply, so can run all elements at same time if required, or add a 2nd BK (steady,.... no budget)

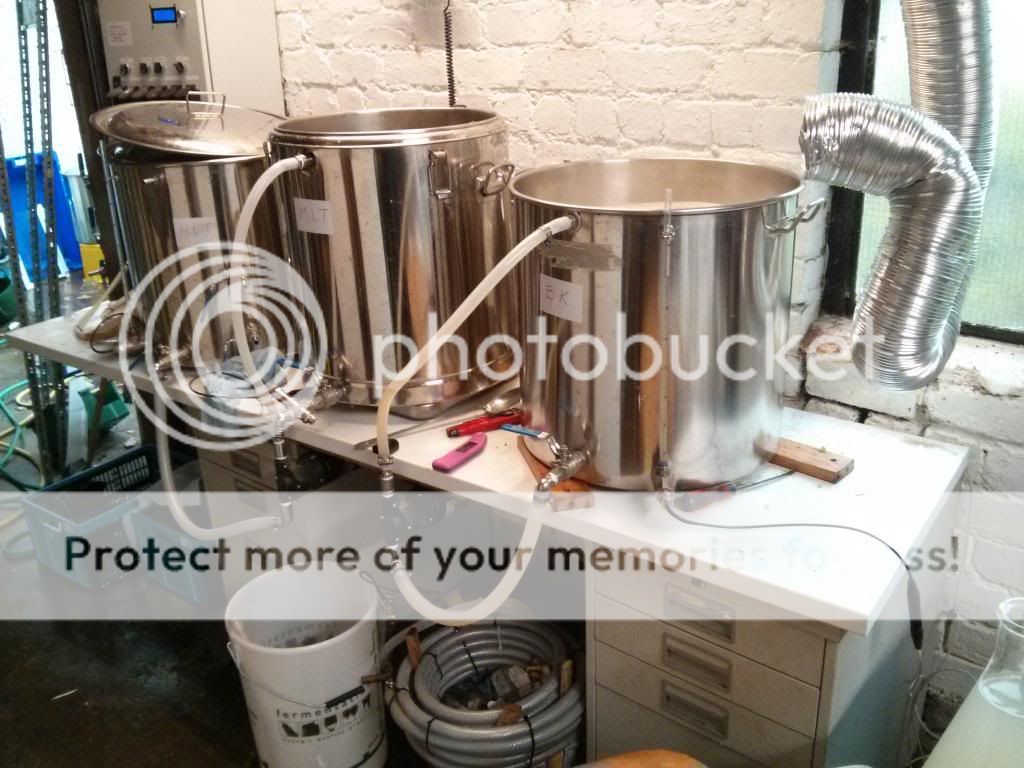
Bergland pots 100/80/100 the middle is insulated mash tun.
(decent sized brew whilst still just possible to lift and tip straight into wheelie bin or take to process cleaning area, ie garden)

2xMarch pumps, upgraded impellor for wort pump

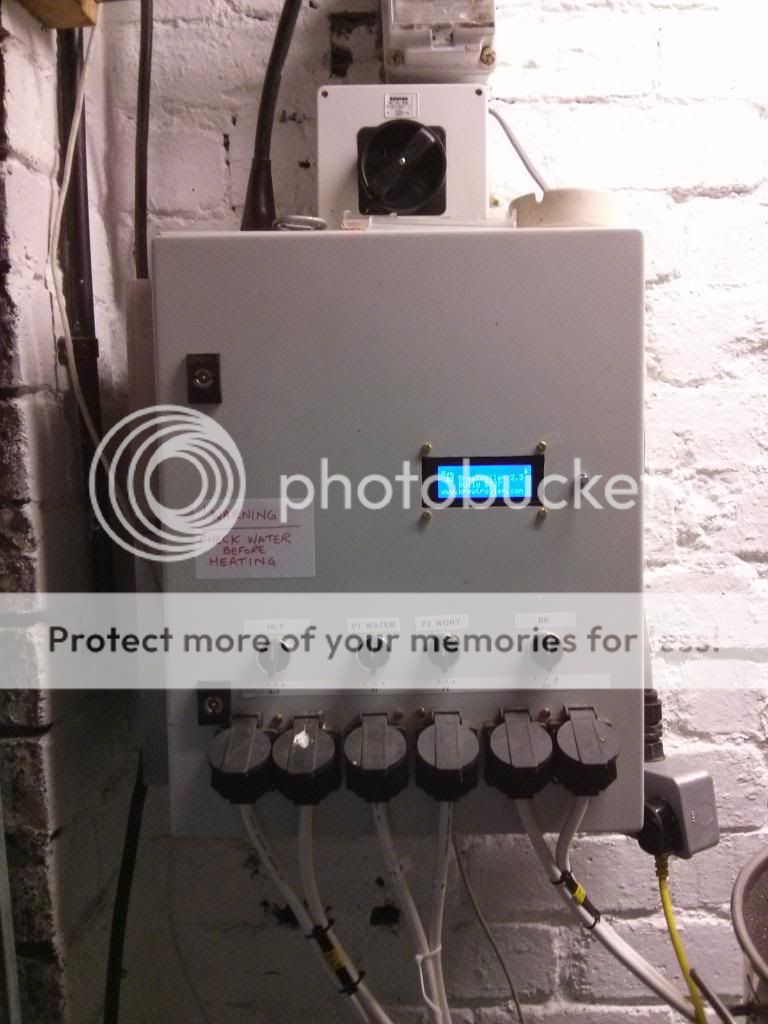
Hand made temp probes using DS18B20 sensors 1-wire bus using XLR connectors back to a Brewtroller for control and display
Much cheaper than 'electric-brew' fancy pants things

2x 2x3KW elements placed together in HLT and BK, high temp cable run each element to 13A plugs on panel, easy to disconnect/isolate when empty and remove for cleanup
(note if SSR fail ON you risk burning out your kettle elements if not covered, I have dry-run protection float switches but can't be bother fitting them)

I use SS hosetails and 15mm silicone tubing without jubilee clips, never got around to quick-disconnects as design was 'fluid'. I may upgrade wort pump suction side which is reinforced PVC to QC, but seem to get by as is.

I have HERMES I think copper tubes in HLT, but don't use them much
(Through experience I get my mash temperature where I want now and am very happy, but early on if I looked at HERMES recirculating temperature in/out, I could never get them correlate with MT hand reading, hey even inside mash until things stabilise there is different probe valves in the mash)

I used to have big fancy manifold with 10 ball valves with a view to automating, but do not use, prefer simpler operation, mainly cos' the silicone tubing is so good to work with.

Oh, btw SS hosetails have massive variation in ID, select carefully which one you fit to pump suction side if you use centrifugal pumps.

Generally I batch sparge, sometime fly-sparge with blichmann float-valve thing, never really noticed any benefit to efficiency which was good anyway. Still to make a monster sized 'Part-Gyled' super sized mash to make oversized batch, will fly sparge to large grain bills here.

Big Fan next to BK using elephant trunk 6inch metal ducting, a hood is not needed

I have a HeatExchanger but never used it, cos home made counter flow cooler is great/better, hits 19oC from 100 every time.

2 fridges with temp controllers and small 60w panel heaters

I have an inherited touch screen, wall mount and small PC for panel to give large brewtroller display,.... you guess it never got round to it, too busy brewing,.....

Got busy for xmas 6x100 pint batches in November, not brewing till the bells ring next year !

ok,ok,ok pictures might have been quicker,..... it's cold out there !
 
Brew-pots... getting there
(When not in use the HLT stacks on the MLT and the BK fits on under the worktop)
3pots_zps540fc561.jpg


Panel.....
13A sockets have IP summin-flaps, Model EPS/13 at bottom of link page...
http://essentialsupplies.co.uk/acatalog ... ckets.html
Using std 13A keeps things nice and simple (and cheap) and if brew panel was to fail I could quickly make a temp solution with less power.

BrewPanel_zpse55241d2.jpg
 
Nice one Alby..

Hope i msread and your not tipping the brew into a wheelie bin, they are impregnated with insectiside, First time i saw a 120l wheelie bin i looked into the possibilities :), if its the grain when spent your talking about i will shut up :)

i can just about waddle upto the compost heap with my 80l tun loaded with a 15kg grainbill.. :)

Are u using the Bubbler level/volume system from brewtroller, if so i may have a few Q's on the initialisation of that aspect?? And what air pump are u using??
 
ha, now if any english councils use conical wheelie bins I could be persuaded :tongue:

I typically do double brews in a day, so the spent grains from first one with body at full strength gets dumped bottom of garden, second gets gently tilted into to mr.wheelie driven direct to MLT.

I have in a drawer two level sensors, but for me I don't see the point for what it saves gains, HLT ? so what if I load in an extra litre or ten, when sparging I like to be hands on with lab kit, temp-pen, refractometer, pH. Cleaning/unloading is an effort, but these pots can be unplugged and lifted to hose bay, bubbler is something else breakable dangling about that needs to get unplugged or forgotten to replugin,.... maybe in a large scale with closed remote vessels level sensors are important 20x-200x bigger !
 
I only use brew troller BT for temperature display and PID control, I never purchased any manual temperature sensors. My view at the time was the BT saved a little money over separate PIDs and manual sensors with scope for doing fancy pants recipe downloads and automation,..... roadmap changed.

Using a valve manifold just added complexity and much more cleaning and places for 'things' to crawl into between brews. In that respect I have swung back to the 'electric-brewery' chaps hose connection style.
 
alby said:
Brew-pots... getting there
(When not in use the HLT stacks on the MLT and the BK fits on under the worktop)
3pots_zps540fc561.jpg


Panel.....
13A sockets have IP summin-flaps, Model EPS/13 at bottom of link page...
http://essentialsupplies.co.uk/acatalog ... ckets.html
Using std 13A keeps things nice and simple (and cheap) and if brew panel was to fail I could quickly make a temp solution with less power.

BrewPanel_zpse55241d2.jpg

Looks very impressive mate:)

Jay
 
They are very fit for purpose, good choice and decent price.

When I was selecting elements I was super-jealous of 5.5kw US ones, but that means high current cabling and special sockets.

There are upsides to using 2x3KW elements, if one fails you can finish your brew, you can use easier to get flex, you can use 13A sockets, you can run extensions to do trials before your panel is finished, if something breaks in your panel and you have no spares like me, you can plug into a ring main to finish off your batch.
 
alby said:
They are very fit for purpose, good choice and decent price.

When I was selecting elements I was super-jealous of 5.5kw US ones, but that means high current cabling and special sockets.

There are upsides to using 2x3KW elements, if one fails you can finish your brew, you can use easier to get flex, you can use 13A sockets, you can run extensions to do trials before your panel is finished, if something breaks in your panel and you have no spares like me, you can plug into a ring main to finish off your batch.

Thanks for the reply, I must admit that I'm liking the idea of 3kw elements and what you said above makes a lot of sense.... Decisions..... Decisions:)

Jay
 
I've just asked MrLard (Homebrewbuiler website) to fit 2 x 3KW LWD elements into the 200L pot he is building for me. Looking forward to using them. :-)
 
thedrayman said:
I've just asked MrLard (Homebrewbuiler website) to fit 2 x 3KW LWD elements into the 200L pot he is building for me. Looking forward to using them. :-)

Now that does sound very nice indeed, may I ask how much his 3kw elements are?

Jay
 

Latest posts

Back
Top