fury_tea
Landlord.
- Joined
- Nov 17, 2018
- Messages
- 799
- Reaction score
- 508
Here's my recipe for bread made using spent grain. I found a few online but none really seemed to work out or required too much work i.e. dehydrating the grains for over 8 hours and blending them in batches etc.
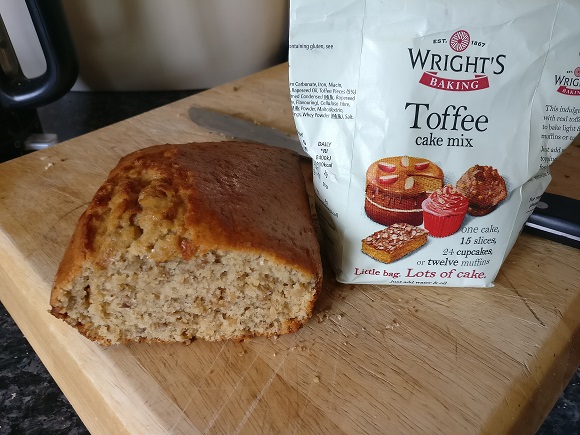
This recipe uses wet spent grain with no extra processing and is adapted from a 'no knead' recipe so it's dead simple and it makes a really nice loaf. Because it uses the full grains you do end up with a few husks in your teeth, but I don't really mind that. I'm not a baker and this is the only loaf I make. You can play with adding more grains if you like, but I found the more you put in the denser the loaf gets. Lighter malts are best for this, but if your mash has caramel malts etc, these are fine and add a different flavour to your bread.
Ingredients:
100g spent grain
350g bread flour
6g sugar
6g salt
1.5g bread yeast
250ml room temperature water (ish)
Mix all the dry ingredients in a large bowl and add the spent grain, then mix it together using the handle of a wooden spoon. Slowly add the water (20ml at a time), until a ball forms and it starts to pick up the flour from the side of the bowl (you can add a few drops of water to any dry flour on the side). Keep going until the bowl is clean and you have a ball of dough, it will take around 5 minutes. You're not looking for a wet dough, just enough to stick to itself. You might not need all the water depending on the moisture content of your grain (sometimes, well under 200ml is all it takes).
Now cover the bowl with cling film or with a lid and put it somewhere warm (20-25c) for 12-24 hours.
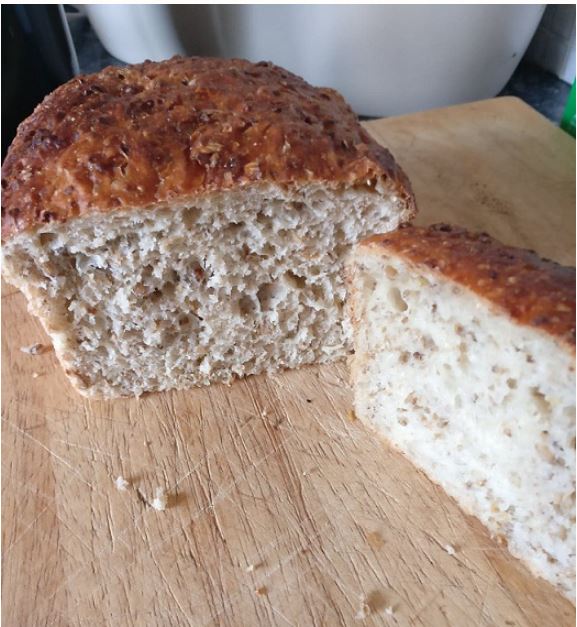
It will double/triple in size and it'll be full of air bubbles once ready. Flour a work surface and empty/scrape it out. Knock the air out of it (you don't want to overwork it, just pat it down) shape it and place either in a 2lb bread tin brushed with olive oil or onto a metal tray brushed with olive oil and cover with a clean floured tea towel, and leave to proof for 2 hours.
Turn your oven to full power and boil a kettle, put a tray on the shelf below the one you want to bake your bread on and put an inch of boiling water in. Spray the surface of the loaf with water (in a pinch you could flick it on from your fingers) and place into the oven. Leave on full for 15 -30 minutes (once you see it turning golden), then spray again and top up the tray with hot water if needed (watch for steam as you open the oven - hot steam in the eyes is not fun), and turn the oven down to around 200c. After another 20-30 minutes your loaf will turn a deep brown on top and it'll be ready.
Turn out onto a wire rack, test the bottom of the loaf. If it feels too moist or too soft for your liking you can put it back in the oven upside down for another 10-20 minutes to dry out a little, but it will dry out a bit on its own when left. Cover with a clean tea towel and let it rest for at least an hour before you cut into it to preserve the crumb structure.
You can now eat the bread.
It's become a staple loaf in our household and on brew day I portion out the grains into 100g batches and freeze them. Get them out a couple of hours before you plan to make the loaf.
It goes great with cheese or eggs, and it makes the best toast, and obviously washed down with a pint of your finesthomebrew is just exquisite.
Let me know if you do decide to make it!
This recipe uses wet spent grain with no extra processing and is adapted from a 'no knead' recipe so it's dead simple and it makes a really nice loaf. Because it uses the full grains you do end up with a few husks in your teeth, but I don't really mind that. I'm not a baker and this is the only loaf I make. You can play with adding more grains if you like, but I found the more you put in the denser the loaf gets. Lighter malts are best for this, but if your mash has caramel malts etc, these are fine and add a different flavour to your bread.
Ingredients:
100g spent grain
350g bread flour
6g sugar
6g salt
1.5g bread yeast
250ml room temperature water (ish)
Mix all the dry ingredients in a large bowl and add the spent grain, then mix it together using the handle of a wooden spoon. Slowly add the water (20ml at a time), until a ball forms and it starts to pick up the flour from the side of the bowl (you can add a few drops of water to any dry flour on the side). Keep going until the bowl is clean and you have a ball of dough, it will take around 5 minutes. You're not looking for a wet dough, just enough to stick to itself. You might not need all the water depending on the moisture content of your grain (sometimes, well under 200ml is all it takes).
Now cover the bowl with cling film or with a lid and put it somewhere warm (20-25c) for 12-24 hours.
It will double/triple in size and it'll be full of air bubbles once ready. Flour a work surface and empty/scrape it out. Knock the air out of it (you don't want to overwork it, just pat it down) shape it and place either in a 2lb bread tin brushed with olive oil or onto a metal tray brushed with olive oil and cover with a clean floured tea towel, and leave to proof for 2 hours.
Turn your oven to full power and boil a kettle, put a tray on the shelf below the one you want to bake your bread on and put an inch of boiling water in. Spray the surface of the loaf with water (in a pinch you could flick it on from your fingers) and place into the oven. Leave on full for 15 -30 minutes (once you see it turning golden), then spray again and top up the tray with hot water if needed (watch for steam as you open the oven - hot steam in the eyes is not fun), and turn the oven down to around 200c. After another 20-30 minutes your loaf will turn a deep brown on top and it'll be ready.
Turn out onto a wire rack, test the bottom of the loaf. If it feels too moist or too soft for your liking you can put it back in the oven upside down for another 10-20 minutes to dry out a little, but it will dry out a bit on its own when left. Cover with a clean tea towel and let it rest for at least an hour before you cut into it to preserve the crumb structure.
You can now eat the bread.
It's become a staple loaf in our household and on brew day I portion out the grains into 100g batches and freeze them. Get them out a couple of hours before you plan to make the loaf.
It goes great with cheese or eggs, and it makes the best toast, and obviously washed down with a pint of your finesthomebrew is just exquisite.
Let me know if you do decide to make it!
Last edited by a moderator: