loady
[Superlative Сasual Dating Real Women]
 Well, i have been picking the brains of people on here asking lots of questions and i have always had good answers a lots of advice so i thought i would give something back, this is how i made the manifold for my MT, it is a 70lt thermo pot (the ones from germany) im not sue wheter the 80lt one has the same diameter but in any case you can always adapt it to your own dimensions.
I cant stress enough how much use a dremmel has for the home brewer who likes to diy or tinker, another tool of great use that someone adviced me on was a pipe cutter, £10 on ebay..made the job so much easier
Parts: (i used 22mm copper)
9 x Tee's
9 x 45 degree elbows
1 x length of copper pipe
Tools:
new hack saw blades
dremmel (not essential)
pipe cutter (not essential but you will be glad you got it)
blow torch
solder
flux
emery cloth or other abrasive
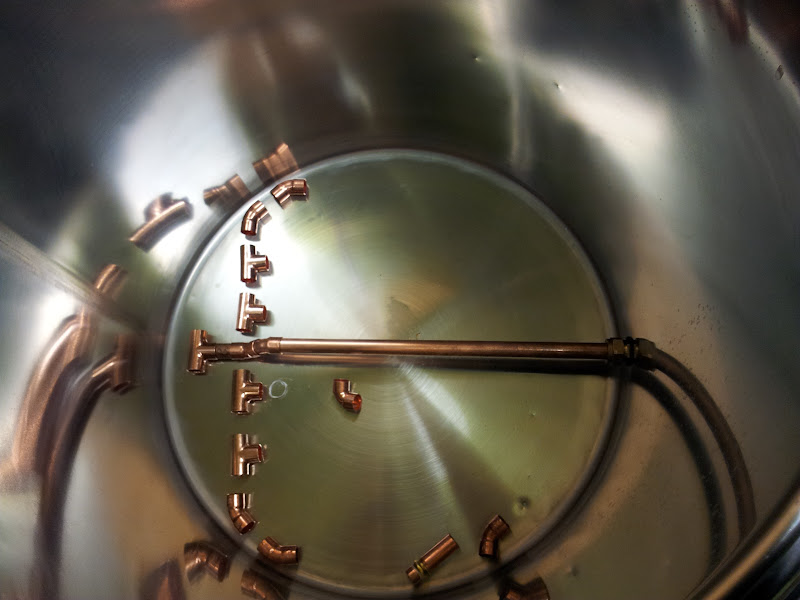
I had already installed the outlet to the MT so i started pondering with no idea at all on how to go about the the manifold..i spent a lot of time thinking about it and it really wasnt needed...just go with it !!..initally i installed the longer uncut take up pipe down the middle but in the end i made the manifold then i made the take up pipe to fit at it is much easier..so i ignore the middle pipe for the time being, lay out your tees and elbows to get a rough idea of what you can fit in, the more pipes you can fit in the more surface area you can cover.
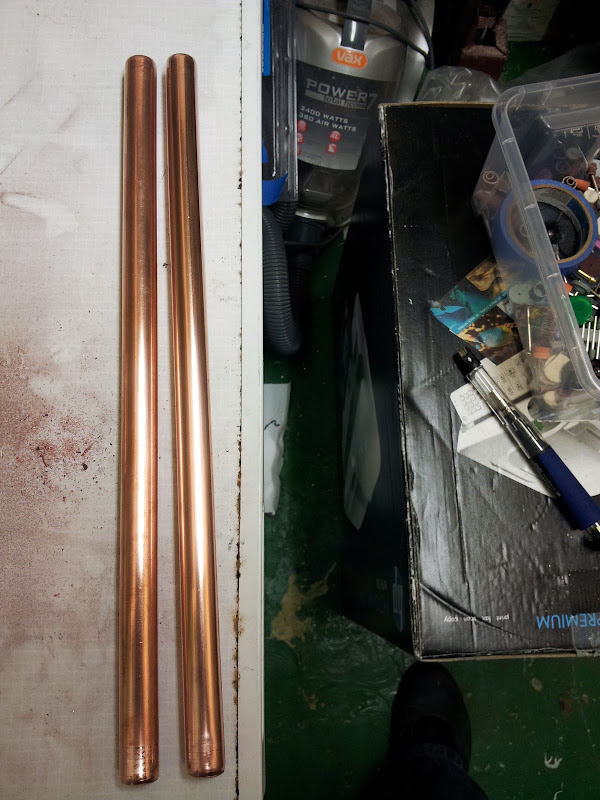
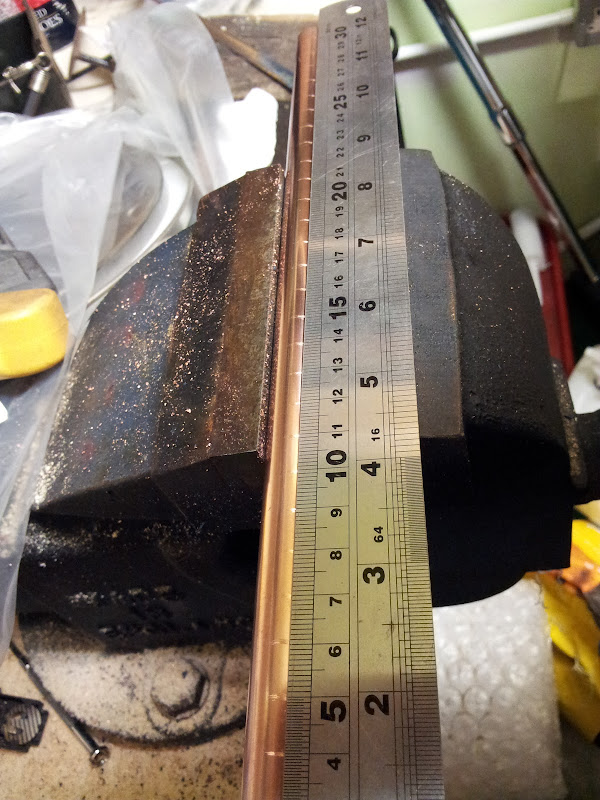
Next we need to get the pipes cut, being a round MT, the outer pipes either side are going to be shorter than the the inner ones, i managed to fit four full length and two slighty shorter pipes, the shorter ones accounting for the rounding of the MT, my four pipes were 31cm each and the two outer ones were 25cm, this gave at least 1cm tolerance all around the edges for fitting the main outlet pipe. I measured the lengths of pipe with a metal scribe though you can use some other sharp instrument to mark the copper, i then lined up the marking with the middle of the pipe cutter and pressed it in and turn off the cuts.
https://lh4.googleusercontent.com/-3TkV ... 203539.jpg
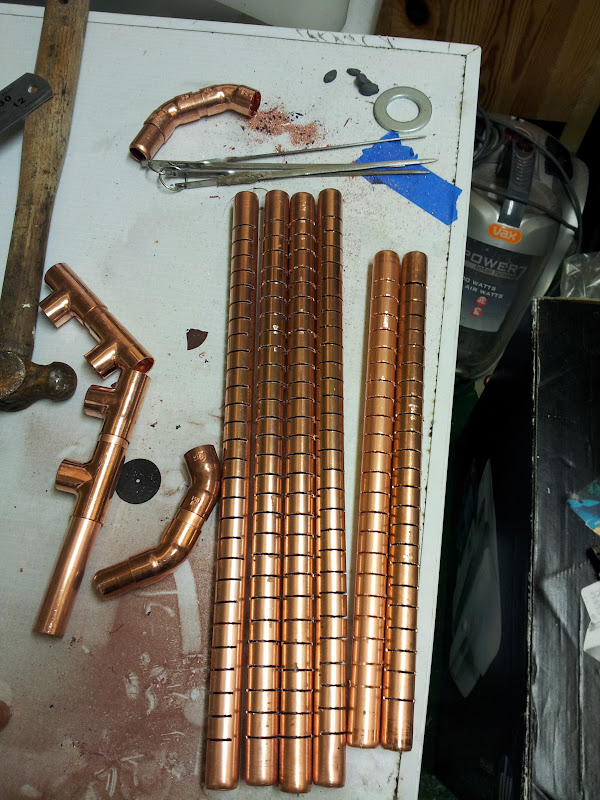
Once i had cut all the lengths of tube it was time to conect them together, i estimated the i would need the tee's and elbows to be 10mm apart, bare in mind that the tee's swallow 10mm as well so i needed to make the joining peices 30mm each, i needed to cut fifteen of these , this is where the pipe cutter comes into its own !!, theres one extra joining piece you need to cut but i cant remember what length it was, you can make this the last cut and is quite easy to fit in, its the peice at the back closest to the outlet hole.
Once you have all these cut you can join them up to see if all is well. if you find that it is very loose, you can use some mole grips to just slightly bite the joints to crimp them and make them less prone to dropping out.
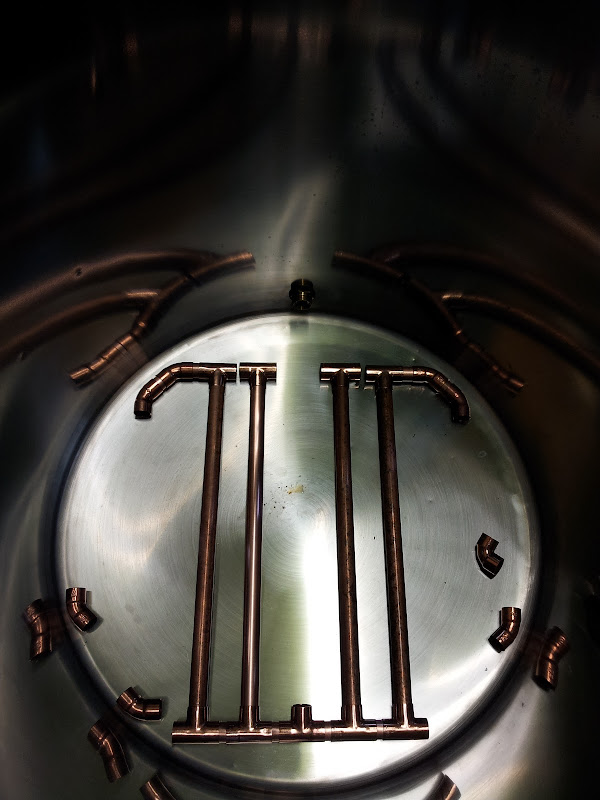
Next comes the graft part of this job !!..cutting the slits, i used a metal rule and scribe to make markings on the copper at 10mm intervals, bare in mind again that the tee's swallow 10mm so i started at 20mm and finished with 20mm left. I cut the slits about just over one 1/3 of the way through, they were not all equal but not to deep, using a new blade really helps here stopping the blade jumping around, do this to all the lengths of pipe you have so far.
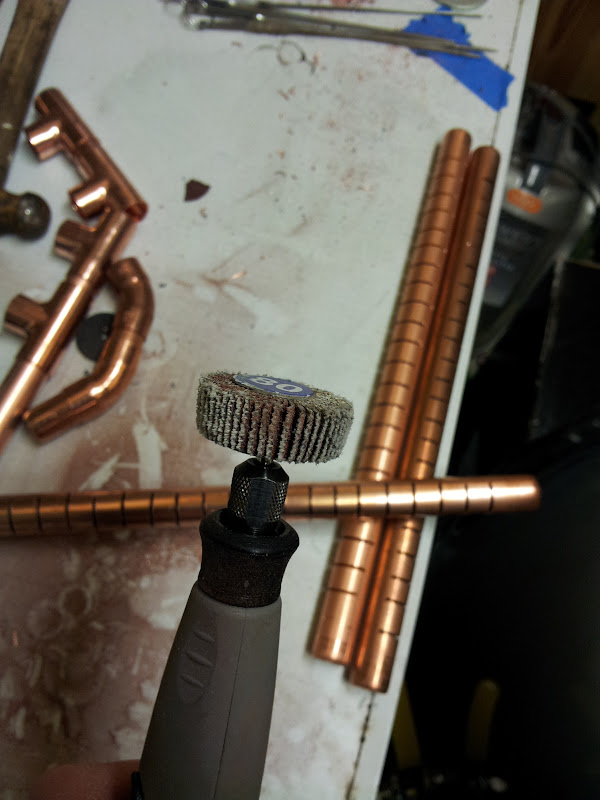
Now you dont have to do this but i am a fussy perfectionist, and if you have a dremmel it is easy to do, you can of course use emery cloth and some elbow grease !, i used the dremmel to take off all the sharp burrs with the flap wheel.
I also didnt like the idea of burrs inside the pipe, you can either use a round file to remove these or what i did was to cut a slit down some 5mm metal rod i had with the hack saw and push some emery cloth down it, i then put this into my drill and inserted it into the pipe and moved it up and down.


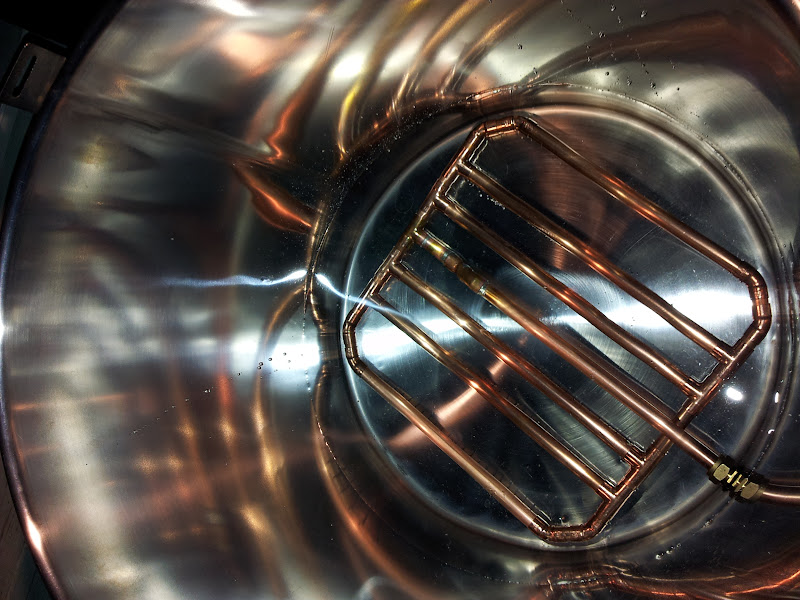
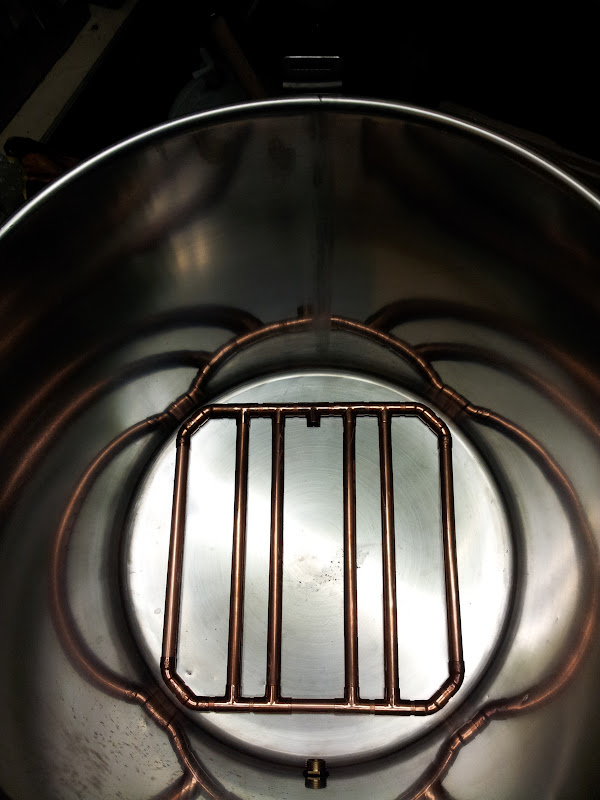
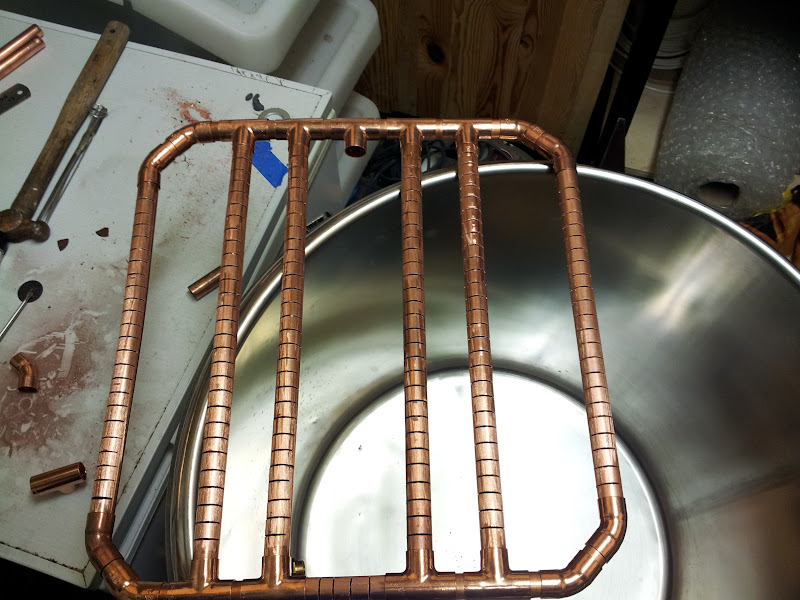
Once you have done all this you should have somethingf that resembles this, the beauty of this is the last tee that connects to the outlet moves so you have lots of play to fit to the outlet.
To fit the outlet pipe i used another 45 degree tee and another 45 degree piece though i am not sure what the technical name for it is, could be a street elbow ?, however, one end of it fits INSIDE the standard 45 degree tee, this part is not listed in the 'parts' as i dont know what it is called
. You dont have to use it as you can just cut extra pipe to do the same job.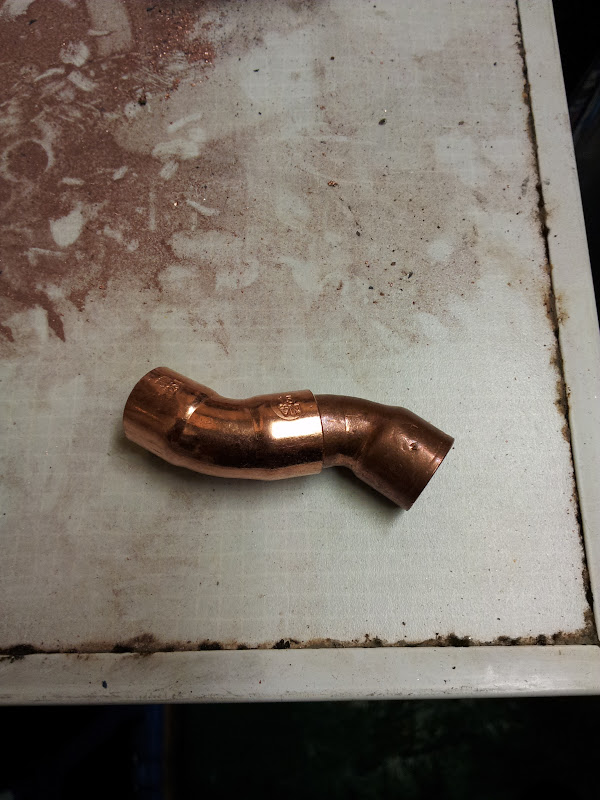
Now you just need to fit in your last pieces to fit it up to your outlet, i cant give dimensions for this as i dont know where you have placed your outlet, once you have it done it is a good idea to solder all the joints down to the first tee, make sure you clean ALL the mating surfaces with wire wool and use plenty of flux, dont solder the tee joints where it fixes to the main manifold, just the part of the first tee that joins to the outlet pipe, after you have done that give it a good clean with some wire wool or emery cloth, when finished you should have something that resembles this..