


RobWalker
Well-Known Member
Partial Mash Brewing At Home!
What is it?
Partal Mash is a step up from extract brewing that lets you use all grain techniques without the costly kit upgrades. It takes some advantage of the reduced cost of using crushed grains, and also allows you to mash any speciality grains instead of steeping them, and adjuncts such as Flaked Barley & Rice that would otherwise be unusable in extract brewing. Partial Mash improves overall brew quality, and you'll also learn the basics of the all grain process quickly and easily.
The only real disadvantages are that you need more hops to reach the same IBU as a full size boil, and the increased brewing time - if you see that as a disadvantage!
Equipment Needed
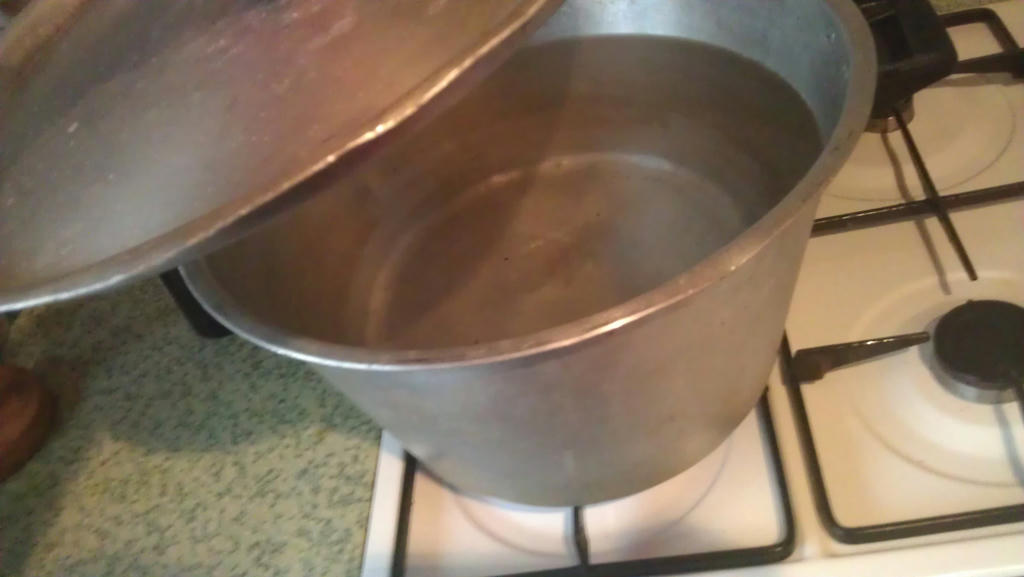
1x 10L+ pot
Fermenting Vessel
Hydrometer & Trial Jar
Thermometer
Grain Bag
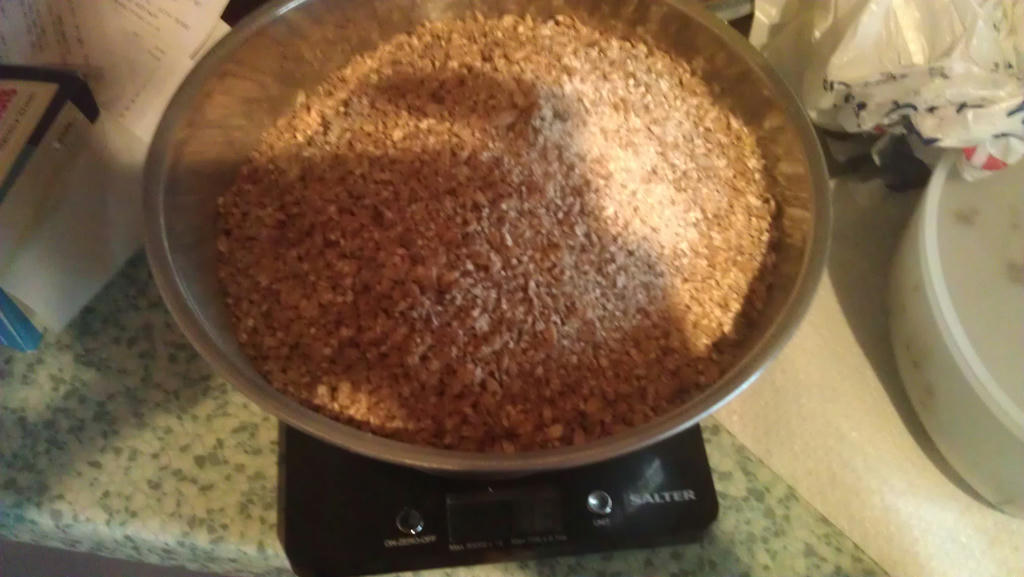
Accurate Scales
Towels, Duvets etc to insulate.
Recipe Designing and Converting
Assuming you create your own recipes, or convert current ones, the difference from extract is simple - you need to replace part of the Dry Malt Extract or Liquid Malt Extract with a good quantity of Pale Malt, then fiddle with the quantities until you get the same ABV, amount of speciality malt, colour, and IBU from the hops. Let's look at an example;
Here is an extract version of my "Pure Gold" Clone, which is less cost effective. Partial Mash uses the same hops as Extract as the boil quantity is the same. We now need to convert this to a Partial Mash version of the recipe;
Using only 1.5kg of Dry Malt Extract and gaining some gravity from the CaraGold, we end up spending a little less on fermentables overall with a Partial Mash brew than an All Extract version. I usually aim to mash around 1kg-1.5kg of grains. You'll need to fiddle with the recipe until it's the same IBU, Colour and Gravity (or approx ABV) as the extract version. We are still using a 1.60 gal boil, so the hops stay the same. I always prefer to do this by hand - a well planned recipe will ensure a good brew day.
The Mashing Method
So, we have our recipe. In the mash section on Beersmith, I input these settings - this will give us a 10 Litre Single Infusion mash, where we simply keep the grains warm in our total volume of water to extract the sugars. This will calculate our strike temperature - the temperature that the water we are boiling needs to be to hit our target temperature, as the grains will reduce the temperature when we drop them in. There are other calculators available online - these settings should be quite universal.

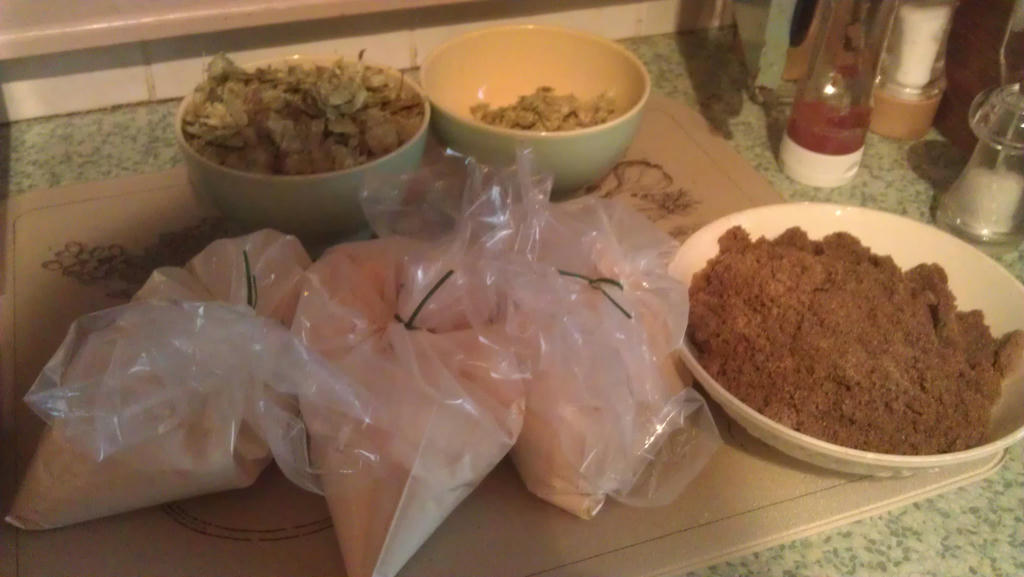
We will start now by mashing the grains. First, measure out everything you need - Grains, Extract, Hops, Water, and organize your Yeast, Irish Moss, Insulation etc. I have good water straight from the tap, but if you don't, treat about 3.2 gallons of it in your FV. Crack a beer or make a cuppa. You're here for a few hours.
Heat 10 Litres of water to 71.1c in your large pan to your strike temperature - 71.1c. It's okay to have the lid on at this point, and your equipment doesn't need to be sterile, but it does need to be clean and chemical free.
When you hit the strike temperature, turn off the heat and wrap the grain bag around the pan. Pour in your grains, then have a quick taste - you'll need this as a reference later on.
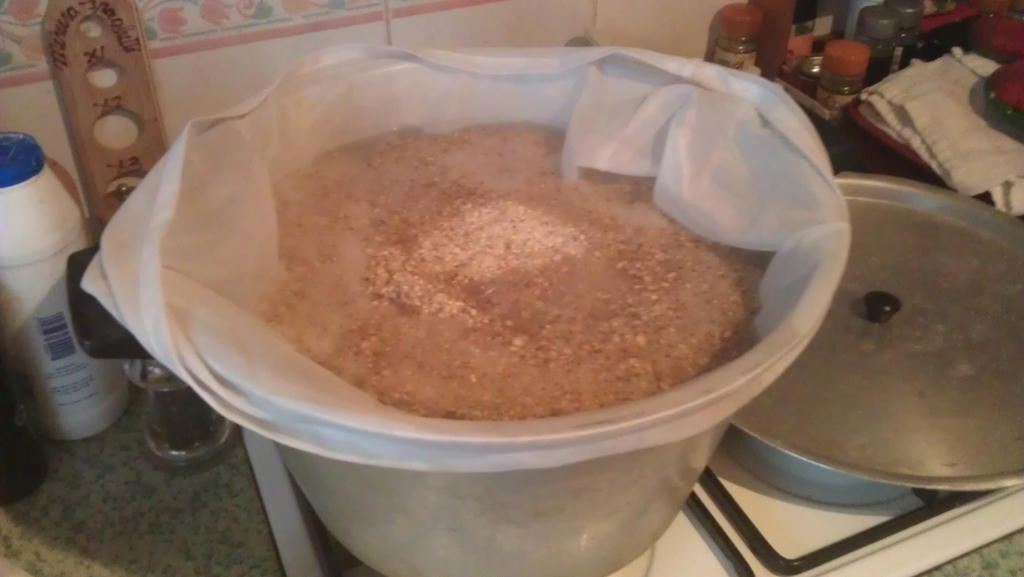
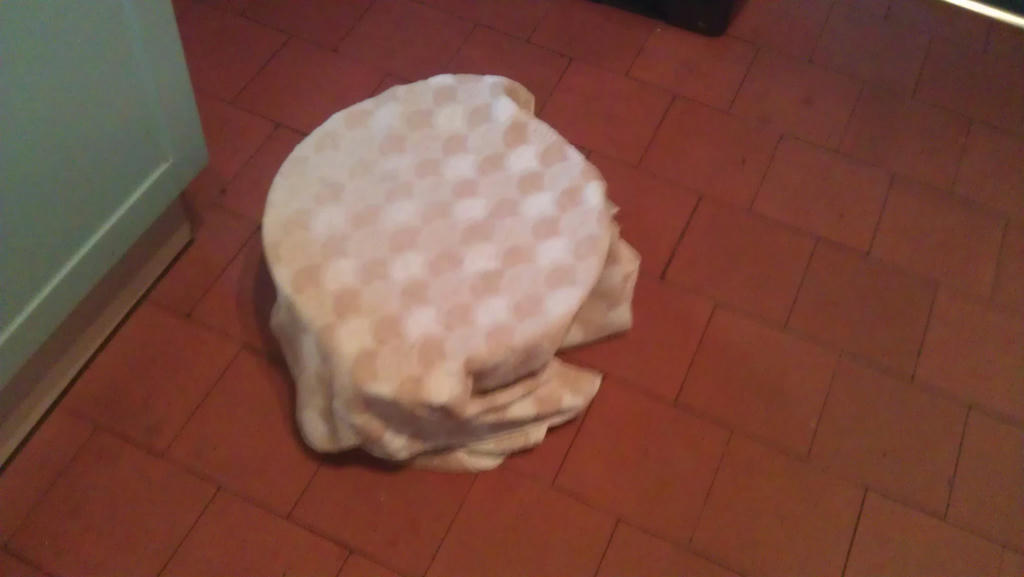
Seal, and then wrap it in whatever insulation you have ready. Mine is an old towel;
Set the timer for 60 minutes and let nature works its magic. After 30 mins, check the temp - if it's dropped much, quickly reheat the water, taking care not to scorch the grain bag on the bottom of the pan! Once this is done, put the lid on, wrap in insulation again, and let it carry on for a further 30 minutes.
After 60 to 90 minutes, mashing should be mostly completed. There are 3 quick tests - taste it. If it's sweet, it's working well. Measure the gravity using your hydrometer - you will need to let liquid in your trial jar cool first. Lastly, take a small amount of the liquid and add a few drops of iodine - if there is little to no colour change to purple, then mashing should be completed. All 3 tests are fine in my opinion!
When you're ready, it's time to conduct the mash out. Using a mash out will increase how much conversion you get - heat the wort to 76 degrees, again, being careful not to scorch the bag on the bottom, and then cover and insulate. Leave for 10 minutes.
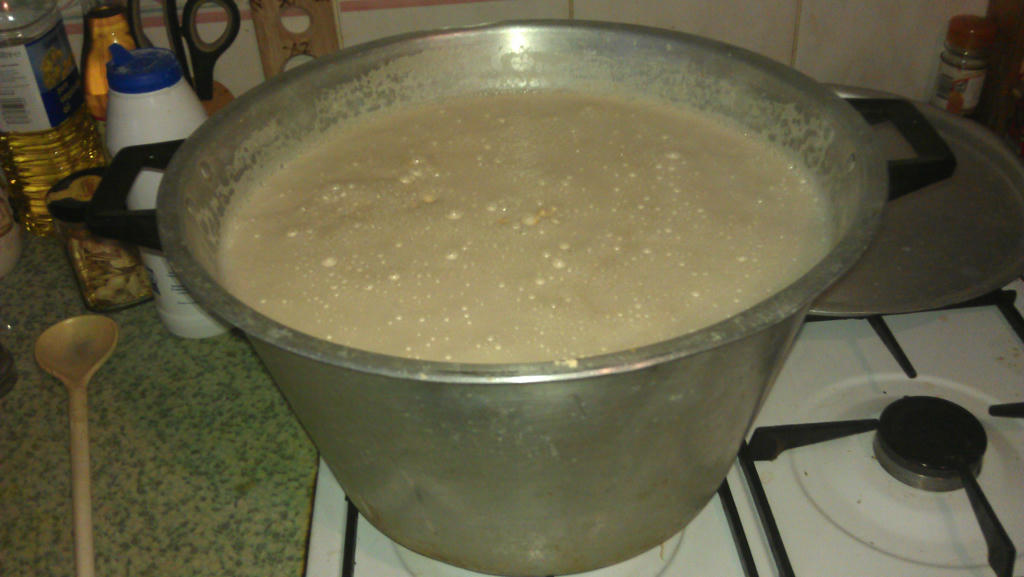
After 10 minutes, lift up your grain bag and let the grains drain out. When your arm gets very tired and you can't extract any more liquid, put the grains to one side. You are now the proud owner of a ready-to-boil Wort, and Partial Mashing is as simple as that!
You can now calculate your efficiency, if you want to. I use the calculator on Brewer's Friend - just take a gravity sample and add it back into your boil.
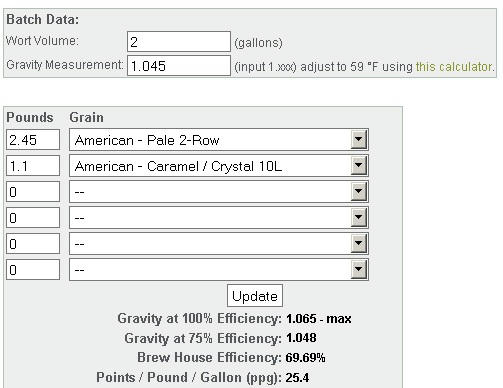
69% efficiency! Nice.
Back to Extract Brewing
Hooray! We're back to extract now. Add your Malt Extract to the Wort and bring it to the boil - this shouldn't take too long as your water is already around 70c. To avoid boiling over, skim your spoon over the top of the froth - this will knock the air out of it.
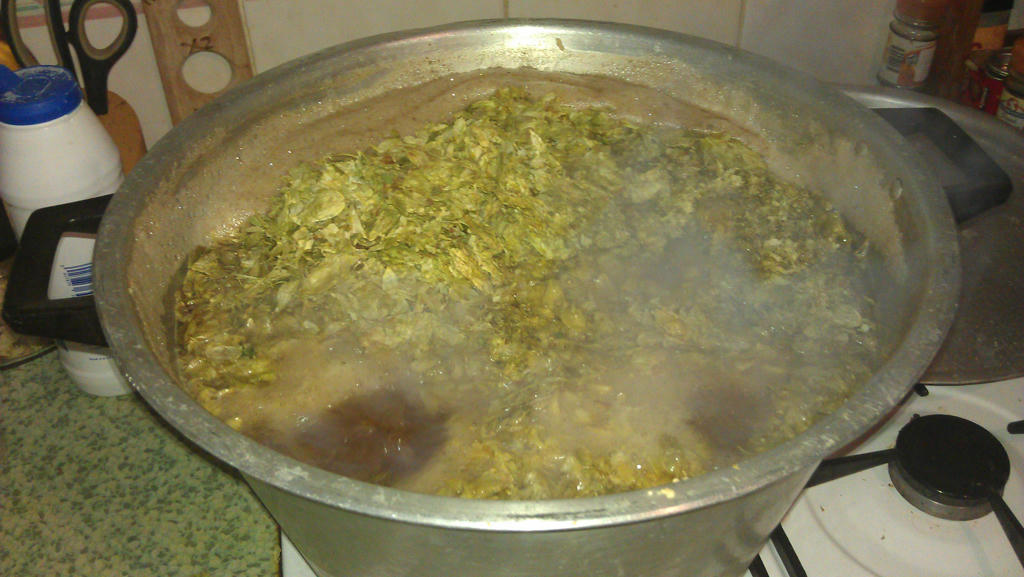
Once you hit your Rolling Boil, add your hop quotas and other ingredients as your recipe states.
When the boil is completed, I pour the wort through a muslin bag into my FV directly into the water, or if your water is good like mine, top up the 3 gallons directly from the tap. Leave the wort to reach room temperature overnight, and at that point, pitch the yeast. You may choose to use a cooler for your wort which will increase the quality - it's an expensive step in my opinion, but one to consider later when and if you go All Grain.
Now, ferment out and enjoy better beer!
Hope this is useful to some people, as I mostly had to wing it when I was learning!
What is it?
Partal Mash is a step up from extract brewing that lets you use all grain techniques without the costly kit upgrades. It takes some advantage of the reduced cost of using crushed grains, and also allows you to mash any speciality grains instead of steeping them, and adjuncts such as Flaked Barley & Rice that would otherwise be unusable in extract brewing. Partial Mash improves overall brew quality, and you'll also learn the basics of the all grain process quickly and easily.
The only real disadvantages are that you need more hops to reach the same IBU as a full size boil, and the increased brewing time - if you see that as a disadvantage!
Equipment Needed
1x 10L+ pot
Fermenting Vessel
Hydrometer & Trial Jar
Thermometer
Grain Bag
Accurate Scales
Towels, Duvets etc to insulate.
Recipe Designing and Converting
Assuming you create your own recipes, or convert current ones, the difference from extract is simple - you need to replace part of the Dry Malt Extract or Liquid Malt Extract with a good quantity of Pale Malt, then fiddle with the quantities until you get the same ABV, amount of speciality malt, colour, and IBU from the hops. Let's look at an example;
Code:
Recipe Specifications
--------------------------
Batch Size: 5.00 gal
Boil Size: 1.60 gal
Estimated OG: 1.041 SG
Estimated Color: 12.9 EBC
Estimated IBU: 17.2 IBU
Brewhouse Efficiency: - %
Boil Time: 60 Minutes

Ingredients:
------------
Amount       Item                                     Type          % or IBU
2.15 kg      Light Dry Extract (15.8 EBC)             Dry Extract   80.8 %
0.51 kg      CaraGold (9.0 EBC)                       Grain         19.2 %
35.00 gm     Northern Brewer [8.50%]  (30 min)        Hops          12.2 IBU
15.00 gm     Styrian Bobek [4.90%]  (30 min)          Hops          3.0 IBU
20.00 gm     Goldings, East Kent [5.00%]  (10 min)    Hops          1.9 IBU
5.00 gm      Goldings, East Kent [5.00%]  (Dry Hop 7 dHops           -
10.00 gm     Styrian Bobek [4.90%]  (Dry Hop 7 days)  Hops           -
0.25 tsp     Irish Moss (Boil 10.0 min)               Misc
1 Pkgs       SafAle English Ale (DCL Yeast #S-04)     Yeast-Ale
Here is an extract version of my "Pure Gold" Clone, which is less cost effective. Partial Mash uses the same hops as Extract as the boil quantity is the same. We now need to convert this to a Partial Mash version of the recipe;
Code:
Recipe Specifications
--------------------------
Batch Size: 5.00 gal
Boil Size: 1.60 gal
Estimated OG: 1.042 SG
Estimated Color: 12.0 EBC
Estimated IBU: 16.8 IBU
Brewhouse Efficiency: 75.0 %
Boil Time: 60 Minutes

Ingredients:
------------
Amount       Item                                     Type          % or IBU
1.50 kg      Light Dry Extract (15.8 EBC)             Dry Extract   48.4 %
1.10 kg      Pale Malt (2 Row) UK (5.9 EBC)           Grain         35.5 %
0.50 kg      CaraGold (9.0 EBC)                       Grain         16.1 %
35.00 gm     Northern Brewer [8.50%]  (30 min)        Hops          12.1 IBU
30.00 gm     Styrian Bobek [4.90%]  (10 min)          Hops          2.8 IBU
20.00 gm     Goldings, East Kent [5.00%]  (10 min)    Hops          1.9 IBU
5.00 gm      Goldings, East Kent [5.00%]  (Dry Hop 7 dHops           -
10.00 gm     Styrian Bobek [4.90%]  (Dry Hop 7 days)  Hops           -
0.25 tsp     Irish Moss (Boil 10.0 min)               Misc
1 Pkgs       SafAle English Ale (DCL Yeast #S-04)     Yeast-Ale
Using only 1.5kg of Dry Malt Extract and gaining some gravity from the CaraGold, we end up spending a little less on fermentables overall with a Partial Mash brew than an All Extract version. I usually aim to mash around 1kg-1.5kg of grains. You'll need to fiddle with the recipe until it's the same IBU, Colour and Gravity (or approx ABV) as the extract version. We are still using a 1.60 gal boil, so the hops stay the same. I always prefer to do this by hand - a well planned recipe will ensure a good brew day.
The Mashing Method
So, we have our recipe. In the mash section on Beersmith, I input these settings - this will give us a 10 Litre Single Infusion mash, where we simply keep the grains warm in our total volume of water to extract the sugars. This will calculate our strike temperature - the temperature that the water we are boiling needs to be to hit our target temperature, as the grains will reduce the temperature when we drop them in. There are other calculators available online - these settings should be quite universal.
We will start now by mashing the grains. First, measure out everything you need - Grains, Extract, Hops, Water, and organize your Yeast, Irish Moss, Insulation etc. I have good water straight from the tap, but if you don't, treat about 3.2 gallons of it in your FV. Crack a beer or make a cuppa. You're here for a few hours.
Heat 10 Litres of water to 71.1c in your large pan to your strike temperature - 71.1c. It's okay to have the lid on at this point, and your equipment doesn't need to be sterile, but it does need to be clean and chemical free.
When you hit the strike temperature, turn off the heat and wrap the grain bag around the pan. Pour in your grains, then have a quick taste - you'll need this as a reference later on.
Seal, and then wrap it in whatever insulation you have ready. Mine is an old towel;
Set the timer for 60 minutes and let nature works its magic. After 30 mins, check the temp - if it's dropped much, quickly reheat the water, taking care not to scorch the grain bag on the bottom of the pan! Once this is done, put the lid on, wrap in insulation again, and let it carry on for a further 30 minutes.
After 60 to 90 minutes, mashing should be mostly completed. There are 3 quick tests - taste it. If it's sweet, it's working well. Measure the gravity using your hydrometer - you will need to let liquid in your trial jar cool first. Lastly, take a small amount of the liquid and add a few drops of iodine - if there is little to no colour change to purple, then mashing should be completed. All 3 tests are fine in my opinion!
When you're ready, it's time to conduct the mash out. Using a mash out will increase how much conversion you get - heat the wort to 76 degrees, again, being careful not to scorch the bag on the bottom, and then cover and insulate. Leave for 10 minutes.
After 10 minutes, lift up your grain bag and let the grains drain out. When your arm gets very tired and you can't extract any more liquid, put the grains to one side. You are now the proud owner of a ready-to-boil Wort, and Partial Mashing is as simple as that!
You can now calculate your efficiency, if you want to. I use the calculator on Brewer's Friend - just take a gravity sample and add it back into your boil.
69% efficiency! Nice.
Back to Extract Brewing
Hooray! We're back to extract now. Add your Malt Extract to the Wort and bring it to the boil - this shouldn't take too long as your water is already around 70c. To avoid boiling over, skim your spoon over the top of the froth - this will knock the air out of it.
Once you hit your Rolling Boil, add your hop quotas and other ingredients as your recipe states.
When the boil is completed, I pour the wort through a muslin bag into my FV directly into the water, or if your water is good like mine, top up the 3 gallons directly from the tap. Leave the wort to reach room temperature overnight, and at that point, pitch the yeast. You may choose to use a cooler for your wort which will increase the quality - it's an expensive step in my opinion, but one to consider later when and if you go All Grain.
Now, ferment out and enjoy better beer!
Hope this is useful to some people, as I mostly had to wing it when I was learning!